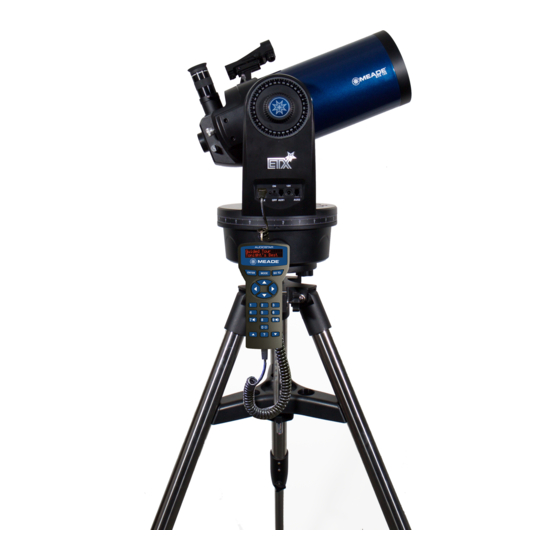
Meade ETX-125 Instruction Manual

Meade ETX-125 Instruction Manual

Etx observer series
Table of Contents

Advertisement

Instruction Manual
ETX OBSERVER SERIES
ETX-125
ETX-90
ETX-80

Advertisement

Table of Contents
loading

Summary of Contents for Meade ETX-125

  • Page 1 Instruction Manual ETX OBSERVER SERIES ETX-125 ETX-90 ETX-80...
  • Page 2 WARNING! ® Never Meade telescope look Sun! Looking at or near the Sun will cause instant and irreversible damage to your eye. Eye damage is often painless, so there is no warning to the observer that damage has occurred until it is too late.
  • Page 3: Table Of Contents

    How to recycle......63 ® The name “Meade,” “AudioStar” and the Meade logo are trademarks registered with the U.S.
  • Page 4: The Etx Observer Telescope

    An advanced, computer-controlled telescope system need to explore the Universe we live in. Meade’s concept was to create a telescope that would be simple enough for anyone to use, yet capable enough for the experienced amateur to stretch their knowledge and skills. With the ETX’s advanced set of features, you will have plenty of room to learn and expand your interest in astronomy and...
  • Page 5: Getting Started

    GETTING STARTED You may want to perform the ETX telescope assembly indoors in the light so that you become familiar with the parts and operation before moving the telescope outside into the dark for observing. Just follow the simple steps below and you will be up and running before you know it.
  • Page 6: Mounting The Telescope

    Lock knob ETX 90/125 USERS ONLY: On the tripod, loosen the latitude control knob and lift up the tilt-plate so that you can easily access the underside of the plate. Re-lock the latitude control knob, so the assembly doesn’t slip while you are attaching the telescope.
  • Page 7: Secure Vertical And Horizontal Locks

    Do not mix battery types. If these precautions are not followed, installed batteries void your Meade warranty. Always remove the batteries if they will not be used for a long Connect the Audiostar period of time.
  • Page 8: Using The Red Dot Finder

    Using the Red Dot Finder to know exactly where your telescope is pointing by simply looking at it. To help you point the telescope quickly and accurately, the ETX has a 1X On/Off & Brightness Adjustment Using the ETX Observer. 10 Now remove the dust cover from the front of the telescope tube.
  • Page 9: Adjusting The Red Dot Finder

    Aligning the ETX Adjusting the Red Dot Finder To automatically track and locate objects in the night Now, without moving the telescope, adjust the indicated thumb screws until you have put the red dot on the to set up the telescope in twilight or before sunset the object at which you were looking.
  • Page 10: Moving Through Audiostar's Menus

    Now unlock the horizontal lock knob and rotate the mount until the OTA points toward magnetic North. Little Dipper Polaris Lock the horizontal lock. The tube should now be level Big Dipper Cassiopeia and pointing toward magnetic North. The ETX is now Figure 2: Locating Polaris in the Alt/Az home position.
  • Page 11: Easy (Two-Star) Align

    3. “Press 0 to Align or Mode for Menu” displays. world. Press 0 to align your telescope using the “Easy 7. AudioStar then asks for the Telescope Model. Align” method, see “Easy (Two-Star) Align” on Using the scroll keys (Pg. 22, Fig. 19a, 7) on the page 11.
  • Page 12: How To Perform The Easy Align Procedure

    of how AudioStar’s keys operate. two stars to align upon. When the telescope Hint: It is best to verify the AudioStar's site alignment star should be easily recognized information before performing any night sky and be the brightest star in the area of the sky alignment.
  • Page 13: Go To Saturn

    the Orion nebula, from the Messier list. Or in Go To Saturn the summer, choose the Dumbbell nebula from After performing the Easy Alignment procedure, the the Deep Sky, Named Objects list. motor drive begins operating and the telescope is aligned for a night of viewing.
  • Page 14: Telescope

    The ETX 80 Telescope - Key Features 1. Focus knob 2. Rear photo port 8. Optical tube 3. Eyepiece holder 9. Dust cover (not visible) 4. Eyepiece 10. Vertical lock knob 11. Fork arm 6. Eyepiece holder thumbscrew 12. Computer control panel Figure 5: ETX 80 Right Side...
  • Page 15 13. Vertical setting 19. Battery compart- circle ment 20. Horizontal setting 14. 90° circle 15. Front lens 16. OTA mounting thumbscrews(2) 17. Bubble level/com- pass 18. Horizontal lock knob 5a. On/Off Switch 12a. Handbox (HBX) port 12b. Power LED adjustment knobs 12c.
  • Page 16: Key Features Explained

    Rotate the focus knob clockwise to focus on distant object. Meade makes a complete line of 9. Dust Cover: Unthread the dust cover counter- accessories to enable you to get the most fun clockwise from the front lens of the telescope and performance from your ETX telescope.
  • Page 17 Do not mix battery types. If light proceeds straight out the photo port for these precautions are not followed, batteries photography. installed batteries void your Meade warranty. Note: Always remove the batteries if they are not to when the control is vertical (perpendicular to be used for a long period of time.
  • Page 18: Scope

    The ETX 90/125 Telescope - Key Features 1. Focus knob 2. Rear photo port 8. Optical tube 3. Eyepiece holder 9. Dust cover (not visible) 4. Eyepiece 10. Vertical lock knob 11. Fork arm 6. Eyepiece holder thumbscrew 12. Computer control panel Figure 12: ETX 90/125 Right Side...
  • Page 19 13. Vertical setting knob circle 19. Battery compart- ment 14. 90° 20. Horizontal setting 15. Front lens circle 16. OTA mounting thumbscrews(2) (ETX 90 ONLY) 17. Bubble level/com- pass 18. Horizontal lock 5a. On/Off Switch 12a. Handbox (HBX) port 12b. Power LED adjustment knobs 12c.
  • Page 20: Key Features Explained

    9. Dust Cover: Remove the dust cover counter- focus on distant object. Meade makes a complete clockwise from the front lens of the telescope line of accessories to enable you to get the most before observing.
  • Page 21 Do not mix battery types. If Note: these precautions are not followed, batteries when the control is vertical (perpendicular to installed batteries void your Meade warranty. the “down” position, turn the control until it is Always remove the batteries if they are not to horizontal.
  • Page 22: Buttons, Display And Their Functions

    • Download the latest software revisions directly few pushes of AudioStar’s buttons. Some of the major from the Meade website (www.meade.com) features of AudioStar are: and share software with other AudioStar •...
  • Page 23 The AudioStar Computer Controller provides control • Site coordinates of virtually every telescope function within a compact • Local Time and Local Sidereal Time (LST) handbox. AudioStar has soft-touch keys designed to • Timer and Alarm Status have a positive feel. The LCD (Liquid Crystal Display) is back-lit with a red LED (Light Emitting Diode) for •...
  • Page 24: Observing Using Audiostar's Keys

    Nine available speeds are: the other end into the coil cord port. Number Key “1” = 1x (Guide) Coil Cord Port: Plug one end of the AudioStar coil cord into this port (pg. 22, Fig. 19a, 10) located at Number Key “2” = 2x the bottom of the AudioStar handbox.
  • Page 25: Observe The Moon

    such an effect on image quality. Observing in early moments to start up the system. “Press 0 to morning hours, before the ground has built up internal align or Mode for Menu” displays (if you select heat, produces better viewing conditions than during “0”, Alignment will begin).
  • Page 26: Audiostar Operation

    AudioStar Operation move down one menu level. Press the MODE key to leave a level; e.g., the wrong menu option is chosen. Important Note: No matter how many levels into AudioStar are traveled, each press of the MODE key moves up a level, until the top level, “Select Item”, is reached.
  • Page 27: Entering Data Into Audiostar

    is the Event menu. sky. These tours are pre-programmed presentations of objects that are visible for the user’s particular location, 8. Press MODE again to move up another level. time and date. This is the top level, “Select Item”. 9. Press MODE again to return to the starting point of “Select Item: Object”.
  • Page 28 AudioStar MENU TREE Figure 22: The AudioStar Menu Tree...
  • Page 29: Event Menu

    The Object Menu options include: • Select – To select a Landmark already in the database (see ADD below), choose the “Select” • Solar System is a database of the eight planets option and scroll through the list. Press “ENTER” (Earth is not included) in ascending orbits from the to select a Landmark, then press “GO TO”...
  • Page 30: Glossary Menu

    Sunrise and Sunset calculates the time that the Sun terms and AudioStar functions. Access directly through rises or sets on the current date. the Glossary menu or through hypertext words embedded in AudioStar. A hypertext word is any word Moon rise and Moon set calculates the time that the in [brackets], usually found when using the AudioStar Moon rises or sets on the current date.
  • Page 31: Setup Menu

    Cord Wrap, when set to “On”, moves the telescope in connected. such a way as to prevent the cords and cables attached Field of View: Scroll through a list of available eye- to your telescope assembly from getting wound around the assembly and tangled as the telescope slews to view is calculated.
  • Page 32 a value near 0, it takes longer for the tube to • Min AOS (Acquisition of Signal) allows you respond as you hold down an Arrow key and enter a value in degrees. This value represents also slews the tube more slowly. Experiment the altitude at which your telescope begins with this option.
  • Page 33 AudioStar handbox. • Software: Sends only the basic AudioStar software. This is useful if one user has downloaded a new version of AudioStar software from the Meade website (www. meade.com) and wants to pass this software along to friends. • All:...
  • Page 34: Advanced Audiostar Features

    You will need to know the latitude and longitude of your Advanced AudioStar Features location to perform this procedure. This information is Adding Observing Sites available on most maps. If you plan to observe using AudioStar at different 1. Using the Add option, choose a site on the geographic locations, you can store up to six list that is closest to your observing site and observation sites in AudioStar’s memory to help simplify...
  • Page 35: Goto A User-Entered Object

    11. Press MODE. “Site: Edit” displays. 4. “User Object: Select” displays. Press the Scroll Down key once. “User Object: Add” displays. 12. Using the Arrow keys, scroll to “Site: Select”. Press ENTER. The site you have just edited displays. Press 5.
  • Page 36: Observing Satellites

    (the tour must be saved as a “text only” or as of view, press ENTER. The telescope starts to track with the satellite. • The Meade #505 Cable Connector Kit to download 11. Use the AudioStar Arrow keys to center the...
  • Page 37: Writing A Tour

    / Extreme Object and end of the desired phrase. For example: “The Orion Nebula is considered “awesome” by many who / (c) 2015 Meade Instruments Corp view it”. Command Line Writing a Tour...
  • Page 38 USER ra dec “title string” “description string” of the object from its database. For example: CALDWELL 17 object with your own description. Enter USER, then the R.A. and DEC. of a desired object, and its title and PLANET “name” description. Use the format described in the Command Enter PLANET and then the name of the desired Line section.
  • Page 39 checks its database every time the tour is activated to see if a meteor shower is visible that evening. If no AUTO SELECT TEXT “Globular Cluster” “Globular meteor shower is visible, this option is skipped and the clusters are huge balls of stars”. tour proceeds on to the next object.
  • Page 40: Landmarks

    examines the programming. If it doesn’t understand 5. Press the Scroll Up key twice and “Object: Landmarks” displays. Press ENTER. “Landmark: Select” displays. areas and displays them in a pop-up window on your computer screen. Make the necessary corrections 6. Press the Scroll Down key once. “Landmark: and try to download again.
  • Page 41: Identify

    Survey list and displays the name of the object. press ENTER. 3. “Searching...” displays. When AudioStar 3. Press MODE to pause the Survey. Press object displays. the survey. 4. Press a Scroll key to display information about this object. AudioStar displays some or all the To check on the available amount of memory in following information about the object with each AudioStar.
  • Page 42: Two-Star Alt/Az Alignment

    Advanced Alt/Az Alignment C. Use the Scroll keys to scroll through the list of countries, states, and provinces. Press ENTER If you would rather choose your own alignment when the correct location displays. stars from the AudioStar database during the Alt/Az D.
  • Page 43: One-Star Alt/Az Alignment

    to by a different name in various areas of when setting the Home Position (Pg. 9, Fig. 1). the world. Because the other methods use two stars to 6. Telescope Model: AudioStar then asks for the align upon, they are more precise than One- Telescope Model.
  • Page 44: Optional Meade® Accessories

    OPTIONAL ACCESSORIES night and site-to-site. Turbulence in the air, even on an apparently clear night, can distort images. If an Meade makes a complete line of accessories to enable you to get the most fun and performance from your power eyepiece.
  • Page 45: Power Supplies

    Power Supplies While the ETX will operate with “AA” cell batteries, several alternative power options are available. Meade #607 DC Power Cord w/Cigarette Lighter Adapter (#07043) Lets you power the ETX Observer from a car cigarette lighter style power socket. Offering convenient power on the go, this item is great for sav- ing batteries and for extended star parties.
  • Page 46 Driver software included. Windows 98, ME, 2000, XP and Win7 compatible. Accessories at Meade.com. Now you can order all these and more accessories or any Meade products right from the Meade Web Site www.meade.com and it will be shipped right to your door.
  • Page 47: Maintenance

    Note: For ETX 90/125 users: When cleaning the MAINTENANCE inside surface of the correcting lens, leave the lens Your ETX model telescope is a precision optical mounted in its metal cell throughout the process. Do instrument designed to yield a lifetime of rewarding not remove the lens from its metal housing or optical observations.
  • Page 48: Inspecting The Optics

    When transporting the telescope, take care not to • If using an external power source, verify that bump or drop the instrument; this type of abuse can it is properly connected between the power damage the optical tube and/or the objective lens and connector and wall plug (AC source) .
  • Page 49: Appendix A

    • Verify the telescopes date, time, location, • Adjust the AZ/RA Percent and/or Alt/DEC daylight savings time, and telescope model Percent values found in the Setup/Telescope are correct. menu. See page 31 & 32 "Az Percent" & "Alt Percent" for more information. •...
  • Page 50: Training The Drive

    APPENDIX A: Verify that AUTOSTAR Press > until it INITIALIZATION is is centered TRAINING THE DRIVE complete. Scope slews left. Bring target back Perform this procedure if you are experiencing any Press MODE until to center using Select Item is displayed. pointing accuracy problems.
  • Page 51: Basic Astronomy

    So as you look through your Meade ETX 90 telescope, Twelve Apollo astronauts left their bootprints on the keep Galileo in mind. To him, a telescope was not Moon in the late 1960’s and early 1970’s.
  • Page 52 Scroll to the “Object: Solar System” menu and scroll Saturn’s rings, called through the lists of planets. When a planet you are Cassini Division, interested in displays, press “ENTER”. Use the Scroll occasionally visible keys to display information about the planet, such as through the ETX 90.
  • Page 53 APPENDIX C: SPECIFICATIONS Model and Product Number ETX 80 Observer Back Pack Telescope # 205002 Optical System Optical Design Achromatic Refractor Front Lens Diameter 3.15” (80mm) Front Lens Material Optical quality glass Focal Length, Focal Ratio 400mm, f/5 Optical Coatings Multi-Coated Resolving Power (arc-seconds) 1.6 arc-seconds...
  • Page 54 SPECIFICATIONS Model and Product Number ETX 90 Observer Portable Observatory # 205004 Optical System Optical Design Maksutov-Cassegrain Primary Mirror Diameter 3.5” (90mm) Primary Mirror Material Optical quality glass Focal Length, Focal Ratio 1250mm, f/13.8 Optical Coatings Ultra-High Transmission Coatings (UHTC™) Resolving Power (arc-seconds) 1.3 arc-seconds Limiting Visual Stellar Magnitude...
  • Page 55 SPECIFICATIONS Model and Product Number ETX 125 Observer # 205005 Optical System Optical Design Maksutov-Cassegrain Primary Mirror Diameter 5” (127mm) Primary Mirror Material Optical quality glass Focal Length, Focal Ratio 1900mm, f/15 Optical Coatings Multi-Coated Resolving Power (arc-seconds) 0.9 arc-seconds Limiting Visual Stellar Magnitude 12.5 Mount...
  • Page 56: Equatorial (Polar) Alignment

    APPENDIX D: The celestial map also contains two poles and an equator just like a map of the Earth. The poles of this EQUATORIAL (POLAR) ALIGNMENT where the Earth’s North and South poles (i.e., the **FOR ETX 90/125 ONLY** celestial sphere. Thus, the North Celestial Pole (Fig. Equatorial Alignment 25) is that point in the sky where an extension of the In equatorial (or “polar”) alignment, the telescope is...
  • Page 57: Equatorial Mount

    Polar Mounting your Telescope with the #884 Deluxe Field Tripod Latitude control bar As the Earth rotates on its axis, astronomical objects appear to move across the sky in an arc. This apparent Tighten to motion is not obvious to the unaided eye, but when viewed through a telescope such as an ETX, this motion is rapid indeed.
  • Page 58 South). Using an Equatorially Mounted Telescope Once your telescope is equatorially mounted, the 7. The telescope is now equatorially mounted; the tripod must not be moved or else the alignment will telescope motor drive will keep a celestial object in the be lost.
  • Page 59 Polar Two-Star Alignment requires some knowledge of Note: The Dec. setting circle is located on the left arm of the telescope fork mount. The right arm of the the night sky. AudioStar provides a database of bright mount contains a graduated circle (mounted behind stars and two stars from this database are chosen by the knurled knob of the vertical lock), without Dec.
  • Page 60 3. The R.A. circle is now calibrated to read the correct R.A. of any object at which the telescope is pointed. The Dec. circle is already calibrated through polar alignment. Dec. coordinates. Then, without touching the setting circles, move the telescope (manually, by unlocking the vertical and horizontal locks or by slewing the telescope using the Arrow keys) so that the R.A.
  • Page 61: Latitude Chart

    APPENDIX E: Northern hemisphere observers (N): If the site is over 70 miles (110 km) North of the listed city, add one LATITUDE CHART degree for every 70 miles. If the site is over 70 miles Latitude Chart for Major Cities of the World South of the listed city, subtract one degree per 70 miles.
  • Page 62: Optical Systems

    Focal point Dew shield Refracting Telescopes use a large objective lens as their primary light-collecting element. Meade ETX refractors include an achromatic (2-element) objective lenses in order to reduce, or virtually eliminate, the false color (chromatic aberration) that results in the telescopic image when light passes through a lens.
  • Page 63: How To Recycle

    RECYCLING INFORMATION (EU Countries only) Correct Disposal of this Product (Waste Electrical & Electronic Equipment) This marking shown on the product or its literature indicates that it must not be disposed of in unsorted municipal waste at the end of its working life To prevent possible harm to the environment or human health from uncontrolled waste disposal, please separate this from other types of wastes and recycle it as required...
  • Page 64: Meade Warranty

    Every Meade telescope, spotting scope, and telescope accessory is warranted by Meade Instruments Corp. (“Meade”) to be free of defects in materials and workmanship for a period of ONE YEAR from the date of original purchase in the USA and Canada. Meade will repair or replace a product, or part thereof, found by Meade to be defective, provided the defective part is returned to Meade, freight-prepaid, with proof of purchase.
  • Page 65: How To Get In Contact

    We appreciate your business. Keep in touch! Let’s Get Social: @MeadeInstruments @MeadeInstruments @MeadeInstrument Share your photos with us: #MeadePhotos Social@meade.com For special offers and other products, visit our website: www. meade.com 1-800-626-3233 Meade Instruments 27 Hubble Irvine, CA 92618 JULY 2016 REV3 14-2050-00...

This manual is also suitable for:

Etx-80Etx-90

Table of Contents