
Related Manuals for Teac TN-300


Summary of Contents for Teac TN-300
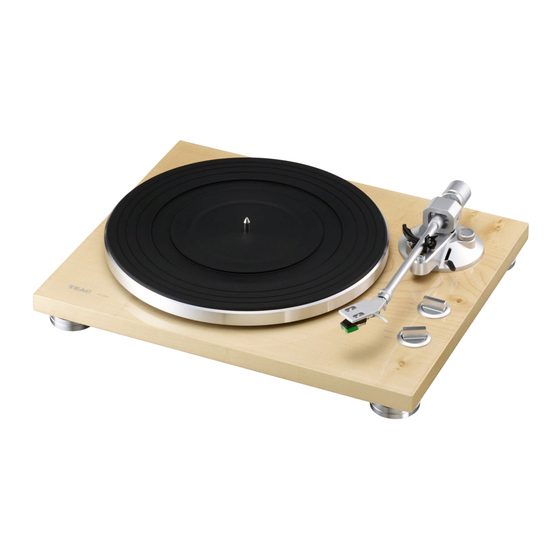
- Page 1 OPTN300TEA01 TN-300 ANALOG TURNTABLE OWNER'S MANUAL MODE D’EMPLOI MANUAL DEL USUARIO BEDIENUNGSANLEITUNG MANUALE DI ISTRUZIONI GEBRUIKSAANWIJZING BRUKSANVISNING...
-
Page 2: Important Safety Instructions
IMPORTANT SAFETY INSTRUCTIONS 1) Read these instructions. 2) Keep these instructions. 3) Heed all warnings. 4) Follow all instructions. 5) Do not use this apparatus near water. CAUTION: TO REDUCE THE RISK OF ELECTRIC SHOCK, DO NOT REMOVE COVER (OR BACK). 6) Clean only with dry cloth. - Page 3 o The mains plug is used as the disconnect device, the disconnect device shall remain readily operable. o Caution should be taken when using earphones or headphones with the product because excessive sound pressure (volume) from earphones or head- phones can cause hearing loss. CAUTION o Do not expose this apparatus to drips or splashes.
-
Page 4: Declaration Of Conformity
Gröbenzell, Germany declare in own responsibility, If a battery or accumulator contains more than the the TEAC product described in this manual is in compliance with specified values of lead (Pb), mercury (Hg), and/or cadmium the corresponding technical standards. -
Page 5: Table Of Contents
Contents Before use Thank you for choosing TEAC. Read this manual care- Included items fully to get the best performance from this unit. Check to be sure the box includes all the supplied accessories shown below. Please contact the store IMPORTANT SAFETY INSTRUCTIONS . -
Page 6: Before Use
When placing it in a rack, for example, leave at least 35 cm (13 3/4”) open above it and 10 cm (4”) open Customers in the USA, please visit the following TEAC behind it. Failure to provide these gaps could cause website to register your TEAC product online. -
Page 7: Preparing The Record Player
Preparing the record player Place the rubber mat. Keep the unit in standby while setting it up ( pages 10 and 11). Place the protective rubber mat that is included with the turntable on it before use. Place it on a flat surface. Since the heights of this unit's feet cannot be adjusted, be sure to place it on a flat surface. -
Page 8: Balancing The Tone Arm And Adjusting The Stylus Pressure
Preparing the record player (continued) Turn the counterweight and adjust so Balancing the tone arm and adjusting that the tone arm is level. the stylus pressure Counterweight Stylus pressure adjustment ring Center line Anti-skating o Remove the cartridge stylus protection cover Cue lever before making adjustments. -
Page 9: Notes About Record Styluses
Notes about record styluses o Record styluses are precision parts, so handle them Turn the counterweight so that the carefully to avoid bending or damaging their tips. If stylus pressure adjustment ring scale a stylus becomes bent or damaged, it might not be matches the stylus pressure specified able to follow the audio groove precisely and could for the cartridge. -
Page 10: Connections
Connections When PHONO EQ is ON Connect to audio input jacks of amplifier, etc. Included AC adapter When PHONO EQ is THRU (GPE053A-120050-Z) Connect to PHONO inputs of amplifier, etc. V Precautions when making connections o Do not plug the unit in until after making all Amplifier connections. -
Page 11: Names And Functions Of Parts
Names and functions of parts USB port (USB B type) Connect this to the USB port of a computer to con- vert the audio signal from this unit to digital and output it to the computer (page 17). DC input connector After completing all other connections, connect the included AC adapter (GPE053A-120050-Z) to this jack. -
Page 12: Turntable Cover
Turntable cover Attaching the rubber feet Opening and closing the turntable cover Rubber feet attachment points Open Rubber foot As shown in the illustration, attach rubber feet to the left and right sides of the turntable cover. Opening Hold the front edge of the turntable cover and gently lift it open completely until it stops. -
Page 13: Handling Records
Handling records Holding records Precautions When holding a record or removing it from its sleeve, o Do not leave records in places that are exposed to avoid touching the grooves by holding the record by direct sunlight or are very hot or very humid. Leaving its label and edge with one hand or by holding it by its a record in such a condition for a long time could edge with both hands. -
Page 14: Changing The Cartridge
Changing the cartridge To change the cartridge, first remove the headshell from Connect the shell lead terminals to the the tone arm. cartridge. o We recommend that you keep the cartridge needle o The signals and colors of the shell leads are protective cap on while changing the cartridge. -
Page 15: Basic Operation
Basic operation Set according to the rotation speed Playing records (RPM) of the record. The rotation speed can be set to 33 1/3 or 45 RPM. Press the STANDBY/ON button on the back of the unit to turn it on. Turn the START/STOP rotation knob to START to start the turntable. - Page 16 Basic operation (continued) Lift the cue lever. When playback finishes Slightly lift the cue lever or the head- shell hook and return the tone arm to its resting position. Cue lever Tone arm o You can also leave the cue lever down and move the raised tone arm over the record and then Cue lever lower the tone arm slowly to start playback.
-
Page 17: Recording With A Computer
Windows 8.1 (32-bit, 64-bit) Internet. As free software, Audacity is not supported (as of September 2014) by TEAC. o When connected to a computer by USB and record- Mac OS X ing audio, do not do any of the following. Doing so OS X Lion 10.7... -
Page 18: Troubleshooting
Troubleshooting The pitch is wrong. If you experience a problem with this unit, please check the following items before requesting service. Something e Set the rotation speed (RPM) to match the record other than this unit could also be the cause of the prob- (page 15). -
Page 19: Specifications
Specifications Turntable General Drive system ........Belt drive AC adapter power Motor . - Page 20 Phone: +1-323-726-0303 TEAC AUDIO EUROPE Liegnitzer Straße 6, 82194 Gröbenzell, Germany Phone: +49-8142-4208-141 This device has a serial number located on its rear panel. Please record the serial number and retain it for your records. Model name: TN-300 Serial number: 0914.MA2111A...
- Page 21 This document contains pre-release information which should not be released to the public before the “Launch Date”. Specifications and contents are subject to change without notice. Please check the TEAC/TASCAM website or with the TEAC sales department for the latest information before you publish any information to the public.
- Page 22 This document contains pre-release information which should not be released to the public before the “Launch Date”. Specifications and contents are subject to change without notice. Please check the TEAC/TASCAM website or with the TEAC sales department for the latest information before you publish any information to the public.
- Page 23 This document contains pre-release information which should not be released to the public before the “Launch Date”. Specifications and contents are subject to change without notice. Please check the TEAC/TASCAM website or with the TEAC sales department for the latest information before you publish any information to the public.
- Page 24 This document contains pre-release information which should not be released to the public before the “Launch Date”. Specifications and contents are subject to change without notice. Please check the TEAC/TASCAM website or with the TEAC sales department for the latest information before you publish any information to the public.
Need help?
Do you have a question about the TN-300 and is the answer not in the manual?
Questions and answers