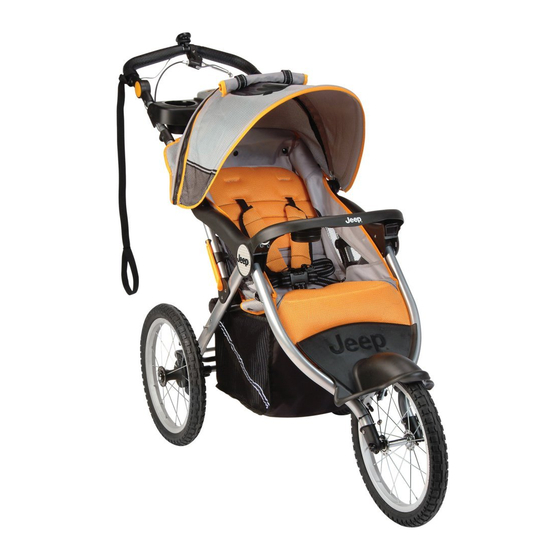
Kolcraft Jeep Overland Limited Instructions Manual
Jogging stroller
Hide thumbs
Also See for Jeep Overland Limited:
- Instructions manual (36 pages) ,
- Instructions manual (28 pages)

Related Manuals for Kolcraft Jeep Overland Limited


Summary of Contents for Kolcraft Jeep Overland Limited
- Page 1 S56J-A.qxd 03/06/2006 9:51 AM Page 1 Jeep Overland Limited Jogging Stroller Instructions ® ©2006 Kolcraft® Enterprises, Inc. All Rights Reserved. S56J-A 3/06...
- Page 2 S56J-A.qxd 03/06/2006 9:51 AM Page 2 WARNING Your child's safety depends on you. Proper stroller usage cannot be assured unless you follow these instructions. DO NOT USE STROLLER UNTIL YOU READ AND FOLLOW THE MANUFACTURER’S INSTRUCTIONS. I I M M P P O O R R T T A A N N T T S S A A F F E E T T Y Y I I N N F F O O R R M M A A T T I I O O N N : : H H o o w w t t o o K K e e e e p p Y Y o o u u r r C C h h i i l l d d S S a a f f e e W W h h i i l l e e U U s s i i n n g g t t h h i i s s S S t t r r o o l l l l e e r r •...
- Page 3 S56J-A.qxd 03/06/2006 9:51 AM Page 3 W W h h a a t t t t o o A A v v o o i i d d W W h h i i l l e e U U s s i i n n g g t t h h i i s s S S t t r r o o l l l l e e r r •...
- Page 4 S56J-A.qxd 03/06/2006 9:52 AM Page 4 Parts List M M u u s s i i c c O O n n T T h h e e M M o o v v e e ® ® S S t t r r o o l l l l e e r r F F r r a a m m e e F F r r o o n n t t W W h h e e e e l l ( ( 1 1 ) ) F F r r o o n n t t T T r r a a y y W W e e a a t t h h e e r r S S h h i i e e l l d d...
- Page 5 S56J-A.qxd 03/06/2006 9:52 AM Page 5 To Assemble Rear Wheels Lay stroller on its side. Slide wheel pins into axle hole as shown. Push down on wheel until you hear a click. Pull up on wheel to make sure it is properly secured.
- Page 6 S56J-A.qxd 03/06/2006 9:52 AM Page 6 Loosen the round nut on the wheel enough for the wheel to slide onto the frame. If the round nut comes all the way off, be sure to S S p p r r i i n n g g reassemble it with the spring as shown.
- Page 7 S56J-A.qxd 03/06/2006 9:52 AM Page 7 To Adjust Odometer Magnet T T O O A A D D J J U U S S T T O O D D O O M M E E T T E E R R M M A A G G N N E E T T In order for the odometer to function properly, the magnet on the front wheel must be in the correct position.
- Page 8 S56J-A.qxd 03/06/2006 9:52 AM Page 8 To Attach Front Tray Slide tray onto round post while pushing in spring loaded buttons, and a click is heard. Make sure there is no gap between stroller frame and front tray. Push down on the right side of the tray until B B u u t t t t o o n n s s the plastic button on the stroller frame pops out through the hole on the front tray.
- Page 9 S56J-A.qxd 03/06/2006 9:52 AM Page 9 To Install Batteries into Music On The Move ® Requires 4 “AA” Batteries (Not Included). Lift up the foam padding in the bottom of the unit. N N O O T T E E : : Foam is used to reduce skipping & eliminate sliding of your portable unit.
- Page 10 S56J-A.qxd 03/06/2006 9:52 AM Page 10 To Adjust Hand Brake T T O O T T I I G G H H T T E E N N H H A A N N D D B B R R A A K K E E T T E E N N S S I I O O N N : : Loosen nut A by turning it away from you, while holding nut B in place.
- Page 11 S56J-A.qxd 03/06/2006 9:52 AM Page 11 To Attach Basket WARNING • A A l l w w a a y y s s b b a a l l a a n n c c e e t t h h e e w w e e i i g g h h t t o o f f t t h h e e s s t t r r o o l l l l e e r r e e v v e e n n l l y y .
- Page 12 S56J-A.qxd 03/06/2006 9:52 AM Page 12 How to Properly Use Your New Stroller To Secure Child In Stroller WARNING Avoid serious injury from falling or sliding out. Always use restraint system. Do not use product without full 5 point Harness Restraint. Removing the shoulder straps will not adequately restrain child.
- Page 13 S56J-A.qxd 03/06/2006 9:52 AM Page 13 T T O O A A D D J J U U S S T T S S H H O O U U L L D D E E R R S S T T R R A A P P H H E E I I G G H H T T N N O O T T E E : : For a secure fit, straps should be at or below the child's shoulder.
- Page 14 S56J-A.qxd 03/06/2006 9:53 AM Page 14 To Recline Seat WARNING To avoid finger entrapment or pinching, do not adjust the seat back while child is in the stroller. To avoid head entrapment, always fasten the canopy to the seat back when using the stroller in the reclined position.
- Page 15 S56J-A.qxd 03/06/2006 9:53 AM Page 15 To Properly Use the Tether Always attach tether around your wrist when using jogging stroller, so that the stroller will not roll away from you. Airpump use and storage Keep air pump stored in basket when not in use.
- Page 16 S56J-A.qxd 03/06/2006 9:53 AM Page 16 To Operate Music On The Move ® Connect the Music On The Move plug to the headphone jack of your personal sound system (iPod ®* , radio, cassette, CD, MP3 or mini disk player). Turn on Music On The Move by locating the power switch as shown.
- Page 17 S56J-A.qxd 03/06/2006 9:53 AM Page 17 To Set Up Odometer Current Speed Kilometers/Miles Mode Symbol Selected Function Display SET/RESET button MODE Button T T O O T T U U R R N N O O D D O O M M E E T T E E R R O O N N : : Press SET/RESET button once.
- Page 18 S56J-A.qxd 03/06/2006 9:53 AM Page 18 To Operate Odometer T T O O D D I I S S P P L L A A Y Y E E L L A A P P S S E E D D T T I I M M E E : : Press MODE button until a “T”...
- Page 19 S56J-A.qxd 03/06/2006 9:53 AM Page 19 To Replace Battery in Odometer N N O O T T E E : : Requires an LR44 battery. Replacement battery not included. Battery Cover Remove odometer from clip. Turn odometer upside down. Remove battery cover, by placing a coin in the battery door slot, and turn it counter clockwise.
- Page 20 S56J-A.qxd 03/06/2006 9:53 AM Page 20 To Fold Stroller Lock foot brake. Recline seat. Close canopy. Locate trigger fold on frame below parent tray. Pull up latches on frame to fold. Push stroller forward to fold stroller. Engage locking latch.
- Page 21 KOLCRAFT warrants this product to be free of defects in materials and workmanship, as follows: For a period of ONE YEAR from the date of purchase, KOLCRAFT will repair or replace, at its option, the defective product. REPAIR OR REPLACEMENT AS PROVIDED UNDER THIS WARRANTY IS THE EXCLUSIVE REMEDY OF THE CONSUMER.
- Page 22 T T o o c c o o n n t t a a c c t t t t h h e e m m a a n n u u f f a a c c t t u u r r e e r r d d i i r r e e c c t t l l y y : : Kolcraft Enterprises, Inc. Consumer Service Department...
- Page 23 S56J-A.qxd 03/06/2006 9:53 AM Page 23 Replacement Parts List...
- Page 24 S56J-A.qxd 03/06/2006 9:53 AM Page 24 Replacement Parts Order Form Complete the following form. Your model number and date of manufacture must be included on the form to ensure proper replacement parts. Model Number Date of Manufacture Total: Shipping & Handling*: Total Due: Cheque or money order (in AUS dollar) enclosed (payable to Karlisle’s Pty Ltd) Charge to credit card...
Need help?
Do you have a question about the Jeep Overland Limited and is the answer not in the manual?
Questions and answers