Table of Contents
Advertisement
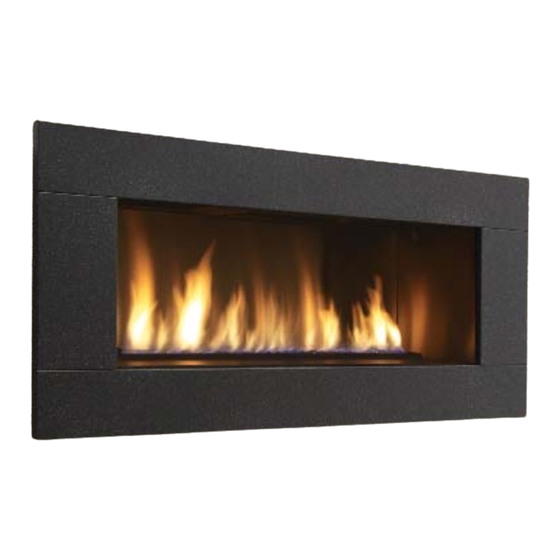
Regency Horizon ™ HZ42E
WARNING:
If the information in these instructions are not followed exactly,
a fi re or explosion may result causing property damage,
personal injury or loss of life.
FOR YOUR SAFETY
Do not store or use gasoline or other fl ammable vapors and
liquids in the vicinity of this or any other appliance.
Installation and service must be performed by a qualifi ed
installer, service agency or the gas supplier.
Tested by:
918-932
FPI FIREPLACE PRODUCTS INTERNATIONAL LTD. 6988 Venture St., Delta, BC Canada, V4G 1H4
Gas Fireplace
Installer: Please complete the details on the back cover
Installer
: Please complete the details on the back cover
and leave this manual with the homeowner.
Homeowner: Please keep these instructions for future reference.
Installation Manual
MODELS:
www.regency-fi re.com
FOR YOUR SAFETY
What to do if you smell gas:
Do not try to light any appliance
Do not touch any electrical switch:
do not use any phone in your
building.
Immediately call your gas supplier
from a neighbour's phone. Follow
the gas supplier's instructions.
If you
cannot reach your gas
supplier, call the fi re department.
Owners &
HZ
42E
-NG Natural Gas
HZ
42E
-LP Propane
06/25/13
Advertisement
Table of Contents

Related Manuals for Regency Horizon HZ42E-NG


Summary of Contents for Regency Horizon HZ42E-NG
- Page 1 Regency Horizon ™ HZ42E Owners & Installation Manual Gas Fireplace MODELS: -NG Natural Gas -LP Propane www.regency-fi re.com WARNING: FOR YOUR SAFETY If the information in these instructions are not followed exactly, What to do if you smell gas: a fi re or explosion may result causing property damage, Do not try to light any appliance personal injury or loss of life.
- Page 2 Congratulations! ® You are the owner of a state-of-the-art Gas Fireplace by REGENCY . The HZ42E has been designed to provide you with all the warmth and charm of a fi replace at the fl ick of a switch. The model HZ42E has been approved by Warnock Hersey/Intertek for both safety and effi...
-
Page 3: Manufactured Mobile Home Requirements
This appliance can only be used with the type of gas indicated on the rating plate. This appliance is not convertible for use with other gases. Ensure that structural members are not cut or weakened during installation. HZ42E Regency Horizon™ Gas Fireplace... -
Page 4: Table Of Contents
Rigid Pipe 4" x 6-5/8" ...........29 Unit Installation with Horizontal Termination ....31 4" x 6-5/8"venting ............31 Unit Installation with Horizontal Termination ....32 Unit installation with Vertical Termination ....33 4" x 6-5/8" venting ............33 High Elevation Gas Line Installation ......34 HZ42E Regency Horizon™ Gas Fireplace... -
Page 5: Safety Label
The State of Massachusetts requires the installation of a carbon monoxide alarm in accordance with NFPA 720 and a CO alarm with battery back up in the same room where the gas appliance is installed. HZ42E Regency Horizon™ Gas Fireplace... -
Page 6: Requirements
(e) A copy of all installation instructions for all Product Approved side wall horizontally vented gas fueled equipment, all venting instructions, all parts lists for venting instructions, and/or all venting design instructions shall remain with the appliance or equipment at the completion of the installation. HZ42E Regency Horizon™ Gas Fireplace... -
Page 7: Dimensions
DIMENSIONS DIMENSIONS UNIT DIMENSIONS 47” (1194mm) ½” (13mm) 1-½” (38mm) 41-3/16”” (1046mm) 14-5/32” (360mm) 1-½” (38mm) 38”” (965mm) ½” (13mm) 36” (914mm) 48-3/4” (1238mm) HZ42E Regency Horizon™ Gas Fireplace... -
Page 8: Installation
SHOULD STAY AWAY TO AVOID BURNS 8) To prevent injury, do not allow anyone who is OR CLOTHING IGNITION. unfamiliar with the operation to use the fi replace. 9) Wear gloves and safety glasses for protection while doing required maintenance. HZ42E Regency Horizon™ Gas Fireplace... -
Page 9: Installation Checklist
Before leaving this unit with the customer, the Flat on Wall installer must ensure that the appliance is fi ring Flat on Wall Corner correctly and operation fully explained to Recessed into Wall/Alcove customer. Corner HZ42E Regency Horizon™ Gas Fireplace... -
Page 10: Clearances
The fi nished fl oor must not come in contact with the front face of the fi replace. Non-combustible material (see "Framing and Finishing" section) must act as a barrier between the front face and fi nished fl oor. Alcove HZ42E Regency Horizon™ Gas Fireplace... -
Page 11: Mantel Clearances
13” To Unit 25-3/4” Base Top of Fireplace Opening MANTEL LEG CLEARANCES Combustible mantel leg clearances as per diagram: 3-7/8”(98mm) MANTEL LEG Non-Combustible 1.5" (38mm) 5-1/2” (140mm) Allowable mantel leg projection 8” (203mm) 11” (279mm) HZ42E Regency Horizon™ Gas Fireplace... -
Page 12: Unit Assembly Prior To Installation
Framing depth measurement is noted with the nailing strips set as far forward on the fi rebox as possible. The nailing strips can be adjusted back up to 1” to allow for varying thicknesses in non-combustible material & wall fi nishes. HZ42E Regency Horizon™ Gas Fireplace... -
Page 13: Framing Dimensions
The nailing strips can be adjusted back up to 1” to allow for varying thicknesses in non-combustible material & wall fi nishes. Drywall or other facing Metal Stud (Header) Note: All other framing may Non-Combustible be of wood construction. Facing Metal Stud on edge Finished Floor HZ42E Regency Horizon™ Gas Fireplace... -
Page 14: Non-Combustible Requirements
6) Prime wall for a second time for proper adhesion of paint Non-combustible board-faces and edges 7) Paint walls using a high quality paint which will withstand MUST BE PRIMED. the high temperatures being emitted from this appliance. HZ42E Regency Horizon™ Gas Fireplace... -
Page 15: Framing & Finishing
fi nished material is beyond for the safe operation of this appliance. 1-1/2". 41-3/8” Unit shown without faceplate 1/2" required between faceplate + fi nished wall HZ42E Regency Horizon™ Gas Fireplace... - Page 16 fi nished material is always at the 1-1/2" edge of the fl ange. Finished Nailing Strip Material Position 1/2" 1" Nailing Strip 1” Forward Unit 1" 1/2" Nailing Strip ½” Forward Unit 1-1/2" 0" (fl ush) Nailing Strip Flush w/unit Factory Set Unit HZ42E Regency Horizon™ Gas Fireplace...
-
Page 17: Vent Restrictor Position
Factory Set Vent Restrictor (no adjustment required) SET 1 THIS HOLE SETS THE VENT RESTRICTOR AT 1-1/2” 1-1/2” SET 2 Vent Restrictor Set 1 THIS HOLE SETS THE VENT RESTRICTOR AT 1” 1” Vent Restrictor Set 2 HZ42E Regency Horizon™ Gas Fireplace... -
Page 18: Exterior Vent Termination Requirements
* Clearance in accordance with local installation codes and the requirements of the gas supplier 3 feet (91cm) within a height of 15 feet (4.5m) above the meter / regulator assembly 3 feet (91cm) above - if within 10 feet (3m) horizontally HZ42E Regency Horizon™ Gas Fireplace... -
Page 19: 4" X 6-5/8" Rigid Pipe
Offset Support 46DVA-ES (N/A - FPI) 4DT-OS SV4SU Wall Thimble-Black 46DVA-WT 4DT-WT 4DWT 4DWT SV4RSM TE-4DE90 Wall Thimble Support/Ceiling Support 46DVA-DC SV4PF TE-4DE90B Firestop Spacer 46DVA-FS 4DT-FS 4DFSP 4DFS SV4BF Trim Plate-Black 4DT-TP 4DFPB 4DCP SV4LA HZ42E Regency Horizon™ Gas Fireplace... - Page 20 Never allow the vent to run downward - this could cause high temperatures and may present a possible fi re hazard. Regency Fireplace Products . 6988 Venture St. . Delta, BC . Canada . V4G 1H4 . 604-946-5155 . www.regency-fi re.com...
-
Page 21: Venting Introduction
Refer to the "Vent Restrictor Position" section for details on how to change the vent restrictor from the factory setting of Set 0 to Set 1 if required. Note: For horizontal terminations the Regency Direct Vent Flex System may be used for installations with a maximum continuous vent length of up to 10 feet. -
Page 22: Horizontal Terminations
S.S. screws #8 x 1-1/2” drill point Notes: 1) Liner sections should be continuous without any joints or seams. ® 2) Only Flex pipe purchased from Regency may be used for Flex installations 3) Horizontal vent must be supported every 3 feet. 4) Regency ®... -
Page 23: Horizontal Terminations
American Metal Products Ameri Vent Direct Vent, Security Secure Vent , ICC Excel, Selkirk Direct-Temp. AstroCap is a proprietary trademark of FPI Fireplace Products International Ltd. Dura-Vent® and Direct Vent are registered and/or proprietary trademarks of Simpson Dura-Vent Co. Inc. HZ42E Regency Horizon™ Gas Fireplace... -
Page 24: Horizontal Terminations
With the above options, maximum total pipe length if 37 feet with minimum of 6 feet total vertical and maximum 17 feet total horizontal. Please note minimum 1 foot between 90 elbows is required. Please note the minimum centerline for basic install shown above. HZ42E Regency Horizon™ Gas Fireplace... - Page 25 3' Max. 4' Min. 6' Max. Please note minimum 4' Max. 6' Min. 7' Max. 1 foot between 90 elbows is required. 5' Max. 8' Min. 8' Max. Restrictor Position - Set 0 (factory setting) HZ42E Regency Horizon™ Gas Fireplace...
- Page 26 1 f o o t 6' Min. 5' Max. 10' Min. 8' Max. between 90 elbows 7' Min. 6' Max. 12' Min. 9' Max. is required. Restrictor Position - Set 0 (factory setting) HZ42E Regency Horizon™ Gas Fireplace...
-
Page 27: Venting Arrangement For Vertical Terminations
Vent Restrictor on Set 1 Please note min. 1 foot between 90 elbows is required. Vent Restrictor on Set 0 (factory set) Max. 10’ (3m)(centerline to centerline) Minimum length of pipe between elbows 12” (305mm) HZ42E Regency Horizon™ Gas Fireplace... -
Page 28: Vertical Terminations
American Metal Products Ameri Vent Direct Vent, Security Secure Vent , ICC Excel, Selkirk Direct-Temp. AstroCap is a proprietary trademark of FPI Fireplace Products International Ltd. Dura-Vent® and Direct Vent are registered and/or proprietary trademarks of Simpson Dura-Vent Co. Inc. HZ42E Regency Horizon™ Gas Fireplace... -
Page 29: Rigid Pipe 4" X 6-5/8" Vertical Terminations
6' Min. 6' Max. 6' Min. Restrictor Position - Set 0 (factory setting) Restrictor Position - Set 0 (factory setting) For additional vertical venting with 2 x 90 elbows, refer to "Rigid Pipe Venting Arrangements" Section. HZ42E Regency Horizon™ Gas Fireplace... - Page 30 Please note min. 1 foot 5' Min. 6' Max. 8' Min. between 90 elbows is 6' Min. 7' Max. 9' Min. required. 7' Min. 8' Max. 10' Min. Restrictor Position - Set 0 (factory setting) HZ42E Regency Horizon™ Gas Fireplace...
-
Page 31: Unit Installation With Horizontal Termination
3 supplied screws (drilling pilot holes will make this easier). 4) Level the fi replace and fasten it to the framing using nails or screws through the top and side nailing strips. Diagram 7 Diagram 2 Diagram 1 HZ42E Regency Horizon™ Gas Fireplace... -
Page 32: Unit Installation With Horizontal Termination
Apply Mill Pac or high temperature silicone to the outer fl ex pipe and slip it over the outer fl ue collar of the vent terminal at least 1-3/8"(35mm) and fasten with the 3 screws. HZ42E Regency Horizon™ Gas Fireplace... -
Page 33: Unit Installation With Vertical Termination
Note that for steep roof pitches, the vertical height must be increased. A poor draft, or down drafting can result from high wind conditions near big trees or adjoining roof lines, in these cases, increasing the vent height may solve the problem. HZ42E Regency Horizon™ Gas Fireplace... -
Page 34: High Elevation Gas Line Installation
Note: Any damage due to carboning resulting screw (clockwise) with a 1/8" fl at screwdriver. from improperly setting the aeration Note: Screw should be snug, but do not over controls is NOT covered under warranty. tighten. HZ42E Regency Horizon™ Gas Fireplace... -
Page 35: Wiring Diagram
AC Adaptor (see AC Adaptor in *Wire Clamp Receptacle *Receptacle Box in Unit inside stove * = supplied with fan kit Other parts are to be supplied by electrician or installer *Receptacle (dedicated use by unit fan only) HZ42E Regency Horizon™ Gas Fireplace... -
Page 36: Optional Accent Lighting Wiring Diagram
INSTALLATION OPTIONAL ACCENT LIGHTING WIRING DIAGRAM Wall Mounted Switch Neutral Optional Accent Lights Receptacle in Unit HZ42E Regency Horizon™ Gas Fireplace... - Page 37 5) Neatly tuck any loose AC Power Adaptor wires neatly underneath / inside the appliance. Note: (keep wires away from the heat as much as possible). FCM - COM HZ42E Regency Horizon™ Gas Fireplace...
-
Page 38: Optional Wall Thermostat
Note 1 ~ Profl ame Flame Modulator for GTM & GTMF Remote Controls are sold seperately. Choice of NG or LP fl ame modulator (to match unit fuel type). See Regency Retail Price pages for complete details Note: Regency Profl ame systems include a white and black wall cover & switch. -
Page 39: Gt Remote Installation
Note: DO NOT USE 4 AA batteries in the battery pack on the tray - the DFBC is now powered by the receiver batteries in the wall. HZ42E HZ42STE 4) Remove the 4 AA batteries if installed, reconnect the connector to the battery pack and put back onto Velcro strip HZ42E Regency Horizon™ Gas Fireplace... -
Page 40: Gtm Remote Installation
(TH) 8) Install the stepper motor in the same location the hi/lo knob was Green to (DFBC) Green and (TH/TP) White to (DFBC) White removed from - with 2 screws as shown below. HZ42E Regency Horizon™ Gas Fireplace... - Page 41 13) Program Receiver and transmitter (refer to manual) Note: DO NOT USE 4 AA batteries in the battery pack on the tray; the DFBC is now powered by the receiver batteries in the wall. HZ42E Regency Horizon™ Gas Fireplace...
-
Page 42: Optional Refl Ective Panel Installation
Left Side Bracket Fit side panel tab into slot Right side back panel tab fi tted into slot Left side panel in position Bracket shown in place on right side of the fi rebox HZ42E Regency Horizon™ Gas Fireplace... -
Page 43: Optional Light Installation
Faceplate 9) Remove cover plate located on the left side of the fi rebox fl oor by removing 4 screws. Discard the cover plate and gasket - keep the screws. Cover Plate Bottom Faceplate Panel HZ42E Regency Horizon™ Gas Fireplace... - Page 44 Install bulb into the socket end of assembly - as shown below. 13) Remove the amber glass - by sliding out. Note: Oils from hands will shorten the life of the bulbs, do not handle bulbs with bare hands. HZ42E Regency Horizon™ Gas Fireplace...
- Page 45 BULB REPLACEMENT 1) Slide out bottom faceplate panel - see step 3 from previous page. 2) Remove 4 screws securing light diffuser mounting plate. 6) Reverse steps 3 through 1.. HZ42E Regency Horizon™ Gas Fireplace...
-
Page 46: Glass Crystals Or Optional Stones
1-2/3 packages (5 x bags pebbles) HZI390E /HZI390PB 3 lbs 1 package (3 x bags pebbles) HZI234E 2 lbs 1 package (3 x bags pebbles) HZO42 / HZO42 (AUS) 3 lbs 1 package (3 x bags pebbles) HZ42E Regency Horizon™ Gas Fireplace... - Page 47 Natural River Pebbles shown surrounding the a Horizon Burner Glass Crystals shown surrounding the Burner Glass Crystals shown on Burner and Firebox Floor For Units HZI390E, HZI540E DO NOT block pilot area with glass crystals HZ42E Regency Horizon™ Gas Fireplace...
-
Page 48: Glass Door Installation
INSTALLATION GLASS DOOR INSTALLATION Hook top of door onto top flange Flush Door Diagram 1 Diagram 2 Diagram 3 HZ42E Regency Horizon™ Gas Fireplace... -
Page 49: Faceplate Installation
6) Install the brackets onto the lower faceplate. Note: Installation location of the left and right brackets is the same for both the HZ42 and HZ42ST. Top of lower faceplate Right bracket shown in position on lower faceplate. HZ42E Regency Horizon™ Gas Fireplace... - Page 50 - see step 2. 11) Final installation of faceplate on HZ42 unit HZ42ST - install slider on this side of the bracket. Note: Two faceplates need to be installed on the HZ42 ST unit. HZ42E Regency Horizon™ Gas Fireplace...
-
Page 51: Operating Instructions
fi lm will bake on and become very diffi cult to remove. Use a non-abrasive cleaner and DO NOT ATTEMPT TO CLEAN THE GLASS WHILE IT IS HOT. HZ42E Regency Horizon™ Gas Fireplace... -
Page 52: Copy Of Lighting Plate Instructions
If service is to be performed - you must disconnect power to the unit, from the battery pack, refer to manual. Appuyez sur le bouton ON / OFF Si le service est effectuée, vous devez débrancher l'appareil, du bloc-piles, voir le manuel d'instruction pour plus de détails. DO NOT REMOVE THIS INSTRUCTION PLATE 918-628b HZ42E Regency Horizon™ Gas Fireplace... -
Page 53: Maintenance Instructions
& reinstalled Replacement of the glass panels in accordance with the manufacturer's should be done by a licensed or instructions. qualifi ed service person. 8) Verify operation after servicing. HZ42E Regency Horizon™ Gas Fireplace... -
Page 54: Glass Door Removal
Glass Door Faceplate 4) Remove the glass door. a) Remove the 3 screws shown below at the bottom of the glass door b) Swing the door out 45 from the bottom and lift up and out. HZ42E Regency Horizon™ Gas Fireplace... -
Page 55: Valve Assembly Replacement
Note: Some of the screws are not visible in Diagram below. Note: If optional accent lights have been installed - assure all wiring is out of the way before removing valve assembly. 5) Remove the pilot cover as shown below. HZ42E Regency Horizon™ Gas Fireplace... -
Page 56: Bulb Replacement
4) Remove one screw securing the socket end of the diffuser and separate the 2 parts - as shown below. 5) Replace bulb. Note: Oils from hands will shorten the life of the bulbs, do not handle bulbs with bare hands. HZ42E Regency Horizon™ Gas Fireplace... -
Page 57: Parts List
7) 911-006 Pilot Assembly - NG 911-007 Pilot Assembly - LP 910-882 Wire (Valve to Burner ON/OFF) 8) 904-593 Orifi ce # 40 (NG) 904-345 Orifi ce # 53 (LP) 918-932 Manual 9) 948-484 Slide Hinge HZ42E Regency Horizon™ Gas Fireplace... - Page 58 GT Profl ame Remote Control 946-681 GTM Profl ame Remote Control 946-683 GTM NG Modulator 946-684 GTM LP Modulator 910-574 GTM Wire Harness 910-576 Cover Wall Mount (white) 910-572 Receiver GTM SIT w/Batt & Cover HZ42E Regency Horizon™ Gas Fireplace...
-
Page 59: Warranty
Conditions: Any part or parts of this unit which in our judgement show evidence of such defects will be repaired or replaced at Regency's option, through an accredited distributor or agent provided that the defective part be returned to the distributor or agent Transportation Prepaid, if requested. - Page 60 Dealer Name & Address: ______________________________________________ ___________________________________________________________________ Installer: ___________________________________________________________ Phone #: ___________________________________________________________ Date Installed: ______________________________________________________ Serial No.: __________________________________________________________ Regency Horizon is a trademark of FPI Fireplace Products International Ltd. Printed in Canada © Copyright 2013, FPI Fireplace Products International Ltd. All rights reserved.
Need help?
Do you have a question about the Horizon HZ42E-NG and is the answer not in the manual?
Questions and answers