Table of Contents
Advertisement
Quick Links
Advertisement
Table of Contents

Related Manuals for Apricorn EZ Bus DTS


Summary of Contents for Apricorn EZ Bus DTS
- Page 1 User Guide eader in ersonaL Torage...
- Page 2 Copyright © Apricorn, Inc. 2008. All rights reserved. Windows is a registered trademark of Microsoft Corporation. All other trademarks and copyrights referred to are the property of their respective owners. Anytime (GB) is used in this document: One gigabyte (GB) = one billion bytes;...
- Page 3 ArrAnty ondItIonS 7. FAq TABLE OF CONTENTS prIcorn product dtS ... ! ... IStA rIve wItH lone rIve wItH reAte mAGe onItor For IndowS IndowS oFtwAre For rIve rIve eZ B dtS ... upport IZArd www.apricorn.com...
-
Page 4: S Ystem R Equirements
& backup products has two models to choose from: USB 2.0 (EZ Bus DT) and Serial ATA/USB 2.0 (EZ Bus DTS). The EZ Bus DTS is for use with SATA (Serial Advanced Technology Attachment) hard drives and connected to any system that offers a eSATA or USB Type B port for USB 2.0/1.1 compatibility. -
Page 5: G Etting To Know Your A Pricorn Product
GETTING TO KNOW YOUR APRICORN PRODUCT Package Contents EZ Bus DTS Enclosure Single Port eSATA PCI Bracket AC Adapter EZ Gig II Backup & Disaster Recovery Software SMART-ER - Hard Drive Monitor Microsoft SyncToy® 1.4 download ShirtPocket SuperDuper! - Backup Software... -
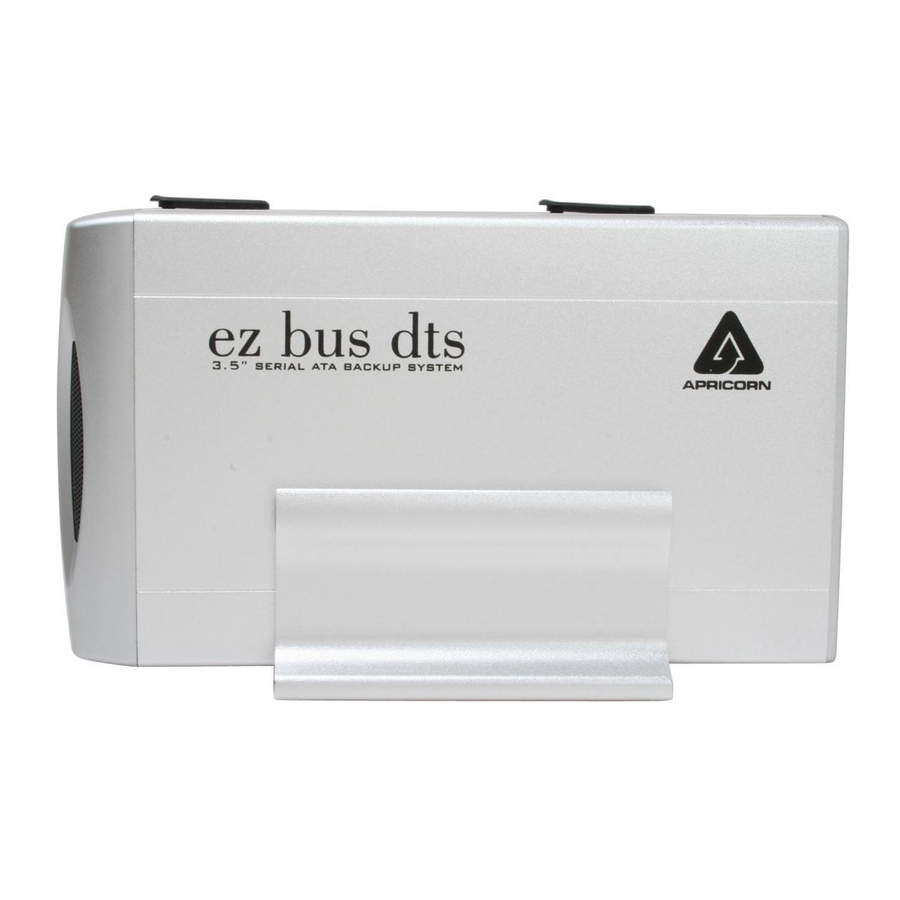
Page 6: Front Panel
Front Panel Rear Panel The Leader in Personal Storage USB Cable SATA Cable Connection Connection On/Off Switch LED activity/ Power Indicator Light AC Adapter Connection... -
Page 7: H Ard D Rive I Nstallation
2. HARD DRIVE INSTALLATION EZ Bus DTS Kit hard disk drive installation instructions (the kit is shipped without a Serial ATA hard disk drive). If you purchased an EZ Bus DTS with a hard drive already installed, please proceed to page 8. - Page 8 4. Replace the top cover by inserting the tabs into the slots on the bottom of the case. 6. Rotate the rubber plugs to the original positions. 8. Proceed to the section on initializing, partitioning and formatting your new hard drive. The Leader in Personal Storage 5.
-
Page 9: Connecting Your Ez Bu Dt
6. Now, power up your computer. For use with the USB cable: 1. Connect the USB cable to the USB port at the rear of the EZ Bus DTS and to an available USB Port on your computer. 2. Connect the AC adapter at the rear of the EZ Bus DTS and then plug into an available wall outlet or power strip. -
Page 10: Installing The Single Port Esata Pci Bracket
Bracket into that slot and secure with the same screw that was holding the PCI bracket insert. 7. Close the computer case and go back to the beginning of Section 3 CONNECTING YOUR EZ BUS DTS (for a system with a pre-installed eSATA card) and follow the instructions. The Leader in Personal Storage... -
Page 11: S Oftware
5. Once you have decided upon your plan, proceed to the appropriate sections in this manual to either use Disk Clone or Disk Image. www.apricorn.com... - Page 12 EZ Gig II installation instructions for Windows Vista: Windows Vista’s User Account Control helps stop unauthorized changes to your computer. The User Account Control window pops up in Administrator Approval Mode whenever a program tries to install on your Windows Vista system.
-
Page 13: Ez Gig Ii For Window
EZ Gig II for Windows 1. Insert Apricorn CD into your CD-ROM drive. 2. Setup screen will pop up. Click Install EZ GIG II button. 3. EZ Gig II installation screen will pop up. 4. Follow instructions for installation. www.apricorn.com... -
Page 14: Cloning Your Hard Drive With Disk Clone
1. Ensure your Apricorn product is connected to your computer. 2. To start EZ Gig II, click Start > Programs > Apricorn > EZ Gig II and click on Apricorn EZ Gig II. This will open the main screen of EZ Gig II. - Page 15 6. If the hard disk drive to receive the cloned data is new or blank, proceed to step 10. If the hard disk drive to receive the cloned data either contains data or is formatted, proceed to step 7. www.apricorn.com...
- Page 16 7. The Source Hard Disk screen will appear. Select the appropriate source hard disk. The interface and disk size can be used to help identify the correct disk number. Click Next to continue. 8. The Destination Hard Disk screen will appear. Select the appropriate destination hard disk.
- Page 17 Back button to check. 10. The next screen outlines the operations that Disk Clone will perform. Click Proceed to continue with cloning your hard disk drive. 12. The computer will reboot and the cloning process will now begin. www.apricorn.com...
- Page 18 When the congratulations screen appears, turn off your computer using the power button. Then unplug the Apricorn product from the computer. DO NOT REBOOT THE COMPUTER WITH A CLONED HARD DRIVE IN THE Apricorn product.
-
Page 19: Imaging Your Hard Drive With Create Image Wizard
2. To start EZ Gig II, click Start > Programs click on Apricorn EZ Gig II. This will open the main screen of EZ Gig II. You can also click on the Apricorn EZ Gig II icon on the Desktop. - Page 20 Click Next to continue. 6. At the Backup Image Location window, find your Apricorn product (it may have the name Apricorn, and the drive letter will vary depending on the configuration of your computer). The Leader in Personal Storage...
- Page 21 Note: For detailed instructions on how to set the options manually read Chapter 5 “Creating Backup Archives” in the “Apricorn EZ Gig II User Guide” located on the Apricorn software CD that came with your Apricorn product. Alternately if you have installed EZ...
- Page 22 (such as the imaging date, computer, operating system, etc.). Click Next to continue. 10. This will open the Apricorn Disk Image Archive File Creation Script window. Verify the operations listed in the white box. If there are corrections to be made, click the Back button to change selected options.
- Page 23 12. BACKUP COMPLETE!!! The Apricorn product now contains a complete image of the selected drive or partition(s). SMART-ER Hard Drive Monitor for Windows 1. Insert Apricorn CD into CD-ROM drive. 2. Setup screen will pop up. Click SMART-ER button. 3. The SMART-ER Setup program will appear (pictured below) with a text file containing your serial number.
-
Page 24: M Icrosoft S Ync T Oy ™1.4 For W Indows
Microsoft Download Center. The easy to use, customizable application helps you copy, move, rename, and delete files between folders and computers. To make it easy for you to find and download, we have created a link that is accessible from the Apricorn Software CD. The Leader in Personal Storage... -
Page 25: Superduper! Backup Software For Mac
SuperDuper! Backup Software for Mac 1. Insert Apricorn CD into your CD-ROM drive 2. When the Apricorn CD appears on your desktop, double click to open. 3. Double click on the SuperDuper!.dmg icon 4. This will open the package and mount a drive on your desktop. -
Page 26: Synchronize! X For Mac
Synchronize! X for Mac 1. Insert Apricorn CD into your CD-ROM drive 2. When the Apricorn CD appears on your desktop, double click to open. 3. Double click on the Synchronize!X.dmg icon 4. This will open the package and mount a drive on your desktop. -
Page 27: I Nitializing Your H Ard D Rive
Unknown and Unallocated with a red no entry sign on the disk number. If you do not see a red no entry sign on the disk number, skip to “Partitioning/Formatting Your Hard Drive” in the next section. (self installed hard drives only) www.apricorn.com... - Page 28 5. Right click on the section to the left where the drive number and red no entry sign are located. Select Write Signature . 6. There are two types of disk storage that you can choose from: basic and dynamic. Select Basic Storage if you want to create partitions and logical drives on the disk.
- Page 29 You have completed partitioning and formatting your new hard drive. You can begin cloning or imaging (see relevant sections for instructions). NTFS is selected by default. Accept the default size Choose a name that is meaningful to you. Recommended Optional www.apricorn.com...
-
Page 30: Reformatting Your Hard Drive
FAT32 does have limitations. You cannot save a file larger than 4GB. In Windows 2000 and XP, the partition size is limited to 32GB. The EZ Bus DTS will be usable in your system, however we recommend that you reformat the hard drive in the... - Page 31 After the drive is initialized the drive named EZ Bus DTS will appear on your desktop. 5. To confirm that the EZ Bus DTS hard drive is properly formatted, select the EZ Bus DTS drive, then Select: File, Get Info, General Information . The drive should read Mac OS Extended.
-
Page 32: Hard Drive
7. Select the check box next to Install Mac OS 9 Drivers . This will allow you to see your EZ Bus DTS hard drive if you boot to Mac OS 9.x 8. Click the Erase button: An alert will appear to confirm the erase process. - Page 33 If you receive an error message that says “The disk “EZ Bus DTS ” is in use and could not be ejected” . Close all the programs that are using files from the drive, then repeat steps 1 and 2.
-
Page 34: C Ontacting T Echnical S Upport
RMA POLICY An RMA (Return Merchandise Authorization) tracking number must be issued by Apricorn. If you need to return or replace your EZ Bus DTS, Apricorn requires that you perform the following steps: 1. Simply call Apricorn’s technical support department with your EZ Bus DTS part number and a description of the problem(s) you are experiencing. -
Page 35: W Arranty C Onditions
WARRANTY CONDITIONS 1-Year Warranty: Apricorn offers a 1-year warranty on the EZ Bus DTS against defects in materials and workmanship under normal use. The warranty period is effective from the date of purchase either directly from Apricorn or an authorized reseller. - Page 36 There is a Serial ATA organization with a website address of www.serialata. org. 5. Why can’t I hot swap my EZ Bus DTS when connected with the eSATA cable? It is true that SATA standards allow for hot swapping external SATA hard drives, however some motherboard manufacturers may not have included support for all of the SATA standards on the first release of their products.
- Page 37 6. The EZ Bus DTS power LED is on, but the drive is not automatically detected by the operating system. a. The mass storage device drivers are not installed correctly or there is a resource conflict in the system. Use the Windows Add New Hardware Wizard to detect the drive, or, if the drive has already been installed, use the Windows Update Device Driver Wizard.
- Page 38 MAC Software Includes: ShirtPocket SuperDuper! and Synchronize! X for Mac. Synchronize! X for Mac is a file synchronization and backup utility for personal data on Mac OS X. Synchronize! X will backup your personal data to another disk, so that it is safe. It can sync your home folder with a file server, or your PowerBook, or a FireWire disk, so that the newest files are in both locations.
- Page 39 Either reformat to NTFS before using it for the first time, or backup the data before reformatting. 12. I am unable to format my 40GB or larger EZ Bus DTS with FAT 32 in Windows 2000 or XP? Windows 2000 and XP limit a FAT32 partition to 32GB. If you choose to format the drive in a larger partition, you will need to use the NTFS file system.
- Page 40 To make it easy for you to find and download, we have created a link that is accessible from the Apricorn Software CD. The Leader in Personal Storage SyncToy 1.4 download? ®...
- Page 41 Notes: www.apricorn.com...
- Page 42 Notes: The Leader in Personal Storage...
- Page 43 Notes: www.apricorn.com...
- Page 44 12191 Kirkham Road Poway, CA, U.S.A. 92064 1-858-513-2000...
Need help?
Do you have a question about the EZ Bus DTS and is the answer not in the manual?
Questions and answers