
Subscribe to Our Youtube Channel
Related Manuals for Janome Decor Excel II 5024


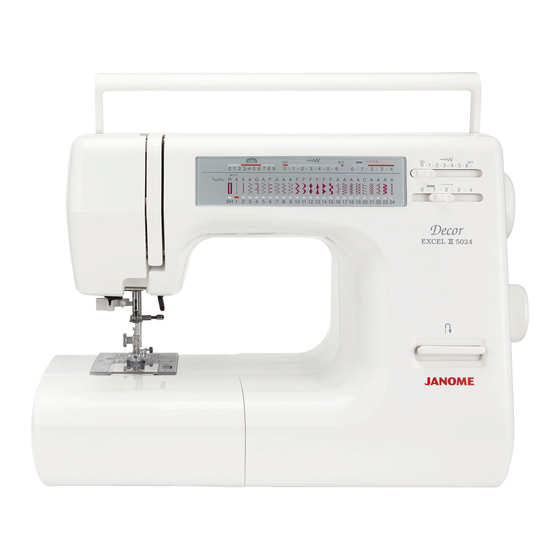
Summary of Contents for Janome Decor Excel II 5024
-
Page 1: Instruction Manual
Janome Decor Excel 5024 Janome 5024 Instruction Manual Instruction Manual INSTRUCTION BOOK www.aaasewing.com 5024 Owners Manual/ User Guide... -
Page 2: Important Safety Instructions
Janome 5024 Instruction Manual IMPORTANT SAFETY INSTRUCTIONS When using an electrical appliance, basic safety precautions should always be followed, including the followings: Read all instructions before using this appliance. DANGERÑ To reduce the risk of electric shock: 1. An appliance should never be left unattended when plugged in. Always unplug this sewing machine from the electric outlet immediately after using and before cleaning. -
Page 3: Table Of Contents
Janome 5024 Instruction Manual Table of Contents Names of Parts ............ 2 Corded Buttonhole ..........26 Detachable Extension Table ......... 3 Zipper Sewing ..........27Ð28 Accessory Storage Compartment ......4 ¥ To Snap On the Zipper Foot ......27 Connecting Machine to Power Supply ....5 ¥... -
Page 4: Names Of Parts
Janome 5024 Instruction Manual Names of Parts 1. Stitch length control 2. Zigzag width control 3. Foot storage compartment 4. Flip-top sewing instruction panel 5. Top cover 6. Thread tension dial 7. Pressure dial 8. Face plate 9. Thread cutter 10. -
Page 5: Detachable Extension Table
Janome 5024 Instruction Manual Detachable Extension Table For Free Arm Sewing To remove, lift out the extension table toward you as illustrated. Advantages of free arm sewing: * Avoid fabric bunching around the needle when bar tacking to reinforce pockets, plackets and waistlines. -
Page 6: Accessory Storage Compartment
Janome 5024 Instruction Manual Accessory Storage Compartment 1. Set of needles 2. L: Quilter 3. G: Blind stitch hem foot 4. D: Hemmer foot 5. E: Zipper foot 6. A: Zigzag foot 7. F: Satin stitch foot 8. C: Overedge foot 9. -
Page 7: Connecting Machine To Power Supply
Janome 5024 Instruction Manual Connecting Machine to Power Supply Power supply plug Power switch Outlet Machine socket Machine plug Before connecting the power cord, make sure the voltage and frequency shown on the machine con- form to your electrical power. -
Page 8: Sewing Light
Janome 5024 Instruction Manual Sewing Light Nornally, the sewing light comes on when you turn on (120V) the main switch. However, if you prefer to have the sewing light off while sewing, you can open the face plate and ac- cess the bulb on/off knob. -
Page 9: To Remove And Attach Presser Foot
Janome 5024 Instruction Manual To Remove and Attach Presser Foot Press the red button on the back of the foot holder. The presser foot will drop off. Place the selected presser foot so the pin on the foot lies just under the groove of the foot holder. Lower the presser bar to lock the foot in place. -
Page 10: Changing Needle
Janome 5024 Instruction Manual Changing Needle Raise the needle by pressing the up/down needle position button and lower the presser foot. Turn off the power switch. Loosen the needle clamp screw by turning it counterclockwise. Remove the needle from the clamp. -
Page 11: Winding The Bobbin
Janome 5024 Instruction Manual Winding the Bobbin ¥ Set the Spool Lift up the spool pin and place the spool of thread on it with the thread coming off the spool as shown. Press the large spool holder firmly against the spool of thread. -
Page 12: Winding The Bobbin
Janome 5024 Instruction Manual ¥ Winding the Bobbin Lift up the spool pin. Place the spool of thread on the spool pin with the thread coming off the spool as shown. Attach the large spool holder, and press it firmly against the spool of thread. -
Page 13: Inserting The Bobbin
Janome 5024 Instruction Manual ¥ Inserting the Bobbin Place the bobbin in the holder with the thread running off counterclockwise. End of thread Guide the thread into the notch on the front side of the bobbin holder. Draw the thread to the left, sliding it between the tension spring blades. -
Page 14: Threading The Machine
Janome 5024 Instruction Manual Threading the Machine * Raise the presser foot lifter. * Press the up/down needle position button twice to raise the needle. Presser foot lifter Lead the thread from the spool and pass it through the thread guide. Then draw it down along the right slot. -
Page 15: Needle Threader
Pull the thread through the needle eye. * The needle threader can be used with a #11 to #16 needle or a Janome Blue Tip needle. Thread size 50 to 100 should also work well. Hook Guide www.aaasewing.com... -
Page 16: Drawing Up The Bobbin Thread
Janome 5024 Instruction Manual ¥ Drawing Up the Bobbin Thread Raise the presser foot. Hold the needle thread lightly with your left hand. Press the up/down needle position button twice to pick up the bobbin thread. Draw up the needle thread together with a loop of bobbin thread. -
Page 17: Adjust The Top Thread Tension
Janome 5024 Instruction Manual Adjust the Top Thread Tension ¥ Choose the Correct Tension For Straight Stitch: The ideal straight stitch will have threads locked between the two layers of fablic, as shown left (mag- nified to show detail). If you look at the top and bottom of the seam, you will notice that there are no gaps;... -
Page 18: Pattern Selector Dial
Janome 5024 Instruction Manual Pattern Selector Dial Raise the needle and turn the pattern selector dial until the red indication is below the desired stitch. At the same time the appropriate thread tension, 0 1 2 3 4 5 6 7 8 9 zigzag width and stitch length are indicated in the upper portion of the guide message window. -
Page 19: Straight Stitching
Janome 5024 Instruction Manual Straight Stitching Stitch selector: Stitch width: Stitch length: 1.5Ð4 Top thread tension: 2Ð6 Presser foot: A: Zigzag foot ¥ Starting to Sew Raise the presser foot and position the fabric next to a seam guide line on the needle plate (see page 18). -
Page 20: Sewing On Heavy Fabrics
Janome 5024 Instruction Manual Sewing on Heavy Fabrics Pressing the black button on Foot A (before lowering) locks it in a horizontal position. This ensures even feeding at the beginning of seams and helps when sewing many layers of fabric. -
Page 21: Zigzag Stitching
Janome 5024 Instruction Manual Zigzag Stitching Stitch selector: Stitch width: 1Ð6.5 Stitch length: 0.5Ð3 Top thread tension: 3Ð5 Presser foot: A: Zigzag foot Simple zigzag stitching is widely used for overcasting, appliquŽing, sewing on buttons, etc. Overcasting Stitch selector: Stitch width: Stitch length: 1Ð2... -
Page 22: Overedge Stitch
Janome 5024 Instruction Manual Overedge Stitch Stitch selector: Stitch width: Top thread tension: 3Ð7 Presser foot: C: Overedge foot Place the edge of the fabric next to the black prong on the foot. The wires on this foot prevent light weight fabric from rolling and creating a ridge. -
Page 23: Triple Strength Stitch
Janome 5024 Instruction Manual Triple Strength Stitch Stitch selector: Stitch width: Top thread tension: 2Ð6 Presser foot: A: Zigzag foot This strong, durable stitch is recommended where both elasticity and strength are needed to insure comfort and durability. Use it to reinforce areas such as crotch and armhole seams. -
Page 24: Sewing Buttons
Janome 5024 Instruction Manual Sewing Buttons Stitch selector: Stitch width: 3Ð3.5 Top thread tension: 3Ð7 Drop feed dog Presser foot: F: Satin stitch foot Tape the button over the placement mark. A pin can be placed on top of the foot to form a shank. Before lowering the foot, test the needle swing, making sure the needle drops in each hole. -
Page 25: Automatic Buttonhole
Janome 5024 Instruction Manual Automatic Buttonhole Stitch selector: Stitch width: 4Ð6.5 Stitch length: Top thread tension: 1Ð5 Presser foot: R: Automatic button hole foot * The size of buttonhole is automatically set by placing the button in the automatic buttonhole foot (R). - Page 26 Janome 5024 Instruction Manual Draw both threads to the left under the foot. Insert the garment under the foot, and lower the needle at the starting point. Then lower the automatic buttonhole foot. * Make sure there is no gap...
-
Page 27: To Alter The Stitch Density
Janome 5024 Instruction Manual When finished, push the buttonhole lever up as far as it will go. ¥To adjust buttonhole stitch density. Set the stitch length slider between 0.5 and 1.0 to adjust the buttonhole stitch density. If the stitch density on the left and right side of the buttonhole are unbalanced, remove the accessory box and adjust the pitch balance dial. -
Page 28: Corded Buttonhole
Janome 5024 Instruction Manual Corded Buttonholes Stitch selector: Stitch width: 4Ð6.5 Stitch length: Top thread tension: 1Ð5 Presser foot: R: Automatic buttonhole foot Use the same procedure as automatic buttonhole. * Set the stitch width to match the thickness of the cord used. -
Page 29: Zipper Sewing
Janome 5024 Instruction Manual Zipper Sewing Stitch selector: Stitch width: Stitch length: 1.5Ð4 Top thread tension: 3Ð6 Presser foot: E: Zipper foot ¥To Snap On the Zipper Foot Fit the pin on the zipper foot into the groove on the foot holder. - Page 30 Janome 5024 Instruction Manual Zipper Sewing, contÕd Sew through all layers next to fold. Stop just before the zipper foot reaches the slider on the zipper tape. Lower the needle slightly into the fabric. Raise the zipper foot and open the zipper.
-
Page 31: Rolled Hem
Janome 5024 Instruction Manual Rolled Hem Stitch selector: Stitch width: Stitch length: 1.5Ð4 Top thread tension: 3Ð6 Presser foot: D: Hemmer foot Make a double 0.25cm (1/8ý) fold approxi- mately 8 cm (3ý) in length. 0.25 cm (1/8ý) 8 cm (3ý) -
Page 32: Blind Stitch Hemming
Janome 5024 Instruction Manual Blind Stitch Hemming Stitch selector: Stitch width: 2Ð3 Stitch length: 1Ð3 Top thread tension: 2Ð6 Presser foot: G: Blind stitch hem foot How to fold the fabric. Wrong side of fabric 0.4Ð0.7 cm (5/32ýÐ1/4ý) Sewing technique and guide setting. -
Page 33: Decorative Satin Stitch Patterns
Janome 5024 Instruction Manual Decorative Satin Stitch Patterns Stitch selector: 10Ð15 Stitch width: 3Ð6.5 Stitch length: 0.5Ð1 Top thread tension: 1Ð4 Presser foot: F: Satin stitch foot For a delicate appearance on fabric such as chiffon, use a single iayer with a tear-away backing if neces- sary. -
Page 34: Adjusting Stretch Stitch Balance
Janome 5024 Instruction Manual Adjusting Stretch Stitch Balance If stretch stitch patterns are uneven when sewn on a particular fabric, adjust them with the feed balance dial. Feed balance dial Standard mark Setting mark Example: Pattern # 21 To Ajust distorted patterns If patterns are compressed, correct by turning the dial in the direction of Ò... -
Page 35: Quilting
Janome 5024 Instruction Manual Quilting Stitch selector: Stitch width: Stitch length: 1.5Ð4 Top thread tension: 3Ð6 Presser foot: A: Zigzag foot Quilter The quilting guide will help to keep the stitching lines straight. Loosen the quilter holding screw. Slide the quilter in the opening to the desired width and tighten the screw. -
Page 36: Shell Tuck
Janome 5024 Instruction Manual Shell Tuck Stitch selector: Stitch width: 5Ð6.5 Stitch length: 2Ð3 Top thread tension: 6Ð8 Presser foot: F: Satin stitch foot Use a lightweight fabric such as tricot. Fold and stitch on the bias. Set the stitch width and length as you desire. -
Page 37: Appliquž
Janome 5024 Instruction Manual AppliquŽ Stitch selector: Stitch width: 3Ð5 Stitch length: 0.5Ð1 Top thread tension: 1Ð4 Presser foot: F: Satin stitch foot Presser Dial: Baste (or fuse with iron-on fabric joiner) appliquŽ pieces on the fabric. Stitch around the appliquŽ making sure the needle falls along the outer edge of the appliquŽ. -
Page 38: Scallop Hems
Janome 5024 Instruction Manual Scallop Hems Stitch selector: Stitch width: 3Ð6.5 Stitch length: 0.5Ð1 Top thread tension: 1Ð4 Presser foot: F: Satin stitch foot Some of the craft patterns can be used to attractively finish the edges of collars, pockets and placements. -
Page 39: Care Of Your Machine
Janome 5024 Instruction Manual Care of Your Machine Caution: Before performing any of the following, make sure that the sewing machine is unplugged from the power source. * Press the up/down needle position button to raise the needle and unplug the machine before cleaning. -
Page 40: Troubleshooting
Janome 5024 Instruction Manual Troubleshooting Cause Reference Condition 1. The needle thread is not threaded properly. Refer to page 12 The needle thread 2. The needle thread tension is too tight. Refer to page 15 breaks. 3. The needle is bent or blunt. - Page 41 Janome 5024 Instruction Manual Troubleshooting, contÕd Condition Cause Reference Gathering 1. The needle thread tension is too loose. Refer to page 15 2. The needle is too heavy or light for the fabrics being sewn. Refer to page 8 The machine doesnÕt 1.
Need help?
Do you have a question about the Decor Excel II 5024 and is the answer not in the manual?
Questions and answers