Table of Contents
Advertisement
Advertisement
Table of Contents

Summary of Contents for Nuvico EasyTrack CK-1000
- Page 2 NUVICO. x NUVICO makes no warranties for damages resulting from corrupted or lost data due to a mistaken operation or malfunction of the Camera, peripheral devices, or unapproved/unsupported devices.
-
Page 3: Warning And Caution
WARNING AND CAUTION WARNING! TO REDUCE THE RISK OF FIRE OR ELECTRIC SHOCK, DO NOT EXPOSE THIS PRODUCT TO RAIN OR MOISTURE. DO NOT INSERT ANY METALLIC OBJECTS THROUGH THE VENTILATION GRILLS OR OPENINGS ON THE EQUIPMENT. CAUTION! The lightning flash with arrowhead symbol, within an equilateral triangle, is intended to alert the user to the presence of uninsulated “dangerous voltage”... -
Page 4: Fcc Compliance Statement
FCC COMPLIANCE STATEMENT FCC INFORMATION: THIS EQUIPMENT HAS BEEN TESTED AND FOUND TO COMPLY WITH THE LIMITS FOR A CLASS A DIGITAL DEVICE, PURSUANT TO PART 15 OF THE FCC RULES. THESE LIMITS ARE DESIGNED TO PROVIDE REASONABLE PROTECTION AGAINST HARMFUL INTERFERENCE WHEN THE EQUIPMENT IS OPERATED IN A COMMERCIAL ENVIRONMENT. -
Page 5: Important Safeguards
IMPORTANT SAFEGUARDS 1. Read these instructions. 2. Heed all warnings. 3. Follow all instructions. 4. Do not use this equipment near water. 5. Clean only with dry cloth. 6. Do not block any ventilation openings. Install in accordance with the manufacturer's instructions. -
Page 6: Table Of Contents
TABLE OF CONTENTS WARNING AND CAUTION ..................... 2 FCC COMPLIANCE STATEMENT ................. 3 IMPORTANT SAFEGUARDS ..................4 QUICK START PAGE ..................... 6 1. INTRODUCTION ......................7 2. INSTALLATION ......................9 2.1 Connection Diagram ..........................9 2.1.1 Basic Installation Diagram ..............................9 2.1.2 Single DVR Configuration .............................. -
Page 7: Quick Start Page
QUICK START PAGE 1. Controller Keyboard CK-1000 Vx.xx Password : The Factory Default Password for the Controller Keyboard is “9999”. 2. DVR [EV-Series DVR] [APEX-Series DVR] The Factory Default Password for the DVR is “000000”. (Six zeros) You must hold onto (Shift), and enter number keys when entering password for the DVRs. -
Page 8: Introduction
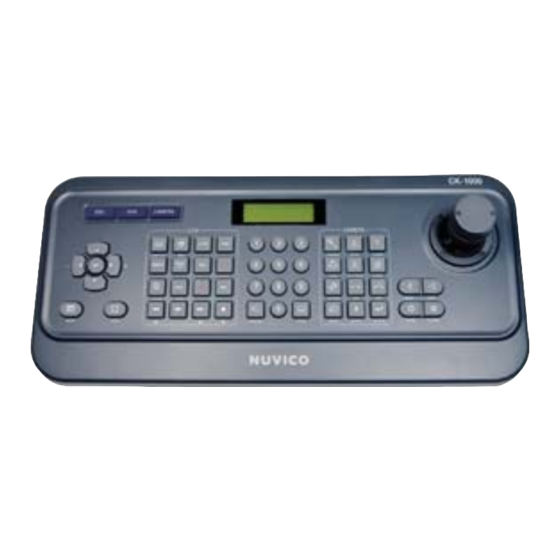
1. INTRODUCTION ABOUT THIS MANUAL Thank you for purchasing NUVICO product. The controller is designed to control up to 64 EasyTrak PTZ speed dome cameras. (It is expandable up to 255 cameras when in simplex control mode). Rollover key functions make it capable of controlling a variety of external switching devices such as EV / APEX Series Digital Video Recorders. - Page 9 4. This Instruction Manual 5. Junction Box: J-Box (Optional) 6. 3m Cable: Data cable (Optional) 7. M4 Self Tapping Screws (Optional) If any of these materials are missing, please contact your distributor or NUVICO Technical Support for assistance. CONTROLLER KEYBOARD...
-
Page 10: Installation
2. INSTALLATION 2.1 Connection Diagram 2.1.1 Basic Installation Diagram POWER AC 24V 4 ALARM INPUT 1 AUX OUTPUT STP AWG#22 RS-485 HALF DUPLEX MODE CONTROLLER REAR DOME POWER AC 24V STP AWG#22 COM Port of the DVR REAR CONTROLLER KEYBOARD... - Page 11 Figure 1 – Basic installation diagram (w/o J-Box) Figure 2 – Basic installation diagram with J-Box CONTROLLER KEYBOARD...
-
Page 12: Single Dvr Configuration
2.1.2 Single DVR Configuration POWER POWER AC 24V AC 24V AWG # 24 4 ALARM INPUT 1 AUX OUTPUT SPOT MONITOR MAIN MONITOR RS-485 HALF DUPLEX MODE CONTROLLER DOME Figure 3 – Single DVR CONTROLLER KEYBOARD... -
Page 13: Single Controller Keyboard With Two Dvr Configuration
2.1.3 Single Controller Keyboard with Two DVR Configuration POWER POWER AC 24V AC 24V AWG # 24 Camera 1~16 Camera 17~12( 15) 4 ALARM INPUT 1 AUX OUTPUT MAIN MONITOR SPOT MONITOR MAIN MONITOR Figure 4 – Two DVR CONTROLLER KEYBOARD... -
Page 14: Multiple Controller Keyboard Configuration
2.1.4 Multiple Controller Keyboard Configuration POWER POWER AC 24V AC 24V AWG # 24 Camera 1~16 Camera 17~12( 15) 4 ALARM INPUT 1 AUX OUTPUT 1ST MAIN MONITOR SPOT MONITOR 2ND MAIN MONITOR Master K/B Setup Slave K/B Setup Figure 5 – Two DVR with Slave Controller Shft + Menu ÎPort ÎSlave Shft... -
Page 15: Termination & Dip Switch Settings
2.2 Termination & Dip Switch Settings The first and last devices in an installation (dome and controller keyboard) must have the data line terminated by setting the DIP switch. Without proper termination, there may be control signal errors. Total length of the cable for communication should not exceed 0.74 Mile or 1.2 Kilometer. - Page 16 Figure 7 – Rear View of the Keyboard D C 1 2 V D A T A 1 D A T A 2 S 2 S 3 S 4 S 5 S 6 S 7 S 8 T R X 1 T R X 2 O F F R S -4 8 5...
-
Page 17: Operation
1111+Enter for the user-level password. Press and then consecutively. (9999+Enter) If you have forgotten your password and are no longer able to access the administrative controls to your unit, please contact your distributor or NUVICO Technical Support for assistance. CONTROLLER KEYBOARD... - Page 18 The controller keyboard will be displayed the following screen and is ready to control dome cameras. Press key will get you back to system mode (camera control) from DVR control CAMERA LCD display in System mode Cam : 001N Camera ID & Time PM 09 : 34 : 04 When you need to control the DVR, press key.
-
Page 19: Controller Keyboard Configuration
3.2 Controller Keyboard Configuration If the user needs to setup the network, change passwords, or perform special tasks such as Uploading and Downloading programmed data from the dome cameras, hold down key, and then press (Shift + Menu.) You will see the following menu. Joystick Up/Down scrolls menu items, turn the joystick to Right to enter the sub-menu. - Page 20 - Factory Default: This function is used to reset the controller keyboard to the factory default setting, It will erase all data and programming. Save and Exit: Save the programmed data and return to the previous Menu (To exit without saving, press key) PORT (Shft + Menu ÎPORT)
- Page 21 Slave (Shft + Menu ÎPORTÎSlave) Device : Controller / None Baud Rate : 9600 / 2400~230K Save and Exit Device: Select Device to be controlled (Controller / None) Baud Rate: Communication speed (2400/ 4800/ 9600/19200/ 38 0/ 57600/ 11.5K /230K) Save and Exit, Press key to exit without saving the data.
- Page 22 Press No. key or twist zoom handle on the first column to enter setup mode. ID: Assign the Dome (PTZ Camera) address. PR: Select the protocol. (NC: NUVICO, P_D: Pelco D, P_P: Pelco P) PT: Select the Port number of Controller Keyboard (P1: TRX#1 / Dome 1, P2: TRX#2 / Dome 2) BR: Baud rate.
- Page 23 Alarm Menu (Shft + Menu ÎAlarm) Alarm Beep : ON / OFF Alarm Dwell : OFF / 3sec~200sec Alarm Action Alarm History Save and Exit Alarm Beep: Enable or disable the beep sound when there is alarm activated. Alarm Dwell: Instant alarm will be extended until programmed time. Alarm Action (Shft + Menu ÎAlarmÎ...
- Page 24 Schedule Setup (Shft + Menu , Î Schedule) Turn down the joystick until Schedule menu Night Shot appears Exit Turn the joystick to the right to enter the SCHEDULE setup menu. Night Shot Setup (Shft + Menu Î Schedule Î Night Shot) Night Shot : OFF / ON...
-
Page 25: Advanced Operation
4. ADVANCED OPERATION 4.1 Selection of the Camera (ID of the Camera) There are three ways for dome camera selection (Next) or (Prev) . With these selections, the keyboard controller has the full control of the selected dome camera. 4.2 Selection of the DVR (ID of the DVR) A DVR must be selected before being controlled by the joystick controller. -
Page 26: Keys For Dvr
Enter the dome programming menu. Menu Shift+Menu will invoke Keyboard set up menu No.+Shft+Preset will store current view as a preset directly. No.+Shft+Tour will open programming menu No.+Shft+Scan will open programming menu Shift+Joystick : In a programming mode (Preset, Pattern, Scan, Privacy….) the Shift joystick operates as if in the normal control mode. - Page 27 This button is used to lock the buttons on the front panel/remote Lock controller by logging off. Press it again and then apply appropriate LOCK password to deactivate the functions. This button is used to change on screen display. Search This button accesses the search menu.
-
Page 28: Specification
5. SPECIFICATION Power Consumption 12VDC, 500mA Communication 2 RS-485, RS-232C Baud Rates 2,400 ~ Up to 230,000 bps Joystick 3-Axis Slave Keyboard Support 1 Master, 7 Slave User Login Admin / User Operating Temperature 0°C to 50°C (32 F to 140 Humidity 0 to 90%RH (non-condensing) Storage temperature... - Page 29 Notes This page is intentionally left blank. CONTROLLER KEYBOARD...
- Page 30 Notes This page is intentionally left blank. CONTROLLER KEYBOARD...
- Page 31 Notes This page is intentionally left blank. CONTROLLER KEYBOARD...
Need help?
Do you have a question about the EasyTrack CK-1000 and is the answer not in the manual?
Questions and answers