Table of Contents
Advertisement
Quick Links
Advertisement
Table of Contents

Subscribe to Our Youtube Channel
Related Manuals for Crowcon Vortex


Summary of Contents for Crowcon Vortex
- Page 1 The products covered by this manual are Vortex, Vortex Rack, Vortex Panel and Vortex DIN. The topics covered by the manual are installation, technical information, operation and maintenance. VORTEX 12 Channel Gas and Fire Control Panel MANUAL Part No M07211, Issue 7 December 2009...
-
Page 3: Table Of Contents
2.2.5 Approvals ................... 6 Installation ....................7 General ....................7 Before installation ................. 7 Installation of a pre-configured Vortex system ........7 Installation of an un-configured Vortex system ........9 3.4.1 General ..................9 Building a Vortex system ..............10 3.5.1... - Page 4 Contents Vortex Manual The Bus Rail and electrical connections ..........20 Quad Channel Input Module ............... 21 4.4.1 Functions of the Quad Channel Input Module ......21 4.4.2 Configuring the Quad Channel Input Module ......22 Relay Output Module ................25 4.5.1...
- Page 5 Appendix A: Glossary ................... 58 Appendix B: Electrical connections ............60 Appendix C: List of spare parts ..............65 Appendix D: Crowcon detector range ............66 Appendix E: Vortex configuration ............... 68 Appendix F: Earthing ..................71 Introduction ....................71 Definitions ....................
- Page 6 Figure 14: Module on DIN Rail, and method of removal ......... 56 Figure 15: Removing batteries from Vortex Standard Enclosure ....57 Figure 16: Connection schematic for the Vortex systemError! Bookmark not defined. Figure 17: Wiring diagram for the Node Controller Module ......62 Figure 18: Wiring diagram for the Quad Channel Input Module ......
- Page 7 LIST OF TABLES Table 1: Vortex options ..................1 Table 2: Which sections of this manual to read ..........2 Table 3: List of Vortex modules ................. 3 Table 4: Vortex Specification ................5 Table 5: Cable characteristics ................. 13 Table 6: Node Controller Module indicators, switches and connectors ..
-
Page 9: Introduction
These relay outputs may be used to drive audible and/or visible alarms.The built-in Modbus communications interface allows multiple Vortex systems to be connected to industry-standard control monitoring systems. The Vortex system may be mounted in a variety of enclosures, the options are listed in Table 1 Table 1: Vortex options Vortex Standard wall-mounted enclosure with display. -
Page 10: What This Manual Contains
Installation of Vortex systems ready configured and supplied with detectors • Installation and configuration of Vortex to work with your own detectors • Installation of Vortex when supplied as modules for mounting in your own equipment • Configuration and technical information •... -
Page 11: System Overview
This chapter gives an overview of the Vortex system, its modules and their interconnection. Vortex can be supplied in a number of variations depending on the modules and enclosures required. If you simply use Vortex for monitoring and responding to alarms, it is not necessary to read this chapter. See chapter 6, Operation. -
Page 12: Input/Output Capability
Vortex Manual Figure 1 : General Assembly of Vortex Modules 2.2.2 Input/output capability The Vortex system is a control panel for gas and fire detectors. It can be used with the following detectors: • 2 wire sink, or 3 wire sink or source 4-20mA detectors. Crowcon manufactures a wide range of flammable and toxic gas detectors and oxygen detectors. -
Page 13: Digital Communications
Vortex Manual System Overview Vortex can control up to 32 fully voted relay outputs, selectable from a number of channel and system functions. The Quad Channel Input Modules and Relay Output Modules (section 2.2.1) can be combined as follows: Number of Quad... -
Page 14: Approvals
Power supply voltage Vortex 20-30V dc 5A 110-120V ac 60Hz 3.2A 220-240V ac 50Hz 1.6A Other Vortex systems are dependent on the size of the system and PSU fitted Backup batteries Vortex: Two series 12V, 2Ah batteries. Larger capacity backup systems are available. -
Page 15: Installation
Appendix F. Vortex is suitable for use in a range of environments. See section 2.2.4 for details. If a Vortex unit is fitted outside and may be subjected to excessive heating by high levels of direct sunlight, an appropriate shade must be provided. - Page 16 Installation Vortex Manual Ensure that the power supply is correct for the system (see section 4.3 and Table 16 on page 36). If your Mains Power Supply Unit has a voltage switch, ensure it is on the correct setting for your mains supply.
-
Page 17: Installation Of An Un-Configured Vortex System
Installation of an un-configured Vortex system 3.4.1 General This section describes how to get started if your Vortex system was not supplied ready-configured, and you need to configure it for your own detectors. It also applies if you wish to reconfigure an existing system, for example, if you are installing new detectors or alarms, or if you are adding new Quad Channel Input Modules or Relay Output Modules to your system, or changing them. -
Page 18: Building A Vortex System
Modules, as shown in the wiring diagram in Figure 19, Appendix B. 16Ensure that the display is cycling through the channels by pressing the RUN button. Building a Vortex system This section provides instructions on building and installing a Vortex system inside your own cabinet or racking. 3.5.1 Building the system Assemble the Bus PCB in the DIN Rail, and mount the DIN Rail in the casing. -
Page 19: Installing The System
Mount the Display Module in an appropriate position. For Vortex Rack this is simply a matter of fixing the display into a 19 inch rack system. For Vortex Panel the template supplied should be used to make the holes in the panel. Then the display and associated metal work is fitted to the rear of the panel with countersunk screws. -
Page 20: Cabling
• For IS devices, Crowcon recommends the use of twisted pair cable with overall screen and sheath. Suitable weatherproof glands must be used. IS devices must be used with a suitable Zener Barrier or Galvanic Isolator when used in a hazardous area. -
Page 21: Circuit Breaker
EN 61010-1 (Low Voltage Directive). The circuit breaker must be close to Vortex and within easy reach of the operator. It must be marked as the disconnecting device for the Vortex. -
Page 22: Zero Adjustment And Calibration Of Vortex
If you are using VortexPC, the software has Zero and Calibration Wizards to enable you to carry out the calibration easily. For Vortex DIN, this is the only method. See VortexPC Help for details. If you are calibrating a Quad Channel Input Module and detector for the first time, Crowcon recommends that two people are involved. - Page 23 Press the CAL button on the inside of the Display Module. The display shows the reading that Vortex believes the detector is sensing. Use the – (HOLD) and + (STEP) buttons to adjust the Reading display to the correct reading: •...
-
Page 24: Technical Information: Vortex
This section contains detailed technical information on the Vortex modules that you may need to refer to during installation, configuration or maintenance of the Vortex system. If you simply use Vortex for monitoring and responding to alarms, it is not necessary to read this chapter. See chapter 6, Operation. -
Page 25: Node Controller Module
Node Controller Module 4.2.1 Functions of the Node Controller Module This module controls the operation of Vortex, gathering the channel readings from the Quad Channel Input Modules. After correcting them for the zero adjustment and calibration it calculates the detector levels and checks them against the alarm limits. -
Page 26: Node Controller Module Indicators, Switches And Connectors
There are two connectors to simplify "daisy- chaining" of multiple systems (up to 32 Vortex systems) which are electrically connected together. The Vortex at the end of a Modbus chain can use this second connector to attach a terminator (120 Ohm). -
Page 27: Configuring The Node Controller Module
CHANNEL TEST buttons have no effect Disable Internal Y/N. If Y, the internal sounder is disabled. Sounder Modbus address The Modbus address of the Vortex on the system. Usually 1 unless the system is multidrop. Number of Quad 1, 2 or 3 Channel Input... -
Page 28: The Bus Rail And Electrical Connections
Two Bus Rails can be connected together within the same cabinet, using the 10-way Bus Interconnection Ribbon Cable Assembly. Using two Bus Rails allows the maximum number of modules in one Vortex system to be fitted. The Vortex standard enclosure holds only one Bus Rail. Figure 4: Bus Rail Assembly Details... -
Page 29: Quad Channel Input Module
Each Quad Channel Input Module is used to power and monitor up to 4 detectors. For a list of available Crowcon detectors, see Appendix D. The first channel on each Quad Channel Input Module can be connected to a gas detector, or to a maximum of 20 chained conventional loop-powered fire detectors and manual call points. -
Page 30: Configuring The Quad Channel Input Module
LK11. See Figure 6 Figure 6: Switches on Quad Channel Input Module If the system is supplied with Crowcon detectors, the Quad Channel Input Modules are already configured. If the system needs configuring, follow the instructions below. Table 8: Quad Channel Input Module switch settings Letters refer to labels in Figure 6. -
Page 31: Table 9: Detector Channel Configurable Properties
Each detector channel is configured using VortexPC. Choose the Inputs Configuration option on the Vortex menu. Select the appropriate channel to view its current configuration. See Table 9. These properties apply to all channels regardless of their Detector Type (except Enabled, which is not available for channels set as Not Configured detectors). - Page 32 The alarm level must be set to either Rising or Falling. The resolution of the Alarm Levels is the same as that of the Vortex system. It is not necessary for Alarm 1 to be the lowest and Alarm 3 to be the highest.
-
Page 33: Relay Output Module
Vortex Manual Technical Information Relay Output Module 4.5.1 Functions of the Relay Output Module Optional Relay Output Modules may be fitted to the system and programmed to provide voted channel and system events. These relays are controlled by the Node Controller Module. -
Page 34: Configuring The Relay Output Module
Technical Information Vortex Manual Yellow LED for each Indicates the relay status (LED on = energised, relay (E) LED off = de-energised). The relay coils are continuously monitored in both energised and de- energised states. Fault LED (F) Indicates a fault condition. This is also shown on the Node Controller Module LED and the Display Module System Fault LED (if fitted). -
Page 35: Figure 8: Relay Ouput Module Selection Switch
Figure 8: Relay Ouput Module Selection SwitchRelay Output Modules are configured in VortexPC, using the Outputs Configuration option on the Vortex menu. Select the appropriate relay to view its current configuration. The configurable properties of relays are listed in Table 12. -
Page 36: Table 13: Relay Output Types
Technical Information Vortex Manual Property Configuration Energisation Either Normally Energised or Normally De- EnergisedThe default is Normally De-Energised. Table 13: Relay output types Note that in the diagrams below, for all output types other than Pulsed and Reset Pulse, the On and Off Delay times are presumed to be zero. - Page 37 Vortex Manual Technical Information Rising Alarm setting Gas level ACCEPT/RESET Latching Acceptable: The relay output is true until the ACCEPT/RESET is pressed, even if the alarm condition has not been cleared. This option is mainly used for external sounders. You can program the ON delay.
-
Page 38: Configuring The Relay Logic
Technical Information Vortex Manual Rising Alarm setting Gas level ACCEPT/RESET Pulsed: You can program an ON delay and an ON On Delay Time On Delay Time time. The relay is activated for the period defined by the OFF delay, unless the alarm clears during the ON delay. -
Page 39: The Display Module
Fire detectors will generate Alarms 1, 2, and 3 on a fire event. In Vortex PC, for each relay, select the detector(s) and the corresponding events, or system properties to trigger the relay. -
Page 40: Figure 10: Front Of Display Module
Technical Information Vortex Manual Figure 10: Front of Display Module Display Module shown is for Vortex ( in its standard enclosure), Vortex Rack and Vortex panel have only minor differences in outline. Issue 7 December 2009... -
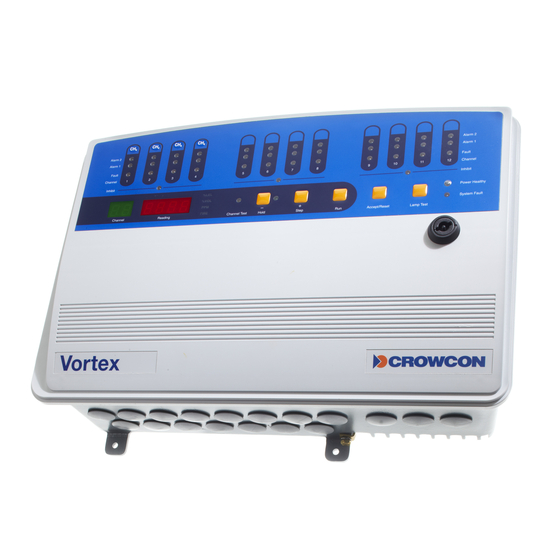
Page 41: Display Module Features
Vortex Manual Technical Information In Vortex and Vortex Panel the Display Module is mounted on the enclosure door. In Vortex Rack, the Display Module is mounted on a 19"rack panel. For Vortex DIN there is no Display Module and monitoring can be done using the RS485 port on the Node Controller Module (see section 4.2) The Display Module displays the status of each channel. - Page 42 HOLD has been selected, or to end Channel Test mode. ACCEPT/ On front of module. Press to inform Vortex that you have noted RESET Button that an alarm or fault condition has occurred. Pressing this button silences the internal sounder. If the alarm condition has cleared, it clears any red or yellow LEDs in the channel status display.
-
Page 43: Power Monitoring Module
The Power Monitoring Module is shown in Figure 11, page 35. The Power Monitoring Module is a standard part of the Vortex system. Note: for multiple Vortex Rack, Vortex panel and Vortex DIN systems supplied by Crowcon, the Power Monitoring Module may have been replaced by a single Power Management System, which meets the EMC and Low Voltage Directive requirements. -
Page 44: Table 16: Features Of The Power Monitoring Module
(G) (section 4.2) and the Display Module (if fitted). TP1 and TP2 Earth When Vortex is supplied in the standard enclosure, links (H) it is supplied with the enclosure isolated from 0V and the earth link fitted to TP2. This link is required for systems where the 0V is isolated from the enclosure. -
Page 45: Removing The 5-Way Cable Assembly
The Power Monitoring Module can be mounted on a DIN Rail using the adapter plate and clips provided, this is not applicable in Vortex. Screw the adapter plate to the clips in the required orientation. Then screw the Power Monitoring Module to the adapter plate, see Figure 12. Push the clips on to the DIN Rail until they click home. -
Page 46: Backup Batteries
In the Vortex standard enclosure these batteries are mounted behind the Power Monitoring Module. There is a 10A in-line fuse between the two batteries behind the Power Monitoring Module. For instructions on changing these batteries, see section 7.9. -
Page 47: Power Failure
Vortex Manual Technical Information Larger batteries or external backup power supply systems may be supplied and fitted according to requirements, details of these are beyond the scope of this manual. See the Specification Sheet supplied with the system for more information. -
Page 48: Technical Information: Field Devices
Vortex. You may need to refer to this during installation, configuration or maintenance of the Vortex system. If you simply use Vortex for monitoring and responding to alarms, it is not necessary to read this chapter. See chapter 6, Operation. -
Page 49: Fire Detectors
The agreement reached on the locations of sensors should be recorded. Crowcon is pleased to assist in the selection and siting of gas detectors. Fire detectors Only one fire loop may be fitted to each Quad Channel Input Module, and this can only be connected to the first input channel. -
Page 50: Fire Detector Location
Connections for audible/visual alarms Vortex is able to drive audible and visual alarms via any relay outputs. Any 20 – 29.5V dc field device (to a maximum of 500mA) may be powered by the dedicated dc outputs on the Power Monitoring Module. -
Page 51: Operation
Operation OPERATION General This section describes the use of the Vortex system for monitoring, and the display of faults and alarms. The system status can be monitored through the Display Module or through an external system using the digital communications ports, for example, a Distributed Control System (DCS). The information here is mostly concerned with the Vortex Display Module. -
Page 52: Alarm Conditions And Faults
Fault Messages 6.4.1 Channel Faults Vortex is able to detect and display faults relating to common problems in both gas and fire detectors. On the Display Module, these faults are displayed as codes in the Reading display. Issue 7 December 2009... -
Page 53: Table 17: List Of Channel Faults
Vortex Manual Operation Table 17: List of channel faults Code Fault description This is displayed when a fault is clearing. It is replaced by the normal reading in a few seconds. E001 Channel Access fault. A problem with the communications between the Node Controller Module and Quad Channel Input Module has occurred. -
Page 54: Power Status
Operation Vortex Manual 6.4.2 Power Status There is a Power Healthy LED on the Display Module, which provides information about the status of the various power systems. Table 18: List of Power Status LED codes Code Fault description Solid green Mains power supply is good and the battery level is good. -
Page 55: System Faults
● Problem with the Ribbon Cable between the Display Module, ● Node Controller and the Power Monitoring Module. Check the Ribbon Cable is connected and intact. If persists contact Crowcon. ● Display access fault. ○ Check the connection between the Node Controller Module and ○... - Page 56 Operation Vortex Manual Code Fault description ● Relay Module fault. ● Relay Coil failure or access fault. Check all Relay Module address ● switches are correct. If persists contact Crowcon. Issue 7 December 2009...
-
Page 57: Maintenance
Calibration Wizards to enable you to carry out the calibration easily. To calibrate Vortex with a new detector, see section 3.8. A simpler procedure can be used for re- calibration, or when a detector has been replaced. The PEAK HOLD CAL function provides a one- person CAL facility. - Page 58 Provided that zero adjustment was successful, reconnect the sensor (for oxygen detectors only) or connector (for fire detectors only). With Vortex not in Channel Test, press PEAK HOLD CAL to clear the memory. For an oxygen detector, expose the detector to free mobile air. Ensure that the display is showing GL and the current gas level reading.
-
Page 59: Channel Test Mode
The internal sounder is not used to sound alarms during Channel Test mode. The detector level readings transmitted over the MODBUS communications link are effected in this mode, contact Crowcon for more details. If you wish to test simple relay configurations, you can use this procedure with the zones not inhibited. -
Page 60: Table 20: Channel Test Display Sequences
Maintenance Vortex Manual Press the Channel Test button repeatedly to display the levels in the order shown in Table 20. If the channel is not inhibited, the relays are tripped as the sequence passes through them. This can be used to test that the relays and their devices are working correctly. -
Page 61: Setting Alarm Levels
Press the + button (STEP) to increase the value or the – button (HOLD) to decrease it. Repeat until the required value is displayed. To store the new value in the Vortex memory, press the ACCEPT/RESET button. The internal sounder beeps. -
Page 62: Event Logging
Maintenance Vortex Manual Event logging The Node Controller Module logs events (300 maximum) which can be accessed through the digital communication links. Each event is recorded with a time stamp. Table 21 lists data recorded in the event log. Table 21: Data recorded in the Event Log... -
Page 63: Module Replacement
Change the required modules. For instructions on mounting and dismounting the modules, see section 7.8. Remove the “hot swap” connection. The previous state of the Vortex system is restored and the sounder stops. Changing certain modules can give rise to the need to recalibrate as defined below;... -
Page 64: Changing The Batteries
Figure 14: Module on DIN Rail, and method of removal Changing the Batteries To change the batteries in Vortex DIN, Vortex Rack and Vortex Panel, simply disconnect the old batteries from the Power Monitoring Module and connect the new ones. It is not necessary to remove the power in order to carry out this function. -
Page 65: Figure 15: Removing Batteries From Vortex Standard Enclosure
Vortex Manual Maintenance Figure 15: Removing batteries from Vortex Standard Enclosure Note: for clarity, cables have been omitted from the diagram. This operation can be carried out without disconnecting the Power Monitoring Module from the system, as described in the text. -
Page 66: Appendix A: Glossary
Master-slave serial communications standard, used between PLCs or DCSs and Vortex. The Vortex system works with the Modbus protocol over this link. This standard is multi-drop, that is, a number of Vortex systems can be controlled by a single master system. Issue 7 December 2009... - Page 67 (the default), readings less than 3% of full scale are suppressed to zero. See section 0. Zone 1, 2, 3 In the Vortex system, refers to the four detector channels in one Quad Channel Input Module. Not to be confused with the standard terms used in classifying hazardous areas.
-
Page 68: Appendix B: Electrical Connections
Appendix B Vortex Manual APPENDIX B: ELECTRICAL CONNECTIONS Figure 16: Connection schematic for the Vortex system Issue 7 December 2009... -
Page 70: Figure 17: Wiring Diagram For The Node Controller Module
Appendix B Vortex Manual Figure 17: Wiring diagram for the Node Controller Module Issue 7 December 2009... -
Page 71: Figure 18: Wiring Diagram For The Quad Channel Input Module
Vortex Manual Appendix B Figure 18: Wiring diagram for the Quad Channel Input Module Issue 7 December 2009... -
Page 72: Figure 19: Wiring Diagram For The Relay Output Module
Appendix B Vortex Manual Figure 19: Wiring diagram for the Relay Output Module Issue 7 December 2009... -
Page 73: Appendix C: List Of Spare Parts
M05746 Power Monitoring Module S01941 Instruction Card M07212 M20 plastic gland plug M04561 M02315 RS232 communications cable E07533 Vortex Ribbon cable assembly E07524 Vortex Rack/Panel/DIN ribbon cable E07554 3 way connector E07101 2-way connector E07100 VortexPC software C01758 DIN Rail Mounting Kit for Power... -
Page 74: Appendix D: Crowcon Detector Range
The following list gives details of some of Crowcon’s detectors, in manufacture currently, for use with Vortex. This list is not definitive as new products are being added to the range all the time. For the most up to date information refer to the Crowcon Web page at www.crowcon.com. - Page 75 Detailed Installation, Operating and Maintenance Instructions are supplied with each type of detector. Read these instructions before connecting the detector to Vortex and applying power. Detectors not listed may still be used with Vortex. For further details contact Crowcon. Issue 7 December 2009...
-
Page 76: Appendix E: Vortex Configuration
Appendix E Vortex Manual APPENDIX E: VORTEX CONFIGURATION The following list shows all the configurable options in the Vortex system. These can be configured from VortexPC. Option/Property Allowed values and explanation System System Name 16-character string used to identify the system Enable Jump on On/Off. - Page 77 Vortex Manual Appendix E Option/Property Allowed values and explanation Range For %LEL and %VOL the range can be 0 to 1, 2, 2.5, 5, 10, 20, 25, 50 or 100. For ppm the range can be 0 to 1, 2, 2.5, 5, 10, 20, 25, 50, 100, 200, 250, 500, 1000, 2000, 2500, 5000, 10000.
- Page 78 Appendix E Vortex Manual Option/Property Allowed values and explanation Energisation Normally Energised or De-energised. See section 4.5.2. Relay logic Detector Links Allow detector alarms and events to be mapped to relay logic, see section 4.5.3 System Links Allow the system fault and system sounder to be mapped to relay logic, see section 4.5.3...
-
Page 79: Appendix F: Earthing
Isolated power supply A power supply where the 0V line is not connected to the earth terminal. The internal power supply in Vortex is isolated. Galvanic isolator An alternative to a zener barrier that does not require the high integrity earth. - Page 80 How many sensors require the use of zener NONE barriers OR galvanic isolators? SOME Does the system use the Vortex internal mains to DC power supply? Is the external mains to DC power supply isolated? Is the safe area interface via a zener barrier...
-
Page 81: Figure 20 Decision Tree For Determining Earthing Requirements
Vortex Manual Appendix F System is Diagrams all IS 2 and 4 System can use either Diagrams zener 1 and 5 barrier or galvanic isolator System Diagrams must use galvanic 2 and 5 isolator System is SOME Diagrams mixed IS... -
Page 82: Diagrams
Appendix F Vortex Manual Diagrams Diagram 1 Connect Vortex chassis (earth) to TP1 on the Power Monitoring Module Issue 7 December 2009... -
Page 83: Diagram 2
Vortex Manual Appendix F Diagram 2 Connect Vortex chassis (earth) to TP2 on the Power Monitoring Module. Issue 7 December 2009... -
Page 84: Diagram 3
Appendix F Vortex Manual Diagram 3 Sensor connection to Vortex without barrier or isolator. 2-wire Sensor Vortex example: Txgard-IS 3,6,9,12 2,5,8,11 Quad Connection to Vortex chassis Channel by cable gland Input Module Issue 7 December 2009... - Page 85 Vortex example: Flamgard 4/20 2,5,8,11 3,6,9,12 1,4,7,10 Quad Connection to Vortex chassis Channel by cable gland Input Module In a system with mixed IS and flameproof sensors in a hazardous area (Zone 1 or 2), the flameproof sensors can be connected as shown above providing the sensor complies with EN50014 and EN50018 (IEC 60079 –0 and IEC 60079 –1).
-
Page 86: Diagram 4A
Appendix F Vortex Manual Diagram 4A Gas sensor connection to Vortex via a zener barrier. Sensor Zener barrier Vortex Earth example: TXgard-IS Earth 3,6,9,12 2,5,8,11 example: MTL 728 Quad Connection to Vortex chassis Channel by cable gland Input Module NOTE: The Vortex 0V line is connected to earth internally by the barrier. -
Page 87: Diagram 4B
Vortex Manual Appendix F Diagram 4B Fire detector connection to Vortex via a zener barrier. Sensors Zener barrier Earth Vortex example: Apollo Earth Series 60 example: MTL 728 Quad Connection to Vortex chassis Channel by cable gland Input Module HAZARDOUS AREA... -
Page 88: Diagram 5A
Appendix F Vortex Manual Diagram 5A Gas sensor connection to Vortex via a galvanic isolator. Sensor Vortex Isolator example: TXgard-IS example: MTL 5041 2,5,8,11 3,6,9,12 1,4,7,10 Quad Connection to Vortex chassis Channel by cable gland Input Module HAZARDOUS AREA SAFE AREA... -
Page 89: Diagram 5B
Refer to BS EN60079-14 section 12.2.2.3 regarding the earthing of screens in the hazardous area. Where galvanic isolators are used the connection of the 0V line to the chassis (at Vortex TP1 or at the external power supply if the power supply is non-isolated) and the chassis to earth must be of high quality, low resistance and high integrity. -
Page 91: Warranty Statement
(“CRN”). It is essential that the address label is securely attached to the outer packaging of the returned goods. Units returned to Crowcon as faulty and are subsequently found to be ‘fault free’ or requiring service, may be subject to a handling and carriage charge. - Page 92 Fax: +1 859 957 1044 Fax: +31 10 421 0542 Email: sales@crowcon.com.sg Email: sales@crowcon.com Email: salesusa@crowcon.com Email: eu@crowcon.com Website: www.crowcon.com Website: www.crowcon.com Website: www.crowcon.com Website: www.crowcon.com Crowcon reserves the right to change the design or specification of this product without notice.
Need help?
Do you have a question about the Vortex and is the answer not in the manual?
Questions and answers