Harman P43 Installation Manual
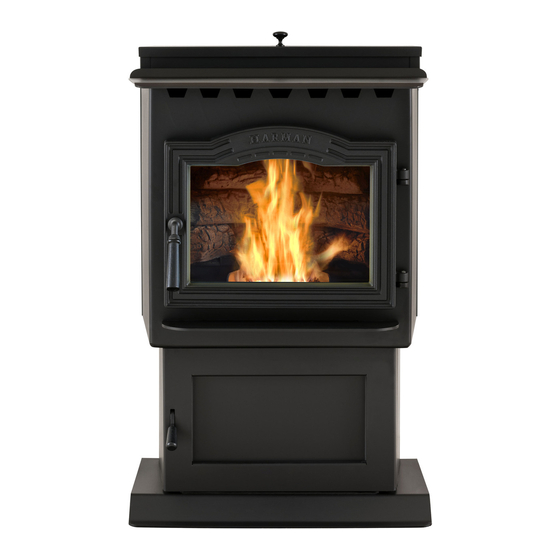
Freestanding pellet stove
Hide thumbs
Also See for P43:
- Owner's manual (44 pages) ,
- Owners manual care and operation (42 pages) ,
- Installation & operating manual (40 pages)
Table of Contents
Advertisement
Quick Links
INSTALLER: Leave this manual with party responsible for use and operation.
OwNER: Retain this manual for future reference.
NOTICE: SAVE THESE INSTRUCTIONS
Model(s):
P43 Freestanding Pellet Stove
!
Tested and approved for wood pellets and shelled field
corn fuel only. Burning of any other type of fuel voids
your warranty.
!
Check building codes prior to installation.
• Installation MUST comply with local, regional, state and
national codes and regulations.
• Contact local building or fire officials about restrictions and
installation inspection requirements in your area.
1
Installation Manual
Installation and Appliance Setup
CAUTION
CAUTION
Harman® • P43 Installation Manual_R21 • 2008 -___ • 08/13
Please read this entire manual before
installation and use of this pellet fuel-
burning room heater.
Failure to follow these instructions
could result in property damage,
bodily injury or even death.
•
Do not store or use gasoline or other flammable
vapors and liquids in the vicinity of this or any
other appliance.
• Do not overfire - If any external part starts to glow,
you are overfiring. Reduce feed rate. Overfiring
will void your warranty.
• Comply with all minimum clearances to
combustibles as specified. Failure to comply
may cause house fire.
wARNING
HOT SURFACES!
Glass and other surfaces are hot during
operation AND cool down.
Hot glass will cause burns.
• Do not touch glass until it is cooled
• NEVER allow children to touch glass
• Keep children away
• CAREFULLY SUPERVISE children in same room as
stove.
• Alert children and adults to hazards of high temperatures.
High temperatures may ignite clothing or other
flammable materials.
• Keep clothing, furniture, draperies and other flammable
materials away.
NOTE
To obtain a French translation of this manual, please
contact your dealer or visit www.harmanstoves.com
Pour obtenir une traduction française de ce manuel, s'il
vous plaît contacter votre revendeur ou visitez www.
harmanstoves.com
wARNING
3-90-04301i
Advertisement
Table of Contents

Related Manuals for Harman P43


Summary of Contents for Harman P43
- Page 1 Model(s): • Do not store or use gasoline or other flammable vapors and liquids in the vicinity of this or any P43 Freestanding Pellet Stove other appliance. • Do not overfire - If any external part starts to glow, you are overfiring. Reduce feed rate. Overfiring will void your warranty. • Comply with all minimum clearances to combustibles as specified. Failure to comply may cause house fire.
-
Page 2: Table Of Contents
I. Fire Safety ........19 = Contains updated information J. Inspect Appliance & Components ....19 Harman® • P43 Installation Manual_R21 • 2008 -___ • 08/13 3-90-04301i... -
Page 3: Installation Standard Work Checklist
Exterior wall/roof flashing installed and sealed ________________________________ Terminations installed and sealed. ________________________________ Electrical Section 1 (Pg. 4) 120VAC unswitched power provided to the appliance. ________________________________ Appliance Setup Section 5 (Pg. 20-21) All packaging and protective materials are removed ________________________________ Accessories installed properly ________________________________ Manual bag and all it’s contents are removed from inside the appliance and given to party responsible for use and operation ________________________________ Started appliance and verified that all motors and blowers operate as they should. ________________________________ Hearth and Home Technologies recommends the following: Photographing the installation and copying this checklist for you file. The this checklist remain visible at all times on the appliance until the installation is complete. Comments: Further description of the issues, who is responsible (Installer/Builder/Other Trades, etc.) and corrective action needed __________________________________________________________________________________________ _________________________________________________________________________________________________ _________________________________________________________________________________________________ Comments communicated to party responsible____________________ by ________________________ on __________ Builder / Gen Contractor) (Installer) (Date) Harman® • P43 Installation Manual_R21 • 2008 -___ • 08/13 3-90-04301i... -
Page 4: Product Specific And Important Safety Information
Technologies grounded to the frame of the mobile home and use only listed pellet vent, Class “PL” connector pipe. • Operate the appliance without fully assembling all components A Harman® Outside Air Kit must be installed in a mobile home installation. • Overfire • Install any component not approved by Hearth & wARNING Home Technologies T H E S T R U C T U R A L I N T E G R I T Y O F T H E MANUFACTURED HOME FLOOR, wALL, AND • Install parts or components not Listed or approved. -
Page 5: Getting Started
• Below adjacent structure Recommended: • Lower roof line • Insulated exterior chase in cooler climates • Avoid outside wall Windward Leeward Multi-level Roofs Recommended: NOT recommended: Outside Air Intake Outside Air Intake on windward side on leeward side Figure 2.1 Harman® • P43 Installation Manual_R21 • 2008 -___ • 08/13 3-90-04301i... -
Page 6: Tools And Supplies Needed
Risk of Fire, Explosion or Electric Shock! DO NOT use this appliance if any part has been under water. Call a qualified service technician to inspect the appliance and to replace any part of the control system and/or gas control which has been under water. Harman® • P43 Installation Manual_R21 • 2008 -___ • 08/13 3-90-04301i... -
Page 7: Appliance Dimension Diagram
Clearances A. Appliance Dimension Diagram Dimensions are actual appliance dimensions. Use for reference only. Outside Air Intake Figure 3.1 Harman® • P43 Installation Manual_R21 • 2008 -___ • 08/13 3-90-04301i... -
Page 8: Clearances To Combustibles
Alternate floor protector dimension may be used as long as they satisfy the measurement requirements shown below. Minimum size floor protection for a corner installation hearth pad is 36" x 36". 9"(228mm) 2"(51mm) *10" (254mm) *16" (406mm) 36"(914mm) *10" (254mm) with side shields 9" (228mm) With or Without Side Shields *16" (406mm) without side shields Figure 3.2 Harman® • P43 Installation Manual_R21 • 2008 -___ • 08/13 3-90-04301i... -
Page 9: Floor Protection
Minimum Size floor protection (USA) is 32 " wide By 33" deep (825mm X 838mm). *Floor protection dimensions for the front and sides are measured from the appliance door opening in The United States. In Canada, the side dimension is measured from the widest part of the appliance. Floor Protection Canada Requirements Sides 6" 200mm Front 6" 450mm Rear 6" 200mm NOTE: Measurement "L" is measured from the pedestal base in the US ONLY NOTE: Measurement "K" is measured from the glass in the US ONLY CANADA loor protector Figure 3.3 Harman® • P43 Installation Manual_R21 • 2008 -___ • 08/13 3-90-04301i... -
Page 10: Termination Location And Vent Information
3 feet away from the flue outlet on the outside of the building. Combustibles 12" min. wall to outlet 36” min clearance to any combustible material Shaded area represents the minimum clearance to combustible materials such as shrubbery, mulch or tall grasses. 3 Ft. to Combustibles Figure 4.2 Harman® • P43 Installation Manual_R21 • 2008 -___ • 08/13 3-90-04301i... - Page 11 The chimney should be sealed at the damper using a steel plate. Kaowool, mineral wool or an equivalent non- combustible insulation is recommended to be installed on top of the sealing plate to reduce the possibility of condensation. The connector pipe should extend through the smoke chamber to the base or into the first flue tile. Seal pipe joints with silicone or aluminum tape in addition to the sealing system used by the manufacturer. Be sure to design the venting so that it can be easily cleaned. Figure 4.4 Harman® • P43 Installation Manual_R21 • 2008 -___ • 08/13 3-90-04301i...
- Page 12 Seal pipe joints with silicone or aluminum tape in addition to the sealing system used by the manufacturer. Pipe size should be increased to 4" using this method. Figure 4.5 #7 Installing into an existing chimney This method provides excellent venting for normal operation. This method also provides natural draft in the event of a power failure. In some places in the US and Canada it is required that the vent pipe extend all the way to the top of the chimney. Seal pipe joints with silicone or aluminum tape in addition to the sealing system used by the manufacturer. The pipe or liner inside the chimney should be 4" diameter. In this method a cap should also be installed on the chimney to keep out rain. Figure 4.6 Harman® • P43 Installation Manual_R21 • 2008 -___ • 08/13 3-90-04301i...
- Page 13 #8 Installing through the ceiling Through the ceiling vent, follow PL vent manufacturers recommendations when using wall and ceiling pass through. Seal pipe joints with silicone or aluminum tape in addition to the sealing system used by the manufacturer. Note: Do not place joints within wall pass-through. min. wall to outlet 12" Area within dotted circle represents the minimum clearance to combustible materials such as shrubbery, mulch or tall grasses. Figure 4.9 Harman® • P43 Installation Manual_R21 • 2008 -___ • 08/13 3-90-04301i...
-
Page 14: Chimney Diagram
NOTE: where passage through a wall, or partition of combustible construction is desired, the installation F. The clearance to an outside corner is 11" from center of shall conform to CAN/CSA-B365. (if in Canada) pipe. G. The clearance to an inside corner is 12". H. A vent must not be installed within 3 feet (90 cm) above a gas meter/regulator assembly when measured from the horizontal center-line of the regulator. Harman® • P43 Installation Manual_R21 • 2008 -___ • 08/13 3-90-04301i... -
Page 15: Venting & Use Of Elbows
Figure 4.11. The longer the vent pipe and more elbows used in the system, the greater the flow resistance. Per national building codes, consideration must be given to The recommended maximum flue lengths for the P43 combustion air supply to all combustion appliances. Failure Pellet Stove are as follows: to supply adequate combustion air for all appliance demands, 4" Stainless Steel Flex: 30 Lineal ft. Vertical* may lead to back-drafting of those and other appliances. -
Page 16: Outside Air
The outside air connection will supply the demands of the pellet appliance, but consideration must be given to the total house demand. House demand may consume some air needed for the stove, especially during a power failure. It may be necessary to add additional ventilation to the space in which the pellet appliance is located. Consult with your local HVAC professional to determine the ventilation demands for your house. Figure 4.12 To install outside air use 2 3/8" I.D. non-combustible flex pipe Figure 4.13. There is a break-away hole on the rear panel of the P43 stove which must be removed before connecting the flex pipe. Figure 4.12. The pipe should be run outside and Flex pipe part# terminate to the side or below the vent pipe outlet so the flue 1-00-08543 outlet is more than 12" from the inlet cover. The maximum length run of this pipe is 15 feet. If a longer run is needed Inlet Cover part# 1-10-08542 the size must be increased to 3". The Inlet cover should be used to keep birds, rodents, etc. out of the pipe Figure 4.13. You may choose to use the optional Direct Vent Wall Pass- through Kit which incorporates the venting pass-through and outside air inlet into one component. Figure 4.14. -
Page 17: Locating Your Appliance And Chimney
• Attic mounted duct work and air handler joints and seams With the stove running on high you should have a negative taped or sealed pressure equal to or greater than the number given in the NOTICE: Hearth & Home Technologies assumes no chart below. If you have a lower reading than you find on responsibility for the improper performance of the chimney the chart, your appliance does not have adequate draft to system caused by: burn the fuel properly. • Inadequate draft due to environmental conditions Minimum Vacuum Requirements: .35 - .55 • Downdraft’s • Tight sealing construction of the structure Prior to installing the flue pipe, connect a draft meter. (The • Mechanical exhausting devices draft meter must have a minimum range of 0 - .5”) Record the first reading. Connect flue pipe to stove and be sure all doors and windows in the home are closed. Record the second draft reading _______. If the second reading is more than .05” lower than the first reading, check for possible restrictions or the need for outside air. For more information on the draft test procedure, refer to Page 21 Harman® • P43 Installation Manual_R21 • 2008 -___ • 08/13 3-90-04301i... -
Page 18: Avoiding Smoke & Odors
The air intake is best located on the same exterior wall as the exhaust vent outlet and located lower on the wall than the exhaust vent outlet. The outside air supply kit can supply most of the demands of the pellet appliance, but consideration must be given to the total house demand. House demand may consume the air needed for the appliance. It may be necessary to add additional ventilation to the space in which the pellet appliance is located. Consult with your local HVAC professional to determine the ventilation demands for your house. Vent Pipe Be sure to use approved pellet vent pipe wall and ceiling pass- through fittings to go through combustible walls and ceilings. Be sure to use a starting collar to attach the venting system to the stove. The starting collar must be secured to the flue stub with at least three screws, and sealed with high temp silicone caulking. 4" stainless steel flex vent piping is only allowed for use in masonry fireplaces and chimneys or factory built woodburning fireplaces with class A metal chimneys. Pellet venting pipe (also known as Type L vent) is constructed of two layers with air space between the layers. This air space acts as an insulator and reduces the outside surface temperature to allow a clearance to combustibles of only 3 inches. The sections of pipe lock together to form an air tight seal in most cases; however, in some cases a perfect seal is not achieved. For this reason and the fact that the P43 operates with a positive vent pressure, we specify that the joints also be sealed with silicone. Where passing through an exterior wall or roof, be sure to use the appropriate pass-through device providing an adequate vapor barrier. Venting manufacturers generally provide these pas-through devices. Harman® • P43 Installation Manual_R21 • 2008 -___ • 08/13 3-90-04301i... -
Page 19: Fire Safety
• Installation and use of any damaged appliance. • Modification of the appliance. • Installation other than as instructed by Hearth & Home Technologies. • Installation and/or use of any component part not approved by Hearth & Home Technologies. • Operating appliance without fully assembling all components. • Do NOT Overfire. Or any such action that may cause a fire hazard. Harman® • P43 Installation Manual_R21 • 2008 -___ • 08/13 3-90-04301i... -
Page 20: Appliance Setup
Appliance Set-Up A. Unpacking The P43 is bolted (1/4 x 1" hex head bolts) to the skid to prevent movement during shipping. To free the stove from the skid you must remove the hold- down bolts in the rear of the pedestal base. Figure 5.1. B. Removing Rear Cover Panels Rear Cover Rear Cover Panel The rear cover panels are secured to the stove with three Panel screws each. Two of the screws need only be loosened, not removed, to remove the panels. It is recommended that the rear covers are installed after the unit is in place and the vent pipe is installed, to prevent contact with hot or moving parts. C. Firebrick Shipping Bolts Install the firebrick horizontally on the angle bracket above Note: These same holes are used for securing the stove in mobile home the burnpot. Figure 5.2. Figure 5.1 installation. D. Flame Guide Install the cast iron flame guide on top of the burn pot. Make... -
Page 21: Room Sensor
(50' maximum). The room sensor should be installed in the 1. Plug unit into a 120 VAC, 60 HZ outlet. location where you want to control the temperature. 2. Close the hopper lid, front view door, and the ash pan. NOTE: Distances of more than 25 feet from the unit or in Neither pellets or a fire are required for this test. another room are not recommended. The room sensor is 3. With the mode selector in the “OFF” position, turn the feed essential for the P43's excellent efficiency. adjuster to “TEST”. NOTE: It is recommended that the room sensor be installed, 4. Record the high draft_____in W.C. (Normal is -.50 to even if only installed on the rear of the unit as a return air -.60) The control will be on the High Draft for a total of 2 sensor. minutes. F. Low Draft Voltage Adjustment 5. After 1 minute, the combustion motor will go down to low... -
Page 22: Reference Materials
Reference Material A. Safety Reminders WARNING When installing and operating your Harman® P43, respect basic safety standards. Read these instructions MOBILE/MANUFACTURED HOME GUIDELINES carefully before you attempt to install or operate the DO NOT ALLOw INSTALLATION IN A SLEEPING P43. Failure to do so may result in damage to property ROOM. or personal injury and may void the product warranty. Consult with your local building code agency and... -
Page 23: Wiring Diagram
B. wiring Diagram Harman® • P43 Installation Manual_R21 • 2008 -___ • 08/13 3-90-04301i... - Page 24 Harman®, a brand of Hearth & Home Technologies Inc. 352 Mountain House Road, Halifax, PA 17032 www.harmanstoves.com Please contact your Harman® dealer with any questions or concerns. For the location of your nearest Harman® dealer, please visit www.harmanstoves.com. Printed in U.S.A. - Copyright 2012 Harman® • P43 Installation Manual_R21 • 2008 -___ • 08/13 3-90-04301i...
Need help?
Do you have a question about the P43 and is the answer not in the manual?
Questions and answers