
Subscribe to Our Youtube Channel
Related Manuals for Stulz BNB1000


Summary of Contents for Stulz BNB1000
- Page 1 BNB Ultrasonic Humidifier Installation, Operation & Maintenance Manual MODELS BNB1000 BNB4000 BNB2000 BNB5000 BNB3000 BNB8000 (©January, 2008) Air Technology Systems, Inc.
- Page 2 No part of this docu- ment may be photocopied, reproduced, or translated into another language for use by anyone other than the owner of the equipment for which this manual is written without the prior written consent of Stulz Air Technology Systems, Inc. (SATS).
-
Page 3: Table Of Contents
BNB Ultrasonic Humidifier Installation, Operation & Maintenance Manual TABLE OF CONTENTS General Common Repairs/Parts Introduction ........1-1 Replacement ..........5-7 General ............1-1 5.4.1 Preparation For Repairs ......5-7 Safety ............1-1 5.4.2 Re-Assembing ........... 5-7 1.2.1 General ............1-1 5.4.3 Replacing Transducer and Nebulizer 1.2.2... - Page 4 BNB Ultrasonic Humidifier Installation, Operation & Maintenance Manual (©January, 2008) Air Technology Systems, Inc.
-
Page 5: Introduction
WARNING or CAUTION safety statement. 1.1 General A safety alert symbol accompanies an electrical Recognized as a world leader, Stulz Air Technology shock hazard WARNING or CAUTION safety state- Systems, Inc. (SATS) ultrasonic humidifiers are ment. designed and manufactured with the highest quality craftsmanship using the finest materials available in the 1.2.2... - Page 6 BNB Ultrasonic Humidifier Installation, Operation & Maintenance Manual NOTE CAUTION SATS offers no warranty protection on humidifcation systems using controls that are Never attempt to remove the mist guide cover not provided by SATS. and/or the mist blow tubes while the humidifier is operating, or electrical shorts may result.
-
Page 7: Product Warranty
SATS offers a standard two year limited warranty as stated below: 2-Year Standard Limited Warranty: Stulz Air Technology Systems, Inc., warrants to the original buyer of its products that the goods are free from defects in material and workmanship. Stulz Air Technology Systems, Inc.’s obligation under this warranty is to repair or replace, at its option, free of charge to the customer, any part or parts which are determined by Stulz Air Technology Systems Inc. -
Page 8: Specifications
BNB Ultrasonic Humidifier Installation, Operation & Maintenance Manual 1.4 Specifications Type Ultrasonic Humidifier BNB Model BNB1000 BNB2000 BNB3000 BNB4000 BNB5000 BNB8000 Nebulizing capacity (lb/h) 11.0 17.6 Nos. of Ultrasonic nebulizer unit Power source Single-phase 48VAC; 50/60Hz Rated power consumption (W) Weight (lb) 15.4... -
Page 9: General Design
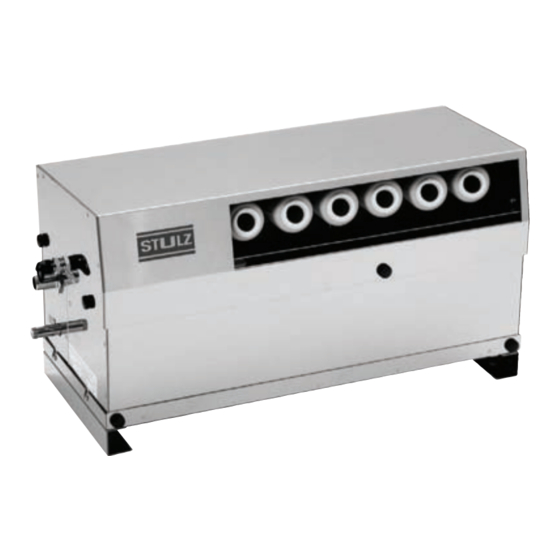
BNB Ultrasonic Humidifier Installation, Operation & Maintenance Manual 1.5 General Design The BNB Ultrasonic humidifier directly atomizes water producing a fine mist and is equipped with a fan to deliver the mist into a room. It is possible to adjust the atomization to maintain room conditions by changing the air volume. -
Page 10: Installation
BNB Ultrasonic Humidifier Installation, Operation & Maintenance Manual INSTALLATION Receiving the Equipment Your Ultrasonic humidifier has been tested and inspected prior to shipment. To ensure that your equipment has been received in excellent condition, make a visual inspection of the equipment immediately upon delivery. Care- fully remove the shipping container and all protective packaging. -
Page 11: Mounting/Placement
BNB Ultrasonic Humidifier Installation, Operation & Maintenance Manual The humidifier must be installed horizontally and level. Prepare hanging bolts for ceiling or brackets for wall (see Figure 1). The distance from the humidifier to the ceiling should be a minimum of 18” and the distance to the wall 3”... -
Page 12: Supply And Overflow Piping
BNB Ultrasonic Humidifier Installation, Operation & Maintenance Manual Supply and Overflow Piping The humidifier will require a field installed water supply line and overflow line. Refer to the piping diagram provided with your unit for details. For the water supply, use DI or RO water. The water supply to the humidifier cannot be taken directly from the public water service pipe. -
Page 13: Main Power/Control Wiring
BNB Ultrasonic Humidifier Installation, Operation & Maintenance Manual 2.6 Main Power And Control Wiring For wiring, refer to the electrical drawing supplied with your unit to determine the total number of interconnecting conductors required for your system and for the proper wire terminations. For internal wiring of the humidifier, see the “Electrical Circuit Diagrams”... -
Page 14: Trial Operation
BNB Ultrasonic Humidifier Installation, Operation & Maintenance Manual TRIAL OPERATION 3.1 Initial Operation 3.1.1 Initial Operation Checklist For new installations, ensure the unit is ready to operate by going through the following checklist prior to start-up: 1. The humidifier is installed horizontally and level. 2. -
Page 15: Operation
BNB Ultrasonic Humidifier Installation, Operation & Maintenance Manual OPERATION 4.1 Precautions The screw provided on the side of the humidifier for adjusting air volume should not be loosened except when adjustment is necessary. Do not remove the air filter at the bottom of the humidifier during operation. Do not block the outlet of the mist blow tubes. -
Page 16: Maintenance/Repairs
BNB Ultrasonic Humidifier Installation, Operation & Maintenance Manual MAINTENANCE/REPAIRS Periodic General Maintenance Systematic, preventive maintenance of the humidifier is recommended for optimum system performance. Routine periodic maintenance should include, but is not limited to the following: Tightening electrical connections. Cleaning, inspecting the unit’s components visually. Checking the level of water and ensuring no leaks are present. -
Page 17: Maintenance Items And Necessary Tools
BNB Ultrasonic Humidifier Installation, Operation & Maintenance Manual Maintenance Items and Necessary Tools Item Cycle Description Necessary Tools Routine Maintenance Air filter cleaning. About once a week depending None Sect. 5.2.1 on on the extent of contamination. page 5-3 The interval should be short- ened if environmental condi- tions are particurlarly dusty Sect. -
Page 18: Air Filter
BNB Ultrasonic Humidifier Installation, Operation & Maintenance Manual 5.2.1 Air Filter 1) Stop the humidifier. 2) Loosen and remove the filter case mounting screws (2 Pcs.) at the lower front of the humidifier. Photo 1 3) Pull out the filter case, remove the stopper and remove the filter. - Page 19 BNB Ultrasonic Humidifier Installation, Operation & Maintenance Manual 9) Loosen and remove the float panel mounting screw (1 Pc.). Lift the float panel and check for contamination of the float switches. Photo 7 Note Be careful not to splash water onto the electrical parts. 10) If no defects are found through the above inspection, re- assemble by reversing the above procedure.
-
Page 20: Troubleshooting And Repair
BNB Ultrasonic Humidifier Installation, Operation & Maintenance Manual 5.3 Troubleshooting and Repair Should any failure occur, make the necessary repairs referring to the following table. As a rule, power must be turned off when troubleshooting is performed but if it is absolutely necessary to troubleshoot when power is supplied, special attention must be paid to avoid electric shock and short-circuiting. - Page 21 BNB Ultrasonic Humidifier Installation, Operation & Maintenance Manual 3) If the cause cannot be located through the above checking, parts may faulty. Check the interior of the humidifier. Failure Cause Checking Remedy If there is no continu- Water supply float Drain the water tank, No mist is ity, replace the switch.
-
Page 22: Preparation For Repairs
BNB Ultrasonic Humidifier Installation, Operation & Maintenance Manual 5.4 Common Repairs/Parts Replacement When parts are replaced, the following sections “5.4.1 Prepara- tion for Repairs” and “5.4.2 Re-assembling” must be observed. 5.4.1 Preparation for Repairs (Removal of Water Tank) 1) Stop the humidifier, set the power supply circuit breaker (main switch) to OFF and close the water supply valve. -
Page 23: Print Plate
BNB Ultrasonic Humidifier Installation, Operation & Maintenance Manual 5.4.3 Replacing the Transducer and Nebulizer Print Plate 1) Referring to Section 5.4.1, “Preparation for Repairs” on page 5-7, take the water tank to a convenient place for working. 2) Loosen and remove the water tank back panel mounting screws (2 Pcs.) and remove the panel portion. -
Page 24: Water Supply Solenoid Valve, Float Switches And Printed Circuit Board
BNB Ultrasonic Humidifier Installation, Operation & Maintenance Manual 5.4.4 Water Supply Solenoid Valve, Float Switches and Printed Circuit Board 1) Referring to Section “5.4.1, “Preparation for Repairs” on page 5- 7, take the water tank to a convenient place for working. 2) Cut the band bundling the solenoid valve and float switch lead wire. -
Page 25: Product Support Group
Unit Model Number (BNBXXXX) through the Product Support Group (PSG) by fax (301) 620-1396, telephone (240) 529-1399 or E-mail • SATS Item Number (123456) (parts@stulz-ats.com). Quotes are given for specified • Unit Serial Number (1234567) listed parts for a specific unit. •... -
Page 26: Drawings
BNB Ultrasonic Humidifier Installation, Operation & Maintenance Manual DRAWINGS 7.1 Layout Drawing of Humidifier Model BNB1000 BNB2000 BNB3000 BNB4000 BNB5000 BNB8000 Dimension “A” 10.12” 14.49” 18.78” 23.11” 27.44” 40.43” Dimension “B” 4.21” 8.54” 12.87” 17.20” 21.54” 34.53” Dimension “L” 11.81”... -
Page 27: Electrical Circuit Diagrams
BNB Ultrasonic Humidifier Installation, Operation & Maintenance Manual 7.2 Electrical Circuit Diagrams BNB1000 to BNB4000 Typical Wiring Diagram 100 VAC BNB5000 & BNB8000 Typical Wiring Diagram 100 VAC (©January, 2008) Air Technology Systems, Inc. - Page 28 BNB Ultrasonic Humidifier Installation, Operation & Maintenance Manual (©January, 2008) Air Technology Systems, Inc.
Need help?
Do you have a question about the BNB1000 and is the answer not in the manual?
Questions and answers