Medela Freestyle Instructions Manual
Hide thumbs
Also See for Freestyle:
- User manual ,
- Instructions for use manual (192 pages) ,
- Instructions manual (28 pages)
Table of Contents
Advertisement
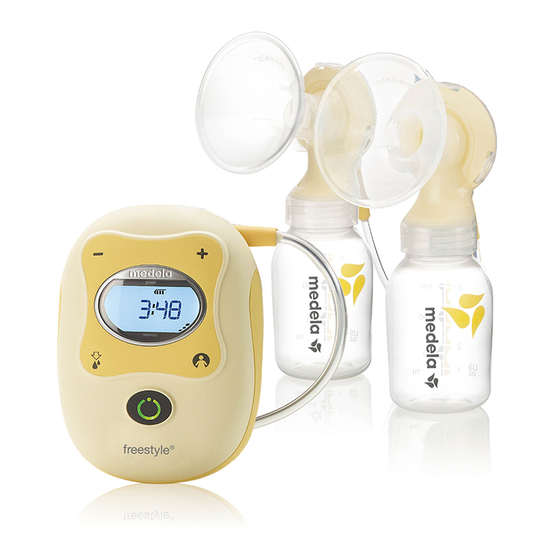
Freestyle
Breastpump
Instructions
To enhance your pumping experience be
sure to read the following sections:
1. Important safeguards ......................p 4
2. Health and safety . ............................p 18
3. Maximum Comfort Vacuum
4. Troubleshooting ...............................p 21
5. Using battery power ........................p 16
®
. ..........p 9
™
Advertisement
Table of Contents

Related Manuals for Medela Freestyle


Summary of Contents for Medela Freestyle
- Page 1 Freestyle ® Breastpump Instructions To enhance your pumping experience be sure to read the following sections: 1. Important safeguards ......p 4 2. Health and safety ......p 18 3. Maximum Comfort Vacuum ...p 9 ™ 4. Troubleshooting .......p 21 5. Using battery power ......p 16...
- Page 2 Visit www.medelafreestyle.com to learn more. You’re going to love Freestyle with 2-Phase Expression technology. Why? It all starts with how babies nurse. Babies nurse in two phases: 1. Fast and light sucking to start your milk fl owing. 2. Slower, deeper sucking to get as much milk as quickly as possible. 2-Phase Expression technology - found in Freestyle - is Medela’s exclusive research-based technology that closely mimics how babies nurse: n The Stimulation Phase (phase 1) is a rapid pumping rhythm to get your milk fl owing.
-
Page 3: Table Of Contents
Storing breastmilk ..... 19-20 How to Assemble & Use Freestyle . ..6 ® Tubing Care ........20 First time use ........6 Moisture in Tubing ......20 Assembling the pump ....6-7 Troubleshooting ......21-23 Basic controls & LCD ......7 Using Freestyle ......8-9 Low or no suction ......21 For single pumping ......8 Battery problems ......22 For double pumping ...... 8-9 Display error messages .... 22-23 Maximum Comfort Vacuum .....9 ™ Warranty ..........24 Using the memory ..... -
Page 4: Important Safeguards
4. Do not place in or drop into water or other liquid. from your breast. Consult your healthcare professional. 11. Plug the power cord into the Freestyle breastpump first and 5. Do not reach for a product if it has fallen into water. Unplug then into the wall socket. -
Page 5: Uses
Uses Important Note: This product is a single user item. Use by more than one user may pose a health risk and performance questions and voids the warranty. I f you have medical reasons or other needs for exclusively pumping, it is recommended that you n use a hospital grade breastpump such as our Symphony breastpump with 2-Phase Expression ® ® technology. To learn more, visit us at www.medelabreastfeeding.com n Maintain a milk supply if breastfeeding is temporarily interrupted. Collect breastmilk at work or during other absences from the baby. n R elieve engorgement with single pumping. Single pumping with simultaneous massage is helpful to relieve engorgement. -
Page 6: First Time Use
How to Assemble and Use Freestyle ® First time use Before using Freestyle for the first time, sanitize the pump kit in boiling water for 10 minutes. Disassemble all the parts that come into contact with the breast and breastmilk: ™ b. PersonalFit breastshields (4) c. Breastshield bodies (2) c2. Membranes (2) c3. Back caps (2) l. Bottles (4) m. Slow flow wide base nipple (1) n. Solid lids (4) o. Wide base nipple collar (1) p. Travel cap (1) Tip: It is not required to clean tubing prior to first use. - Page 7 3. Screw bottle into base. 4. Push breastshield into breastshield body. 5. Connect tubing to the breastshields and the pump (see picture for placement). Basic controls and display a. On/off (standby mode) button b. Vacuum increase c. Vacuum decrease d. Let-down button/timer reset button e. Memory button f. Timer display g. Stimulation phase indicator h. Expression phase indicator i. Memory “on” indicator j. Battery status indicator k. AC power indicator...
-
Page 8: Using Freestyle
Using Freestyle ® Freestyle offers a single or double pumping experience. For single pumping: 1. Follow pump kit assembly instructions (pages 6-7) using one breastshield. 2. Plug one tube into the back of breastshield assembly. 3. Plug unused end into center tubing dock. Tip: To switch from double pumping to single pumping, simply unplug tube from the side you wish to stop pumping from and place open tube into tubing dock. For double pumping: Follow pump kit assembly instructions (pages 6-7) using two breastshields. -
Page 9: Maximum Comfort Vacuum
4. If you let-down (your milk starts to flow) sooner than two minutes, you may pump more efficiently by pressing the let-down button at that time, manually changing it to expression phase (phase 2). If you have not let down within two minutes it will automatically change into the expression phase. Once in expression phase, push the let-down button again to go back to stimulation phase (phase 1). Tip: Some moms prefer going back and forth between Stimulation and Expression to achieve a second let-down throughout a pumping session. You can do this by pressing the let-down button. 5. Once in the expression phase, set your Maximum Comfort Vacuum ™... -
Page 10: Using The Memory
Using the Memory Once you’ve identified a pumping pattern that’s comfortable and effective for you, it’s easy to program Freestyle to repeat your personal pumping pattern ® without having to reset it every time you pump. Setting the memory allows you to duplicate: n Length of stimulation phase (up to 2 minutes). n One vacuum level in stimulation phase. n One vacuum level in expression phase. To set the memory during a pumping session: 1. Follow the usage instructions on page 8 making sure to: a. Set the vacuum level in the stimulation phase to your comfort. b. Press the let-down button when your milk starts to flow. -
Page 11: Using The Timer
5. At your next pumping session, turn the pump on and press the memory button (do not hold more than 3 seconds). The pattern you set previously will automatically occur. If you hold down the memory button for more than 3 seconds, you will override your previous memory setting. Tips for using the memory: n You can still adjust time in stimulation phase and vacuum levels with the memory on. This will not change the pattern in your memory unless you press and hold the memory button for 3 seconds to reset. n If you’re in expression phase with the memory on, you can still press the let-down button to go back to stimulation phase. If you do this, you’ll stay in stimulation phase until you press the memory button or for up to 2 minutes. n It’s common for your vacuum comfort levels to change throughout your pumping experience. If you find that your initial memory setting is not as effective or comfortable, try resetting the memory according to the above instructions. Using the Timer The timer automatically starts when the pump is turned on. If for any reason you want to restart the timer during a pumping session, press the let-down button and hold for 3 seconds. This will restart the timer. -
Page 12: Using Battery Power
Using Battery Power Before using for the fi rst time: 1. Open the battery compartment by sliding the back panel of the pump down and removing. 2. Please make sure to insert the battery correctly into the This side down ” message on the battery pump. The “ should be oriented down, toward the inside bottom of the battery compartment. Make sure that the gold contacts on the battery are adjacent to the gold contacts inside the battery compartment. The pull tab should be facing up, toward you, allowing for convenient removal should the battery need to be replaced. Tip: The pump will not operate on battery power if the battery is inserted improperly. When oriented properly the battery will easily slide into the battery compartment. -
Page 13: Traveling Outside Of The U.s
CAUTION - The battery used in this device may present a risk of fire or chemical burn if mistreated. Do not disassemble, heat above 60 ºC or incinerate. Replace battery with Medela part number 9197010 only. Use of another battery may present a risk of fire or explosion. -
Page 14: Health & Safety
3. Air-dry on clean towel and cover parts when not in use. Important: Make sure all parts are completely dry before re-assembling. Moisture in tubing: Cleaning the tube is not necessary unless tubing is dirty. If you wash the tubing and there is residual water left over from cleaning, it is okay to operate the pump. To avoid getting moisture into tubing, make sure breastshield assemblies are dry before use. If tubing is moldy, discontinue use and replace tubing. See Freestyle parts (pg.2) for more details. ® IMPORTANT: Do not wash the pump or power cord. Use a damp (not wet) cloth to wipe down the pump body if necessary. Do not sterilize piece parts in autoclave. Tip: As an alternative to soap and water, use Quick Clean wipes or Quick Clean... -
Page 15: Storing Breastmilk
Storing Breastmilk Check with your hospital for specific storage instructions. When freezing, do not fill containers more than 3/4 full to allow space for expansion. Label containers with the date of pumping. Freshly Expressed Breastmilk Storage Guidelines (For Healthy Term Babies) Cooler with Room Thawed 3 Frozen Refrigerator Freezer Temperature Breastmilk Ice Packs 3–8 days 6–12 4–6 hours 24 hours at 39 °F months use within... -
Page 16: Tubing Care
To avoid getting moisture into tubing, make sure breastshield assemblies are dry before use. If tubing is moldy, discontinue use and replace tubing. See Freestyle parts (pg.2) for more details. -
Page 17: Troubleshooting
Troubleshooting There are a few reasons why you may be experiencing low or no suction: n I ncorrect assembly of breastshield. Make sure the breastshield pumping kit (breastshields, membranes and connector bodies) are assembled correctly and the back cap is firmly attached at all three connection points. Please refer to page 6 for assembly instructions. n B reastshield assembly is wet. n Make sure breastshield bodies, back caps and membranes are completely clean and dry prior to pumping. n B reastshield components (breastshields, connectors, bodies and membranes) could be damaged. Please be sure to inspect parts for cracks or tears. If you notice any damage, replace parts. n Make sure the tubing ends are securely attached into the pump and breastshield assemblies. There should be a slight click when the tubing connection is properly made. n Take care not to kink the tubing. n Make sure yellow membrane is not folded over between the breastshield body and clear back cap. -
Page 18: Battery Problems
This indicates a problem with the voltage and/or power supply. First, make sure to use the appropriate Medela power cord that came with the pump. If this does not solve the problem, call Medela Customer Service at 800-435-8316. - Page 19 Note: A fully charged battery, if removed from pump, will cause the battery symbol to flash when re-inserted. Recharge for 24 hours to reset flashing battery symbol. n Battery symbol (outline only) flashing and pump does not turn on: This indicates a problem with the battery. • First, connect the pump to the power cord and plug in until battery is fully charged. • If this does not work, disconnect the power cord and remove the battery for at least 10 seconds. Reinsert the battery, connect the power cord, and plug in for a full charging cycle (this may take up to 24 hours). • If this does not work, replace with a new battery (call Medela Customer Service at 800-435-8316).
-
Page 20: Warranty
Freestyle Breastpump Warranty ® WARNING! This is designed to be a single user product. Use of breastpumps by anyone other than the original owner presents health and performance risks and voids the product warranty. This product is warranted by Medela, Inc. to the original retail purchaser to be free from defects in material and workmanship for the period of 1 year for pump mechanism and rechargeable battery (90 days for other parts and accessories) from the date of purchase. In the event of a defect, Medela will repair or, at Medela’s option, replace this product, without charge for such replacement parts or labor. Purchaser shall bear all expense for returning this product to Medela. This warranty does not apply to any product used commercially or which has been subjected to misuse, abuse or alteration. ANY AND ALL IMPLIED WARRANTIES, INCLUDING THE WARRANTY OF MERCHANTABILITY, ARE LIMITED TO A DURATION OF 3 YEARS FROM DATE OF PURCHASE. SOME AREAS DO NOT ALLOW LIMITATIONS ON HOW LONG AN IMPLIED WARRANTY LASTS, SO THE ABOVE LIMITATIONS MAY NOT APPLY TO YOU. - Page 21 Additional Medela Products for Use with Freestyle ® Intimate Apparel Seamless Nursing Bras Optimal everyday support n S mooth, natural appearance with seamless stretch lace cups. n E asy nursing with one-hand release clasp. n C onforms to different stages of breast fullness throughout the day. Breastmilk Bottles n D rop cups enhance skin-to-skin n C ompatible with Medela contact with baby. breastpumps to pump, store and feed with the same bottle.
-
Page 22: Accessories
Quick Clean Micro-Steam Bags ™ n G reat for breastpump accessories, breastshields, breastmilk bottles, nipples, 21 mm 24 mm 27 mm 30 mm 36 mm pacifi ers and cups. (provided with Freestyle ® n Steam cleaning eliminates 99.9% of most common bacteria. For more information on all Medela products, visit medela.com or call 800-435-8316.
Need help?
Do you have a question about the Freestyle and is the answer not in the manual?
Questions and answers