
Related Manuals for Urive Albatross


Summary of Contents for Urive Albatross
- Page 1 User manual This is an auxiliary product for safe driving. The Manufacturer is not held responsible for liability arising from an accident. Use the product in accordance with the intended use.
-
Page 2: Table Of Contents
CONTENTS 01. Before getting started with Urive Albatross Mini ....2 15. PC Viewer – Viewer Buttons........35 02. Precautions before using the product ......3 16. PC Viewer – Black-box configuration ......38 03. Precautions when using the product ......4 17. PC Viewer – Play List ..........44 04. -
Page 3: Before Getting Started With Urive Albatross Mini
Before getting started with Urive Albatross Mini Urive Albatross Mini is a safety assistance device for vehicle that records front and rear image and sound of when driving and parking. Urive Albatross Mini is a trademark of MiDong E&T Co., Ltd. -
Page 4: Precautions Before Using The Product
If the micro SD memory card is inserted forcibly into the wrong direction, the card and main body may be damaged. Use 64GB Micro SD memory card after formatting the card with Urive PC viewer or Albatross Mini main body. -
Page 5: Precautions When Using The Product
Precautions when using the product The following instructions are given to ensure your safety and prevent the loss of property. Read them thoroughly and ensure the product is correctly used. The user is liable for any damage to the product or the car resulting from failure to follow this instruction. - Page 6 Precaution - Minor injuries or insignificant damage to the product could be caused if violating the instructions Do not use the product for a long period of time while Recording may not take place normally when using a non- connected to the electrical power of the vehicle directly. certified micro SD card.
-
Page 7: Features
Real time image check and record on 3” LCD screen with PIP (Picture-in-picture) and Drag-and-drop for front and rear images. System configuration and SD card format available with a touch. Formatting on the LCD function is supported The auto format function is supported on the Albatross Mini’s touch LCD. Driving Mode Records videos in 1minute segment. - Page 8 Battery discharge protection device In order to prevent a car battery from discharge during the parking mode, Urive Albatross Mini has parking timer and voltage cut-off setting mode. If the voltage is lower than the set volume, it executes the voltage cut-off automatically for preventing the car discharging.
- Page 9 Voice announcement and voice recording Auto-saver The auto-saver function allows the LCD to be turned off for its safe use when the car’s internal temperature rises (above the guaranteed LCD temperature). While the LCD is turned off, if the recording continues and the temperature decreases to the deactivating level, the LCD screen will be turned on automatically.
-
Page 10: Components
Please check if all the basic components below are packed in the gift box before use. If any of the components are missing or damaged, please contact your retailer. Basic Components Optional Accessories Vehicle drive Rear camera Urive MicroSD Cigar Jack Power cable GPS Module recorder and holder and cable(6m) -
Page 11: Names Of Parts And Function Description
Names of Parts and Function Description (Main Body) 10 _... - Page 12 Part names and functions (front camera) Names Functions ① Holder Transparent main body holder ② Camera Lens 2M Pixel Front Camera Lens High-luminance blue LED for indicating the operational state and providing ③ Security LED security effect ④ DC Power Port Port for connecting the power cable ⑤...
- Page 13 Names of Parts and Function Description (Rear Camera) Name Functions ① Holder Transparent Holder ② Camera Lens 2M pixel rear camera Lens ③ Connecting Port Connecting to main body (mini USB 5 pins) ④ Security LED Showing working status and the car is secured (High brightness blue LED) ⑤...
-
Page 14: Features And Connectors
Features and Connectors Features Operation State Voice notification LED Indication - Blue LED turns on while booting and ACC ON Driving mode starts after blinks after booting. “Start recording” (Driving Mode) booting - Green LED of main body turns on. - Blue LED of rear camera turn off. - Page 15 Port pin arrangement Ports Images Pin arrangement Power port ③ ② ① ① GND ② ACC ③ BAT (B+) (DC socket) ① VCC(3.6~6V DC) ② Rx ④ ③ ② ① GPS port(2.5 pie) ③ GND ④ Tx(GPS Signal Output) ① VCC(5.0V DC) ② Video signal - ③ Video Signal + ①...
-
Page 16: Firmware Update
Firmware Update [Automatic Update] The system can be updated in Urive Albatross Mini PC viewer. Insert MicroSD memory card to the reader and connect to PC. Execute the PC viewer. Press the button at the top left corner of the viewer window. - Page 17 16 _...
- Page 18 “Update ends with “Ring” and the system reboots automatically. When the system roboots the system creates designated folders in the formatted memory card. <Notice> The system preserves the previous setting when the system is updated in Urive Albatross Mini main body. User's Manual _ 17...
-
Page 19: Installation Precautions
Installation Precautions It is recommended to install the device in an area with a flat surface. The ignition must be turned off while installing. As the product is powered by car battery, it is required to check battery power whether the front and rear videos are saved normally before the process of installation. -
Page 20: Installation
Installation - Main Body (Front Camera) Clean the spot on the front window Put the device where you want to where the product is installed. place it The constant power supply must Connect rear camera cable and GPS be installed by an expert. cable with the power switch turned - Black: GND (ex. - Page 21 Installation - Rear Camera Clean the spot on the rear window Put the device where you want to where the product is installed. place it. Connect mini USB cable to the main Connect mini USB cable to the rear body with the power switch turned camera.
-
Page 22: Gui (Graphic User Interface)
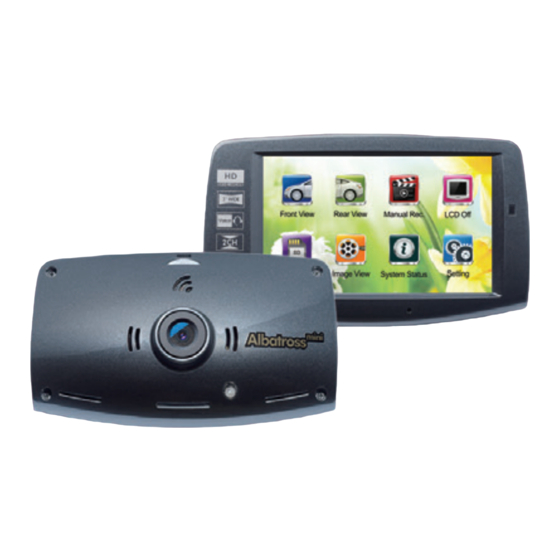
GUI-Descriptions (Displays) After booting in driving mode, real-time image shows on the screen. On screen dispalys, firmware version, video recording time (yy/mm/dd), video quality, voice recording on/off, GPS on/off, recording mode (REC, EVT) can be checked. When PIP feature is on, front and rear images are displayed on the screen together. - Page 23 GUI-Descriptions (Main Menu) LCD screen turns to main menu when touching the screen once. The menu screen will show eight icons for front video, rear video, image recording, LCD off, formatting, video view, system state, and setting. Video/audio recording continues on main menu screen. The screen turns to screen saver when there is no operation for over one minute when screen saver feature is on.
- Page 24 GUI - Descriptions (Screen Saver) The he screen turns to screen saver when there is no operation for over one minute when screen saver feature is on. When screen saver feature is off, the LCD screen turns off in two minutes.
- Page 25 GUI - Descriptions (Video Play) Video Play: The user can browse the file list in Driving, Event, Parking, Parking Event folders and play files by clicking the file na me Selecting and clicking a file from the list of files will play back the stored video. Icons Meaning Icons...
- Page 26 GUI - Descriptions (Video Play) Video view: Checks the lists of files of continuous recording, event recording, motions detected while parked, and events recorded while parked, and playing them back directly for checking. Selecting and clicking a file from the list of files will play back the saved video. Zooming - After pressing “Pause”...
- Page 27 GUI - Descriptions (System Status) [Menu button (Home)] Format Date: the last date MicroSD memory card formatted Driving Mode File: number of files recorded in driving mode Event Mode File: number of files recorded in event mode Parking Mode File: number of files recorded in parking mode Parking Event File: number of files recorded in parking event mode Firmware Version: the version of installed firmware SD Card Use: used space / total space of MicroSD memory card.
- Page 28 GUI - Descriptions (System Setting) [Menu button (Home)] Icons Meaning Functions sets impact sensitivity in driving, event, parking, System Setting parking event modes / (battery) power cut-off / parking mode SD card use, time sets coordinate correction, PIP, screen saver, Display Setting rear image flip Audio Setting...
- Page 29 GUI - Descriptions (System Setting) [Previous] [Menu button (Home)] Icons Meaning Details Impact Sensitivity Dull - Normal - at Driving Mode Sensitive Impact Sensitivity Dull - Normal - at Parking Mode Sensitive Motion Dectection Dull - Normal - Sensitivity Sensitive 28 _...
- Page 30 [Previous] [Menu button (Home)] Icons Meaning Details - Voltage: Off, (Battery) Power 11.5V, 11.7V, 11.9V, 12.1V cut-off setup by - Time: Off, voltage & time 6hr, 12hr, 24hr, 48hr SD card use allocation setup for 0%, 25%, 50% parking mode year, month, day, hour, Time setup minute...
- Page 31 GUI - Descriptions (Display Setting) [Previous] [Menu button (Home)] Icons Meaning Details Correction will be completed when pushing For correcting the five points shown on Coordinates touch the screen (The top left, correction coordinates the top right, the bottom right, the bottom left, center of the screen) For turning on PIP on/off...
- Page 32 GUI - Descriptions (Audio Setting) [Previous] [Menu button (Home)] Icons Meaning Details Audio Voice recording Recording or Mute Speaker Volume Volume setting User's Manual _ 31...
-
Page 33: Voice Guidance
Voice Guidance Voice Description - After booting - After system setting completed Recording Start - After checking system status - After video playing completed - When “video playing or system status or system setting” chosen Recording Stop - When system format starts Check SD Card - When SD card missing or SD card error Turning to Driving Mode... -
Page 34: Pc Viewer Installation
PC Viewer Installation 1. Connect the MicroSD memory card with MicroSD card reader to the PC and execute the “AlbatrossMini.exe”. [Minimum PC spec. for PC viewer] • Computer OS : XP (32bit), Vista (32bit), Window7 (32/64bit), Window8(32/64bit) • Computer H/W : PENTIUM4 2.8GHz / 1G RAM •... -
Page 35: Pc Viewer - Main
PC Viewer - Main Front Image Viewer Minimize/Close Full Screen Viewer/Firmware Version & updates Map On/Off Open files. SD format Front Video File arrangement (ascending order) Black Box Play Control Bar configuration Tracking and tracing Rear Video the driving record Rear Image Volume, Brightness, Impulse/Latitude/... -
Page 36: Pc Viewer - Viewer Buttons
PC Viewer - Viewer Buttons Program version information This button is for going directly to the Urive homepage and shows viewer, firmware version information. Users can check the version information and update the viewer and firmware by connecting Micro SD to PC. - Page 37 Pause Stop the play Screen print Printing the whole screen of the viewer. Screen capture Saving the full screen at the viewer as a JPG file. Volume control Control the volume up to 10. Control the play speed Control the play speed as 1/4, 1/2, 1, 2, 4. G-force/Velocity Graph These are toggle buttons which are used to display acceleration and velocity graphs, respectively.
- Page 38 Display/Hide Map This button is used to display the information on the driver’s location on the map in playback mode. This function is available the GPS module (optional) is mounted. File open This button is used to open a video file (multiple files can be selected simultaneously if the Shift or Ctrl key is pressed and held).
-
Page 39: Pc Viewer - Black-Box Configuration
Black-box configuration [Configuration] Black Box configuration: when users press button in the viewer main screen, it shows configuration window like below. It is separated with time, screen, voice/image and user setting tap. Connect the MicroSD memory card with MicroSD card reader to the PC. Select the button on the Viewer Main screen. - Page 40 Blocking voltage setup : Blocking voltage setup is reference voltage setup and separated by a timer set. The reference voltage setup is [11.5V], [11.7V], [11.9V], [12.1V] to available as a choice to step 4. timer is 6 hours, 12 hours, 24 hours, 48 hours can be selected in four steps.
- Page 41 [Screen setting] When the screen setting tab is selected, users can determine whether to use the PIP function, the screen saver and the rear video shift function. PIP Mode : Functions to check live videos of the front and rear view in a LCD screen simultaneously.
- Page 42 [Time setting] Time Settings tab, the black-box time settings and standard time settings are available. Standard Time Setup : The GMT can be set by country. The PC system time is loaded and recognized as the standard time. (Standard Time of South Korea – GMT +09:00 Seoul) When you click the Save button after you select this, the environment setting is finished.
- Page 43 [Voice/image setting] When the audio/video setting tab is selected, it will be possible to set the quality of videos in the continuous mode as well as in the parking mode, and set whether to carry out audio recording, and also set the speaker volume. Video quality: The quality of the videos, to be stored while in the continuous (driving) as well as in the parking mode, can be set at high or low level.
- Page 44 [User setting] By selecting driver setting tab, you can set driver information and license number of the vehicle. This is a useful function when a separate memory card is used for each driver. After completing selections of modes, press save button to save the selected settings.
-
Page 45: Pc Viewer - Play List
PC Viewer - Play List The video data, recorded by the black box and then stored in the micro SD card or in a computer, can be selected and played back all or by type and. The list of files can be arranged in ascending or descending order. Remove the micro SD card from the black box and connect it to a computer. -
Page 46: Pc Viewer - File Open
PC Viewer - File Open Replaying stored video images : By opening a black box file in a specific folder, replay starts as it enters to the file list automatically. If you want to replay a specific file, press replay button after selecting the file you wish to reply in a file list. -
Page 47: Pc Viewer - Sd Card Format And Restore
PC Viewer - SD Card Format and Restore Take Micro SD card out of the black box and connect it computer. If you select button in main screen of viewer, SD format tab where Micro SD card can be formatted will appear as shown in the picture of (1). - Page 48 User's Manual _ 47...
- Page 49 SD inspection and restoration : functions to fix errors or restore bad sectors in SD memory. Proceed this procedures after closing all other application programs accessing (using) the memory in SD card. Take Micro SD card out of the blackbox and connect it computer. If you select button in main screen of viewer, SD inspection and restoration tab where Micro SD card can be inspected and restored will appear as shown in the picture of (1).
-
Page 50: Pc Viewer - Driving Record Trace
PC Viewer - Driving Record Trace When the GPS module is connected to the car DVR main body, the system saves driving record every 10 seconds. Each “dat” file keeps one month of driving records. GPS module which is an option item should be installed to support this feature. - Page 51 #This table is explanation for icons in the “shuttle history trace” window. Button Description Button Description To Open Setup folder Of Micro SD having Move the selected item from the list of Driving history files(extension .dat) paths on the map in order to play. To marking on the route path during At the map screen to save the file as ‘jpg’.
-
Page 52: Pc Viewer - Full Screen
PC Viewer - Full Screen Click the switching button at the top of the viewer to view the full screen of front/rear images. 전체화면 전환 Full screen mode : button in top of Viewer, will to change to the full screen mode. Return to the screen : To return to the previous screen in full screen, button clicked will return to the main screen window. -
Page 53: Pc Viewer - File Folder's Structure
PC Viewer - File folder’s structure Blackbox Folder: Driving Mode Folder. Files are recorded by one minute. Event Folder: Driving Mode Event Folder. Files are recorded for 20 seconds (10 sec before impact and 10 seconds after impact) Parking Folder: Parking Mode Motion Detection Folder. Files are recorded for 20 seconds (10 sec before detection and 10 seconds after detection) Parking Event Folder: Parking Mode Impact Folder. -
Page 54: Pc Viewer - Each File Size And Saving Capacity
Parking impact recording files are saved separately as event files up to 5% of memory space. It is highly recommended to use Urive genuine MicroSD memory card. Urive shall hold no liability for problems incurred in connection with the use of other memory card In the Parking mode, recording is triggered only when a motion or an impact is detected. -
Page 55: Technical Specifications
92.6 x 55.1 x 33.8 mm (Main Body without holder) / 59.2 x 24.5 x 27.2 mm (Rear Camera) SD Card Memory Urive Genuine MicroSD SDHC Card Class 10 (up to 64GB) Recording Type Driving / Event / Manual (Forced) / Parking / Parking Event Front Camera 2 Million Pixels (HD, 1280x780) View Angle: 120°... -
Page 56: Warranty
Warranty Urive Products are covered under warranty for a period of 1 year. Components and consumable parts other than the main body are covered by a separate warranty. The warranty service will be provided based on what is described in the warranty. - Page 57 MEMO 56 _...
- Page 58 MEMO User's Manual _ 57...
- Page 59 MEMO 58 _...
- Page 60 MEMO User's Manual _ 59...
- Page 61 MEMO 60 _...
- Page 62 MEMO User's Manual _ 61...
- Page 63 MEMO 62 _...
- Page 64 MEMO User's Manual _ 63...
- Page 65 MEMO 64 _...
Need help?
Do you have a question about the Albatross and is the answer not in the manual?
Questions and answers