Sign In
Upload
Download
Table of Contents
Contents
Add to my manuals
Delete from my manuals
Share
URL of this page:
HTML Link:
Bookmark this page
Add
Manual will be automatically added to "My Manuals"
Print this page
×
Bookmark added
×
Added to my manuals
Manuals
Brands
TEXIO Manuals
Power Supply
PDS20-10A
Instruction manual
TEXIO PDS20-10A Instruction Manual
Regulated dc power supply
Hide thumbs
1
2
Table Of Contents
3
4
5
6
7
8
9
10
11
12
13
14
15
16
17
18
19
20
21
22
23
24
25
26
27
28
29
30
31
32
33
34
35
36
37
38
39
40
41
42
43
44
45
46
47
48
49
50
51
52
53
54
55
56
57
58
59
60
61
62
63
64
65
66
67
68
69
70
71
72
73
74
75
76
77
78
79
80
81
82
83
84
85
86
87
88
89
90
91
92
93
94
95
96
97
98
99
100
101
102
103
104
105
106
107
108
109
110
111
112
113
114
115
116
117
page
of
117
Go
/
117
Contents
Table of Contents
Troubleshooting
Bookmarks
Table of Contents
Table of Contents
Daily Maintenance
Using the Product Safety
About this Manual
Outline of Product
Features
PDS-A Power Supply Unit
IF-71RS (Option)
IF-70GU (Option)
IF-71LU (Option)
Cable for Master-Slave Operation (Option)
Handle (Option)
2 Prior to Use
Accessories
Connecting the Power Cable
Connecting to the Output Terminals
Attaching the Output Grounding Cable
Connecting the Voltage Remote Sensing Cables
Attaching the Rear Output Terminal Cover
Caution on Connecting to a Capacitive Load
Connecting the Protective Grounding Terminal on the Bottom Face
Caution on Mounting the Unit in a Rack
Connecting the Power Cable to the Primary Power
Installation Environments
3 Panels
Front Panel
Operation Panel
Rear Panel
4 General Instructions
Connecting Loads
Alarm
5 Functions and Operation Procedures
Operation Modes
Turning on Power
Display When Power Is Turned on
Performing a Unit Scan While Using a Parallel Connection
Recalling Settings When Turning on Power, and Saving the Setting Data
Basic Operation
Voltage Setting Procedure
Current Setting Procedure
Fine Adjustment of Voltage/Current
Output Functions
Memory Function
Storing and Recalling Preset Voltage/Current Data
Switching the Display in the Voltage/Current Indicator Display
Switching between the Set Voltage/Current Display and Output Voltage/Current Display
Displaying Power in the Voltage and Current Indicators
Protective Functions
Display When Protective Functions Are Activated
Modification of the Set Values of Protective Functions
Deactivating Protective Functions
Key Lock / Local Function
Key Lock and Unlock Procedures
Remote Mode Deactivation Procedure
6 Setting with the Menu Key
Output off Timer
Setting the Output off Timer
Operating the Output off Timer
Specifying the Automatic Cancellation Time of the Setting Menu Display
Specifying Settings When the Power Is Turned on
Recalling Preset Values When the Power Is Turned on
Setting the Output When the Power Is Turned on
Setting the CC Priority Mode
Setting the Display While the Output Is off
Default Setting of the Power Relay When the Power Is Turned on
Specifying the Baud Rate While in IF-71RS PDS Mode
Clearing the Memory
Clearing All the Setting Data Stored in the Unit
Clearing the Setting Data for Manual Operation
Clear the Setting Data of Sequence Operation
Clearing the Setting Data for IF-71LU IP Address Setting
7 Master-Slave Operation
Configuration of Master and Slave Units
Configuring the Master and Slave Units
Specifying the Number of Units
Parallel Master-Slave Operation
Serial Master-Slave Operation
8 Sequence Operation
Setting of Sequence Operation
8-1-1.Turning on the Power Switch with Sequence Operation
Setting the Unit to Start in Sequence Operation by Turning the Power Switch on
Sequence Programs
Step No. and Setting Items
Setting Step Execution
Confirming the Step No. and the Step Being Executed
Confirming the Step No. While the Sequence Program Is Stopped
Confirming the Step No. Being Executed During Sequence Program Execution
Confirming the Setting Items for Steps
Confirming the Settings for Sequence Program Execution
Executing Sequence Programs
Automatic Execution of Sequence Programs
Paused and Resumed Sequence Programs
Manual Execution of Sequence Programs
Stopping Sequence Programs
9 Operation by External Analog Signal
Analog Interface Boards
Cautions on Applying Analog if Boards
Wiring an Analog Signal to the Standard Board
Operating the Analog if Board
Setting the Voltage
Adjusting the Set Voltage
Current Setting
Adjusting the Set Current
Turning the Output On/Off through External Contacts
Checking the Status When the Output Is off
Main Relay ON/OFF Operation
10 Interface Option
Accessories
11 Using Digital Communication Interface for Remote Control
Outline
If-70Gu
If-71Lu
If-71Rs
Cable and Connector Settings
Address Settings
Checking the Mode and Address Settings of the Interface Card
GP-IB Connection
USB Connection
RS-232C Connection
LAN Connection
Local Bus Connection
Communication Control Commands
Communication Commands Table
Automatic Message Output
Command Format
Commands
Voltage Setting (VOLT)
Current Setting (AMP)
OVP Setting (OVP)
UVP Setting (UVP)
OCP Setting (OCP)
Output Setting (OUTPUT)
Status Query (XSTATUS)
Recalling Preset Settings (PRESET)
Saving Preset Settings (SETPRE)
Preset Voltage Setting (PREVOLT)
Preset Current Setting (PREAMP)
Power Monitor Display Setting(MONDSP)
Power-Off Display Setting(DSPY)
Monitor Display Switching (CHECK)
CC Priority Mode Setting When the Output Is Turned on (CCPRIO)
Output off Timer Setting (OFFTM)
Automatic Cancellation Time Setting for the Setting Menu Display (ESC)
Main Relay Setting (POWER)
Unlocking (GTL)
Local Lock out Setting (LLO)
Sequence Operation Setting When the Power Is Turned on (PONSEQ)
Preset Setting When the Power Is Turned on (PONPRE)
Output Setting When the Power Is Turned on (PONOUT)
Main Relay Setting When the Power Is Turned on (PONPOW)
Notification Setting 1 (MASK)
Notification Setting 2 (AMASK)
Notification Setting 3 (SMASK)
Querying Alarm Status (ALM)
Alarm Reset (EXIT_ALM)
Clearing Sequence Programs (SCLR)
Writing Sequence Program (XSWRITE)
Reading out a Sequence Program (XSREAD)
Sequence Start Point Setting (SSADR)
Sequence End Point Setting (SEADR)
Sequence Execution Mode Setting (SMODE)
Sequence Repeat Cycle Setting (SCYCLE)
Sequence Mode Setting (CHGSEQ)
Panel Operation Mode Setting (CHGNORM)
Sequence Start (SSTART)
Sequence Stop (SSTOP)
Sequence Pause (SPAUSE)
Sequence Jump (SSTEP)
Reading out the Sequence Execution Status (SRUN)
Reset (*RST)
Function Reset (RESET)
Reading out the Status Byte (*STB)
Reading out the Product Information (*IDN)
Querying the Model and Specifications (MODEL)
Local Bus Setting (ADRS)
Returning the Product Name of the Unit (UNIT?)
Query-Dedicated PC Address for Device Identification (LPCAD?)
Cautions about Communication
Compatibility of PDS-A Series and PDS Series
Communication Specifications
Appendix A. TROUBLE SHOOTING
Appendix B. OUTSIDE DIMENSIONS
Appendix C. SPECIFICATIONS
Advertisement
Quick Links
1
Pds-A Power Supply Unit
2
Appendix A. Trouble Shooting
Download this manual
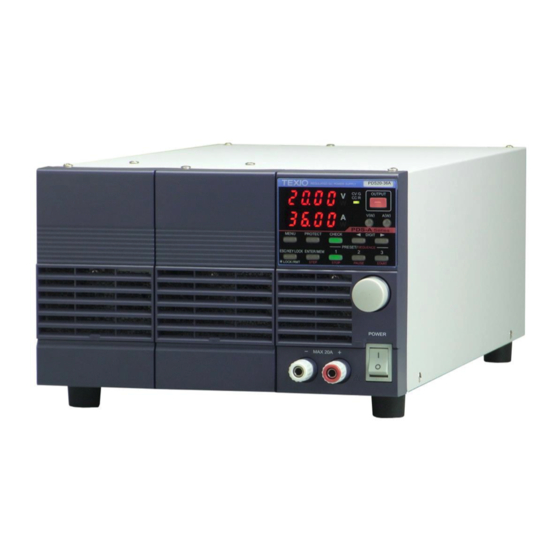
REGULATED DC POWER SUPPLY
PDS-A SERIES
PDS20-10A
PDS36-6A
PDS60-6A
OPTIONAL INTERFACE UNITS
IF-71RS
INSTRUCTION MANUAL
PDS20-18A
PDS36-10A
PDS60-12A
FOR PDS-A SERIES
IF-70GU
B71-0194-01
PDS20-36A
PDS36-20A
IF-71LU
Table of
Contents
Previous
Page
Next
Page
1
2
3
4
5
Advertisement
Table of Contents
Need help?
Do you have a question about the PDS20-10A and is the answer not in the manual?
Ask a question
Questions and answers
Related Manuals for TEXIO PDS20-10A
Recording Equipment TEXIO IF-71RS Instruction Manual
Interface units (2 pages)
Power Supply TEXIO PDS36-10A Instruction Manual
Regulated dc power supply (117 pages)
Power Supply TEXIO PDS20-18A Instruction Manual
Regulated dc power supply (117 pages)
Power Supply TEXIO PDS36-20A Instruction Manual
Regulated dc power supply (117 pages)
Power Supply TEXIO PD18-10AD Instruction Manual
Regulated dc power supply pd-ad series (39 pages)
Power Supply TEXIO PW18-3ADP Instruction Manual
Pw-a series multi-output dc stabilized power supply units (86 pages)
Power Supply TEXIO PA10-5B Instruction Manual
Regulated dc power supply pa-b series (50 pages)
Power Supply TEXIO PSF-400L Instruction Manual
Regulated dc power supply psf series (121 pages)
Power Supply TEXIO PSF-800L Instruction Manual
Regulated dc power supply psf series (121 pages)
Power Supply TEXIO PSW Series Instruction Manual
(116 pages)
Power Supply TEXIO PS20-20A Instruction Manual
Regulated dc power supply optional interface units for ps-a series if-71rs if-70gu if-70ps (116 pages)
Power Supply TEXIO PS20-40A Instruction Manual
Regulated dc power supply optional interface units for ps-a series if-71rs if-70gu if-70ps (116 pages)
Power Supply TEXIO PS40-10A Instruction Manual
Regulated dc power supply optional interface units for ps-a series if-71rs if-70gu if-70ps (116 pages)
Power Supply TEXIO PS40-20A Instruction Manual
Regulated dc power supply optional interface units for ps-a series if-71rs if-70gu if-70ps (116 pages)
Power Supply TEXIO PR-A Series Instruction Manual
Regulated dc power supply (19 pages)
Power Supply TEXIO PHU Series Instruction Manual
Multi range dc power supply (179 pages)
This manual is also suitable for:
Pds36-10a
Pds20-18a
Pds20-36a
Pds36-20a
Pds60-6a
Pds60-12a
...
Show all
If-71rs
If-70gu
Pds36-6a
If-71lu
Table of Contents
Print
Rename the bookmark
Delete bookmark?
Delete from my manuals?
Login
Sign In
OR
Sign in with Facebook
Sign in with Google
Upload manual
Upload from disk
Upload from URL


Need help?
Do you have a question about the PDS20-10A and is the answer not in the manual?
Questions and answers