Table of Contents
Advertisement
Advertisement
Table of Contents

Related Manuals for FujiFilm MX-1200


Summary of Contents for FujiFilm MX-1200
-
Page 2: Warning
( 1 ) This device may not cause harmful and receiver. Product Name : DIGITAL CAMERA FUJIFILM MX-1200 Manufacture's Name : Fuji Photo Film Co., Ltd. — Connect the equipment into an outlet on a circuit... -
Page 3: Table Of Contents
Contents TAKING PICTURES USING THE LCD MONITOR ... 25 4 Advanced Features Playback Warning ............2 PC MODE (DOWNLOADING IMAGES VIEWING YOUR IMAGES ( PLAYBACK ) ..28 TO A PERSONAL COMPUTER) ....64 EC Declaration of Conformity ......3 ADVANCED PLAYBACK ........ -
Page 4: Preface
Preface Camera Features and Accessories Test Shots Prior to Photography 15minutes and then seek medical assistance. Features Accessories For particularly important photographs (such as weddings If liquid crystal is swallowed Flush your mouth thoroughly with water. Drink large and overseas trips), always take a test photograph to check Hand Strap ( 1 ) High-quality images from the 1.31-million-pixel CCD and LR6 AA-size alkaline... -
Page 5: Nomenclature
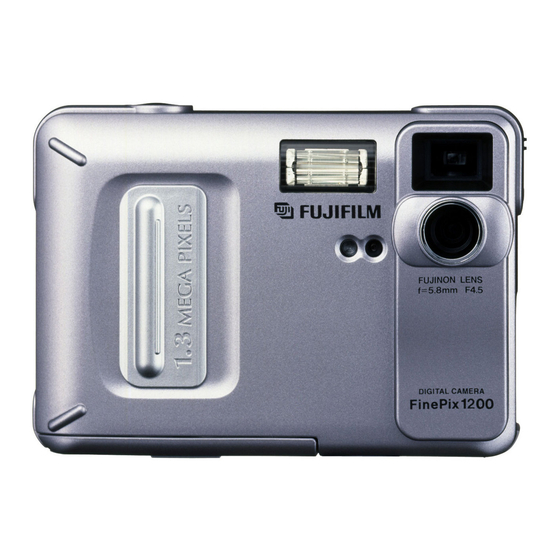
Nomenclature Flash Shutter button Viewfinder lamp DISP button Viewfinder POWER switch Viewfinder window LCD monitor 4-direction button Normal/Macro switch Mode dial MENU/EXE Slot cover button Self-timer Lens Strap mount lamp Flash control Tripod mount DIGITAL (digital sensor input/output) socket SmartMedia cover lock Battery cover DC IN 5V SmartMedia slot... - Page 6 Nomenclature Mode dial Example of LCD Monitor Text Display : Shooting QUALITY(image quality) Setup mode Mode Self-Timer mode Standard no. of PC mode shots available Manual mode Digital telephoto Macro mode icon Auto mode Protect mode FILE SIZE Standby (number of pixels) (ready to shoot) Playback mode Erase mode...
-
Page 7: Getting Ready
Install replacement batteries within 5 minutes since Do not use lithium or manganese batteries in the camera settings are only retained for 5 minutes your MX-1200 because the heat generated by the batteries could damage the camera. once the batteries are removed. -
Page 8: Loading The Smartmedia
Operation of this camera is only guaranteed when it off to protect the SmartMedia. is used with Fujifilm SmartMedia. The SmartMedia will not slide fully into the slot if it is Take care not to drop the batteries when opening Some 3.3V SmartMedia are labelled as “3V ”... -
Page 9: Switching On And Off
SWITCHING ON AND OFF Using the AC Power Adapter LCD Monitor Blank Flashing When you switch the LCD monitor on ( P.25), the standard number of shots available on the DC IN 5V socket Slide the POWER switch in the direction of the With the LCD monitor on, you can check the SmartMedia is displayed. -
Page 10: Setting The Date And Time
SETTING THE DATE AND TIME Once you have finished adjusting the date and time, press the “MENU/EXE” button to apply the new settings. To set the time precisely, press the “MENU/EXE” button when the time is at zero seconds. DATE TYPE Press “... -
Page 11: Switching The Lcd Monitor Display
SWITCHING THE LCD MONITOR DISPLAY ADJUSTING THE LCD MONITOR BRIGHTNESS Mode LCD Monitor Display Status Self-timer mode LCD monitor OFF LCD monitor ON LCD monitor LCD monitor ON Manual mode Text display (no text) The display status of the Press “ ”... -
Page 12: Basic Photography
Basic TAKING PICTURES USING THE VIEWFINDER ( POWER-SAVING MODE ) Photography Loop the strap over your wrist and hold the Take care that your fingers or the carry strap do Look through the viewfinder and point the Set the mode dial to “ ”. -
Page 13: Taking Pictures Using The Lcd Monitor
TAKING PICTURES USING THE LCD MONITOR TAKING PICTURES USING THE VIEWFINDER ( POWER-SAVING MODE ) Viewfinder Lamp Display Beep Color Status Meaning Ready to shoot Green AE in progress or camera shake Flashing warning Image being recorded onto the SmartMedia or battery charging in Orange progress Loop the strap over your wrist and hold the... - Page 14 TAKING PICTURES USING THE LCD MONITOR Beep Look at the image on the LCD monitor and point the camera so that the subject is in roughly the Take care to ensure that the lens, flash and To take the picture, press the shutter button middle of the image.
-
Page 15: Viewing Your Images ( Playback )
” appears on the LCD monitor. Images That Can be Viewed on the MX-1200 You can use this camera to view images recorded on an MX-1200 or images recorded onto a 3.3V SmartMedia using a Fujifilm MX series and DX series digital camera. -
Page 16: Removing The Smartmedia
REMOVING THE SmartMedia ™ ERASING SINGLE FRAME Press the “MENU / EXE” button to erase the Grip the SmartMedia and pull it out. Check that the camera is not recording data displayed image. When erasing is complete, the and then switch the camera off. next image appears and the “... -
Page 17: Advanced Features
The MX-1200 provides a choice of 5 flash The flash fires a pre-flash just before the picture is colors when you are shooting under lighting modes to suit all conditions. -
Page 18: Suppressed Flash
MACRO ( CLOSE-UP ) MODE FLASH MODE Macro mode allows you to take close up shots of subjects only 10cm (3.9 in.) from the camera. In this mode, when the flash mode is set to “ ” or “ Red-eye Reduction”, the mode is automatically changed to “... -
Page 19: Using The Digital Telephoto
USING THE DIGITAL TELEPHOTO MANUAL MODE If the digital telephoto is used when FILE SIZE (number of pixels) is set to [1280 960], the image is recorded at 640 480 pixels. ( P.43) If FILE SIZE (number of pixels) is set to [640 480], the number of pixels recorded (the image size) does not change when the... -
Page 20: Setting The White Balance
MANUAL MODE : Automatic adjustment Subjects for Which Exposure Adjustment (Shooting to show the ambience of the is Particularly Effective light source) Positive (+) Compensation : Shooting outdoors in fine weather : Shooting in shade Copying of printed text (black : Shooting under “Daylight”... -
Page 21: Self-Timer Mode
SELF-TIMER MODE MANUAL MODE Beep Beep When you have finished the menu settings, Set the Mode dial to “ ”. press the “MENU / EXE” button to apply the settings. These settings are retained even when the camera is switched off. Press the shutter button to take the picture. -
Page 22: Setup Mode
SETUP MODE SELF-TIMER MODE The table below explains the camerasettings Settings Display Factory default Explanation You can select any of 3 levels of quality (recorded image QUALITY compression ratio), depending on the type of shot. The FINE/NORMAL/BASIC NORMAL (Image quality) standard number of available shots varies depending on the selected image quality ( P.78) . - Page 23 SETUP MODE Frame NO. Memory You can check the file number by viewing the Formatted SmartMedia used for both A and B. image. The last 4 digits of the 7-digit number Use “ ” and “ ” on the 4-way button to displayed in the top-right corner of the screen RENEW : Pictures are stored on each change and apply the settings (other than...
-
Page 24: Advanced Features Playback
Advanced ADVANCED PLAYBACK PLAYBACK ZOOM Features Playback DC IN 5V socket This section explains the advanced functions that If there is a power outlet nearby, use the AC-5V are available when the Mode dial is set to “ ”. AC Power Adapter (sold separately) to prevent All the explanations in this section assume that loss of power during image playback. -
Page 25: Multi-Frame Playback
PLAYBACK ( AUTOMATIC PLAYBACK ) MULTI-FRAME PLAYBACK PLAYBACK MENU Use “ ” and “ ” on the 4-way button to move the cursor (the orange frame) and select a frame. To zoom in on the selected image, press the “DISP” button again. Press the “DISP”... -
Page 26: Resize
RESIZE PLAYBACK MENU If “ ” is displayed, the size of the photographed image is not 1280 960 pixels. Only images shot with the FILE SIZE set to [1280 960] can be resized. Display the image you want to resize on the Select “... -
Page 27: How To Specify Print Options
The frames to be printed and the number of prints for each frame Imprinting of the date and time This section gives a detailed description of how to order your prints with the MX-1200. Note that some printers do not support date and time imprinting or specification of the number of prints. -
Page 28: Dpof Review/Cancel
DPOF REVIEW CANCEL DPOF SET FRAME PLAYBACK MENU PLAYBACK MENU You can use “ ” or “ ” to display the next frame and specify the number of prints. You can confirm the settings for only those Once the settings are complete, press the Select “REVIEW/CANCEL”. -
Page 29: Dpof Set All/Cancel All
PLAYBACK MENU DPOF REVIEW / CANCEL DPOF SET ALL CANCEL ALL PLAYBACK MENU The total number of prints is displayed on the LCD monitor and then the menu screen To cancel a print specification, display the image reappears. you want to cancel and press the “MENU/EXE” button. -
Page 30: Advanced Features Other
Advanced ERASING ALL FRAMES FORMATTING Features Other ERASE ALL This erases all of the images on the SmartMedia. The directories and protected images will not be erased. FORMAT Erases all the data on the SmartMedia and reformats (initializes) the card for use in the camera. -
Page 31: Setting And Removing Single-Frame Protection
SETTING AND REMOVING SINGLE-FRAME PROTECTION Select “FRAME”. When the “MENU/EXE” button is pressed, the When you set the Mode dial to “ ”, the menu Use “ ” or “ ” to select the image to be protected. image is protected and the “ ”... -
Page 32: Setting And Removing Protection For All Frames
SETTING AND REMOVING PROTECTION FOR ALL FRAMES SmartMedia Write-Protection Attaching a write-protect sticker to a SmartMedia ensures that you do not accidentally record or erase images or format the SmartMedia. Peeling off the sticker allows you to use the card normally again. -
Page 33: Pc Mode (Downloading Images To A Personal Computer)
System Expansion Options PC MODE ( DOWNLOADING IMAGES TO A PERSONAL COMPUTER ) By using the MX-1200 together with other optional Fujifilm products, your system can be expanded to fill a wide range of uses. TV monitor MX-1200 ( commercially available) -
Page 34: Accessories Guide
AC Power Adapter AC-5V Floppy Disk Adapter ( FlashPath ) Use the AC-5V when taking pictures for a long period of time or when the MX-1200 This adapter inoludes 2 same size and shape as a 3.5-inch floppy disk. You can copy is connected to a personal computer. -
Page 35: Explanation Of Terms
Places affected by smoke or steam that allows you to specify which of the frames shot using a digital camera are printed and how to a piece of Fujifilm lens cleaning paper and wipe gently. Places subject to strong magnetic fields (such as places near many prints are made of each image. -
Page 36: Notes On The Power Supply
MX-1200 because the heat generated by the When loading the batteries in the camera, ensure that the effective life and should be replaced. -
Page 37: Notes On The Smartmedia
This could subject the SmartMedia to this will make it impossible to use the SmartMedia in The SmartMedia card supplied with your MX-1200 When inserting the card into the camera, hold the camera is a new image recording medium developed SmartMedia straight as you push it in. -
Page 38: Warning Displays
Warning Displays The table below lists the warnings that are displayed on the LCD monitor. Explanation Remedy Remedy Warning Displayed Explanation Warning Displayed The camera battery is low on charge. Replace or recharge the battery. The frame number has reached 999- Switch the Frame No. -
Page 39: Troubleshooting
Troubleshooting Before you decide the camera is faulty, check the following once more Problem Cause Remedy Problem Cause Remedy No power • The battery is exhausted. • Load a new battery. I can’t use the flash to take • The shutter button was pressed when the •... -
Page 40: Specifications
Specifications Viewfinder This indicates the number of available frames shot System Input/Output Terminals Real Galileo type ; Frame coverage : 80% consecutively at room temperature with a flash use rate of 50%. Lens Model Digital (RS-232C) Note that these figures may vary depending on the ambient Fujinon fixed-focus f/4.5, f/11 Digital camera Stereo mini-jack (ø2.5mm) (1) for image data input/output... -
Page 41: Safety Notes
Safety Notes To ensure that you use your MX-1200 camera correctly, WARNING WARNING WARNING read these Safety Notes and your Owner’s Manual carefully beforehand. When a fault arises, switch the Never attempt modify Do not use the batteries except as... - Page 42 Safety Notes CAUTION CAUTION WARNING Do not use this camera in locations Do not cover or wrap the camera or If the battery leaks and fluid gets into your eyes or comes into contact with severely affected by oil fumes, steam, the AC power adapter in a cloth or humidity or dust.
- Page 43 26 - 30, Nishiazabu 2 - chome, Minato - ku, Tokyo 106 - 8620, Japan BB10366-200 ( 1 ) FGS-991108-Ni...
Need help?
Do you have a question about the MX-1200 and is the answer not in the manual?
Questions and answers