Table of Contents
Advertisement
Quick Links
Download this manual
See also:
Owner's Manual
MultiMAX Manual
changes for
ACC (accessory) port
version
The owner's manual included with
your purchase refers to the previous
US model of the MultiMAX. The
following adjustments should be
noted for proper operation of your
MultiMAX with ACC (accessory) port:
Pages 10 and 50:
The MultiMAX now connects to a
different AC adapter than pictured or
specified in the original manual.
To use your new MultiMAX on AC power you will need to get either a
PocketWizard 6-pin AC adapter (PN: PW-AC-3) or a special
PocketWizard adapting device to use a standard 2-pin AC adapter.
Please check with your dealer for availability of either the correct AC
adapter or the adapting device.
Page 27:
The original MultiMAX manual incorrectly states that a maximum of 30
triggers per second (also referred to as frames per second or FPS)
was obtainable.
This ACC (accessory) port version of the MultiMAX can obtain 30 FPS
when set correctly and used in conjunction with certain PocketWizard
products. For maximum frame rates and optimum settings please visit
the User Forum of our website at:
http://www.pocketwizard.com/
MultiMAX, ACC Version, Manual Change Revision 1.02 (LP602)
Advertisement
Table of Contents

Related Manuals for Pocket Wizard MultiMax


Summary of Contents for Pocket Wizard MultiMax
- Page 1 AC adapter than pictured or specified in the original manual. To use your new MultiMAX on AC power you will need to get either a PocketWizard 6-pin AC adapter (PN: PW-AC-3) or a special PocketWizard adapting device to use a standard 2-pin AC adapter.
- Page 3 T he PocketWizard MultiMAX is a m icrop roces sor-b ased radio slave s ystem that us es advan ced digital sig naling to inc reas e trigg ering rang e, reliability, an d rejec tion of radio noise from other sources.
- Page 4 FCC & IC Compliance Information W AR NIN G : Ch anges or mod ifications to this u nit not expres sly app roved by the p arty resp ons ible for c omp liance c ould void the u ser's authority to operate the eq uipm ent. NO TE : This equipm ent has been tested and found to comp ly with the limits for a Class B digital device, pursuant to Part 15 of the FCC R ules.
-
Page 5: Table Of Contents
T riggerin g M ultiple Flas hes W ith M ultiple R EC EIV E U nits ....17 Connecting MultiMAX (set for TRANS MIT mode) to Flash ....17 Stan dard R adio O peration . - Page 6 Men u S ystem ............24 Navigation .
- Page 7 O ther F eatures ............39 Keypad Lock .
-
Page 8: Icons Used In This Manual
Icons Used in this Manual Read the information following this icon. It shows important notes about the subject being discussed. Follow this icon for more detailed information on the subject in another section. Find valuable tips and techniques with this icon. Ref er to h tt p: // ww w .p oc k et wiz ar d. -
Page 9: Features
Features Communication Technology • Fu ll Digital R adio C omm unic ation • Microprocessor controlled • 32 digitally coded channels • Com plex 16 or 2 4 bit c oded s ignal • Selective Quad-Triggering Basic Features • Bu ilt-in hot sh oe •... -
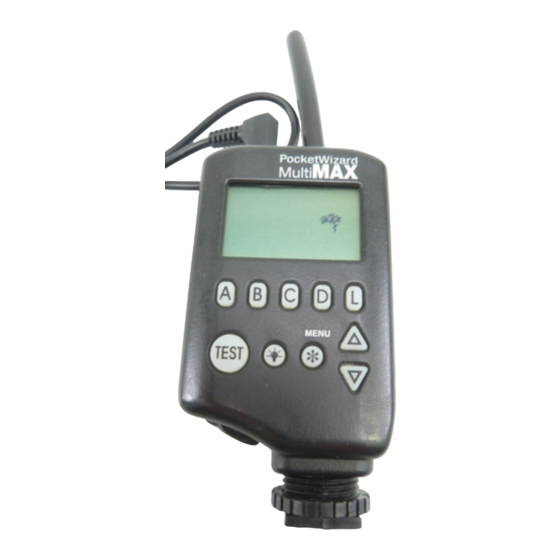
Page 10: Parts Designation
Parts Designation... -
Page 11: Lcd Information
LCD Information... -
Page 12: Controls
• and Local. Also used in menu navigation and num eric entry TEST • Triggers MultiMAX. Press to test operation or to trigg er rem ote units and/or attac hed c ameras /flash es • (Back Light) Illuminates LCD and keypad. -
Page 13: Getting Started
Battery Compartment Battery Life The MultiMAX displays remaining battery life with a 3 segment battery icon in the u pp er lef t c or ner of th e L C D : 3 s egm ents disp layed = batteries are fres h/new... -
Page 14: Lanyard
Expect only a 10 - 20% longer battery life (approximate) over Alkaline batteries when using Lithium batteries. Examine batteries frequently to prevent damage from leaking battery acid. Remove batteries from MultiMAX units in the following circumstances to avoid damage from leaking: •... -
Page 15: Care And Maintenance
Care and M aintenance To ensure continued reliability, please follow these guidelines: • D o n ot s u bjec t u nit s to h ig h m ec h an ic al s h oc k (d o n ot d rop ! ) •... -
Page 16: Quick Setup - Basic Radio Slave Operation
Use flash cable to connect flash unit’s sync terminal to FLASH / PORT 2 T urn both M ultiMA X un its on Set power switch on MultiMAX attached to camera to TRAN SMIT m ode Set power switch on MultiMAX attached to flash to REC EIVE mode... -
Page 17: Trig Gering M Ultiple Flashe S W Ith M Ultiple Re Ce Ive U Nits
F LA S H / P O R T 2 Set power switch on each additional MultiMAX unit to RECE IVE mode Set all Mu ltiMA X un its to s am e ch ann el as T R AN SM IT un it You ’re all s et! U se the camera n orm ally. -
Page 18: Standard Radio Operation
Transmitter (sending device) set the power switch to TRAN SMIT. To use the MultiMAX as a Receiver set the power switch to RECEIVE. T here is a s pec ial mode th at enables a Mu ltiMA X to autom atically switc h fr om RE CE IVE to TR AN SM IT then b ack to R EC EIV E w hile triggering a remote c amera. -
Page 19: Com Patibility
Co mp atibility MultiMAX channels are compatible with all PocketW izard radio slave products per the table below: Digital Radio Mo del M ultiM AX Co m pa tible Ch an ne ls Poc ketW izard 10 C han nel C lass ic... -
Page 20: Selective Quad-Triggering (A B C D Keys)
Zones : A, B , and L ocal Set one MultiMAX to TR ANS MIT mode Set up to 4 MultiMAX units to RECE IVE mode (sam e ch annel as T RA NS MIT unit) Us ing the A B C D L keys set each RECEIVE... -
Page 21: C Lass Ic C Han Nels
C lass ic C han nels C lass ic c han nels are c om patib le with early Poc ketW izard m odels an d the P ocketW izard P lus. Selec tive Q uad -T rigg ering is on ly available in channels 17 through 32. -
Page 22: True Confirmation
(either no flash was detected or the radio link was incomplete) the zone letter and the flash icon will invert A MultiMAX (set for TRA NSM IT mode) will look for REC EIVE units and confirm the radio link after each of these operations: •... -
Page 23: Confirmation (Radio And Flash)
Confirmation can only be performed using MultiMAX units on channels 17 and higher. PocketW izard Plus, Classic, and the original MAX do not perform confirmation. True Confirmation is designed to work with one MultiMAX (set for RECEIVE mod e) per zon e. Mu ltiple RE CE IVE units set to the s ame c hann el and zon e will not individually confirm and may cause incorrect confirmation errors. -
Page 24: Menu System
Menu System Navigation Man y functions of the M ultiMA X are acc ess ed throu gh eas y-to-navigate m enus . /M E N U to enter the menu system. Menu items are selected by using the Press A B C D L keys. /M E N U key performs two functions: W hile within th e men us the /M E N U return s you to th e main s creen... -
Page 25: Num Eric Entry
Num eric Entry Several menu items require a number or value to be entered. Numeric entry is performed with A B C D keys. T he A B C D keys each select and add 1 to a specific digit as follows: A –... -
Page 26: Main Menu
Main Menu /M E N U to enter the From the main screen press Main Men u. P ress a letter to either proceed to another menu or perform a function per the list below. /M E N U A A: Advanced M enu –... -
Page 27: Basic Settings
(set for TRAN SMIT m ode) will continuously send the radio trigger signal and hold the contact on a MultiMAX (set for RECE IVE) as well as the TR ANS MIT unit. W hen the TEST button is released each unit’s contact time will then begin. - Page 28 For trigg ering rem ote cam eras , a long er c ontac t tim e allows for c ontin uou s r epeatab le motor d rive triggering (examp le: 5 fram e burs ts every trigger ). It also allows for con trolled bulb exposu re.
-
Page 29: B: Beep Menu
Bee p C ha rac teris tic Indicates Sin gle Long Beep Indicates Trigger Confirmation error or remote MultiMAX (unit set for RECEIVE m ode) has reached zero count Dou ble Long Beep Indicates MultiMAX has reached zero count... -
Page 30: Counter Menu
/M E N U C enter the Counter Menu. This menu Press controls the counter functions of the MultiMAX. The cou nter c an s how th e total num ber of trig gers . It can also c oun t up or dow n f rom a set valu e. C oun t is... -
Page 31: C: C Lear / Res Et
(des ired nu mb er to start th e coun t from , whic h is th en loaded into the MultiMAX computer memory). The def ault value is 3 6. M aximu m value for the c oun ter is 9999. -
Page 32: Advanced Menu
/M E N U A to enter the A dvanced Me nu . T his Press menu contains the advanced functions of the MultiMAX. Precision timing and sequencing operations are available in this menu. R EC EIVE un it /M E N U D to cancel advanced functions... -
Page 33: B: R Em Otes O Nly
/M E N U A A B B: R em otes O nly – En ters the n um eric entry s cr een. D elays th e R adio rem ote un its on ly. PO R T 2 w ill trigger immediately. -
Page 34: A: Delay Menu - Receiver
/M E N U A A A: Delay Menu - RECEIVER – En ters th e delay menu for a M ultiMA X (s et for RE CE IVE mod e). Eac h R EC EIV E u nit can have its own d elay for seq uenc es or f or sync hronization . -
Page 35: C: E Qualize
Read the Camera Equalization section, Page 43 , before continuing. Equalize mode is designed to be used with at least 3 MultiMAX units (set in RECEIVE mode). Two or more MultiMAX units will be attached to cameras and one MultiMAX w ill b e attac hed to a f las h u nit. -
Page 36: B: Intervalom Eter ( T Im E Lap Se Photogr Aph Y)
A MultiMAX (set for TRANS MIT mode) does not send interval radio triggers. T he M ultiMA X (s et for T RA NS MIT mod e) will sen d out a s ingle radio trigg er puls e at the beg inning of the f irst interval only. -
Page 37: C: M Ultipop
For delays longer than the 6.4 seconds (maximum available in delay modes) use Intervalometer or Multipop mode. Set the interval to the desired delay. Set the count to 1. A ttac h your cam era to P O R T 1 an d trig ger th e M ultiM AX . T he c am era will trigg er aft er the set in terval. -
Page 38: D: Speedcycler - Transmitter
Set each MultiMAX (set for RECEIVE m ode) to a different zone Trigger the MultiMAX (set for TRA NSM IT mode). The first trigger will fire the first zone selected, the second trigger will fire the next zone selected. The display indicates the next zone to trigger with an arrow. -
Page 39: D: Fast Mode - Receiver
A MultiMAX (set for RECE IVE mode) in fast mode will show FAST M OD E on the display. W hile in this mode Quad-Triggering and Relay Mode are not available and the A B C D L keys perform no fu nc tion on a R EC EIV E u nit. -
Page 40: Relay Mode
Transmits Channel 20 Set a MultiMAX to TRAN SMIT m ode and select the channel and zones for the remote f lash u nits Set th e sam e Mu ltiMA X to R EC EIV E m ode and selec t the ch annel and zone for the remote camera. -
Page 41: Applications Of Advanced Functions
The applications below are unique ways to use the advanced functions of the MultiMAX. Many of them require fine-tuning or adjustment to work with different cam era equip men t. Alw ays perf orm tes t exposu res to ins ure reliable res ults. -
Page 42: Programmed Sequence Shooting
This may cause the flash to overheat. Use Multipop Mode to protect the flash by setting a safe recycle lockout time. Follow the steps below: /M E N U A C On a MultiMAX (set for RECEIVE mode) press /M E N U Enter the desired recycle lockout time and press... -
Page 43: Camera Equalization
Camera Equalization Eq ualization, or syn ch ronizing mu ltiple cam eras to th e sam e flash , requires prec ision timing . Even th ough we perc eive camer a triggering activity as ins tantaneous , it is not. Even th e flash , whic h app ears to p rovide light only for an instan t, has a tim e duration (flash duration) that needs to be factored into synchronization calculations. -
Page 44: Lag Time Measurement
Us ing the in form ation above set u p your c amera f or bes t equalization per form anc e. Attach a MultiMAX (set for RECEIVE mode) to the camera as follows: Plac e a M ultiM AX in the cam era’s hot s hoe or attac h a c able f rom the c am era’s P C term in al to P O R T 1 Attac h the c able from PO RT 2 to the c amera’s motor d rive. - Page 45 Speed is not the most important factor in camera equalization, consistency is. If a slow c amera h as extrem ely cons istent lag tim es it will be a better eq ualization can didate than a faster but inc ons istent c amera. T he reas on wh y it is imp ortant to know the ap proxim ate fas test lag tim e for a c am era, es pec ially an inc ons isten t one, is to calculate margin of error (discus sed later in this section).
- Page 46 If your c amera’s maxim um sync sp eed is s lower than the nu mb er listed th en you mu st u se th e slower s ync s peed. C amera eq ualization does not give a cam era fas ter sync sp eeds than th e cam era is des igned to h andle.
-
Page 47: O Ne U Nit Eq Ualization
Attac h the s lower c amera’s motor d rive to PO RT 2 on th e T RA NS MIT unit. D o not leave the MultiMAX (set for TRAN SMIT m ode) in the hot shoe or have the PC termin al attached to PO RT 1 as this m ay caus e a looping or loc k-up situation Attach the f aste r c am era’s mo tor dr ive to either P O R T on th e R EC EIVE un it... - Page 48 If using both Mu ltiMA X units as R EC EIVE units being triggered by any PocketW izard Transmitter follow these steps: Set both units to REC EIVE mode Measure lag times of cameras as previously described and record the fastest lag for each D eterm ine w hic h c am era is fas ter and w hic h is slow er overall D e ter m in e th e d elay tim e...
-
Page 49: Eq Ualization Adjus Tmen Ts
Eq ualization A djus tmen ts W ith all the variable factors above it may seem that perf ormin g the m ath nec ess ary for equalization is daunting. Here are some techniques for fine- tuning or adjusting equalization times without using specific math: On some 35m m c ameras you can gauge timing without using film. -
Page 50: Technical Information
T his is not con trollable by the L key. W hile the device may trigger in sync with the shutter, it will not be controlled by the MultiMAX. If the device is a high voltage flash unit then the MultiMAX does not provide voltage protection to the camera in this situation. -
Page 51: Radio Information
3 49 .0 0 M H z 3 49 .5 0 M H z 24 B it 3 50 .0 0 M H z MultiMAX and MAX only (20 Bit in 3 50 .5 0 M H z FAST MODE) 3 51 .0 0 M H z... -
Page 52: Maximum And Minimum S Ettings
M aximum and M inimum Settings The following table details the maximum and minimum values allowed for each numeric entry setting available in the MultiMAX. Setting M axim um M inimum C o nt ac t T im e 640 .00 s econ ds or .01 seconds... -
Page 53: Troubleshooting
Troubleshooting W hen in dou bt ! Many issues can be resolved by powering the unit off and then back on again or by resetting to factory default settings. Before proceeding to any other troubleshooting procedure follow these steps: Set power to OFF W ait 10 second s or until display completely blanks Set p ower to R EC EIV E or T RA NS MIT Reset to Default Factory Settings... -
Page 54: Radio Performance
Radio Performance The MultiMAX is an advanced digital radio system. Its true digital technology guarantees optimum interference rejection while maintaining high performance. As with all radio devices (c ell phones, walkie talkies, cordless s ound systems ) there are som e situations wher e perform anc e may be d egraded by outs ide fac tors. F or... -
Page 55: Time Conversion Charts
Time Conversion Charts Frac tions to D ecim al: Here are some comm on photographic fractions in decimal values. All numbers are rounded to the nearest .0001 or 1/10,000th. T hes e times are not R ear C urtain S ync tim es. T hes e are prec ision n um bers . Rear Curtain Sync numbers are always less than the exact conversions.
Need help?
Do you have a question about the MultiMax and is the answer not in the manual?
Questions and answers