Advertisement
Advertisement
Table of Contents

Related Manuals for Kicker SX400.2


Summary of Contents for Kicker SX400.2
- Page 2 Kicker to vali- This installation manual contains valuable infor- date your warranty.
-
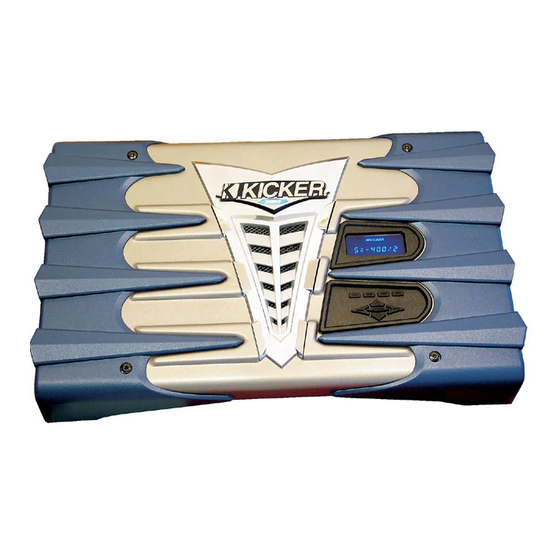
Page 3: Vfd Display
AMP1 AMP2 LOCK LEFT RIGHT MUTE GAIN EQ LPF HPF PHASE KOMP kicker AMP2 MEM-1 MEM-2 MEM-3 MEM-4 Only available in four channel amps. - Indicates the amplifier controls are locked out and LOCK not usable. - Page 4 SX .2 Series Amplifiers Mounting Remove When selecting a location to mount your Kicker amplifier be sure it is structurally sound and that there are no items behind the area that could be damaged by the screws. Check for wiring, brake lines, fuel lines, gas tanks, etc.
-
Page 5: System Diagrams
Hi-Lo level signal power connection to the battery. Adding an additional ground adapter. See your Kicker dealer for more details on this. wire between the car battery’s negative post and the car chas- sis of this same gauge (or larger) is also recommended. - Page 6 BATTERY HOME These are just a few of the many ways you can use your SX.2 series Kicker amplifier. These system diagrams are designed to give you a basic understanding of the most com- mon uses for this amplifier. For more complex systems please visit your local authorized Kicker dealer.
-
Page 7: Navigation
BLAST input jack of the next amplifier. SX .2 Series Amplifiers BACK VIEW Mounting Surface Your KICKER SX series amplifier uses the latest in Digital DSP SIDE VIEW control and provides you with valuable operational informa- tion about your amplifier, real-time diagnostics and a full multi-level menu-driven operating system to access and adjust your amplifier. -
Page 8: Up And Down
This information scrolls through the display one after the other and then repeats. - Hey, we needed a brand plug for us since this KICKER amp is sooooo cool! - Displays the current voltage at the XX.X Volts amplifier’s + 12 volt battery input terminal. - Page 9 HOME Amp Name - Here you can assign a unique name to your KICKER SX amplifier. This name will replace the model 7c.) PINK NOISE is a built in pink noise generator name in the DEFAULT screen. If you change your mind and...
- Page 10 10.) Mem Name - Here you can change the names of the Remote Adr memory locations. The factory defaults are reserved for future expansion. 11.) Memory-1 Gain Range UltraMatch gain control. Possible choices are: Memory-2 Memory-3 HOME Memory-4 Select the one closest to the maximum RCA input voltage you expect to send to the amplifier.
- Page 11 16.) Reset Amp - This option resets all adjustable Now use the settings back to their original factory defaults. to increase or decrease the gain of the selected channel(s) in .5 dB Use the DOWN keys to increments from 0 dB to +12 dB. select SKIP RESET DO RESET...
- Page 12 HOME one you want to adjust. The KICKER SX amplifier monitors and prevents any low pass crossover point from being any closer than 1/3 octave from selects the crossover point and can be set at any the high pass crossover point. If you cannot set the low pass...
- Page 13 MENU - Here you can switch the polarity of each MENU - Here you can mute each channel(s) output for Phase Mute channel(s) output between 0 or 180 setup or testing purposes. degrees. Press the Press the key to enter the HOME MUTE menu.
- Page 14 You will need to call KICKER directly at (405) 624-8583 to handle this situation. You will need your amplifier’s serial number AND your receipt as the guys and gals answering the and then return you to screen.
-
Page 15: Memory Presets
Memory-4 sets the amplifier up for mid-bass duty. Perfect MEMORY-1 MEMORY-2 MEMORY-3 MEMORY-4 for a set of KICKER mid-bass drivers. 6 DB 6 DB 6 DB... -
Page 16: Troubleshooting
Other S S ymptoms: Amp is very hot, no output. There are two LEDs on the end panel of your KICKER SX series amplifier, one green and one red. The green LED indi- verify. Check for proper impedance at speaker cates the amplifier is turned on. - Page 17 @ 14.4V, 4Ω Mono, 1% THD Length With EndKaps setting is really geared for bass and midbass Fusing Recommended Power & Ground Wire Performance Model SX400.2 SX500.2 SX600.2 88 x 2 113 x 2 138 x 2 175 x 2...
-
Page 18: What Is Not Covered
“B B S S t t o o c c k k ” it is warranted for 9 9 0 0 D D A A Y Y S S from date of original purchase with receipt. If labeled “B B S S t t o o c c k k ” and purchased from an Authorized KICKER Dealer, it is warranted for O O N N E E ( ( 1 1 ) ) Y Y E E A A R R from date of purchase with receipt. - Page 19 Notes Pizza Delivery SX .2 Series Amplifiers SX .2 Series Amplifiers...
- Page 20 Chic’s Numbers Hook Ups SX .2 Series Amplifiers SX .2 Series Amplifiers...
Need help?
Do you have a question about the SX400.2 and is the answer not in the manual?
Questions and answers