Table of Contents
Advertisement
Advertisement
Table of Contents

Subscribe to Our Youtube Channel
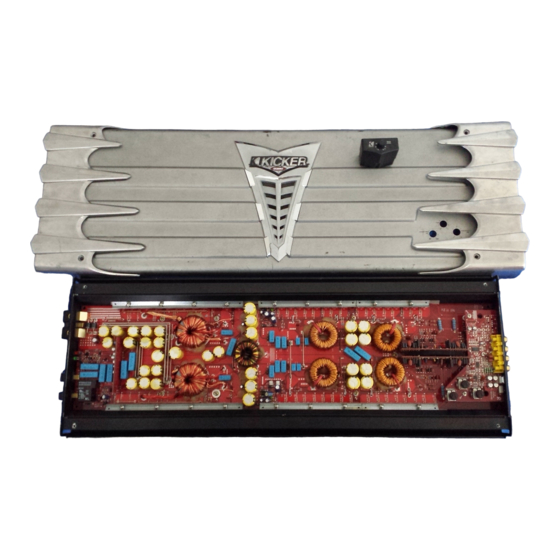
Summary of Contents for Kicker KX2500.1
- Page 2 If you require service on this amplifier during the warranty period, you will need to provide this information and a copy of the receipt to Kicker to validate your warranty. ALWAYS KEEP YOUR RECEIPT! _____________________________________________...
- Page 3 Can be prepped and painted any custom color you choose. Big Toothy Grin Expression on your face as you and your friends admire this ‘surfboard’ in your trunk. Two Year Warranty KICKER dealer. KX2500.1 Amplifier Assure Dash or center console When purchased from an Authorized...
- Page 4 NOTE: Objects in the manual are larger than they appear! Pictures and diagrams of the massive KX2500.1 in this manual are not to scale...this was done to prevent having a manual the size of your average wakeboard.
- Page 5 + 12 volt source in your vehicle. Model KX2500.1 To Chassis Ground Remote Turn-On To + Post On Battery KX2500.1 Amplifier Fuse Size Wire Gauge 300 Amp 1/0 Ga To Speaker - Terminal LED Status...
-
Page 6: Main Battery
We recommend using Genuine Kicker Installation Accessories. Visit your local dealer or visit www.Kicker.com to learn more. Kicker highly recommends the following: An alternator with a minimum 140 amp output capacity. - Page 7 MONO CHANNEL OPERATION The KX2500.1 amplifier is capable of operating into a minimum impedance of 2 ohms (Ω). If you are using a single voice coil woofer be sure the impedance of the voice coil is equal to or greater than 2Ω. If using dual voice coil subwoofer or driving multiple subwoofers, be sure the net impedance presented to the amplifier is at least 2Ω...
- Page 8 This diagram shows how to power a single Dual Voice Coil (DVC) subwoofer using two KX2500.1 amplifiers. For maximum power output from your KX2500.1 to the subwoofer each voice coil should be 2Ω impedance. Do not connect to voice coils with an impedance lower than 2Ω!
-
Page 9: Two Subwoofers
Two 4Ω SVC - Parallel Wired Coil Coil Coil Coil Single 4Ω DVC - Parallel Wired Coil 1 Two 2Ω DVC - Series/Parallel Wired Coil 2 Coil 1 KX2500.1 Amplifier Coil 2 Coil 2 Coil 1 Coil 2 Coil 1... - Page 10 Voice Coil (DVC) subwoofers. Four 8Ω SVC - Parallel Wired Coil Coil Coil Coil Four 4Ω DVC - Series/Parallel Wired Coil 2 Coil 2 Coil 1 Coil 1 Coil Coil Coil 2 Coil 1 KX2500.1 Amplifier Coil Coil Coil 2 Coil 1...
-
Page 11: Remote Bass Level Control
Run the cable from the controller to the remote (REMOTE BASS) jack on the amplifier chassis. When using more than one KX2500.1 amplifiers you have the ability to control all of them from one Remote Bass Level Control. -
Page 12: Input Gain Control
Navigation Your Kicker amplifier has three rotary controls on top and one switch on the end panel. These controls ensure the reliability and performance of the amplifier, so they need to be set correctly. SUBSONIC FILTER SWITCH NEVER CHANGE THE SUBSONIC FILTER SWITCH SETTING... -
Page 13: Troubleshooting
There are two LEDs on the end panel of your Kicker KX series amplifier, one green and one red. When the green LED is lit this indicates the amplifier is turned on and no trouble exists. - Page 14 Variable 0 to +18 dB boost @ 40 Hz Subsonic Filter: 12 dB/octave High Pass @ 25 Hz NOTE: All specifications and performance figures are subject to change. Please visit the support section at www.kicker.com for the most current information. Performance 1 x 1500...
-
Page 15: What Is Not Covered
ELECTRONICS LIMITED WARRANTY Kicker warrants this product to be free from defects in material and workmanship under normal use for a period of THREE (3) MONTHS from date of original purchase with receipt. When purchased from a Authorized KICKER Dealer it is warranted for TWO (2) YEARS from date of original purchase with receipt.


Need help?
Do you have a question about the KX2500.1 and is the answer not in the manual?
Questions and answers