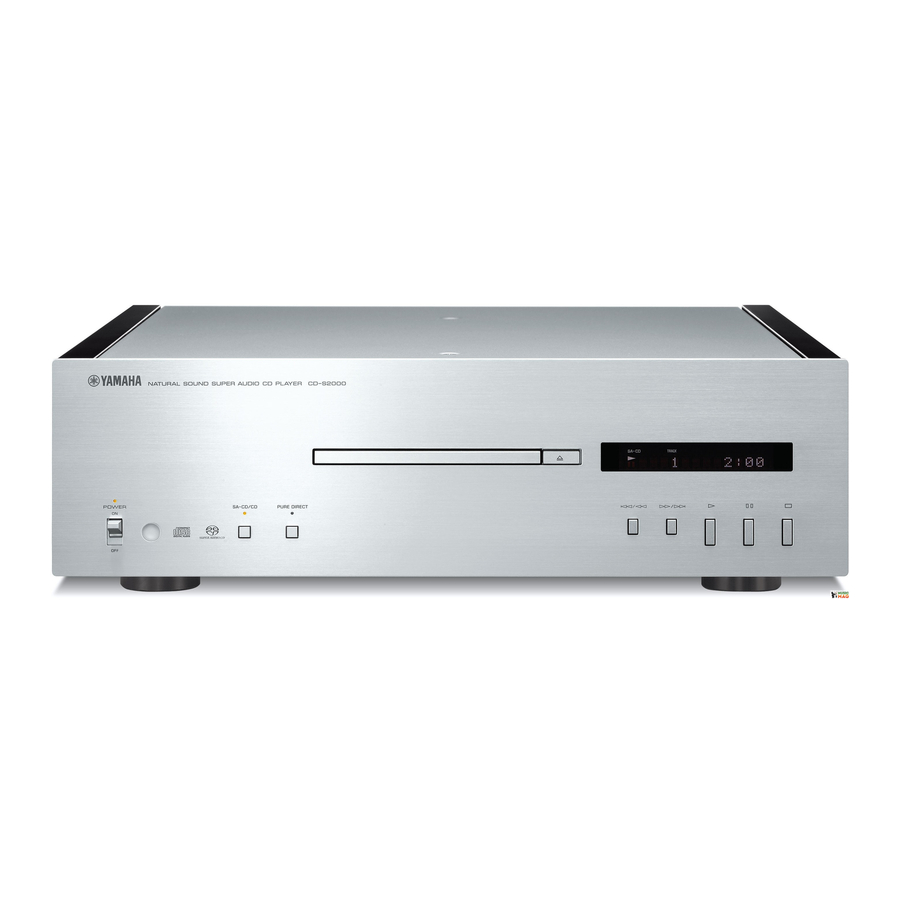
Yamaha CD-S2000 Owner's Manual
Super audio cd player lecture super audio cd
Hide thumbs
Also See for CD-S2000:
- Service manual (59 pages) ,
- User manual (30 pages) ,
- Owner's manual (29 pages)
Table of Contents
Advertisement
Available languages
Available languages
Quick Links
Advertisement
Chapters
Table of Contents

Related Manuals for Yamaha CD-S2000


Summary of Contents for Yamaha CD-S2000
- Page 1 UCAB OWNER’S MANUAL MODE D’EMPLOI...
- Page 2 HiFi Began with Yamaha Yamaha’s involvement with and passion for music goes back more than a century, to when we built our first reed organ in 1887. Now we are the world’s leading producer of pianos and other musical instruments, and are involved with music in many other ways as well.
- Page 3 MX-10000 Power Amplifier and CX-10000 Control Amplifier Redefined the capabilities of separate components. AX-1 Integrated Amplifier GT-CD1 CD Player MX-1 Power Amplifier and CX-1 Preamplifier Soavo-1 and Soavo-2 Natural Sound Speaker Systems A-S2000 Stereo Amplifier and CD-S2000 Super Audio CD Player...
-
Page 4: Table Of Contents
Full-stage balanced signal transmission achieves the ultimate in CD reproduction Full-stage balanced signal transmission beginning with the DAC Exclusive Yamaha loading mechanism with superior quietness Independent power supplies with digital and analog completely separated Pure Direct Left-right symmetrical design with rigid, stable construction... -
Page 5: Controls And Functions
CONTROLS AND FUNCTIONS Controls and functions In this chapter, you will learn the controls and functions of CD-S2000. - Page 6 Controls and functions Front panel POWER SA-CD/CD PURE DIRECT 1 POWER 4 PURE DIRECT Press upward or downward to turn on or off this unit. Turns on the PURE DIRECT mode to improve audio quality. When this unit is in the PURE DIRECT mode: The POWER indicator above lights up when this unit is turned •...
- Page 7 SA-CD TRACK TOTAL REMAIN PROG RANDOM (Open/Close) (Stop) Opens or closes the disc tray. Stops playback. A Playback status indicator You can also close the disc tray by: B Disc type indicator • pressing (Play) on the front panel or on the remote control or by pressing the front edge of the disc tray gently.
- Page 8 Controls and functions Rear panel OUTPUT BALANCED OUT ANALOG OUT BALANCED OUT OPTICAL COAXIAL DIGITAL OUT See page 14 for connection information. 1 BALANCED OUT jacks 2 ANALOG OUT jacks 3 OPTICAL DIGITAL OUT jack 4 COAXIAL DIGITAL OUT jack...
- Page 9 (Asia and General models) VOLTAGE SELECTOR AC IN 5 VOLTAGE SELECTOR 7 Foot (Asia and General models only) The feet of this unit include built-in spikes. Using the spikes can reduce the effect of vibrations on the set. When The VOLTAGE SELECTOR on the rear panel of this unit using the spikes, remove the magnet foot by pulling it.
- Page 10 Controls and functions 1 Infrared signal transmitter Remote control Sends infrared signals to this unit. 2 SA-CD/CD Switches the playback layer of a hybrid SA-CD between SA-CD and CD. SA-CD/CD PURE DIRECT OPEN/CLOSE • The SA-CD/CD indicator on the front panel lights up when the SA-CD layer is selected.
- Page 11 8 OPEN/CLOSE (Pause) Opens or closes the disc tray. Pauses playback. Press to resume playback. 9 PURE DIRECT (Play) Turns on the PURE DIRECT mode to improve audio Starts playback. quality. (Stop) When this unit is in the PURE DIRECT mode: Stops playback.
- Page 12 Controls and functions Installing batteries in the remote control Using the remote control The remote control transmits a directional infrared beam. Be sure to aim the remote control directly at the remote control sensor on the front panel of this unit during operation.
-
Page 13: Connections
CONNECTIONS Connections In this section, you will make connections between CD-S2000 and your amplifier. - Page 14 Connections OUTPUT BALANCED OUT ANALOG OUT BALANCED OUT OPTICAL COAXIAL DIGITAL OUT Select one of these connections. If your amplifier is equipped with XLR balanced input jacks, we recommend balanced connection for optimum audio performance. Amplifier...
- Page 15 AC IN Connecting to the BALANCED OUT jacks Connect your amplifier with the XLR balanced output When connecting, be sure to match the pins and insert the jacks. The pin assignments for these jacks are shown connector of the “female” XLR balanced cable. When below.
- Page 16 Connections VOLTAGE SELECTOR (Asia and General models only) Caution The VOLTAGE SELECTOR on the rear panel of this unit must be set for your local voltage BEFORE plugging the power cable into the AC wall outlet. Improper setting of the VOLTAGE SELECTOR may cause damage to this unit and create a potential fire hazard.
-
Page 17: Specifications
Specifications In this section, you will find technical specifications for CD-S2000. - Page 18 Specifications AUDIO SECTION Taking care of this unit • Frequency Response When you wipe this unit, do not use chemical solvents SA-CD ............. 2 Hz to 50 kHz (–3 dB) CD ................. 2 Hz to 20 kHz (ex. alcohol or thinner etc.); this might damage the finish.
-
Page 19: Playable Disc Format
Playable disc format Supported disc types CD-R, CD-RW digital audio discs This unit is designed to play back compact discs bearing the marks shown below. Never attempt to load any other types of discs into this unit. This unit can also play back 8- cm (3-inch) compact discs. - Page 20 Playable disc format About MP3 and WMA discs Handling compact discs You can play back MP3 and WMA files recorded on a • Always handle a disc with care so that its surface is not CD-R or CD-RW with similar uses as a music CD. scratched.
-
Page 21: Troubleshooting
Refer to the chart below if this unit does not function properly. If the problem you are experiencing is not listed below or if the instructions below do not help, turn off this unit, disconnect the AC power cable, and contact the nearest authorized Yamaha dealer or service center. Problem... - Page 22 La Hi-Fi doit ses débuts à Yamaha La passion de Yamaha pour la musique remonte à plus d’un siècle, plus exactement à 1887, l’année où nous avons conçu notre première orgue à anche. Actuellement, nous sommes le principal producteur de pianos et d’instruments de musique au monde, et nous sommes impliqués de...
- Page 23 Devenue une des enceintes de studio les plus populaires au monde. Amplificateur intégré A-1 Tourne-disque PX-2 Le premier tourne-disque à bras droit de Yamaha. Amplificateur de puissance B-6 Amplificateur de puissance pyramidal. Tourne-disque GT-2000/L Premier lecteur de CD (CD-1) commercialisé en1983...
- Page 24 Transmission symétrique du signal sur tous les étages pour une reproduction exceptionnelle des CD. Transmission du signal symétrique à tous les étages à partir du convertisseur N/A Lecteur CD de haute précision et à chargeur silencieux Sources d’alimentation indépendantes avec numérique et analogique complètement séparés.
-
Page 25: Commandes Et Fonctions
COMMANDES ET FONCTIONS Commandes et fonctions Ce chapitre décrit les commandes et fonctions du CD-S2000. - Page 26 Commandes et fonctions Panneau avant POWER SA-CD/CD PURE DIRECT 1 POWER 4 PURE DIRECT Appuyez vers le haut ou le bas pour mettre cet appareil Met en service le mode PURE DIRECT pour améliorer la sous ou hors tension. qualité du son. Lorsque cet appareil est en mode PURE DIRECT: •...
- Page 27 SA-CD TRACK TOTAL REMAIN PROG RANDOM (Ouverture/Fermeture) (Arrêt) Ouvre ou ferme le tiroir de disque. Arrête la lecture. A Témoin du mode de lecture Vous pouvez aussi fermer le tiroir de disque en: B Témoin du type de disque • appuyant sur (Lecture) sur l’afficheur du panneau avant ou sur le boîtier de télécommande, ou bien en appuyant doucement C Témoin du mode d’affichage du temps...
- Page 28 Commandes et fonctions Panneau arrière OUTPUT BALANCED OUT ANALOG OUT BALANCED OUT OPTICAL COAXIAL DIGITAL OUT Voir page 14 en ce qui concerne les raccordements. 1 Prises BALANCED OUT 2 Prises ANALOG OUT 3 Prise OPTICAL DIGITAL OUT 4 Prise COAXIAL DIGITAL OUT...
- Page 29 (Modèle pour l’Asie et modèle Standard) VOLTAGE SELECTOR AC IN 5 VOLTAGE SELECTOR 7 Pied (Modèle pour l’Asie et modèle Standard Les pieds de cet appareil sont pourvus de crampons. Utilisez ces crampons pour réduire l’effet des vibrations seulement) sur l’appareil. Si vous utilisez les crampons, retirez le pied Vous devez régler le sélecteur VOLTAGE SELECTOR à...
- Page 30 Commandes et fonctions 1 Émetteur de signal infrarouge Boîtier de télécommande Envoie les signaux infrarouges à cet appareil. 2 SA-CD/CD Sélectionne la couche de lecture SA-CD ou CD d’un SA-CD hybride. SA-CD/CD PURE DIRECT OPEN/CLOSE • Le témoin SA-CD/CD sur le panneau avant s’allume lorsque la couche SA-CD est sélectionnée.
- Page 31 8 OPEN/CLOSE (Pause) Cette touche ouvre ou ferme le tiroir de disques. Met la lecture en pause. Appuyez sur pour poursuivre la lecture. 9 PURE DIRECT Met en service le mode PURE DIRECT pour améliorer la (Lecture) qualité du son. Active la lecture.
- Page 32 Commandes et fonctions Mise en place des piles dans le boîtier Utilisation du boîtier de télécommande de télécommande Le boîtier de télécommande émet un faisceau infrarouge étroit. Veillez à le pointer directement sur le capteur de télécommande de l’appareil pour en assurer le fonctionnement.
-
Page 33: Raccordements
PROG RANDOM Raccordements 1 Témoin du type de disque Dans cette section, vous allez raccorder le CD-S2000 à votre amplificateur. S’allume selon le type de disque. 2 Témoin du mode d’affichage du temps S’allume selon le mode d’affichage du temps. - Page 34 Raccordements OUTPUT BALANCED OUT ANALOG OUT BALANCED OUT OPTICAL COAXIAL DIGITAL OUT Sélectionnez un de ces raccordements. Si votre amplificateur est muni de prises d’entrée symétriques XLR, nous vous conseillons le raccordement symétrique pour obtenir le meilleur son possible. Amplificateur...
- Page 35 AC IN Raccordement aux prises BALANCED OUT Raccordez votre amplificateur aux prises de sortie Lors du raccordement, veillez à bien aligner les broches et symétriques XLR. Les broches se répartissent de la façon insérer la fiche symétrique XLR “femelle”. Pour suivante pour ces prises.
- Page 36 Raccordements VOLTAGE SELECTOR (Modèle pour l’Asie et modèle Standard seulement) Avertissement Le sélecteur VOLTAGE SELECTOR placé sur le panneau arrière de cet appareil doit être convenablement positionné AVANT de brancher la fiche du câble d’alimentation secteur. Un mauvais réglage du sélecteur VOLTAGE SELECTOR peut endommager l’appareil et créer un risque d’incendie.
-
Page 37: Caractéristiques Techniques
Caractéristiques techniques Dans cette section vous trouverez les caractéristiques techniques du CD-S2000. - Page 38 Caractéristiques techniques SECTION AUDIO Entretien de cet appareil • Réponse en fréquence Pour essuyer cet appareil n’utilisez pas de solvants SA-CD ............2 Hz à 50 kHz (–3 dB) CD ................2 Hz à 20 kHz chimiques (alcool ou diluant, etc.) qui risqueraient d’endommager la finition.
-
Page 39: Formats De Disques Lisibles
Formats de disques lisibles Types de disques pris en charge Disques audio numériques CD-R, CD-RW Cet appareil peut lire les disques compacts portant les logos suivants. N’essayez jamais de mettre d’autres types de disques dans cet appareil. Cet appareil peut également lire les disques compacts de 8 cm. - Page 40 Formats de disques lisibles À propos des disques MP3 et WMA Maniement des disques compacts Vous pouvez lire les fichiers MP3 et WMA enregistrés sur • Toujours manier un disque avec précaution de manière un CD-R ou CD-RW de la même façon qu’un CD de à...
-
Page 41: Guide De Dépannage
Reportez-vous au tableau suivant si l’appareil ne fonctionne pas comme il devrait. Si l’anomalie constatée n’est pas mentionnée, ou encore si les actions correctives suggérées sont sans effet, mettez l’appareil hors service, débranchez la fiche du câble d’alimentation secteur et prenez contact avec le revendeur ou le service après-vente agréé Yamaha le plus proche. Voir la... - Page 42 Printed in Malaysia WM15690-1 © 2007 Yamaha Corporation All rights reserved.
- Page 43 UCAB Super Audio CD Player Lecteur Super Audio CD SAFETY BROCHURE BROCHURE SUR LA SECURITE...
-
Page 44: Important Safety Instructions
We Want You Listening For A Lifetime Yamaha and the Electronic Industries Association’s Consumer Electronics Group want you to get the most out of your equipment by playing it at a safe level. One that lets the sound come through loud and clear without annoying blaring or distortion –... - Page 45 Modifications not expressly approved by following measures: Yamaha may void your authority, granted by the FCC, to use the product. Relocate either this product or the device that is being affected by the interference.
- Page 46 Please act according to your local rules cause fire, damage to this unit, and/or personal injury. Yamaha and do not dispose of your old products will not be held responsible for any damage resulting from use with your normal household waste.
- Page 47 (http://www.yamaha-hifi.com/ or http://www.yamaha-uk.com/ for U.K. resident). The product is guaranteed to be free from defects in workmanship or materials for a period of two years from the date of the original purchase. Yamaha undertakes, subject to the conditions listed below, to have the faulty product or any part(s) repaired, or replaced at Yamaha’s discretion, without any charge for parts or labour.
- Page 48 Comme les sons trop forts causent des lésions auditives qui ne peuvent être détectées qu’à long terme, lorsqu’il est trop tard, Yamaha et le Groupe des Entreprises Électroniques...
- Page 49 FCC. Ces normes sont destinées à assurer une protection commercialiser ce type de produit. Si ce n’est pas possible, suffisante contre les interférences nuisibles avec d’autres prière de contacter Yamaha Electronics Corp., États-Unis, appareils électroniques dans une installation résidentielle. 6660 Orangethorpe Ave., Buena Park, CA 90620.
- Page 50 Alimenter l’appareil sous une tension plus élevée est européenne 2002/96/EC. dangereux et peut être responsable d’incendie, de dommage à l’appareil ou de blessure corporelle. Yamaha ne saurait être Ce symbole indique que l’élimination des tenue responsable des dommages résultant de l’alimentation équipements électriques et électroniques en...
- Page 51 Web (http://www.yamaha-hifi.com/ ou http://www.yamaha-uk.com/ pour les résidents au Royaume-Uni). Ce produit est garanti contre les vices de fabrication et de matériaux pour une période de deux ans à compter de la date d’achat originale. Yamaha réparera, ou remplacera à...
- Page 52 YAMAHA ELECTRONICS (UK) LTD. YAMAHA HOUSE, 200 RICKMANSWORTH ROAD WATFORD, HERTS WD18 7GQ, ENGLAND YAMAHA SCANDINAVIA A.B. J A WETTERGRENS GATA 1, BOX 30053, 400 43 VÄSTRA FRÖLUNDA, SWEDEN YAMAHA MUSIC AUSTRALIA PTY, LTD. 17-33 MARKET ST., SOUTH MELBOURNE, 3205 VIC., AUSTRALIA...
Need help?
Do you have a question about the CD-S2000 and is the answer not in the manual?
Questions and answers