Kenwood KRF-A4030 Instruction Manual
Kenwood audio receiver instruction manual
Hide thumbs
Also See for KRF-A4030:
- Service manual (22 pages) ,
- Instruction manual (19 pages) ,
- Instruction manual (18 pages)
Table of Contents
Advertisement
AUDIO RECEIVER
KRF-A4030
INSTRUCTION MANUAL
About the supplied remote control (RC-R0708) . . .
Compared to standard remote controls, the remote control supplied with this receiver has
several operation modes. These modes enable the remote control to control other audio
components. In order to effectively use the remote control it is important to read the
operating instructions and obtain a proper understanding of the remote control and how to
switch its operation modes (etc.).
Using the remote control without completely understanding its design and how to switch
the operation modes may result in incorrect operations.
B60-4557-00 (EN)
Advertisement
Table of Contents

Related Manuals for Kenwood KRF-A4030


Summary of Contents for Kenwood KRF-A4030
- Page 1 AUDIO RECEIVER KRF-A4030 INSTRUCTION MANUAL About the supplied remote control (RC-R0708) . . . Compared to standard remote controls, the remote control supplied with this receiver has several operation modes. These modes enable the remote control to control other audio components.
-
Page 2: Preparations
Before applying the power Units are designed for operation as follows. Europe and U.K..AC 230 V only Russia ... AC 220 V only Safety precautions WARNING : TO PREVENT FIRE OR ELECTRIC SHOCK, DO NOT EXPOSE THIS APPLIANCE TO RAIN OR MOISTURE. CAUTION RISK OF ELECTRIC SHOCK DO NOT OPEN... -
Page 3: Table Of Contents
Remote controllable audio function By connecting KENWOOD source components such as a cassette deck and CD player through system control connec- tion, the basic operations of these components can be con- trolled from the remote control unit provided with this unit. -
Page 4: Setting Up The System
Setting up the system Make connections as shown below. When connecting the related system components, be sure to also refer to the instruction manuals supplied with the components you are connecting. Do not connect the power cord to a wall outlet until all connections are completed. -
Page 5: Connecting The Antennas
Connecting the antennas AM Antenna terminal connections 1 Push lever. 2 Insert cord. AM loop antenna The supplied loop antenna is for use indoors. Place it as far as possible from the receiver, TV set, speaker cords and power cord, and adjust the direction for best reception. FM indoor antenna The supplied indoor antenna is for temporary use only. -
Page 6: Connecting The System Control
2. Do not connect system control cords to any components other than those specified by KENWOOD. It may cause a malfunction and damage your equipment. 3. Be sure the system control plugs are inserted all the way in to the system control terminals. -
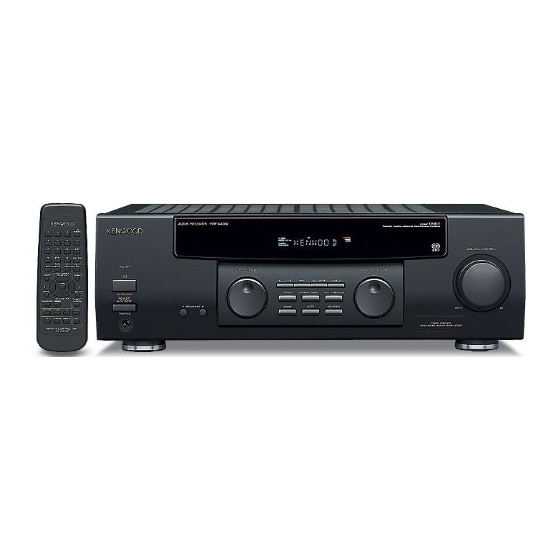
Page 7: Names And Functions Of Parts
Names and functions of parts Main unit Band indicators MUTE indicator Speaker indicators RDS indicator EON FM TI. VOL S.DIRECT indicator S.DIRECT TAPE 2 /MONI TAPE 2/ MONI indicator STANDBY ON/STANDBY POWER A SPEAKERS B PHONES 1 ON/STANDBY ( ) key Use to switch the power ON/STANDBY when the POWER is turned ON. -
Page 8: Remote Control Unit
Remote control unit BAND AUTO ¡ TUNING P.CALL MULTI CONTROL fi VOL. UP MEMORY MUTE SOUND fi VOL. DOWN BASS BOOST DIMMER MD/TAPE1 TUNER TA/NEWS DISPLAY REMOTE CONTROL UNIT RC-R0708 1 Numeric keys (1~0, +10) If CD or MD is selected as the input source, these keys function as numeric keys. -
Page 9: Preparing The Remote Control
Preparing the remote control Loading the batteries 1 Remove the cover. 2 Insert the batteries. 3 Close the cover. • Insert two AA-size (R06) batteries as indicated by the polarity markings. Operation When the “STANDBY” indicator is lit, the power turns ON when you press the POWER ( ) key on the remote control. -
Page 10: Normal Playback
Normal playback ON/STANDBY SPEAKERS A B POWER MULTI CONTROL BALANCE SOUND SOURCE DIRECT AUTO VOLUME UP, DOWN SOUND BASS BOOST Preparing for playback Some preparatory steps are needed before starting playback. Turning on the receiver 1 Turn on the POWER key to ON. 2 Turn on the power to this receiver by pressing ON/ STANDBY ( ) key. -
Page 11: Adjusting The Sound
Adjusting the sound Adjusting the tone Use the following procedure to adjust the bass and treble levels. 1 Press the SOUND key to select the tone mode to be adjusted. BASS : Select this to adjust the low frequency range. (Press the SOUND key once.) TREBLE : Select this to adjust the high frequency range. -
Page 12: Recording
Recording MULTI CONTROL INPUT SELECTOR SOUND SOUND Recording audio Recording a music source 1 Use the input selector (INPUT SELECTOR) to select the source (other than “TAPE 1”) you want to record. 2 Set the cassette deck to record. 3 Start playback, then start recording. Copying tapes TAPE 1 = TAPE 2 copying 1 Use the input selector to select “TAPE 1”. -
Page 13: Listening To Radio Broadcasts
Listening to radio broadcasts Tuning (non-RDS) radio stations Radio stations can be classified into RDS (Radio Data System) stations and other stations. To listen to or store RDS stations in the preset memory, see the section entitled, “Using RDS”. TA/NEWS DISPLAY BAND MEMORY... -
Page 14: Using The Display Key
Using the DISPLAY key Pressing the DISPLAY key changes the contents of the display. Each press switches the display mode as follows: 1 PS (Program Service name) display 2 RT (Radio Text) display 3 Frequency display 1 PS (Program Service name) display: The station name is displayed automatically when an RDS broadcast is received, If no PS data was sent, “NO PS”... -
Page 15: Presetting Radio Stations Manually
Presetting radio stations manually The RDS auto memory function assigns preset numbers to RDS stations starting from preset number ”01“. Therefore, be sure to execute the RDS auto memory function before using the following operations to manually store AM stations and other FM stations, and RDS stations. -
Page 16: Other
Tuning by program type (PTY search) This function lets you set the tuner to automatically search for stations which are currently broadcasting the type of program (genre) you want to listen to. Under certain receiving conditions, it may take more than 1 minute to complete the search. - Page 17 Press the TA/NEWS key to select the information type of your choice. Display When ”TA“ is selected A B MUTE B B C 1 F M EON FM S.DIRECT TAPE 2/MONI ”TP“ lights for stations where TP (Traffic Program) information can be received.
-
Page 18: In Case Of Difficulty
In case of difficulty Resetting the Microcomputer If the microcomputer may malfunction (unit cannot be operated, or shows an erroneous display) if the power cord is unplugged while the power is ON, or due to some other external factor. If this happens, execute the following pro- cedure to reset the microcomputer and return the unit to its normal operating condition. - Page 19 Remote control unit Symptom Remote control operation is not possible. Memory back up function Please note that the following items will be deleted from the unit's memory if the power cord is disconnected from the AC outlet or the main power switch is turned off for approximately 3 days.
-
Page 20: Specifications
Frequency response (30 Hz ~ 15kHz) ... +0.5 dB ~ –3.0 dB Notes: 1. KENWOOD follows a policy of continuous advancements in development. For this reason specifications may be changed without notice. 2. The full performance may not be exhibited in an extremely cold location (under a water-freezing temperature).
Need help?
Do you have a question about the KRF-A4030 and is the answer not in the manual?
Questions and answers