
Related Manuals for AU KYL21 DIGNO S


Summary of Contents for AU KYL21 DIGNO S
- Page 1 Basic Manual Contents Safety Precautions Getting Ready Basic Operation Phone Tool/Applications File Management Settings Appendix/Index...
-
Page 2: Preface
"Setting Guide"/"Basic Manual" (This manual) Before you assume that the product is malfunctioning, check for possible remedies in the following au Customer Support site of au Handles only basic operations for main features. homepage: For detailed descriptions on various functions, refer to the "Instruction http://cs.kddi.com/support/komatta/kosho/index.html... -
Page 3: List Of Packaged Items
• This product is compatible with the international roaming service. List of Packaged Items Each network service described in this manual varies depending on the area and service content. Before your start using the product, make sure that you have all the •... -
Page 4: Table Of Contents
Micro IC Card (LTE)......... 31 Entering characters ........49 List of Packaged Items ........1 Attaching the au Micro IC Card (LTE) .... 32 Switching keyboards ........49 Removing au Micro IC Card (LTE) ....33 Inputting text with the 10-key/QWERTY ..50 Contents ........ - Page 5 Using Disaster Message Board ..... 61 Specifi c Absorption Rate of Mobile Phone ............... 74 Using emergency early warning mail .... 61 Using Index ............76 (Disaster voice message service) ....63 Intellectual property rights ......78 ® Gracenote End User License Agreement File Management .......
-
Page 6: Safety Precautions
Indications used for the operation of selecting Regarding notations used in this document items/icons/buttons, etc. Key indications used in this manual Notations used for operation procedures in this manual are as follows. In this manual, keys are represented by simplified illustrations as Tapping is to select a button or icon displayed on the screen by lightly shown below. -
Page 7: Exemptions
Information • Reproduction of the content of this manual in part or in whole is prohibited. • The content of this manual is subject to change without notice. Operations from the vertical display are mainly described. Menu items/ • Every effort has been made in the preparation of this manual. Should you icons/keys on a screen may be different from the ones in the horizontal notice any unclear points, omissions, etc., feel free to contact us. -
Page 8: Safety Precautions (Observe Strictly)
Precautions common to the main unit, battery These instructions are divided into the following categories. Explanation of indications used in this manual pack, charging equipment, au Micro IC Card (LTE), peripheral devices This symbol indicates the potential and imminent (*1) - Page 9 Doing so might Do not touch the main unit or the specified charging equipment for a cause electric shock or injury from damaged parts. Contact an au shop long time while power is being supplied from an external source. Doing or Secure cell phone support center.
-
Page 10: Main Unit
Secure cell phone support center. Also, if you have dropped or damaged the product, do not continue to use it in that state, and contact an au shop or Secure cell phone support center. - Page 11 Doing so might cause injury by from the pacemaker or cardioverter-defibrillator. the broken part. Contact au shop or Secure cell phone support center. 2. Turn the product off in crowded trains or other crowded places,...
-
Page 12: Battery Pack
Part Material Surface treatment Do not put the product directly on sand at a beach, etc. Sand or other Camera lens, PMMA resin Hard coating small particles might get inside the earpiece, microphone or speaker, Infrared data port causing the volume to drop. If sand gets inside the product's main unit, it might cause overheating or a fault. - Page 13 AC Adapter for Desktop Holder (KYL21PQA): 100 VAC to 240 VAC the battery pack, and contact an au shop or Secure cell phone support AC adapter (sold separately) that can be charged overseas except center.
- Page 14 If you feel any abnormality with your skin, immediately consult a Wipe off dust on the power plug. Failure to do so might cause fire, dermatologist. Itching, rashes, eczema, etc. sometimes occurs burns or electric shock. depending on your physical constitution and condition. Install and position in-car devices where they do not hinder driving The materials of parts used on the Quick Charge Desktop Holder or safety equipment such as airbags.
- Page 15 Doing so might cause melting, overheating, fuming, loss of data or a fault. Do not throw the au Micro IC Card (LTE) into a fire or heat it. Doing so might cause melting, overheating, fuming, loss of data or a fault.
-
Page 16: Handling Precautions
- main unit Operation with a foreign object placed on the touch panel - Battery pack, au Micro IC Card (LTE) (attached to the main unit) Operation with a protective sheet or sticker on the touch panel Do not use in places subject to lots of dust or vibration. - Page 17 Act and Telecommunications Operations Act. Take care not to place magnetized items such as magnetic cards, speakers Never use modified au cell phones. Use of a modified device violates the and TV sets near the product, as it might cause malfunction.
- Page 18 Old products are collected at au false operation of the touch panel.
- Page 19 Surrounding sounds may not be heard clearly, and The au Micro IC Card (LTE) is lent to you by au. In case of loss or damage, the gazing at the screen might distract your attention causing a traffic accident.
-
Page 20: Available Security Codes
PIN code available security codes are as follows. Do not forget the various To prevent unauthorized use of the au Micro IC Card (LTE) by a third security codes that are set as they are necessary for various party, you can set the product to require PIN code entry each time operations and contracts. - Page 21 <Please copy this section and use> Password entry field Google account ID Screen Lock: PIN @gmail.com Google account password Screen Lock: Password au ID account ID Screen Lock: Pattern au ID account password Facebook account ID Facebook account password...
-
Page 22: Notes On Waterproof And Dustproof
Notes on waterproof and dustproof Important items to remember before use Make sure that the external This product has a waterproof property equivalent to IPX5* connection terminal cover is firmly IPX7* , as well as a dustproof property equivalent to IP5X* on the closed, and the battery cover is condition that the external connection terminal cover and battery... - Page 23 Attaching the battery cover Tips for comfortable use Attach the battery cover with the main unit, trace in the direction from Once the product gets wet, water may remain in gaps of the main unit. according to the arrow mark not to come off the cover, and then push the Shake the product well to drain water.
- Page 24 In such case, contact an temperature for a while until condensation is cleared. au shop near you. • When viewing 1Seg, place the product on a stable surface. If any liquid other than plain water gets on the product •...
- Page 25 It is recommended to replace the parts for maintaining waterproof property once textiles every 2 years regardless of whether any abnormality is present. For information on part replacement, contact an au shop near you. Charging Never charge the battery if the main unit is wet.
- Page 26 washroom. Doing so might cause fire, electric shock or a fault. Do not bring Press the product gently to them into a bathroom, etc. even when you are not charging with them. clean dry cloth without waste textiles, and wipe off water remained in the gaps in the microphone, speaker, external connection terminal, earphone...
-
Page 27: Wireless Lan (Wi-Fi ® ) Functions
3. If you are unclear on any points or are troubled by anything, increase noise and prevent it from performing communications. contact an au shop or Customer Service Center. (This product is particularly susceptible to noise when it used near ®... -
Page 28: Cautions On Using 5 Ghz Band
Internet is required, to which packet communication charge applies. Bands of mobile unit identification devices cannot be avoided. (For receiving e-mails such as "au (Notes from au)" and "WEB de (Notification of WEB de Seikyu-sho)",... -
Page 29: Notes On Google Play/Au Market/Applications
Notes on Google Play/au Market/applications Be sure to check the security of the application, then install it at your own risk. Some applications might cause virus infection, damage various data, and send out your location information, usage history or personal information stored in your cell phone via the Internet. -
Page 30: Getting Ready
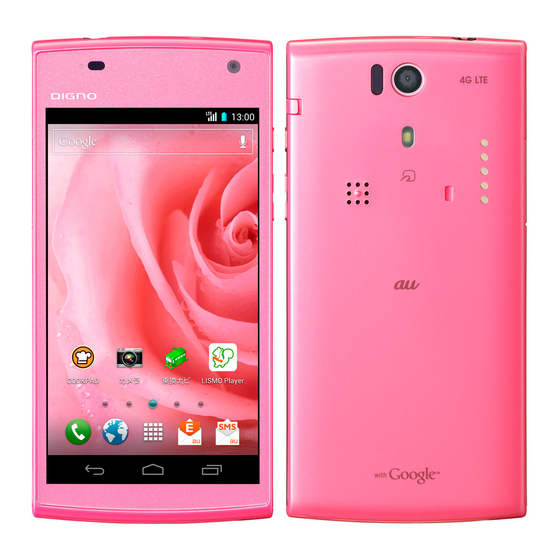
Names and functions of parts Air vent* * Since the product is waterproof and hermetically-sealed, an air vent (hole for removal of air) is provided. • Air vent does not affect the waterproofness. • Do not cover the air vent with sticker etc. -
Page 31: Power Key
With the smart sonic receiver, hear the other party's voice on call, FeliCa antenna play sound of answer memo, etc. Main/Sub antenna* For details, refer to "About Smart Sonic Receiver" ( P. 30). au Micro IC Card (LTE) slot In camera (lens) microSD memory card slot Display Battery pack Microphone Transmits your voice to the other party during a call. -
Page 32: About Smart Sonic Receiver
About Smart Sonic Receiver Attaching/Removing the battery pack The product is equipped with Smart Sonic Receiver which transmits Use a dedicated battery pack and attach it properly. sound by vibrating the display. Although there is not earpiece hole, you can use as usual. Touching to your ear Before attaching/removing the battery pack and battery cover, turn the Touch earpiece part of the product to your ear as shown below. -
Page 33: Removing The Battery Pack
The product supports only with au Micro IC Card (LTE). You cannot use the product with Be sure to check the au Micro IC Card (LTE) is certainly attached and then an au IC-card or a micro au IC-card switched attach the battery pack. -
Page 34: Attaching The Au Micro Ic Card (Lte)
• Do not touch the IC (metal) part of the au Micro IC Card (LTE) or the IC Turn the power off and remove the battery pack card terminal inside the product. -
Page 35: Removing Au Micro Ic Card (Lte)
Check the orientation of the notch. The proper position when the tray Turn the power off and remove the battery pack is pushed into the end is where the edge of au Micro IC Card (LTE) is ( P. 31 "Removing the battery pack") shown a little. -
Page 36: Charging
If the light keeps blinking, stop charging and then Approx. 160 minutes (sold separately) contact au shop or Secure cell phone support center. Clean the power terminal/charging terminal with dry cotton swabs, etc. with Common DC adapter 03 Approx. - Page 37 Charging with the Quick Charge Desktop Holder When charging is fi nished, remove the product from Quick Charge Desktop Holder (KYL21PUA) by tilting (KYL21PUA) Using supplied Quick Charge Desktop Holder (KYL21PUA) and AC the product forward Adapter for Desktop Holder (KYL21PQA) enables quick charge, Charging with the specifi ed AC adapter (sold shorter charging time than usual.
- Page 38 Insert the power plug of Common AC adapter 04 (sold separately) into an outlet (100 VAC to 240 VAC)/Insert Note that applying unnecessary force with the external connection terminal the plug of Common DC adapter 03 (sold separately) connected to the external device might cause damage. When charging starts with the battery empty, the charging light may not into a cigarette lighter socket light immediately.
-
Page 39: Turning The Power On/Off
Tap to unlock the screen and then corresponding application can be activated. "au (au Easy Setting)" can be set up later even though it is skipped. ( P. 38) If the charging light blinks in yellow when you turn the power on, the remaining battery is not sufficient for activating the product. -
Page 40: Turning The Power Off
Turning the power off Setting au ID By setting au ID, you can use various services provided by au F(hold down for at least one second) such as "au Simple Payment Service" which allows you to purchase [Power off] [OK] applications from the au Market or Google Play. -
Page 41: Setting Up Google Account
Setting up Google account Set up a Google account to use online services provided by Google. If Google account is not set up, when you activate an application or function that requires Google account, a setup screen appears. Setup screen of Google account If you have a Google account [Existing] Enter mail address and password "Sign in"... -
Page 42: Basic Operation
Long-touch Basic Operation Keep touching an item with your finger. Using the Touch panel The display on the product is a touch panel operated by touching it with your finger. • The touch panel is designed to be lightly touched by fingers. Do Slide not push it forcibly with a finger or press it with sharp objects (nail, ballpoint pen, pin, etc.). -
Page 43: Using The Navigation Bar
Drag Using Home screen Keep touching an item or icon, trace it to the On the Home screen, shortcuts, widgets, folders can be added. Tap desired direction to move. "H" to go to the Home screen any time. Status bar Quick search box Shortcuts/ Widgets/ Folders (Convenient tools) etc. -
Page 44: Adding Shortcuts/Widgets/Folders To The Home Screen
Switching home screens Editing Home screen The home screen is configured of multiple screens that can be Narrow with fingers on the home screen to display thumbnail so that switched by flicking left or right. you can add, delete, sort home screens, etc. Up to 9 home screens can be set. -
Page 45: Using (Convenient Tools)/ My Selection
Using ( Convenient tools)/ My Selection In step , if you long-touch a widget/ application, the home screen thumbnail appears. Drag an item to desired position and then release your (Convenient tools)/My Selection is a folder/widget which finger to add. allows you to locate shortcuts of frequently-used applications on the You cannot add an item when there is no space in a displayed home Home screen. -
Page 46: Using The Applications List
Downloaded applications are allocated to " Camera (Downloaded application)" page in the application list. au Market When you use functions from the application, communication fees may be charged depending on the function. You can install Android-based applications offered with au Smart Pass service. - Page 47 You can enjoy as many applications as you want from Call for technical supports on the phone operations among over 500 apps by ¥390 (including tax) per month! by sharing the screen that you are watching with au Also coupons, presents, photo storage and security apps operators.
-
Page 48: Using The Menu Of Applications List
Home screen. Quick launch area can be fixed and displayed in any screen of the It is not possible to change applications on the Simple menu. home screens. By default, Phone, Browser, Camera and au (au Smart Pass) are already registered. -
Page 49: Checking The Status Of The Product
Schedule notification of the calendar LTE Available/ 3G Available/ In roaming TV (1Seg) is active Airplane mode is activated. Playing music au Micro IC Card (LTE) not inserted Dialing, calling or receiving an incoming call ® Wi-Fi signal strength Answering memo level 4/... -
Page 50: Notification/Status Panel
Clear notifi cation Notifi cation/Status Panel Tap to clear all notifications. Slide down the status bar to display the notification/status panel. Sticky You can check details of notification icons or start corresponding Paste memos. applications. Also, you can set frequent-used functions or activate Monthly calendar applications from shortcuts. -
Page 51: Character Entry
Context menu Character entry The context menu is a menu displayed by long-touching the screen or items. Example: In the browser screen Entering characters Use software keyboard to enter characters. The software keyboard appears when you tap the entry field displayed for registering a contact or composing a mail. -
Page 52: Inputting Text With The 10-Key/Qwerty
Switching 10-key/QWERTY to Handwriting Character entry screen (LaLaStroke) (QWERTY) Character entry screen (10-key/QWERTY) It is a keyboard with characters allocated in the same order as general PC. Tap [Kanji]/[Rapid] character input key to enter character Tap "Keyboard" on the handwriting (LaLaStroke) screen to return to the on the key. - Page 53 Emoji, Symbol, Facemark/Alphanumeric, Kana key* Shift key Displays the list of Emoji/Symbol/Facemark. By tapping the shift key, you can switch uppercase characters Displays hiragana, katakana, alphabet, number and predicted entry and lowercase characters entry. date and time assigned to the entered key as conversion The display changes as follows each time you tap it.
-
Page 54: Entering By Handwriting
Flick input Handwriting (LaLaStroke) For software keyboard "10-key", you can enter characters by flicking screen (Rapid Handwriting) key up/down/left/right without tapping the key repeatedly. Recognize characters of hiragana/ Long-touch a key to display input candidates for flick input. Flick to katakana/alphabet/symbol/number* the direction of character to enter in the character entry area. - Page 55 Handwrite a character in the handwriting input fi eld Katakana to 1-byte Set whether to enter katakana in one-byte character. Characters are entered when handwritten characters are recognized. other characters to Set whether to enter symbol/number/ • In the case of "Kanji Handwriting", when the handwritten character 1-byte alphabet in one-byte character.
-
Page 56: Using Convenient Functions For Character Entry
Using Mushroom applications Using convenient functions for character entry You can use various character input applications using Mushroom. Character entry screen (10-key/QWERTY) Entering Emoji/Symbol/Facemark Long-touch " " You can use Emoji/Symbol/Facemark with 10-key or QWERTY. Tap " " on the handwriting input screen. Character entry screen (10-key/QWERTY) [ Select an application Displays the list of Emoji/Symbol/Facemark. -
Page 57: Registering To The User Dictionary
Auto Set whether to convert capitalize Lines of Candidate Change a number of lines for displaying Capitalization automatically when entering one-byte Area conversion candidate list such as alphabet. prediction conversion when entering characters with software keyboard. Auto Space Input Set whether to enter a space automatically when conversion candidate word is Mushroom Set whether to use Mushroom add-ons. -
Page 58: Phone
Call charges when adding "1401" are deducted from the money registered If you add "184" before the emergency call number 110/119/118, the in your au prepaid card. emergency call receiving agency will not be notified of your location and Note that even if you cover the microphone, the sound can be conveyed phone number. -
Page 59: Using History To Make A Call
(Incoming notification service)" is a service Using history to make a call that notifies you via SMS of incoming call to the voice mail while au phone is turned off, in Airplane mode or out of service area. Phone number input screen [... -
Page 60: Calling Overseas (Au International Call Service)
* Calling from a telephone that cannot notify you of the phone number. use au International Call Service in the period from the time that au finds You can set not to display the phone number, name, image, etc. of exceeding the charge limit to the last day of the same month. - Page 61 When you do not answer the incoming call appears on the status bar. Slide the status bar down to open the notification/status panel, a received time and phone number or name registered in the Contacts are displayed. To disable ringtone or vibrator for incoming call Press lr while call is incoming to disable ringtone or vibrator.
-
Page 62: Tool/Applications
E-saving mode Use GPS satellites Set GPS function. Using E-saving mode switch Live wallpaper Set Live wallpaper. NFC R/W P2P Set NFC function. By setting backlight timeout or screen brightness at the minimum All data ® ® value, or setting Wi-Fi , Bluetooth , etc. -
Page 63: Using Au (Au Disaster Countermeasure)
Using Disaster Message Board from the meteorological bureau or disaster evacuation information delivered from the government or local public organization to all au Disaster Message Board service enables you to register information cell phones in specified areas simultaneously. - Page 64 (Delete) Delete the received mail. (Setting) (Emergency earthquake The service is available only in Japan (it cannot be used overseas). information): Set whether to receive No information fee or communication charge is required for receiving emergency early warning mail. emergency earthquake information. You cannot receive emergency early warning mail when your cell phone is (Disaster evacuation turned off or during a call.
-
Page 65: Using
Voice message can be recorded for up to 30 seconds. Tsunami warning is a notification delivered from the meteorological bureau Voice messages can be sent and received to or from au cell phones (major tidal wave, seismic sea wave) to the area including target coast. -
Page 66: File Management
• This product supports microSD/microSDHC/microSDXC memory result in failure to remove the microSD memory card or damage to the card. For supported microSD/microSDHC/microSDXC memory microSD memory card or the product. cards, contact each microSD memory card manufacturer or refer to the au homepage. -
Page 67: Removing Microsd Memory Card
Removing microSD memory card Make sure to unmount a microSD memory card before removing. Do not touch the terminal part of microSD memory card. Do not remove the microSD memory card forcefully. It may result in Applications list [Settings] [Storage] damage to the microSD memory card or the product or data loss. -
Page 68: Settings
Item Description Settings ® Location Make location settings using wireless LAN (Wi-Fi services or GPS functions. You can access the setting menu to set and manage functions of the Security Make security settings such as screen lock. product. You can customize wallpaper and ringtones, set security, Language &... -
Page 69: Setting Airplane Mode
Setting Airplane mode Setting the Silent Mode When Airplane mode is set, all wireless functions (phone, packet Set Silent mode not to inconvenience people around you in a public ® ® communication, wireless LAN (Wi-Fi ) function, Bluetooth function) space. are turned off. -
Page 70: Appendix/Index
Customer Service Center. AC Adapter JUPITRIS (White) (L02P001W) (sold separately) Accessories described on this page can be purchased from the au Online AC Adapter JUPITRIS (Red) (L02P001R) (sold separately) Shop. http://auonlineshop.kddi.com/ AC Adapter JUPITRIS (Blue) (L02P001L) (sold separately) -
Page 71: Troubleshooting
Turn off the power and then turn it on again. P. 37 Power is not turned on. Is the battery pack charged? P. 34 Is your au Micro IC Card (LTE) inserted? P. 32 " " appears. Is the battery pack attached properly? P. -
Page 72: Using Earphones
For more details, visit au Customer Support site of au homepage. http://cs.kddi.com/support/komatta/kosho/index.html Notes Using earphones • When au Micro IC Card (LTE) is not inserted, software cannot be updated. Connect an earphone (commercially available), an earphone • You are charged for data communication when connecting to the microphone (commercially available) or a stereo earphone Internet from the product using packet communication. -
Page 73: Downloading And Updating Software Or Os
• If you fail to update software, it may become impossible to operate For details on " Android (KYOCERA the product. If this happens, bring it to an au shop or PiPit (not Android phone update tool)", visit the website as follows; accepted by some shops). Kyocera homepage: http://www.kyocera.co.jp/prdct/telecom/consumer/kyl21/... - Page 74 Micro IC Card (LTE) The Company retains performance parts for repair of the DIGNO S The au Micro IC Card (LTE) is lent to you by au. In case of loss or main unit and its peripherals for six years after discontinuation of damage, the card will be replaced at your expense.
-
Page 75: Available Data
Replacement cell phone delivery service Main specifi cations When you have trouble with your au cell phone, replacement cell phone (same model, same color, including new battery) is delivered by calling to. Return your damaged cell phone within 14 days after replacement cell Display Approx. -
Page 76: Specifi C Absorption Rate Of Mobile Phone
Bluetooth device connection procedure according to the product's applications. guidelines when used with au Carrying Case F Black (0105FCA) (sold *5 To use this profile, " (Car Navigation Data Communication Setting)" separately) recommended by KDDI (*2). In case you are not using the application is required. - Page 77 Ministry of Internal Affairs and Communications website: http://www.tele.soumu.go.jp/j/sys/ele/index.htm Association of Radio Industries and Businesses website: http://www.arib-emf.org/index02.html au homepage: http://www.au.kddi.com/ *1 Technical regulations are defined by the Ministerial Ordinance Related to Radio Law (Article 14-2 of Radio Equipment Regulations). *2 Regarding the method of measuring SAR when using mobile phones in positions other than against the ear, the international standard IEC62209-2 was set in March 2010.
-
Page 78: Index
International Call Service..58 Quick launch area ....41 46 Major update ........ 71 External connection terminal ..29 au Micro IC Card (LTE) ... 29 31 Quick search box ......41 Menu during an incoming call ..59 External connection terminal cover Auto-rotate screen ...... - Page 79 Tap ..........40 Troubleshooting ......69 Turning the power off ....38 Turning the power on ....37 TV antenna ........29 Volume DOWN/UP key ....29 Widen/Narrow with fingers ... 40 Widgets ........41 42 ® Wi-Fi ..........25 ®...
-
Page 80: Intellectual Property Rights
® ® Bluetooth and Bluetooth logo are registered trademarks owned by the Bluetooth SIG, Intellectual property rights Inc., and KYOCERA Corporation is licensed to use those trademarks. AirStation™ and AOSS™ are trademarks of BUFFALO INC. Trademarks ® ® Wi-Fi , WPA , Wi-Fi CERTIFIED logo and Wi-Fi Protected Setup logo are registered Company names and product names referred to in this manual are ®... - Page 81 Part of services are provided by Open Globe, Inc. for US patent (#6,304,523) under Copyright © 2012 DigiOn, Inc. All rights reserved. license. DigiOn and DiXiM are registered trademarks of DigiOn, Inc. Gracenote and CDDB are registered trademarks of Gracenote, Inc. DLNA®, DLNA logo and DLNA CERTIFIED™...
-
Page 82: Gracenote
(c) This Software is provided without implied warranties of merchantability, means of the intended End-User functions of this application or device. fitness for a particular purpose and noninfringement of third party rights. You agree that you will use Gracenote Data, the Gracenote Software, and Note that the existing license agreement takes priority for usage of GNU General Gracenote Servers for your own personal non-commercial use only. -
Page 83: Openssl License
Original SSLeay License OpenSSL License Copyright © 1995-1998 Eric Young (eay@cryptsoft.com) All rights reserved. OpenSSL License This product includes cryptographic software written by Eric Young (eay@cryptsoft.com) Copyright © 1998-2007 The OpenSSL Project. All rights reserved. THIS SOFTWARE IS PROVIDED BY ERIC YOUNG ''AS IS'' AND ANY This product includes software developed by the OpenSSL Project for use in EXPRESS OR IMPLIED WARRANTIES, INCLUDING, BUT NOT LIMITED the OpenSSL Toolkit. -
Page 84: Fcc Notice
FCC Notice FCC RF EXPOSURE INFORMATION Warning! Read this information before using your phone. This device complies with part 15 of the FCC Rules. Operation is subject to the following two conditions: (1) This device may not cause harmful Warning! Read this information before using your phone. In August 1996, interference, and (2) this device must accept any interference received, the Federal Communications Commission (FCC) of the United States, with including interference that may cause undesired operation. -
Page 85: European Rf Exposure Information
European RF Exposure Information Your mobile device is both a radio transmitter and receiver, and is designed not to exceed limits for exposure to radio waves recommended by international guidelines. These guidelines were produced by independent scientific organization, ICNIRP, and include safety margins designed to protect all persons, regardless of age and condition of health. - Page 86 From au cell phones: 0077 - 7 - 111 area code not required PRESSING ZERO WILL CONNECT YOU TO AN OPERATOR AFTER CALLING 157 ON YOUR au CELL PHONE For loss, theft or damage and operation information (toll free) From fixed-line phones:...
Need help?
Do you have a question about the KYL21 DIGNO S and is the answer not in the manual?
Questions and answers