Advertisement
Advertisement
Table of Contents

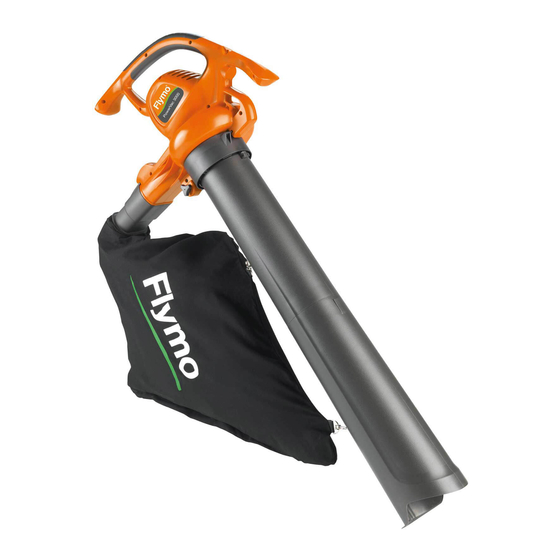
Summary of Contents for Flymo PowerVac 3000
- Page 1 PowerVac 3000 (PV3000) Original instructions...
-
Page 2: Carton Contents
Lower Vacuum Tube on plug IMPORTANT! Please check the contents of the carton are correct BEFORE assembling your new Flymo product. IF ANY PARTS ARE MISSING CONTACT: Husqvarna UK Ltd. Customer Service Department direct Telephone: 0844 844 4558 UK... - Page 3 Explanation of symbols on the product WARNING: This unit can Switch off! Remove plug from mains before adjust- be dangerous! Careless or improper use can cause ing, cleaning or if cable is entangled or damaged. serious injury. Read the user instructions The use of eye and ear carefully to make sure you protection is recommended.
- Page 4 e) The electric cord must be un- This enables better control of the coiled. Coiled cord can overheat power tool in unexpected situ- and reduce the efficiency of the ations. product. Always wind cord carefully, e) Dress properly. Always wear avoiding kinks.
- Page 5 If damaged, have the power tool Vacuum safety warnings: repaired before use. Keep all Stop the motor and disconnect the cooling air inlets clear of debris. extension cord before opening the Many accidents are caused by poor- air inlet door or attempting to insert ly maintained power tools.
-
Page 6: Assembly Instructions
Cables IMPORTANT 1. No earth required. Flymo products Use only 1.00mm size cable up to 30 are double insulated metres length maximum. to EN60335 and under no circum- stances should an earth be con- Maximum rating : nected to any part of the product. -
Page 7: Blower Assembly
Blower Assembly 1. Switch off the product and discon- nect from the mains electricity supply. 2. Align the grooves on the blower tube with the grooves on the blower outlet. Push the blower tube onto the blower outlet until it snaps into place as illustrated in figure A. - Page 8 5. Place the hinge of the upper tube in- to the hook on the bottom side of the blower unit as illustration in figure E. 6. Using the ground for support, pivot the blower unit until tube snaps into the latches of the retaining posts on the blower unit as illustrated in figure F.
- Page 9 For extra support when using your product as a vacuum, a shoulder strap is included. Attach the strap to the blower unit before operation. Snap the hook onto the retainer as illustrated in figure J. Converting from Vacuum Use to Blower Use WARNING: Switch off the product and disconnect from the mains electricity...
-
Page 10: Cable Restraint
Cable Restraint 1. Form loop in mains cable and push the loop through the slot as illus- trated in figure M. 2. To secure, position loop over the hook and pull the cable back through the slot as illustrated in figure N. Starting and Stopping WARNING: WARNING:... -
Page 11: How To Use
How to Use Using as a blower (figure P) WARNING: Inspect the area before using the product. Remove all debris and hard objects such as rocks, glass, wire, etc., that can ricochet, be thrown, or otherwise cause injury or damage during operation. Use your product as a blower for: Sweeping debris or grass clippings from driveways, sidewalks, patios, etc. -
Page 12: Maintenance
Maintenance Before each use WARNING: Switch off the Check for loose fasteners and parts product and disconnect from the mains S Inlet Cover electricity supply before performing S Blower Tube maintenance. S Vacuum Tubes General recommendations S Debris Bag The warranty on this product does not Check for damaged or worn parts cover items that have been subjected to Please contact your local Approved... - Page 13 Service 1. Remove the vacuum tubes. WARNING: All internal or electri- 2. Carefully reach into the vacuum cal service be performed by your MUST opening and clear out the air intake local Approved Service Centre. area. Clear all debris from impeller. How to remove an object from the 3.
- Page 14 Fault Finding Hints Fails To Operate Poor Vacuum 1. Is the product switched on? 1. The air inlets may be blocked; 2. Is the blower ube, vacuum tubes, clean all air inlets. or elbow tube/debris bag fitted cor- 2. The vacuum tubes, elbow tube or rectly? debris bag inlet may be blocked.
-
Page 15: Service Recommendations
A network of specialist dealers can be from most Flymo Approved found in your local Yellow Pages. Service Dealers. To obtain service on your Flymo product 4. Your product is uniquely identified simply telephone or visit your local Ser- by a silver and black product rating vice Centre. -
Page 16: Specifications
Specifications Type PowerVac 3000 (PV3000) Motor - - power consumption 3000 W max. Mains voltage 220--240 V Frequency 50 Hz 170 l/s Vacuum flow Mulch ratio 16:1 Blow speed Max. 310 km/h Weight blower/vacuum Max. 4,5 kg Capacity of debris bag... -
Page 17: Ec Declaration Of Conformity
Model(s) ......PowerVac 3000 (PV3000) Identification of Series .... - Page 20 Our policy of continuous improvement means that the specification of products may be altered from time to time without prior notice. Copyright E 2011 Flymo S.A. All rights reserved. FlymoRand other product and feature names are registered or unregistered trademarks of Flymo S.A.


Need help?
Do you have a question about the PowerVac 3000 and is the answer not in the manual?
Questions and answers