Table of Contents
Advertisement
Advertisement
Table of Contents

Related Manuals for Reebok PURE


Summary of Contents for Reebok PURE
- Page 1 PURE BIKE USER MANUAL...
-
Page 2: Serial Number
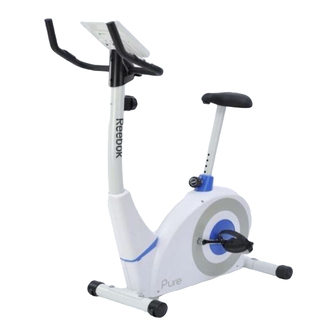
Welcome from Reebok Fitness. Thank you for choosing this Reebok Pure Exercise Bike. Before you get started, please read the instructions. Should you experience any difficulties, our support team will be happy www.reebokftness.info to help or check out our website at: Important note: Consult your doctor before starting any exercise program. -
Page 3: Table Of Contents
CONTENTS Pre-assembly Notes Assembly Steps Precautions Computer Operation Maintenance Exloded Diagram Assembly Diagram Parts List Warm Up Limited Warranty... - Page 4 PRE-ASSEMBLY NOTES Open The Box Make sure to inventory all of the parts that are included in the box. Check the Hardware Chart for a full count of the number of parts included for proper assembly. If you are missing any parts, please call our Technical Support line 0800 440 2459 Gather Your Tools...
-
Page 5: Assembly Steps
ASSEMBLY STEPS Step 1: 1-1: Attach Rear Stabilizer (3) to Main frame (1), fasten with Allen Head Bolts (14), tighten with Allen Key. 1-2: Attach Front Stabilizer (2) to Main frame (1), fasten with Allen Head Bolts (14), tighten with Allen Key. Step 2: 2-1: Slide Front Post Cover (11) onto Front Post (4).( Lift it to the... - Page 6 Step 3: 3-1: Secured Handlebar (5) onto Front Post (4), with Bracket (26), fasten with Allen Head Bolt (27). 3-2: Fix Front Bracket Cover (28) onto Handlebar (5), fasten to Handlebar (5) with L shape Knob (29).Now fix Rear Bracket Cover (24) on the other side and fasten with Screws(23).
- Page 7 Step 5: 5- : 1 Slot the Pedal Strap on the pedals as marked L and R for left and Right. the side of the pedal strap with more slots should go on outside of pedal to allow ease of adjustment at a later date 5-2: Attach the Right Pedal (13) onto the right pedal shaft and tighten with open end spanner.
-
Page 8: Precautions
PRECAUTIONS This product has been designed for in-home use. These instructions are intended to provide important information for use and maintenance of the equipment as well as for your personal safety. Keep this user manual safe for future reference. WARNING! This product is made for home use only and tested up to a maximum body weight of 120 kilograms. - Page 9 • Follow the steps of the assembly instructions carefully . • Only use suitable tools for assembly and ask for assistance if necessary. • Only use original Reebok parts as delivered). SAFETY CHECKS BEFORE EVERY USE • Tighten all adjustable parts to prevent sudden movement while training.
-
Page 10: Computer Operation
: 30~240 BPM. OPERATION After inserting the batteries the console will sound a beep for 2 seconds, your PURE bike console is fitted with an automatic standby feature, to turn on simply pedal. OPERATION METHOD You can set the time and calendar or by pressing mode set the following functions :TIME/DIST./CAL/PULSE ,the function selected can be set when it’s... - Page 11 RECOVERY When you have finished your workout, press RECOVERY. For RECOVERY to function correctly, it needs your Heart Rate input. TIME will count down from 1 minute and then your fitness level from F1 to F6 will be displayed. NOTE: during RECOVERY, no other displays will operate. F 1 ~ F6 = RECOVERY HEART RATE LEVEL Operating ENTER: 1.
-
Page 12: Maintenance
MAINTENANCE Proper maintenance is very important to ensure your equipment is always in top working condition. Improper maintenance could cause damage or shorten the life of your equipment as well as exceeding the warranty coverage. 1. Inspect and tighten all parts of the cycle regularly. •... -
Page 13: Exloded Diagram
EXPLODED DIAGRAM... -
Page 14: Assembly Diagram
ASSEMBLY DIAGRAM... -
Page 15: Parts List
Part List Part description Q’y Main Frame Front Stabilizer Rear Stabilizer Front Post Handlebar Computer Seat Post Seat Seat Post Cover Quick Release Knob Front Post Cover Left Pedal Right Pedal Allen Head Bolt M10*20 Tension Knob & Upper Tension Wire Lower Tension Wire Middle Computer Wire Lower Computer Wire... -
Page 16: Part List
Part List Part description Q’y Flange Screw M10x1.25xT6.5 Crank Cap Φ 23*7 Rear Stabilizer End Cap Front Transportation Wheel Nut M6 Seat Post Bushing Speed Sensor Mount U Shape Washer Handlebar Grip Handlebar End Cap Drive Belt Screw M6 * 30 Bearing 6203Z Clip Φ... -
Page 17: Warm Up
WARM UP WARMING UP It is important to warm up before exercising to prepare your body for the workout it is about to do. The frst phase of a warm up is to increase your heart rate and get blood pumping around your body faster. Choose an activity which will warm up the same muscles you are going to use during your workout, so if you are planning on cycling for 30 minutes, your warm up could consist of a 5 to 10 minute steady cycle. -
Page 18: Limited Warranty
Guidance on the correct storage of equipment is contained within the product’s user manual. PLEASE RETAIN YOUR RECEIPT AS PROOF OF PURCHASE. RECYCLE Reebok products are recyclable. At the end of its useful life please dispose of this Reebok bike correctly and safely (local refuse sites). - Page 19 CALL TECHNICAL SUPPORT ON 0800 440 2459 OR E-MAIL: techsupport@rfeinternational.com or Mail: RFE UK LTD., THE PERFORMANCE CENTRE, MAIDSTONE RD., KINGSTON, MILTON KEYNES Mk10 0BD www.reebokfitness.info. 2010 Reebok UK Ltd. All rights Reserved. ReebokRBK and the Vector logo are registered trademarks of Reebok.
Need help?
Do you have a question about the PURE and is the answer not in the manual?
Questions and answers