Table of Contents
Advertisement
Advertisement
Table of Contents

Related Manuals for Compaq Prolinea Family


Summary of Contents for Compaq Prolinea Family
- Page 1 Thank you for purchasing this Factory Service Manual CD/DVD from servicemanuals4u.com. Please check out our eBay auctions for more great deals on Factory Service Manuals: servicemanuals4u...
- Page 2 Notice The information in this guide is subject to change without notice. Compaq Computer Corporation shall not be liable for technical or editorial errors or omissions contained herein; nor for incidental or consequential damages resulting from the furnishing, performance, or use of this material.
- Page 3 This Maintenance and Service Guide is a troubleshooting guide that can be used for reference when servicing the Desktop 3 slot/3 bay and Desktop 4 slot/4 bay models of the Compaq ProLinea Family of Personal Computers. Additional information is available in the SERVICE QUICK REFERENCE GUIDE.
- Page 4 System Serial Number The system serial number is displayed in two locations on the Compaq ProLinea Family of Personal Computers: on the right side of the computer near the front, and below the top expansion slot on the rear of the computer.
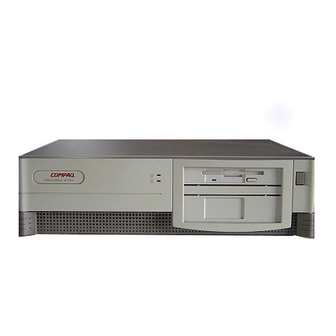
- Page 5 Chapter 1. Product Description Chapter 1.1 Models and Features The Compaq ProLinea Family of Personal Computers introduces a new generation of desktop computers designed for the business environment. The family includes Desktop 3 slot/3 bay (DT3) and Desktop 4 slot/4 bay (DT4) models.
- Page 6 Chapter 1.2 Models The Compaq ProLinea Family of Personal Computers is available in the desktop models described in the following sections. Compaq ProLinea Personal Computer DT3 Models The Compaq ProLinea Personal Computer is available in the DT3 models described in Table 1-1. These desktop computers have two ISA expansion slots, one shared PCI/ISA expansion slot, one Compaq option slot, and three mass storage bays.
- Page 7 =========================================================================== Compaq ProLinea Personal Computer DT4 Models The Compaq ProLinea Personal Computer is available in the DT4 models described in Table 1-2. These desktop computers have two ISA expansion slots, two shared PCI/ISA expansion slots, one Compaq option slot, and four mass storage bays.
-
Page 8: Chapter 1.3 Standard Features
* Not all models are available in all geographic regions. =========================================================================== Chapter 1.3 Standard Features The Compaq ProLinea Desktop Personal Computers have the following standard features: o 486DX2/50, 486DX2/66, 486DX4/100, 586/75, and 586/90 processors o 4 MB (SIMM), 8 MB (soldered down) or 16 MB (soldered down) memory,... - Page 9 - PCI Local Bus Integrated Graphics Controller on selected 486 and 586 models - QVision 2000+ Graphics Controller on selected 586 models o DT3 form factor includes: one PCI/ISA shared slot, two ISA slots, Compaq option slot, one internal third-height drive bay, and two external half-height drive bays...
-
Page 10: Chapter 1.4 Options
Setup password prevents unauthorized changes to the system configuration. Chapter 1.4 Options The options that are available from Compaq for the Compaq ProLinea Family of Personal Computers are described in the following sections. Processor Upgrade The processors in Compaq ProLinea Family of Personal Computers can be upgraded according to the schedule in Table 1-3. - Page 11 586/75 586/90 =========================================================================== System Memory Options The system memory options that are available from Compaq for the Compaq ProLinea Family of Personal Computers are listed below. The memory modules are SIMM, 70ns, without parity. o 4 MB memory module o 8 MB memory module...
- Page 12 Mass Storage Options The following mass storage options are available from Compaq for the Compaq ProLinea Family of Personal Computers: o 1.2 MB diskette drive, 5.25-inch, half-height o 1.44 MB diskette drive, 3.5-inch, third-height o 270 MB IDE hard drive...
- Page 13 Compaq 171 FS Color Monitor with low emissions and AssetControl NOTE: The Compaq ProLinea Family of Personal Computers does not support the AssetControl feature. Graphics Controllers and Memory Options The following graphics controller and memory options are available from...
-
Page 14: Chapter 1.5 Front Panel Controls And Leds
o SCO XSight Runtime version 4.1 o Open Desktop Development System, release 3.0 o Windows NT o Sytos Plus Tape software for MS-DOS o Sytos Plus Tape software for OS/2 Chapter 1.5 Front Panel Controls and LEDs The front panel controls and LEDs for the DT3 and DT4 are almost identical. -
Page 15: Chapter 1.6 Rear Panel Controls And Connectors
Light writing. Num Lock Light When the Num Lock light is on, the numeric keypad is activated. Caps Lock Light When the Caps Lock light is on, all letters typed will be capitalized. Scroll Lock Light When the Scroll Lock light is on, the screen will not scroll. - Page 16 Table 1-6. Rear Panel Controls and Connectors * =========================================================================== Item Description Function =========================================================================== Power Cord Connector Connects the computer to an electrical power outlet. Mouse Connector Connects the mouse. Voltage Select Switch Switches voltage between 115 VAC (US) and 230 VAC to match geographical requirements. Serial Port Connects to serial devices, such as a serial printer.
-
Page 17: Chapter 1.7 System Design
Chapter 1.7 System Design This section presents a design overview and functional descriptions of the key components of the Compaq ProLinea Family of Personal Computers. All replaceable components are identified in Chapter 3 and removal/replacement instructions are presented in Chapter 5. - Page 18 486-Based Board With 4 MB RAM The 486-based system board with 4 MB RAM has the following characteristics: o Used on 3-slot/3-bay and 4-slot/4-bay computers o 4 MB SIMMs o 4 SIMM sockets for memory expansion o PCI Local Bus integrated graphics controller o Accommodates 486DX2/50, 486DX2/66, and 486DX4/100 processors (238-pin ZIF socket) o 128 KB cache memory standard on 486DX4/100 models only;...
- Page 19 o Measures 8.5 x 13.75 inches (21.6 x 34.9 cm) 586-Based Board Without Integrated Graphics The 586-based system board without integrated graphics has the following characteristics: o Used on 3-slot/3-bay and 4-slot/4-bay computers o Designed for use with QVision 2000+ Graphics Controller in a PCI slot o Six SIMM sockets for memory expansion o Accommodates 586/75 and 586/90 processors (320-pin ZIF socket) o 256 KB cache memory...
- Page 20 486DX4/100 models support an optional 128 KB or 256 KB cache board. 586 models support an integrated 256 KB cache. Graphics The Compaq ProLinea Family of Personal Computers is supported with a 2-tiered graphics strategy. The 486-based system boards and selected 586-based system boards are shipped with a PCI Local Bus integrated graphics controller.
- Page 21 This chapter describes the three levels of troubleshooting for the computer: o Power-On Self-Test (POST) o Compaq diagnostics o Troubleshooting without diagnostics POST messages, diagnostic error codes, and memory error codes are included. The messages and codes appear in tables that include a description of the error, the probable cause, and the recommended action to resolve the error condition.
-
Page 22: Chapter 2.2 Power-On Self-Test
4. Replace the unit cover and perform the desired troubleshooting. Chapter 2.2 Power-On Self-Test Power-on Self-Test (POST) is a series of diagnostic tests that runs automatically when the system is turned on. POST checks the following assemblies to ensure that the computer system is functioning properly: o Keyboard o Power supply o System board... - Page 23 o Hard drives POST also detects the type of mass storage devices installed in the computer. If POST finds an error in the system, an error condition is indicated by an audible and/or visual message. Power-on Self-Test Messages An error message results if a problem is encountered during the Power-On Self-Test utility.
- Page 24 --------------------------------------------------------------------------- 178 - Processor None Processor type or Run Computer Setup. Configuration step do not match Invalid configuration memory --------------------------------------------------------------------------- 201 - Memory None RAM failure 1. Run Computer Error Setup. 2. Replace the memory module(s) (if any). 3. Replace system board.
- Page 25 --------------------------------------------------------------------------- 501 - Display 1 Long, Video display Replace the video Adapter Failure 2 Short controller board. --------------------------------------------------------------------------- 601 - Diskette None Diskette controller 1. Check and/or Controller Error circuitry replace cables. 2. Replace the system board. --------------------------------------------------------------------------- 602 - Diskette None Diskette in drive A Replace the...
- Page 26 primary address --------------------------------------------------------------------------- 1772 - Secondary 2 Short Internal and external Run Computer Setup. Disk Port Address hard drive Assignment controllers are both Conflict assigned to the secondary address --------------------------------------------------------------------------- 1780 - Disk 0 None Hard drive/format Run the Failure error Configuration and Diagnostics...
-
Page 27: Chapter 2.3 Compaq Diagnostics
Diagnostics are available by selecting the Computer Checkup (TEST) utility on the Configuration and Diagnostics menu. Compaq Diagnostics are installed on the hard drive of the Compaq ProLinea Personal Computer. The diagnostics are also available on diskettes. IMPORTANT: The diagnostics and setup utilities are located on a hard disk partition in the computer, not on ROM. - Page 28 Accessing the Configuration and Diagnostics Menu at Startup To display the menu immediately after startup, complete the following steps: 1. Turn on or restart the computer (Ctrl+Alt+Delete). 2. Press the F10 key as soon as the cursor moves to the upper-right corner of the screen.
- Page 29 Compaq Diagnostics for Windows Compaq Diagnostics for Windows utility contains the same functionality as the DOS-based INSPECT program but in a Windows environment. To use the Compaq Diagnostics for Windows utility, select the Compaq Diagnostics icon from the Compaq Utilities group box.
- Page 30 Prepare computer for Compaq Service Call (RemotePaq) o Create a Diagnostics Diskette See the user documentation for descriptions of the Security Management and Power Management utilities. A brief description of each of the troubleshooting utilities is presented below. Ample prompting is provided with each of these utilities.
- Page 31 Graphics controllers o Diskette drives o Fixed disks o Serial interfaces o Installed Compaq devices (tape drive, SCSI device, or network status) View System Information (INSPECT) This utility allows you to inspect the status and configuration of the following parameters:...
-
Page 32: Chapter 2.5 Diagnostic Error Codes
Test Another Computer This utility allows you to download Computer Checkup (TEST), View System Information (INSPECT), or Computer Setup utilities through your computer's serial interface to a supported Compaq product that does not have a diskette drive. RemotePaq This utility is available in some geographical areas and requires a modem. - Page 33 For assistance in the removal and replacement of a particular subassembly, see Chapter 5, "Removal and Replacement Procedures." Table 2-2. Processor Test Error Codes =========================================================================== Error Code Description Recommended Action =========================================================================== 101 - xx CPU test failed Replace the system board and retest. --------------------------------------------------------------------------- 102 - xx Coprocessor or Weitek...
- Page 34 failed through 215 - xx: 204 - xx Address test failed 1. Remove the memory modules one at a time until the error goes away. 211 - xx Random pattern test 2. Replace the good modules one at a failed time while making sure the error code does not return.
- Page 35 602 - xx Diskette read test 3. Replace the diskette drive and retest. failed 4. Replace the system board and retest. 603 - xx Diskette write, read compare test failed 604 - xx Diskette random read test failed 605 - xx Diskette ID media failed 606 - xx...
- Page 36 1205 - xx Auto answer Test failed 1210 - xx Modem Direct Connect Test failed =========================================================================== Table 2-9. Hard Drive Test Error Codes =========================================================================== Error Code Description Recommended Action =========================================================================== 1701 - xx Hard drive format The following steps apply to 1701 - xx test failed through 1736 - xx: 1702 - xx...
- Page 37 1736 - xx Drive monitoring test failed --------------------------------------------------------------------------- * ECC = Error Correction Code =========================================================================== Table 2-10. Tape Drive Test Error Codes =========================================================================== Error Code Description Recommended Action =========================================================================== 1900 - xx Tape ID failed The following steps apply to 1900 - xx through 1906 - xx error codes: 1901 - xx Tape servo write...
- Page 38 failed 509 - xx Video 320 x 200 mode color set 1 test failed 510 - xx Video 640 x 200 mode test failed 511 - xx Video screen memory page test failed 512 - xx Video gray scale test failed 514 - xx Video white screen...
- Page 39 2416 - xx Video noise pattern test failed 2418 - xx ECG/VGC memory test failed --------------------------------------------------------------------------- Error Code Description Recommended Action --------------------------------------------------------------------------- 2419 - xx ECG/VGC ROM The following steps apply to 2402 - xx checksum test failed through 2456 - xx error codes: 2421 - xx ECG/VGC 640 x 200 1.
- Page 40 =========================================================================== Table 2-12. Audio Test Error Codes =========================================================================== Error Code Description Recommended Action =========================================================================== 3206 - xx Audio System Internal Replace the audio board and retest. Error =========================================================================== Table 2-13. Pointing Device Interface Test Error Codes =========================================================================== Error Code Description Recommended Action =========================================================================== 8601 - xx...
- Page 41 05, indicate a seek failure, as listed in Table 2-15C. When you combine this information, you know that the diagnostics program was testing the random-read functioning of the hard drive and received a seek failure. The device is faulty and must be replaced. Table 2-15A.
- Page 42 XXXX - 14 Drive hardware error --------------------------------------------------------------------------- XXXX - 15 Illegal drive command Replace the indicated device. --------------------------------------------------------------------------- XXXX - 16 Media was changed Replace the indicated device. --------------------------------------------------------------------------- XXXX - 17 Tape write protected 1. Disable write protect on tape cartridge.
-
Page 43: Chapter 2.6 Troubleshooting Without Diagnostics
XXXX - 44 Parity error XXXX - 50 Data pins bad XXXX - 51 Data line 7 bad XXXX - 52 MSG, C/D and/or I/O lines bad XXXX - 53 BSY never went busy XXXX - 54 BSY stayed busy XXXX - 60 Controller CONFIG-1 register bad... - Page 44 o Is the computer connected to a working power outlet? o Is the computer turned on and the power light illuminated? o Are all cables connected properly and seated? o Are all of the necessary device drivers installed? o Is the CONFIG.SYS file correct? o Is the AUTOEXEC.BAT file (MS-DOS) or STARTUP.CMD file (OS/2) correct? o Was a nonbootable diskette loaded in the diskette drive at powerup? o Are all switch settings correct?
- Page 45 Diskette drive cannot write 1. Diskette is not formatted. Format the to a diskette. diskette. 2. Diskette is write protected. Either use another diskette that is not write protected or disable the write protection on the diskette. 3. Writing to the wrong drive. Check the drive letter in your path statement.
- Page 46 Proof of this test failure is required when returning a hard drive to Compaq as a failed hard drive. The information provided by the diagnostics test includes: error code, system serial number, drive serial number, drive model, and drive firmware revision.
- Page 47 Drive not found. Cable could be loose. Check cable connections. --------------------------------------------------------------------------- Nonsystem disk message. 1. The system is trying to start from a diskette that is not bootable. Remove the diskette from the diskette drive. 2. The system is trying to start from the hard drive but the hard disk has been damaged.
- Page 48 of the computer system. Reboot the computer and follow the instructions for accepting the changes. 2. The system may not have automatically recognized the new device. Run Computer Setup and identify the new device. 3. The cables for the new external device are loose or the power cables are unplugged.
- Page 49 Chapter 3.0 Introduction This chapter provides an illustrated parts breakdown and a reference for spare parts for the DT3 and DT4 models of the Compaq ProLinea Family of Personal Computers. Spare part numbers and warranty tier are included. Chapter 3.1 System Unit Table 3-1.
- Page 50 2. Front Bezel (DT4) (Order logo separately) 172632-004 --------------------------------------------------------------------------- 3. Logo Kit (includes logos for ProLinea 450, ProLinea 466, ProLinea 4100, ProLinea 575, and ProLinea 590) 172331-001 --------------------------------------------------------------------------- 4. Blank Bezel Kit, Includes: a. 1/2-height bezel b. 1/6-height bezel c. 3.5-inch diskette drive bezel d.
-
Page 51: Chapter 3.2 Mass Storage Devices
Chapter 3.2 Mass Storage Devices Table 3-2. Hard Drives =========================================================================== Spare Part Warranty Description Number Tier =========================================================================== 1. Hard Drive (270 MB IDE, w/o Bracket) 172778-001 2. Hard Drive (420 MB IDE, w/o Bracket) 172780-001 3. Hard Drive (540 MB IDE, w/o Bracket) 188666-001 4. - Page 52 Table 3-3. Diskette Drives, CD-ROM Drives, and Tape Drives =========================================================================== Spare Part Warranty Description Number Tier =========================================================================== 1. Diskette Drive (3.5", 1.44 MB, 3-mode, 1/3-height without bracket and bezel) 160788-201 2. Diskette Drive (5.25", 1.2 MB, 1/2-height) 141367-201 3. CD-ROM Drive (Internal Quad Speed, IDE) 172717-001 4.
- Page 53 Table 3-4. Cables =========================================================================== Spare Part Warranty Description Number Tier =========================================================================== 1. Cable kit, includes: 172478-001 a. IDE CD-ROM/hard drive cable, (Quantity = 2) b. Audio cable, (Quantity = 2) 2. Cable, Diskette Drive (DT3) 172477-001 3. Cable, Diskette Drive (DT4) 172797-001 4.
-
Page 54: Chapter 3.4 Standard And Optional Boards
4. Power cord, AC, Black (Japan) 139867-005 4. Power cord, AC, Gray (Switzerland) 150304-002 4. Power cord, AC, Gray (UK, Hong Kong, Singapore) 100613-002 5. Cable, 2-device SCSI (3-Connector) 146997-001 6. Cable, hard drive (cable-select) 172945-001 7. Cable, LED Assembly 172531-001 8. - Page 55 Table 3-5 Standard and Optional Boards =========================================================================== Spare Part Warranty Description Number Tier =========================================================================== 1. Memory Module (SIMM, 4 MB/70ns/Nonparity) 172718-001 1. Memory Module (SIMM, 8 MB/70ns/Nonparity) 172719-001 1. Memory Module (SIMM, 16 MB/70ns/Nonparity) 172938-001 1. Memory Module (SIMM, 32 MB/70ns/Nonparity) 172939-001 2.
- Page 56 16. Serial/Parallel Interface Board 106886-002 17. Controller, QVision 1280/I Graphics w/2 MB VRAM (not shown) 139182-001 18. Controller, QVision 1280/P+ Graphics w/1 MB VRAM (not shown) 137898-001 =========================================================================== Table 3-6. System and Backplane Boards =========================================================================== Spare Part Warranty Description Number Tier =========================================================================== 1.
- Page 57 Tables 3-7 and 3-8 to determine the correct spare part number. =========================================================================== The configuration code for the Compaq ProLinea Personal Computer is located in the fifth, sixth, seventh, and eighth digits of the system serial number, for example: XXXXHLH1XXXX where HLH1 is the configuration code.
- Page 58 GMZ2 3816-002 172019-001 GMZ3 3816-002 172019-001 HMZ1 3816-002 172019-001 HMZ2 3816-002 172019-001 HMZ3 3816-002 172019-001 =========================================================================== Table 3-7. DT4 Configuration Codes =========================================================================== Configuration Code PCA Number System Board Spare Part No. =========================================================================== GLA2 3910-001 172170-001 HLA1 3910-001 172170-001 HLA2 3910-001 172170-001 GLB2 3910-002...
- Page 59 HLD4 3819-001 172024-001 HLD5 3816-001 172019-001 GNA2 3816-002 172019-001 GNA3 3816-002 172019-001 GNA4 3819-002 172024-001 GNA5 3816-002 172019-001 HNA1 3816-002 172019-001 HNA2 3816-002 172019-001 HNA3 3816-002 172019-001 HNA4 3819-002 172024-001 HNA5 3816-002 172019-001 =========================================================================== Chapter 3.5 Keyboards...
- Page 60 Table 3-9. Keyboards =========================================================================== Spare Part Warranty Description Number Tier =========================================================================== 1. Keyboard, Spacesaver (Albanian *) 160648-226 2. Keyboard, Spacesaver (Arabic *) 160648-217 3. Keyboard, Spacesaver (Belgian *) 160648-218 4. Keyboard, Spacesaver (Brazil *) 160648-235 5. Keyboard, Spacesaver (BHCSY *) 160648-220 6.
- Page 61 27. Keyboard, Spacesaver (Swedish/Finnish *) 160648-210 28. Keyboard, Spacesaver (Swiss *) 160648-211 29. Keyboard, Spacesaver (Taiwanese *) 160648-234 30. Keyboard, Spacesaver (Turkish *) 160648-214 31. Keyboard, Spacesaver, (UK English *) 160648-203 32. Keyboard, Spacesaver (US) 160648-201 33. Keyboard, Spacesaver (Yugoslavia *) 160648-228 --------------------------------------------------------------------------- Not shown in Figure 3-7.
- Page 62 Spare Part Warranty Description Number Tier =========================================================================== 1. VGA 14" Monochrome Monitor (NA) 194962-001 1. VGA 14" Monochrome Monitor (NH) 194962-002 1. VGA 14" Monochrome Monitor (SH) 194962-003 2. VGA 14" Color Monitor, Low Emissions (NA) 143654-501 2. VGA 14" Color Monitor, Low Emissions (NH, 470AP) 143654-502 2.
- Page 63 5. 151 FS Color Monitor, Low Emissions (NA, 441P) 147265-501 5. 151 FS Color Monitor, Low Emissions (NH, 443P) 147265-502 5. 151 FS Color Monitor, Low Emissions (NA, 443P) 147265-503 5. 151 FS Color Monitor, Low Emissions (SH, 443P) 147265-504 5.
-
Page 64: Chapter 3.7 Miscellaneous Hardware Kit
8. QVision 200 Color Monitor, AssetControl (NH) 143372-602 8. QVision 200 Color Monitor, AssetControl (SH) 143372-604 --------------------------------------------------------------------------- NOTE: AssetControl feature is not available on the Compaq ProLinea Personal Computer. =========================================================================== Chapter 3.7 Miscellaneous Hardware Kit Table 3-11. Miscellaneous Hardware Kit... -
Page 65: Chapter 3.8 Miscellaneous Plastics Kit
4. CD-ROM left drive rail 5. CD-ROM right drive rail 6. System board bracket (Minitower only/not shown) 7. 3.5" Diskette/Hard Drive left rail 8. 3.5" Diskette/Hard Drive right rail 9. Main panel clip for Minitower (not shown) 10. Access panel clip for Minitower (not shown) 11. -
Page 66: Chapter 3.9 Miscellaneous Parts
Table 3-12. Miscellaneous Plastics Kit =========================================================================== Spare Part Warranty Description Number Tier =========================================================================== 1. 3.5" Diskette Drive Bezel 172795-001 2. Drive Cage Lock 3. Switch Holder 4. Switch Cap (DT3 & DT4) 5. Switch cap (V3 & V4) 6. Option Card Guide (DT3) 7. -
Page 67: Chapter 3.10 Shipping Boxes
Table 3-13. Miscellaneous Spare Parts =========================================================================== Spare Part Warranty Description Number Tier =========================================================================== 1. Compaq Mouse 141189-201 2. Battery, Real-Time Clock (External) 160274-001 3. Tape Cartridge, 250 MB 115298-001 4. Tape Cartridge, 525 MB 119504-001 5. Option slot cover 173007-001 6. - Page 68 =========================================================================== Spare Part Warranty Description Number Tier =========================================================================== DT3 Shipping Box, (Quantity = 5) 172141-001 DT4 Shipping Box, (Quantity = 5) 172142-001 Packing cushion (DT4) 172682-001 Packing cushion (DT3) 172683-001 Box and Packing, QV200 Color Monitor 143393-001 Shipping Box, QV200 Color Monitor (Quantity = 5) 143394-001 Box and Packing, QV172 Color Monitor 149408-001...
- Page 69 Guide (German) 172636-041 Kit, ProLinea Quick Setup Guide & Beyond Setup Guide (French) 172636-051 Kit, ProLinea Quick Setup Guide & Beyond Setup Guide (Finnish) 172636-351 Kit, ProLinea Quick Setup Guide & Beyond Setup Guide (Hungarian) 172636-211 Kit, ProLinea Quick Setup Guide & Beyond Setup Guide (Italian) 172636-061 Kit, ProLinea Quick Setup Guide &...
-
Page 70: Chapter 3.12 Software
User's Guide, QVision 171 Color Monitor 189571-001 User's Guide, Compaq 1024/151FS 189572-001 =========================================================================== Chapter 3.12 Software =========================================================================== Spare Part Warranty Description Number Tier =========================================================================== Advanced Diagnostics 3.5-inch Diskette Kit (US) 109728-001 Advanced Diagnostics 3.5-inch Diskette Kit (German) 109728-041 Advanced Diagnostics 3.5-inch Diskette Kit... - Page 71 IDE CD-ROM Driver Diskette Kit (Italian) 181456-061 IDE CD-ROM Driver Diskette Kit (Spanish) 181456-071 IDE CD-ROM Driver Diskette Kit (Danish) 181456-081 IDE CD-ROM Driver Diskette Kit (Norwegian) 181456-091 IDE CD-ROM Driver Diskette Kit (Swedish) 181456-101 IDE CD-ROM Driver Diskette Kit (Portuguese) 181456-131 IDE CD-ROM Driver Diskette Kit (Dutch) 181456-331...
- Page 72 * International spares are not available from Houston. North American customers can order backup sets of all software on diskette format from the Compaq Order Center. ** QuickFind is updated monthly. To complete the QuickFind part number, add the suffix from Table 3-17 for the desired month. If you do not specify the 3-digit suffix, the default is the current month in which the order is placed.
- Page 73 Table 3-17. QuickFind Part Number Suffix =========================================================================== Suffix Month Suffix Month =========================================================================== - 001 January - 007 July - 002 February - 008 August - 003 March - 009 September - 004 April - 010 October - 005 - 011 November - 006 June...
- Page 74 Chapter 4. Removal and Replacement Preliminaries Chapter 4.0 Introduction This chapter provides general service information for the computer. Adherence to the procedures and precautions described in this chapter is essential for proper service. Chapter 4.1 Electrostatic Discharge Information A sudden discharge of static electricity from your finger or other conductor can destroy static-sensitive devices or microcircuitry.
- Page 75 packaging and ground precautions are necessary to prevent damage. o To avoid hand contact, transport products in static-safe containers such as tubes, bags, or boxes. o Protect all electrostatic parts and assemblies with conductive or approved containers or packaging. o Keep electrostatic sensitive parts in their containers until they arrive at static-free stations.
- Page 76 Metallized laminate 15,000 V =========================================================================== Grounding Workstations To prevent static damage at the workstation, use the following precautions: o Cover the workstation with approved static-dissipative material. Provide a wrist strap connected to the work surface and properly grounded tools and equipment. o Use static-dissipative mats, foot straps, or air ionizers to give added protection.
-
Page 77: Chapter 4.2 Service Considerations
Flat-bladed screwdriver o Diagnostics software Screws The screws used in the computer are not interchangeable. If an incorrect screw is used during the reassembly process, it can damage the unit. Compaq strongly recommends that all screws removed during disassembly be... - Page 78 kept with the part that was removed, then returned to their proper locations. IMPORTANT: As each subassembly is removed from the computer, it should be placed away from the work area to prevent damage. Cables and Connectors Most cables used throughout the unit are flat flexible cables. These cables must be handled with extreme care to avoid damage.
- Page 79 Chapter 5.0 Introduction This chapter presents the removal and replacement procedures for the DT3 and DT4 models of the Compaq ProLinea Family of Personal Computers. Chapter 5.1 System Serial Number The system serial number should be provided to Compaq when requesting information or ordering spare parts.
-
Page 80: Chapter 5.3 Preparation For Disassembly
Chapter 5.3 Preparation for Disassembly To prepare the computer for the removal and replacement procedures, complete the following steps: 1. Remove any diskette, compact disc, or tape from the computer. 2. Turn off the computer and any peripheral devices that are connected to the computer. -
Page 81: Chapter 5.4 External Components
Unit Cover o Front Bezel o Rear Bezel Compaq Logo The Compaq logo is secured to the front bezel with adhesive. If the original logo came off, complete the following steps to replace the logo without removing the unit cover assembly: 1. - Page 82 If the original logo is still installed and it is necessary to replace it, complete the following steps: 1. Remove the unit cover assembly as described later in this section. 2. From the inside of the front bezel, use a small screwdriver at the two holes shown in Figure 5-3 to apply pressure to the logo and remove it from the front bezel.
- Page 83 Feet Four rubber feet are mounted to the underside of the base pan. No parts have to be removed to gain access to the feet. The feet have an adhesive surface and are shipped with a protective strip in place. If necessary, use a small flat-bladed screwdriver to remove the old feet.
- Page 84 Cable Lock Installation The center thumbscrew is the recommended location for installation of the optional cable lock . Remove the thumbscrew and install the cable lock U-bolt as shown in Figure 5-6).
- Page 85 Unit Cover Removal and Replacement To remove the unit cover assembly, complete the following steps: 1. Perform preparation procedures described in section 5.3. 2. Loosen the three thumbscrews on the rear of the computer to release the cover (Figure 5-7). You may need a flat-bladed screwdriver to loosen the screws.
- Page 86 3. Slide the cover toward the front of the computer and lift it up and away from the chassis (Figure 5-7). The internal components of the computer are now accessible for service. To replace the unit cover, reverse the above procedure. >>>>>>>>>>>>>>>>>>>>>>>>>>>>>>>>>...
- Page 87 1. Perform the preparation procedures described in Section 5.3. 2. Remove the cover assembly as described earlier in this section. 3. Remove the five screws the secure the front bezel to the cover (Figure 5-8) and separate the bezel from the cover. IMPORTANT: Note the locations and orientations of the grounding clips so they can be replaced in their original locations and orientations.
-
Page 88: Chapter 5.5 Power Supply
disassembly. 2. Completely remove the three thumbscrews that secure the unit cover assembly (Figure 5-7). 3. Remove the power supply mounting screws (Figure 5-10). NOTE: If the computer has a cable lock mechanism installed in place of one of the thumbscrews, see Cable Lock Installation presented earlier in this section. - Page 89 The power supply assembly includes the power supply, attached cables with connectors, power switch, power switch holder, and power switch cap. The power supply is located in the right rear corner of the computer assembly. Removing the Power Supply To remove the power supply, complete the following steps: >>>>>>>>>>>>>>>>>>>>>>>>>>>>>>>>>...
- Page 90 4. Disconnect the power switch (Figure 5-11). 5. Release the drive cage lock (plastic) on the top of the drive cage by rotating it clockwise as shown in the top view in the inset in Figure 5-12.
- Page 91 6. Elevating the drive cage will provide access to the drive cable connectors and power switch cable clamps on the floor of the chassis. Push the metal drive cage release (Figure 5-13) away from the drive cage and elevate the back end of the drive cage. The drive cage release will engage a cutout in the side of the drive cage when it has been elevated the proper amount (Figure 5-13).
- Page 92 7. Release the wires going to the power switch from the clamps on the base pan (Figure 5-14).
- Page 93 8. Disconnect the power supply cables from the hard drive (Figure 5-15), CD-ROM drive (Figure 5-16), and diskette drive (Figure 5-17). Any other mass storage device will disconnect in the same manner.
- Page 96 9. Slide the power supply forward to disengage it from the base pan. Then lift it out slightly and disconnect the two power supply cables from the connectors on the backplane board (Figure 5-18). These connectors are not the same size so they can not be replaced incorrectly.
- Page 97 10. The power supply is now disconnected from the computer and can be lifted out of the chassis. Installing the Power Supply To install the power supply, complete the following steps: 1. Position the power supply in its approximate mounting position and connect the two power supply cables to the connectors on the backplane (Figure 5-18).
-
Page 98: Chapter 5.6 Power Switch
When returning the drive cage from its elevated position to its resting position, lower the cage slowly and keep fingers clear of its travel path. >>>>>>>>>>>>>>>>>>>>>>>>>>>>>>>>>>>>><<<<<<<<<<<<<<<<<<<<<<<<<<<<<<<<<<<<<< >>>>>>>>>>>>>>>>>>>>>>>>>>>>>>>>> CAUTION <<<<<<<<<<<<<<<<<<<<<<<<<<<<<<<<< When returning the drive cage to its resting position, ensure that none of the cables are pinched between the drive cage and the base pan. -
Page 99: Chapter 5.7 Hard Drive
7. Reverse the above procedure to install a switch. IMPORTANT: Spreading the switch holder tabs to release the switch fatigues the plastic and renders it less reliable for retaining the switch. Compaq recommends that the switch holder should be discarded and not used for another switch installation. - Page 100 drive bays cage (Figure 5-20). To remove and replace the internal hard drive, complete the following steps: IMPORTANT: Pay particular attention to the routing and folding of the power and signal cables for the hard drive. If it becomes necessary to replace one of these cables, it is essential that the cable is folded and routed in a similar manner at installation.
- Page 101 accessible bay drive cage and remove the hard drive with bracket attached (Figure 5-21). NOTE: Offset flanges on the hard drive bracket engage cutouts in the side of the drive cage. Be sure to engage these flanges when installing the hard drive. 5.
- Page 102 Reverse the above procedure to install the mounting bracket and the hard drive. Be sure that the offset flanges on the bracket engage the cutout in the side of the drive cage. Chapter 5.8 Accessible Drives The following procedures assume the following accessible drive configurations.
- Page 103 manner at installation. CD-ROM Drive Ejecting a Compact Disc Manually If you are unable to eject a CD from the CD-ROM drive by pressing the load/eject button, you can eject the CD manually as follows: 1. Turn off the computer. 2.
- Page 104 1. Complete the steps in Section 5.3 to prepare the computer for disassembly. 2. Complete the steps in Section 5.4 to remove the unit cover to gain access to the drive cage and the CD-ROM drive. 3. Release the drive cage lock (plastic) on the top of the drive cage by rotating it clockwise (Figure 5-12).
- Page 105 >>>>>>>>>>>>>>>>>>>>>>>>>>>>>>>>>>>>><<<<<<<<<<<<<<<<<<<<<<<<<<<<<<<<<<<<<< >>>>>>>>>>>>>>>>>>>>>>>>>>>>>>>>> CAUTION <<<<<<<<<<<<<<<<<<<<<<<<<<<<<<<<< When returning the drive cage to its resting position, ensure that none of the cables are pinched between the drive cage and the base pan. >>>>>>>>>>>>>>>>>>>>>>>>>>>>>>>>>>>>><<<<<<<<<<<<<<<<<<<<<<<<<<<<<<<<<<<<<< 6. Lower the drive cage down into its normal operating position, taking care not to damage the drive cage lock and retainer.
- Page 106 Reverse the above procedure to install the mounting brackets on the CD-ROM drive and install the CD-ROM drive. Diskette Drive To remove the diskette drive, complete the following steps: 1. Complete the steps in Section 5.3 to prepare the computer for disassembly.
- Page 107 >>>>>>>>>>>>>>>>>>>>>>>>>>>>>>>>> WARNING <<<<<<<<<<<<<<<<<<<<<<<<<<<<<<<<< When returning the drive cage from its elevated position to its resting position, lower the cage slowly and keep fingers clear of its travel path. >>>>>>>>>>>>>>>>>>>>>>>>>>>>>>>>>>>>><<<<<<<<<<<<<<<<<<<<<<<<<<<<<<<<<<<<<< >>>>>>>>>>>>>>>>>>>>>>>>>>>>>>>>> CAUTION <<<<<<<<<<<<<<<<<<<<<<<<<<<<<<<<< When returning the drive cage to its resting position, ensure that none of the cables are pinched between the drive cage and the base pan.
- Page 108 8. Remove and retain the diskette drive mounting bracket with bezel attached (Figure 5-29). The bracket is secured in place with four screws.
- Page 109 IMPORTANT: Cable-select may not function properly if drives other than those supported by Compaq are installed. NOTE: The second drive on a cable-select cable can be a CD-ROM drive. However the CD-ROM drive must be installed in the device 1 position if there is a hard drive installed on the same cable.
- Page 110 The following procedure assumes that a second hard drive is already installed in the computer and it is being replaced. To install a second hard drive with cable-select configuration, complete the following steps: 1. Complete the steps in Section 5.3 to prepare the computer for disassembly.
- Page 111 >>>>>>>>>>>>>>>>>>>>>>>>>>>>>>>>> WARNING <<<<<<<<<<<<<<<<<<<<<<<<<<<<<<<<< When returning the drive cage from its elevated position to its resting position, lower the cage slowly and keep fingers clear of its travel path. >>>>>>>>>>>>>>>>>>>>>>>>>>>>>>>>>>>>><<<<<<<<<<<<<<<<<<<<<<<<<<<<<<<<<<<<<< >>>>>>>>>>>>>>>>>>>>>>>>>>>>>>>>> CAUTION <<<<<<<<<<<<<<<<<<<<<<<<<<<<<<<<< When returning the drive cage to its resting position, ensure that none of the cables are pinched between the drive cage and the base pan.
- Page 112 8. Remove and retain the hard drive mounting bracket (Figure 5-33).
- Page 113 9. Ensure that both hard drives have their configuration set for cable-select installation (see Chapter 6) and install the mounting bracket onto the hard drive (Figure 5-33). 10. Reverse the above procedure to complete the installation of the hard drive into an accessible drive bay. Drive Bay Bezel To remove a drive bay bezel, complete the following steps: 1.
- Page 114 Reverse the above procedure to install a bezel. NOTE: The 1/6-height bezel is always installed directly below the diskette drive. Chapter 5.9 Drive Cage Lock The drive cage lock snaps into place in the hole provided on the top surface of the drive cage. To replace the lock assembly, it is not necessary to remove any of the mass storage devices from the drive cage.
- Page 115 4. Install the replacement lock by snapping it into place as shown in Figure 5-35. Chapter 5.10 Speaker The speaker is mounted on the front chassis panel of CDS models. The speaker and its mounting bracket are installed as a unit but you must retain the speaker bracket for reassembly.
- Page 116 4. Release the speaker bracket from the front panel by pushing on the tab and rotating the bracket away from the chassis panel (Figure 5-37).
- Page 117 5. The speaker is installed into the bracket with a snap action. Remove the speaker from the bracket. 6. Install the replacement speaker into the bracket using a snap action, making certain that the wires exit the speaker bracket as shown in Figure 5-37.
- Page 118 3. Disconnect any cables connected to the expansion card. NOTE: If removing an expansion card from one of the lower slots, it might be necessary to remove the upper expansion card(s) to have sufficient access for cable removal. NOTE: If removing a full length expansion card from a CDS model, the speaker will have to be removed from the front panel of the chassis to provide adequate clearance.
-
Page 119: Chapter 5.12 System Board
Reverse the above procedure to install an option card. Chapter 5.12 System Board The system board rests on the bottom of the base pan under the option cards. It is not necessary to remove expansion cards or an option card prior to removing the system board. - Page 120 If a replacement battery has been installed in the computer, do not disconnect the battery cable. Release the battery from the rear panel of the base pan and remove the system board with the battery connected to the board. >>>>>>>>>>>>>>>>>>>>>>>>>>>>>>>>>>>>><<<<<<<<<<<<<<<<<<<<<<<<<<<<<<<<<<<<<< NOTE: Before removing the system board, observe the relationship between the ends of the system board bracket and base pan.
- Page 121 System Board Installation The replacement system board can be installed in the computer by completing the following steps: >>>>>>>>>>>>>>>>>>>>>>>>>>>>>>>>> CAUTION <<<<<<<<<<<<<<<<<<<<<<<<<<<<<<<<< The system board should have four bumper pads installed on its bottom side. Verify that the bumper pads are in place before installing the system board.
-
Page 122: Chapter 5.13 Option Card
The option card slot on the ProLinea Desktop Personal Computer is located immediately above the system board connector. The standard option cards are: o Compaq 6260 SCSI-2 Controller o IDE Disk Drive Controller o NetFlex ENET/ISA Controller o IBM Auto 16/4 Token-Ring ISA Adapter... - Page 123 o Enhanced Business Audio Board Installation of each of these options uses the same procedure. It is necessary to remove the system board to remove either of these options. To remove and replace an option card, complete the following steps: 1.
- Page 124 6. If an option card is removed and not replaced, fill the opening in the rear panel with a slot cover as shown in Figure 5-39. 7. Reverse the above procedure to install an option card. NOTE: If installing an Enhanced Business Audio Board in the option slot, the speaker cable should be connected to the speaker connector on the backplane board.
- Page 125 4. Complete the steps in Section 5.12 to remove the system board. NOTE: On models with CD-ROM installed, disconnecting the speaker cable from the backplane board (Figure 5-35) will prevent interference from this cable during these procedures. 5. Disconnect the LED cable from its connector on the backplane (Figure 5-43).
- Page 126 NOTE: For reference during replacement, note how the LED wires route through the end of the card guide (Figure 5-43). 7. Remove the LEDs from the card guide by spreading the tabs that secure the LEDs in place sufficiently for the LED to clear the tab hooks and pull the LEDs out of the card guide (Figure 5-45).
-
Page 127: Chapter 5.15 Memory Module
Reverse the above procedure to install the LEDs. HINT: At installation, allowing the tabs that hold the LEDs to extend well beyond the cutout in the chassis front panel will facilitate proper positioning of the mounting tabs for easy insertion of the card guide. - Page 128 3. Push out on the SIMM slot latches and tilt the SIMM 45 degrees from vertical and slide the SIMM out of its slot (Figure 5-46). The notch on the left end of the SIMM (Figure 5-46) serves as an orientation indicator.
- Page 129 3. Remove any option/expansion cards that interfere with access to the processor (Sections 5-11 and 5-13). 4. Release the heat sink clip as shown in Figure 5-47 (586-based system boards only), remove the heat sink, and raise the eject lever to remove the processor.
- Page 130 Note the orientation of the notched corner of the processor and reverse the above procedure to install a processor. Chapter 5.17 Cache Board This procedure applies to 486-based system boards only. The secondary cache board is installed on the 486-based system board adjacent to the SIMM sockets (Figure 5-47).
- Page 131 Reverse the above procedure to install a secondary cache board. NOTE: The configuration of the connectors on the cache board and system board will not allow the board to be installed improperly. However, as a safeguard, verify that you are matching the cache board connectors (E9 and E10) with the system board connectors (P9 and P10, respectively).
- Page 132 Reverse the above procedure to install a video memory board. Chapter 5.19 QVision 2000+ Controller Memory Board The QVision 2000+ Graphics Controller is installed in a PCI slot. Reference Section 5.11 for removal and replacement of the board. To remove and replace the 2 MB VRAM upgrade module on the board, complete the following steps.
-
Page 133: Chapter 5.20 Rtc Battery
Reverse the above procedure to install a VRAM upgrade module and replace the QVision 2000+ Graphics Controller. Chapter 5.20 RTC Battery The RTC battery is permanently installed and cannot be removed. To install a replacement battery, complete the following steps: 1. -
Page 134: Chapter 5.21 Backplane Board
4. Move the E5 jumper plug to pins 2 and 3. 5. Connect the battery cable to connector P3 on the system board as shown in Figure 5-52. NOTE: The hook-loop fastener on the replacement battery allows you to temporarily remove the battery from the rear panel without having to disconnect the battery from the system board. - Page 135 4. Complete the steps in Section 5.12 to remove the system board. 5. Disconnect the LED cable from its connector on the backplane board (Figure 5-42). 6. Release the speaker cable from the backplane board (Figure 5-35). 7. Disconnect the two power supply cables from the back side of the backplane board (Figure 5-19).
- Page 136 Reverse the above procedure to install a backplane board. IMPORTANT: If installing a Revision A backplane board, slide the board toward the front of the baseman before tightening the mounting screws. This will ensure proper alignment with the system board. Chapter 5.22 System Board Guide This procedure applies to the 486-based system board only.
- Page 137 3. Complete the steps in Section 5.11 to remove the option cards. 4. Complete the steps in Section 5.12 to remove the system board. 5. Remove and discard the system board guide. A small, flat-bladed screwdriver can be used to pry the guide from the chassis (Figure 5-55).
- Page 138 Chapter 6.0 Introduction This chapter provides switch and jumper settings for the DT3 and DT4 models of the Compaq ProLinea Family of Personal Computers. Chapter 6.1 486-Based System Boards Connector and jumper locations on the 486-based system board are shown in Figure 6-1.
- Page 139 --------------------------------------------------------------------------- Internal/ 1 - 2 Internal (onboard) battery External Battery 2 - 3 External battery. Connect battery at header P3 =========================================================================== 486-Based System Board Processor Clock Speeds The switch settings for the processors for the 486-based system boards are shown in Table 6-2. Table 6-2.
- Page 140 Replacement Battery 4 Pin Header, Key 2 Feature Connector 26 Pin Header P1013 Processor/Upgrade Socket XU42 Graphics Memory Expansion 30 Pin Small Header J1006, J1014 =========================================================================== Chapter 6.2 586-Based System Boards Connector and jumper locations on the 586-based system board are shown in Figure 6-2.
- Page 141 Enable/Disable 2 - 3 Password disabled --------------------------------------------------------------------------- Internal/ 1 - 2 Internal (onboard) battery External 2 - 3 External battery. Connect battery Battery at header P3 =========================================================================== 586-Based System Board Processor Clock Speeds The settings for the processor switch SW1 for the 586-based system board are shown in Table 6-6.
-
Page 142: Chapter 6.3 Backplane Boards
Function Description Designator =========================================================================== SIMM Sockets 72 Pin SIMM J7, J8, J10 - J13 Replacement Battery 4 Pin Header, Key 2 Feature Connector 26 Pin Header J1013 Processor/Upgrade Socket XU10 Graphics Memory Expansion 44 Pin Small Header P4, P5, P7, P8 =========================================================================== Chapter 6.3 Backplane Boards 3-Slot Backplane Board... - Page 143 Standard ISA Slots ISA Socket J5, J7 Shared ISA/PCI Slot ISA Socket Shared ISA/PCI Slot PCI Socket Compaq Option Slot ISA Socket System Board Edge connector Diskette Drive 34-pin edge connector IDE Drive 40 Pin Edge P4, P5 Speaker 4-pin/key 3...
- Page 144 Standard ISA Slots ISA Socket J7, J8 Shared ISA/PCI Slots ISA Socket J3, J5 Shared ISA/PCI Slots PCI Connector J4, J6 Compaq Option Slot ISA Socket System Board Edge connector Diskette Drive 34-pin edge connector IDE Drive 40 Pin Edge P4,P5...
-
Page 145: Chapter 6.4 Ide Hard Drives
Power Supply P1, P2 =========================================================================== Chapter 6.4 IDE Hard Drives The following IDE hard drives for the Compaq ProLinea Family of Personal Computers are available from Compaq Computer Corporation: o 270 MB IDE hard drive o 420 MB IDE hard drive... - Page 146 RAM copy of the system ROM. If you are using an operating system other than MS-DOS, you must use the Compaq Diagnostics Diskette to set up the hard drive parameter without translation.
- Page 147 420 MB IDE Hard Drive Jumper Settings The jumper settings for the 420 MB IDE hard drives are shown in Figures 6-7 and 6-8.
- Page 149 540 MB IDE Hard Drive Jumper Settings The jumper settings for the 540 MB IDE are shown in Figures 6-9 and 6-10.
- Page 151 720 MB IDE Hard Drive Jumper Settings The jumper settings for the 720 MB IDE are shown in Figure 6-11.
- Page 152 1 GB IDE Hard Drive Jumper Settings The jumper settings for the 1 GB IDE are shown in Figure 6-12.
-
Page 153: Chapter 6.5 Scsi Hard Drives
Chapter 6.5 SCSI Hard Drives The following SCSI hard drives for the Compaq ProLinea Family of Personal Computers are available from Compaq Computer Corporation: o 535 MB Fast SCSI-2 hard drive o 1.0 GB Fast SCSI-2 hard drive o 1.05 GB Fast SCSI-2 hard drive... - Page 154 o 2.1 GB Fast SCSI-2 hard drive 535 MB SCSI Hard Drives Jumper Settings The jumper locations for the three 535 MB SCSI hard drives are shown in Figures 6-13 through 6-15. Jumper settings are given in Tables 6-12 through 6-14. Table 6-12.
- Page 155 Table 6-13. 535 MB SCSI-2 DEC Hard Drive Jumper Options (Shipped configuration below) =========================================================================== Jumper Option Description =========================================================================== 1 - 2 PARK SCSI Address, Bit 0 3 - 4 PARK SCSI Address, Bit 1 5 - 6 OPEN SCSI Address, Bit 2 OPEN Fault LED OPEN...
- Page 156 15 - 16 OPEN 17 - 18 OPEN Reserved 19 - 20 OPEN Spindle Sync Reference =========================================================================== Table 6-14. 535 MB IBM SCSI-2 Hard Drive Jumper Options (Shipped configuration below) =========================================================================== Jumper Option Description =========================================================================== 1 - 2 Device Identification, Bit 0 3 - 4 Device Identification, Bit 1 5 - 6...
- Page 157 13 - 14 TI Sync Negotiation Enabled =========================================================================== 1.05 GB SCSI Hard Drive Jumper Settings The jumper locations for the 1.05 GB SCSI hard drives are shown in Figures 6-16 through 6-21. See Tables 6-15 through 6-19 for jumper settings. Table 6-15.
- Page 158 OPEN Spindle Sync Reference OPEN +5V Out OPEN Reserved 13 - 14 OPEN Delay Spin/Write Protect, Disabled 15 - 16 OPEN 17 - 18 OPEN Reserved 19 - 20 OPEN Spindle Sync Reference =========================================================================== Table 6-16. 1.05 GB IBM SCSI-2 Hard Drive Jumper Options (Shipped configuration below) =========================================================================== Jumper...
- Page 159 7 - 8 Auto Spin Up Enabled 9 - 10 Unit Attention Enabled 11 - 12 SCSI Terminator On 13 - 14 TI Sync Negotiation Enabled =========================================================================== Table 6-17. 1.05 GB SCSI HP Hard Drive Jumper Options (Shipped configuration shown) =========================================================================== Jumper Option...
- Page 160 7 - 8 Synchronized Spindle (unused) PARK SCSI Address, Unit Select 1 PARK SCSI Address, Unit Select 2 SCSI Address, Unit Select 3 =========================================================================== Table 6-18. 1.05 GB SCSI Micropolis Hard Drive Jumper Options (Shipped configuration shown) =========================================================================== Jumper Option Description =========================================================================== ---------------------------------------------------------------------------...
- Page 161 Parity Checking enabled Write protect disabled Spin up with Start Unit Command Spin up delay disabled LED on PCBA is enabled Drive provide BUS termination power Termination power provided by Host Drive provide local termination power Slave Sync Termination enabled Master Sync Termination disabled =========================================================================== Table 6-19.
- Page 162 Jumper Option Description =========================================================================== --------------------------------------------------------------------------- SCSI-2 level Normal operation Unit attention enabled Retry count is unlimited Parity checking enabled Initiate SDTR message at power-on and reset LED lights during operation Spin up with Start Unit Command CNH11 --------------------------------------------------------------------------- 1 - 2 Park SCSI address, Unit Select 1 3 - 4...
- Page 163 2.1 GB SCSI Hard Drive Jumper Settings The jumper locations for the two 2.1 GB SCSI hard drives are shown in Figures 6-22 and 6-23. See Tables 6-20 and 6-21 for jumper settings.
- Page 164 Table 6-20. 2.1 GB Seagate SCSI-2 Hard Drive Jumper Options (Shipped configuration below) =========================================================================== Jumper Option Description =========================================================================== --------------------------------------------------------------------------- 1 - 2 Terminator Power SCSI Address, Unit Select 1 3 - 4 --------------------------------------------------------------------------- 1 - 2 Spindle Sync Connector 3 - 4 Initiate SDTR Message at Power-On and Reset 5 - 6 Remote LED Connector...
- Page 165 15 - 16 Reserved 17 - 18 SCSI Address, Unit Select 0 19 - 20 SCSI Address, Unit Select 1 21 - 22 SCSI Address, Unit Select 2 =========================================================================== Table 6-21. 2.1 GB HP SCSI-2 Hard Drive Jumper Options (Shipped configuration below) =========================================================================== Jumper...
-
Page 166: Chapter 6.6 Cd-Rom Drive Jumper Settings
Synchronized Spindle Disabled SCSI Pin 29 Disabled Spin Up with Start Unit Command Parity Checking Enabled Initiate SDTR Message at Power-On and Reset Unit Attention Enabled Write Protect based on Mode Page Reserved Terminator Disabled Terminator Power Disabled =========================================================================== Chapter 6.6 CD-ROM Drive Jumper Settings The jumper settings for the quad speed IDE CD-ROM drive are shown in Figure 6-24 and 6-25. - Page 169 Chapter 7. Compaq Utilities Chapter 7.0 Introduction This chapter contains description of some Compaq utilities that can be helpful when servicing the Compaq ProLinea Family of Personal Computers. These utilities include: o Energy Saver utility o Graphics resolution o QuickLock/QuickBlank...
- Page 170 Setting Energy Saver Values To set Energy Saver values under the Windows environment, complete these steps: 1. Select the Power Management icon in the Compaq Control Center. Power Management can also be found in the Compaq Utilities group box of Windows Program Manager.
- Page 171 If you do not have a Plug and Play monitor, you can set up your display manually. Supported Resolutions Resolutions supported by the two graphics controllers installed on the Compaq ProLinea Family of Personal Computers are presented in the following Tables: Table 7-2a. Supported Graphics Resolution for the Compaq QVision 2000+ Graphics Controller...
- Page 172 If the computer has a PCI Local Bus Integrated Graphics Controller, complete the following steps to change the monitor type: 1. Select the Winmode icon from the Compaq Utilities Group Box. This launches a window showing the current configuration of your computer.
- Page 173 If the computer has a PCI Local Bus Integrated Graphics Controller, complete the following steps to change the resolution: 1. Select the Winmode icon from the Compaq Utilities Group Box. This launches a window showing the current configuration of your computer.
- Page 174 4. From the main menu, select the Security Management feature, and press the Enter key. 5. When the steps in the Security Management screen display, select the step View or Edit Details and press the Enter key. 6. Page down to locate the QuickLock password and QuickBlank items on the screen and follow the instructions provided to enable them.
- Page 175 These features must be used in combination with a power-on password. To enable one of these features: 1. Select and open Security Management, found in the Compaq Control Center. 2. Click on the Power-on Password box. 3. From the Power-on Password box, click on the Advanced box.
-
Page 176: Chapter 7.5 Flash Rom
(Read Only Memory). Flash ROM, set to its default setting of OFF, protects the Flash ROM from being upgraded and the System BIOS from being updated. To update the ROM, order the ROMPaq diskette from Compaq. To upgrade the ROM, complete the following procedures: 1. - Page 177 not write-protected and unauthorized updates can occur. >>>>>>>>>>>>>>>>>>>>>>>>>>>>>>>>>>>>><<<<<<<<<<<<<<<<<<<<<<<<<<<<<<<<<<<<<< 2. Enter the Setup Password. 3. If the Setup Password is entered correctly, the ROMPaq utility will take over and run the flash ROM upgrade. NOTE: If the Setup Password is entered incorrectly, the procedure will terminate and no changes will be made to the ROM.
- Page 178 Chapter 8. Specifications Chapter 8.0 Introduction This chapter provides physical, environmental, and performance specifications for the Compaq ProLinea Family of Personal Computers. Chapter 8.1 System The specifications for the DT3 and DT4 computers are presented in Table 8-1 and 8-2, respectively.
-
Page 179: Chapter 8.2 System Interrupts
Table 8-2. Table 8-2. DT4 System Specifications =========================================================================== U.S. Metric =========================================================================== Dimensions: Height 5.75 in 14.61 cm Width 17.69 in 44.93 cm Depth 15.30 in 38.86 cm --------------------------------------------------------------------------- Weight (approximate) 24.0 10.9 kg --------------------------------------------------------------------------- Power Supply: Voltage Select Setting 115 VAC 230 VAC Operating Voltage Range 90 - 132 VAC... -
Page 180: Chapter 8.3 System Dma
IRQ 8 Real-Time Clock (Not on ISA Bus) IRQ 9 IDE Controller (Secondary) IRQ 10 IDE Controller (Secondary) IRQ 11 PCI Interrupt * IRQ 12 Mouse * IRQ 13 Coprocessor (Not on ISA Bus) IRQ 14 IDE Controller (Primary/Hard Drive) * IRQ 15 IDE Controller (Secondary/CD-ROM Drive) * ---------------------------------------------------------------------------... - Page 181 Keyboard Controller Port B 062 - 063 Unused Keyboard Controller 065 - 06F Unused 070 - 071 NMI Enable/Real Time Clock 072 - 07F Unused 080 - 08F DMA Page Registers 090 - 091 Unused Port A 093 - 09F Unused 0A0 - 0BF Interrupt Controller # 2...
- Page 182 1F0 - 1F7 Fixed Disk Controller 1F8 - 1FF Unused Unused Unused 202 - 21F Unused 220 - 22F Entertainment Audio (Default; Alternate =240h) 230 - 277 Unused 278 - 27F Reserved Parallel Port 280 - 2E7 Unused 2E8 - 2EF Reserved Serial Port 2F0 - 2F7 Unused...
-
Page 183: Chapter 8.5 System Memory Map
3F8 - 3FF Serial Port (Primary) =========================================================================== Chapter 8.5 System Memory Map =========================================================================== Size Memory Address System Function =========================================================================== 640 KB 00000000 - 0009FFFF Base Memory 128 KB 000A0000 - 000BFFFF Video RAM 24 KB 000C0000 - 000C5FFF Video ROM 2 KB 000C6000 - 000C67FF Unused... -
Page 184: Chapter 8.7 Hard Drives
540 MB =========================================================================== Formatted Capacity: Physical (MB) 270.6 272.7 421.9 428.1 528.4 Logical (MB) 270.6 272.7 421.9 428.1 541.3 --------------------------------------------------------------------------- Compaq Part Number 172772 172773 172774 189586 172851 --------------------------------------------------------------------------- Drive Type --------------------------------------------------------------------------- Transfer Rate: Media (Mbits/sec) 36.0 35.8 27.9 32.0 36.0... - Page 185 535 MB =========================================================================== Formatted Capacity: Physical (MB) 545.5 730.8 1083.8 545.7 541.9 Logical (MB) 545.5 730.8 1082.0 535.8 535.8 --------------------------------------------------------------------------- Compaq Part Number 172852 189587 214127 148158 192766 --------------------------------------------------------------------------- Drive Type SCSI SCSI --------------------------------------------------------------------------- Transfer Rate: Media (Mbits/sec) 35.8 47.2 50.2 43.1...
- Page 186 2.1 GB 2.1 GB =========================================================================== Formatted Capacity: Physical (MB) 1083.9 1050.4 2139.5 2132.6 Logical (MB) 1050.0 1050.0 2104.3 2104.3 --------------------------------------------------------------------------- Compaq Part Number * 142189 142154 142294 142214 --------------------------------------------------------------------------- Drive Type SCSI SCSI SCSI SCSI --------------------------------------------------------------------------- Transfer Rate: Media (Mbits/sec) 35.4...
-
Page 187: Chapter 8.8 Cd-Rom Drive
Logical 1001 1001 --------------------------------------------------------------------------- Data Heads: Physical Logical --------------------------------------------------------------------------- Sectors per Track: Physical 58 - 96 58 - 94 58 - 97 68 - 108 Logical --------------------------------------------------------------------------- Buffer Size (KB) --------------------------------------------------------------------------- * All part numbers have a -001 suffix =========================================================================== Chapter 8.8 CD-ROM Drive =========================================================================== Applicable Disc:... - Page 188 --------------------------------------------------------------------------- Cache Buffer 128 KB --------------------------------------------------------------------------- Data Transfer Rate: Sustained 600 KB/sec Burst 4.0 MB/sec --------------------------------------------------------------------------- Interface Cable Length (Max) 18 in --------------------------------------------------------------------------- Startup Time < 7 sec (typical) --------------------------------------------------------------------------- Stop Time < 2 sec --------------------------------------------------------------------------- Dimensions: Height 1.67 in (42.5 mm) Width 5.75 in (146.0 mm) Depth...
- Page 189 --------------------------------------------------------------------------- Vibration: Operating 1 GO - P at 5 to 500 Hz Nonoperating 2 GO - P at 5 to 300 Hz Transportation 0.015 G2/Hz at 5 to 50 Hz (with standard package) =========================================================================== Chapter 8.9 Mouse =========================================================================== U.S. Metric =========================================================================== Dimensions: Height...
-
Page 190: Appendix A. Connector Pin Assignments
Appendix A. Connector Pin Assignments This appendix contains the pin assignments for all external connectors: Table A-1. Keyboard =========================================================================== Signal =========================================================================== Data Unused Ground +5 VDC Clock Unused ===========================================================================... - Page 191 Table A-2. Mouse =========================================================================== Signal =========================================================================== Data Unused Ground +5 VDC Clock Unused ===========================================================================...
- Page 192 Table A-3. Parallel Interface =========================================================================== Signal =========================================================================== Strobe * Data Bit 0 Data Bit 1 Data Bit 2 Data Bit 3 Data Bit 4 Data Bit 5 Data Bit 6 Data Bit 7 Acknowledge Busy...
- Page 193 Paper End Select Auto Linefeed Error Initialize Printer Select IN 18 - 25 Signal Ground =========================================================================== Table A-4. Serial Interface =========================================================================== Signal =========================================================================== Carrier Detect Receive Data Transmit Data...
- Page 194 Data Terminal Ready Signal Ground Data Set Ready Request to Send Clear to Send Ring Indicator =========================================================================== Table A-5. VGA Monitor =========================================================================== Signal =========================================================================== Red Analog Green Analog Blue Analog Not Connected...
- Page 195 Ground Ground Analog Ground Analog Ground Analog Not Connected Ground Not Connected Not Connected Horizontal Sync Vertical Sync Not Connected ===========================================================================...
-
Page 196: Appendix B. Power Cord Set Requirements
Power cord sets for use in other countries must meet the requirements of the country where you use the computer. For more information on power cord set requirements, contact your Authorized Compaq Reseller or Service Provider. General Requirements The requirements listed below are applicable to all countries: 1. - Page 197 Japan Norway NEMKO Sweden SEMKO Switzerland United Kingdom United States --------------------------------------------------------------------------- NOTES 1: The flexible cord must be <HAR> Type HO5VV-F, 3-conductor, 1.0 mm2 conductor size. Power cord set fittings (appliance coupler and wall plug) must bear the certification mark of the agency responsible for evaluation in the country where it will be used.
Need help?
Do you have a question about the Prolinea Family and is the answer not in the manual?
Questions and answers