Table of Contents
Advertisement
Quick Links
Download this manual
See also:
Operator's Manual
Advertisement
Table of Contents

Subscribe to Our Youtube Channel
Related Manuals for Wacker Neuson BFS 1350AL


Summary of Contents for Wacker Neuson BFS 1350AL
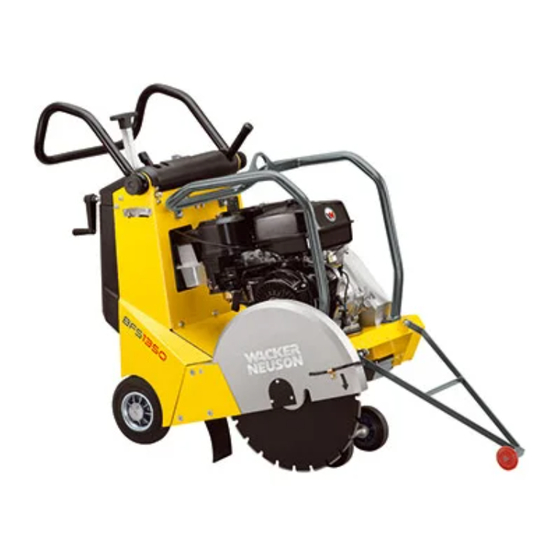
- Page 1 0201438en 10.2005 Gasoline powered floor saw BFS 1350AL Operator´s Manual...
-
Page 3: Important Information
IMPORTANT INFORMATION Important information This machine has been equipped with an EPA certified engine. Additional information found engine manufacturers notes. WARNING The engine exhaust from this product contains chemicals known to the State of California to cause cancer, birth defects or other reproductive harm. -
Page 5: Foreword
FOREWORD Foreword For your own safety and protection from bodily injuries, carefully read, understand and follow the safety instruc- tions in this manual. Please operate and maintain your Wacker machine in accordance with the instructions in this manual. Defective machine parts are to be replaced as soon as possible. All rights, especially the right for copying and distribution are reserved. -
Page 6: Table Of Contents
TABLE OF CONTENTS IMPORTANT INFORMATION FOREWORD SAFETY INSTRUCTIONS General instructions Operation Safety checks Maintenance Transport Maintenance checks TECHNICAL DATA DESCRIPTION Field of applications Dimensions Max. admissible inclination Description of function General instruction for the use of diamond blades TRANSPORT TO WORK SITE OPERATION Guide handle adjustment Guide wheel adjustment... -
Page 7: Safety Instructions
SAFETY INSTRUCTIONS SAFETY INSTRUCTIONS FOR THE USE OF FLOOR SAWS WITH COMBUSTION ENGINE General instructions Floor saws may only be operated by persons who * are at least 18 years of age * are physically and mentally fit for this job * have been instructed in operating saws and proved their ability for the job to the employer * may be expected to carry out the job they are charged with carefully. -
Page 8: Safety Checks
SAFETY INSTRUCTIONS Always wear protective goggles, hearing protection, work gloves, protective helmet, tight-fitting clothing and safety shoes during operations with the equipment. Shoes and pants must be closed to offer pro- tection against flying sparks. Wear approved respiratory protection (e.g. a mask) if there is a lot of dust in the air. -
Page 9: Technical Data
TECHNICAL DATA BFS 1350AL BFS 1350L 1350ALS Item no. 0008898 ... 0008936 ... 0008885 ... Weight Power transmission From drive engine via drive belt to cutting blade Max. diameter of blade Min. thickness of blade Max. cutting width Location bore 25,4 Max. -
Page 10: Description
DESCRIPTION Field of applications * Cutting expansion joints in concrete and asphalt surfaces. * Repair jobs on roads, e.g. cutting out damaged patches of either asphalt or concrete road surfaces. * Straightening black-top and concrete surfaces. * Demolition jobs and renovation of old dwellings. * Cutting precast concrete elements. -
Page 11: Description Of Function
DESCRIPTION Description of function The floor saw should only be operated in a forward direction (see arrow). The drive engine (2), which is fastened to the frame, drives the cutting disc by way of a drive belt (7). A hand crank (5) is used to operate the infinitely variable height adjuster on the blade, and 1 turn = 5 mm cutting depth adjustment. -
Page 12: General Instruction For The Use Of Diamond Blades
DESCRIPTION General instruction for the use of diamond blades * Never use a blade of a diameter larger than necessary to cut a certain depth. * In case the blade stops operating, take it out of the cut before starting the engine anew. Check the belt ten- sion if the cutting disc should get stuck in the cut. -
Page 13: Transport To Work Site
TRANSPORT TO WORK SITE Transport to work site Conditions: Only use suitable lifting equipment with a minimum lifting capacity of 200 kg for the transport of the floor saw. Always switch off motor during transport! Empty the water tank. Attach appropriate secure lifting devices to the central lifting point (10) provided for this purpose. Tie down the protection frame during transport of the floor saw on the bed of a vehicle. -
Page 14: Operation
OPERATION Guide handle adjustment The guide handle can be individually adjusted to the height of the operator. Loosen the knurled thumb screws (11) on both sides, swivel the guide handle to the desired position and then tighten back both knurled thumb screws. Guide wheel adjustment The guide wheel makes the job of cutting long straight cuts easier. -
Page 15: Cutting Depth Adjustment
OPERATION Cutting depth adjustment Place the quick-lift lever in the forward lock-in position; this will enable you to exactly adjust the cutting depth by turning the crank (5). One turn of the crank drops the cutting disc by 5 mm (cutting depth). It is possible to choose between two lock-in positions of the quick-lift-lever (3) at any time: 1. -
Page 16: Water Tank
OPERATION Water tank The floor saw has been equipped with an integrated, removable water tank (15). The filler opening (16) can be found at top left side. The water supply can be adjusted (17) and also turned off. To remove the water tank proceed as follows: 1. -
Page 17: Removal Of The Cutting Disc
OPERATION Removal of the cutting disc Proceed as follows to remove a cutting disc: 1. Apply parking brake (6), stop engine (23) and stop water supply (17). 2. Move quick-lift lever (3) to position at the rear. 3. Disconnect the water hose. 4. -
Page 18: Right-Hand, Left-Hand Cutting Conversion
OPERATION Right-hand, left-hand cutting conversion To switch the cutting blade from one side to the other proceed as follows: 1. Disassemble the water hose fasteners and then reassemble on the opposite side in each case. 2. Loosen screws (24), remove cutting disc guard (1) and protective hood (22). 3. -
Page 19: Engine Check Before Starting
OPERATION Engine check before starting 1. Oil level check Insert dipstick in oil filter neck, but without screwing in. If oil level is low, fill to the top of the oil filter neck with Fuchs Titan Unic 10W40 MC oil. ATTENTION! Place machine in horizontal position before checking engine oil level. -
Page 20: Operation The Engine
OPERATION 3. Push throttle lever (4) slightly forward. 4. Turn main switch (23) to position ”1”. 5. Pull starter handle out slowly until a slight resistance is felt, then pull handle with strength. Caution: Do not allow the starter grip to snap back against the en- gine. -
Page 21: Stopping The Engine
OPERATION Stopping the engine Turn the main switch to the position ”0” to stop the engine in an emergency. Proceed as follows under normal working conditions: 1. Pull the throttle lever (4) all the way back to the stop position. 2. -
Page 22: Maintenance
MAINTENANCE Maintenance schedule Check all external screw connections for tight fit approx. 8 hours after first operation. Parts Maintenance jobs Maintenance interval Air filter Check for external damage and tight daily fit. Check foam and filter insert clean or replace if necessary. -
Page 23: Oil Change
MAINTENANCE Oil change Drain the oil while the motor is still warm to assure rapid and complete draining. 1. Remove the oil filler cap drain plug to drain the oil. 2. Install the drain plug, and tighten it securetly. 3. Refill with the recommended oil and check oil level. ATTENTION! Place machine in horizontal position before checking engine oil level. -
Page 24: Cleaning The Fuel Filter Cup
MAINTENANCE Cleaning the fuel filter cup Close the fuel tap. Remove the cup with the O-ring and clean with non-inflammable or hardly-inflammable sol- vent. Let dry thoroughly, then reassemble and tighten well. Turn the fuel valve on, and check for leaks. Spark plug Recommended spark plug: BP6ES-11, BPR6ES-11 (NGK), W20EP-U11, W20EPR-U11 (ND). -
Page 25: Adjusting Drive Belt Tension
MAINTENANCE Adjusting drive belt tension The tension of the belt should be checked at the time of the weekly engine maintenance and, if necessary, tensioned as follows: 1. Remove V-belt guard. 2. Loosen counter nut (31). 3. Loosen the fastening screws (32) until the V-belt’s take-up can be shifted without play. -
Page 26: Electric Wiring Diagram
ELECTRIC WIRING DIAGRAM Switch Ground Frame Ground Fuel line yellow/black Engine SK00652GB... -
Page 27: Labels
LABELS Warning sign Lifting point Notice sign Notice sign Notice sign Notice sign Type Wacker Logo Sound power level SK00651GB... -
Page 29: Ec - Conformity-Certificate
EC - CONFORMITY-CERTIFICATE Wacker Construction Equipment AG , Preußenstraße 41, 80809 München hereby certify that the construction equipment specified hereunder: 1. Category: Powered floor saw 2. Type: BFS 1345... / BFS 1350... 3. Equipment item number: 0008764 ..., 0008885 ..., 0008898 ..., 0008909 ..., 0008936 ... 4. - Page 31 DIN EN ISO 9001 CERTIFICATE...
- Page 32 Wacker Construction Equipment AG Preußenstraße 41 80809 München Tel.: +49-(0)89-3 54 02-0 Fax: +49-(0)89-3 54 02-390 Wacker Corporation - P.O. Box 9007 - Menomonee Falls, WI 53052-9007 - Tel.: +1-(1)(262)-255-0500 - Fax: +1-(1)(262)-255-0550 - Tel.: (800)770-0957 Wacker Asia Pacific Operations-Skyline Tower, Suite 2303, 23/F, 39 Wang Kwong Road, Kowloon Bay, Hong Kong-Tel.: +852 2406 6032-Fax: +852 2406 6021...
Need help?
Do you have a question about the BFS 1350AL and is the answer not in the manual?
Questions and answers