Table of Contents
Advertisement
Quick Links
Advertisement
Table of Contents

Summary of Contents for S.E.M. Ergo IP-10
-
Page 3: Table Of Contents
CONTENTS IMPORTANT SAFETY & NOTICE ....................SYSTEM BASICS Location of Controls - Main Unit ......... Location of Controls - Remote ..........Power Supply AC Operation ..........iPod OPERATION Preparation of iPod Dock ............Operation with iPod .............. DIGITAL CLOCK Digital Clock Functions ............How to Set Correct Time ............ - Page 4 IMPORTANT SAFETY & NOTICE The lightning fl ash and arrowhead within the triangle is a warning sign alerting you of “dangerous voltage” inside the product. WARNING: CAUTION To reduce the risk of electric shock, do not remove cover (or back). No user-serviceable RISK OF ELECTRIC SHOCK parts inside.
-
Page 5: Location Of Controls - Main Unit
SYSTEM BASICS LOCATION OF CONTROLS - MAIN UNIT 1. CAVITY FOR DOCK ADAPTOR 11. ON/ STANDBY KEY 2. DOCK ADAPTOR FOR iPod 12. VOLUME DOWN ( ) KEY (SEVERAL DIFFERENT ADAPTORS ARE 13. MEM / ALARM KEY PROVIDED) 14. STOP/ MEMORY KEY 3. -
Page 6: Location Of Controls - Remote
SYSTEM BASICS LOCATION OF CONTROLS - REMOTE CONTROLS 1. ON/ STANDBY KEY 10. CLOCK ADJ. KEY 2. MUTE KEY 11. MEM. + KEY 3. ALARM KEY 12. EQ/ DISPLAY KEY 4. MEM. - KEY 13. FUNCTION KEY 5. SLEEP/ SNOOZE KEY 14. -
Page 7: Preparation Of Ipod Dock
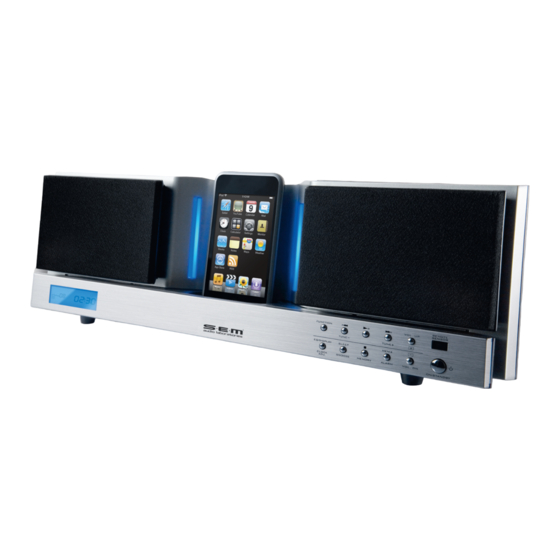
iPod OPERATION PREPARATION OF iPod DOCK To connect an iPod with a dock connector to this unit, fi rst insert the dock adaptor that fi ts your iPod, and then connect your iPod. Your Hi-Fi includes dock adaptors that work with several models of iPod with dock connectors. - Page 8 iPod OPERATION OPERATION WITH THE iPod - Turn on both the unit and the iPod. - Connect the iPod to the unit as described. - Press the “function” key repeatedly until the display shows “iPod”. - Press the Play/ Pause key on the unit, then the fi...
-
Page 9: Digital Clock Functions
DIGITAL CLOCK DIGITAL CLOCK FUNCTION - The set has a built-in digital clock, which is displayed in 2 situations: (1) When the set is in “Standby mode”. (The display will continuously show the current time). In this situation the blue backlight is normally off (to save electricity) but you can switch on the blue display light by pressing any key, (on the set or remote control) except the “On/ Standby”... -
Page 10: Alarm Function
DIGITAL CLOCK ALARM FUNCTION - This set is equipped with 3 alarm modes: buzzer, radio and iPod. Before setting the alarm, make sure to set the clock (see “digital clock function” in the pervious section) . PREPARE FOR THE ALARM SETTINGS Press the ON/STANDBY key to switch on the set (display blue light will be “on”). - Page 11 DIGITAL CLOCK 6. The alarm time is now fully programmed and the alarm symbol will appear on and also the selected alarm source will be fl ashing to indicate that the alarm function is “active”. (Display shows as follows with blue backlight “off”) 7.
-
Page 12: Snooze Function
GENERAL FUNCTION SNOOZE FUNCTION - Whenever the alarm comes on, it can be temporarily suspended for a short period of 5 minutes, by pressing the “Snooze” key once. - The alarm will then automatically come on again after the 5 minutes “Snooze” period has ended. -
Page 13: Using The Audio Line In Connection
GENERAL FUNCTION USING THE AUDIO LINE IN CONNECTION (AUX-INPUT) - You can connect the audio output of an external device such as a MP3 player or a TV to this unit, to listen to the sound of that device through the high quality amplifi er of this music system. -
Page 14: Operation Of Radio
RADIO OPERATION OF RADIO - Press the “On/ Standby” key once to switch on the unit. - Press the FUNCTION key repeatedly until the display shows “tuner”. - Extend and adjust the fm-wire antenna to obtain the best reception. - Use the STEREO/MONO key (on remote control) to select the desired mode. In some cases, where reception is poor, it may be advisable to select “mono”... -
Page 15: Specifi Cations
SPECIFICATIONS SPECIFICATIONS Power Supply : ....DC 12V, 1.5A though built-in DC jack External AC-DC power adaptor 100V-240V ~ 50/60Hz Power Consumption : ....17W Speaker : ....Speaker 3” x 2 E-12...
Need help?
Do you have a question about the Ergo IP-10 and is the answer not in the manual?
Questions and answers
how to ajust month, year and date