Table of Contents
Advertisement
Advertisement
Table of Contents

Related Manuals for Sherbourn PRE-1


Summary of Contents for Sherbourn PRE-1
-
Page 2: Table Of Contents
Sound Drops Out with CD or DVD Playback Remote Not Working External Amplifier(s) Shut Down (often or prematurely) Remotely Connected External Amplifier(s) Do Not Turn Off With PRE-1 “Hum” Noises Other Probable Causes of Speaker Noise Problems with the whole A/V System... -
Page 3: Thank You From Sherbourn
Thank You from Sherbourn Thank you very much for your decision to purchase one of our superb Sherbourn amplifiers. We take enormous pride in the design and build quality of all of our products and we are confident that our product will provide you with many years of enjoyable and trouble free service. -
Page 4: Safety Precautions
Do not install the PRE-1 on any stand, shelf, or other piece of furniture that is unable to support its weight. If a cart is used to move the PRE-1, use caution to avoid injury from tip-over. -
Page 5: Fcc Interference Statement
The power cable for the PRE-1 should be unplugged from the outlet during severe electrical storms, or when unused for a long period of time. Only replace the fuse in the PRE-1 with a fuse of proper value and voltage rating. -
Page 6: Nec (National Electrical Code) Standards
It is important to save all the packing materials and the boxes in case your PRE-1 ever needs to be moved or shipped back to the factory for service. Make sure you keep your sales receipt. It is the only way... -
Page 7: Pre-1 Preamplifier Features
PRE-1 Features Precision low noise phono input with moving magnet or moving coil capability Seven stereo inputs with precision instrumentation grade relay switching Microprocessor controlled pure analog signal path Full remote control operation Gold plated discrete RCA connectors for all inputs and outputs ... -
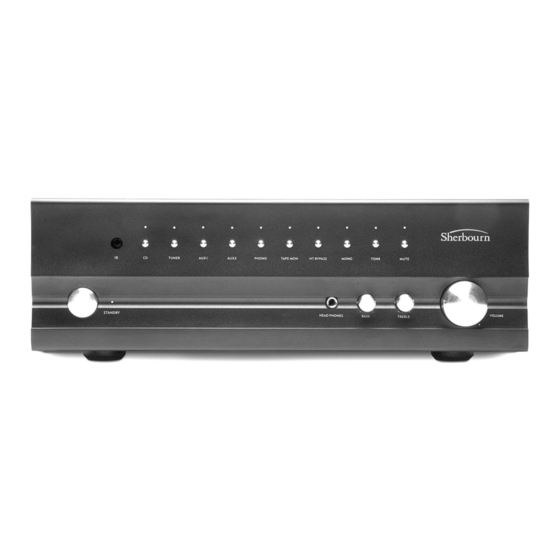
Page 8: Front Panel Layout
12. Power Button and standby LED The power button is a non-latching momentary button that 3. Tuner Source Selection Button turns the PRE-1 on or off. On indicates with a blue LED. Selects a properly connected Tuner as input source. Off indicates with red LED. -
Page 9: Rear Panel Layout
This rocker switch provides the master power for the PRE-1. Magnet. After it is in the ON position, the PRE-1 can be turned on 3. AUDIO Section (from left to right) manually from the front panel switch, remote control, or •... -
Page 10: Remote Control
3. Source Selection Buttons These buttons select the various PRE-1 source inputs. LEDs on the front panel of the PRE-1 will light in corre- spondence with the selected input. • CD - selects CD player input as source. -
Page 11: Connecting Audio Source Units
Connect the Left output on the CD player to When connecting to amplifiers and speakers, make sure the Left input of the CD INPUT section of the PRE-1, and to use the properly labeled connections. the Right output on the CD player to the Right input of the Check to make sure that you have connected the CD INPUT section of the PRE-1. -
Page 12: Trigger Connections
• If the hum persists, disconnect all the source compo- nents one at a time from the back of the PRE-1 until you identify the problem. (Ground loop isolators are available for audio lines and video. Ask Sherbourn... -
Page 13: Other Probable Causes Of Speaker Noise
Frequency Response: 5Hz - 80kHz +/- 0.05 dB a separate line. 5Hz - 250kHz +/- 1 dB • If the hum is heard from within the PRE-1 and not through the speakers, this may also be caused by Maximum Line Out Level: 9V RMS interference on the AC or DC lines. - Page 14 LIMITATION MAY NOT APPLY TO YOU. A claim under this warranty must be made by you within the Term. A claim shall not be valid (and Sherbourn has no obligation related to the claim) if it is not made within the Term and if it is not made in strict compliance with the requirements of the “How do you get service?”...
- Page 15 The CSR will provide you with a returned material authorization number (“RMA”). Ship the product to Sherbourn at the following address, with the RMA written in large, bold letters on the outside of the box, and with the letters “RMA” written before the number. Parcels arriving without an RMA number on the outside of the box will be refused.
Need help?
Do you have a question about the PRE-1 and is the answer not in the manual?
Questions and answers