Table of Contents
Advertisement
Advertisement
Table of Contents

Subscribe to Our Youtube Channel
Related Manuals for Sherbourn PA 2-50


Summary of Contents for Sherbourn PA 2-50
- Page 1 PA 2-50 TWOOCHANNEL FLEX AMPLIFIER Owner’s Manual...
-
Page 3: Important Safety Precautions And Explanation Of Symbols
Do not install the PA 2-50 in locations without proper ventilation. The PA 2-50 should not be operated on a bed, sofa, rug, or similar surface that may block vents. The PA 2-50 should not be installed in an enclosed location such as a bookcase, cabinet, or closed equipment rack unless sufficient forced-air ventilation is provided. - Page 4 PA 2-50. You should seek service for your PA 2-50 by qualified service personnel if any of the following occur: 1. The power-supply cord or the plug has been damaged.
-
Page 5: Table Of Contents
PA 2-50 Two-Channel Flex Amplifier Contents Important Safety Precautions and Explanation of Symbols Introduction ....................2 The PA 2-50 Two-Channel Flex Amplifier ...........2 About This Manual ..................2 Mechanical and Environmental ..............3 Remote Control ..................4 Front Panel ....................5 Rear Panel....................6 Inputs and Outputs ..................8 Installation Tips ...................9... -
Page 6: Introduction
The Sherbourn PA 2-50 is a medium-powered, audiophile quality, class A/B power amplifier with a wide variety of input and control options. The PA 2-50 offers two stereo inputs, each of which can be manually selected or configured to operate automatically, and utilizes a digitally controlled analog level control, which provides very precise control of gain, very tight channel tracking, perfect repeatability, and virtually no distortion. -
Page 7: Mechanical And Environmental
Mechanical and Environmental SIDE SHERBOURN 14.5” PA 2-50 14” 8.5” FRONT 2.625” 3.125” UFP x1 (single rack mount kit) 3.5” 2.375” 8.625” 15” 19” UFP x2 (dual rack mount kit) 3.5” 2.375” 15” 17” 19” Page 3... -
Page 8: Remote Control
Dimensions: 8.5 ” wide x 3.125” high x 14.5” deep (includes feet, binding posts, no rack kit). Weight: 11.2 lbs / 5.1 kg (unboxed); 14.4 lbs / 6.6 kg (boxed). Rack mountable: Yes, single or paired, with optional rack mount kits. Power requirements: 115 VAC or 230 VAC +/- 10% @ 50 / 60 Hz (selectable by rear-panel switch). -
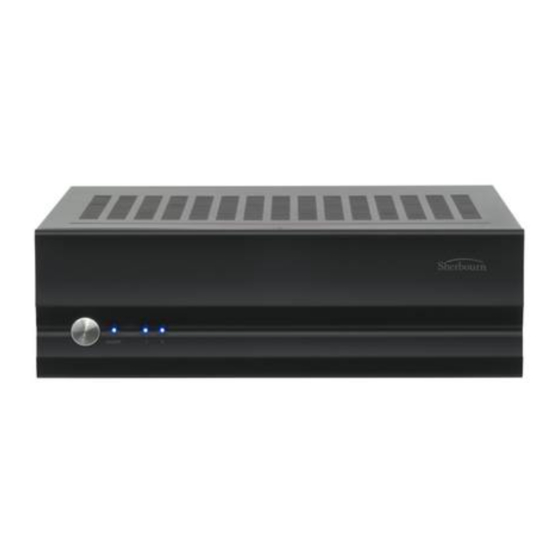
Page 9: Front Panel
Press and hold either button to increase or decrease volume gradually. 6. Volume LEDs (8) These LEDs indicate the approximate volume setting. Note: The Volume on the PA 2-50 can be set in very small increments; the LEDs only show an approximation of the current setting. Page 5... -
Page 10: Rear Panel
Phoenix-type connectors for connecting up to two pairs of speakers. 5. Power Switch Switches the AC mains power to the PA 2-50 On and Off. When this switch is Off, the PA 2-50 will not respond to trigger signals or manual controls. - Page 11 9. IR Input. Connect an external IR sensor to this input if the PA 2-50 is mounted such that IR remote control signals cannot reach the front panel directly. 10. Power Mode Switch. Selects between regular, triggered, and auto-on power modes.
-
Page 12: Inputs And Outputs
Input Voltage (protected slide switch); selects 115 or 230 VAC line voltage. Power Mode toggle switch (On / Off / Triggered). Remote control: The Sherbourn PA 2-50 includes a compact infrared (IR) remote control. May also be controlled by standard (user-supplied) multi-remote. Remote control via RS-232 serial connected controller (bi-directional). -
Page 13: Installation Tips
Auto Power Mode When the rear panel Power switch is set to On, and Power Mode is set to Auto, the PA 2-50 will switch On when signal is detected at either input (regardless of which input is selected as the signal source). - Page 14 Rack Mounting Options The Sherbourn PA 2-50 may be rack mounted using the Sherbourn UFPx1 rack mount kit. Two PA 2-50 units may be mounted side by side in a 19” rack using the Sherbourn UFPx2 rack mount kit. Page 10...
-
Page 15: Configuration
Operating Voltage - Verify that the Sherbourn PA 2-50 is configured for the correct operating voltage for your area. (Voltage is set via the AC Input switch on the rear panel of the PA 2-50). Power Mode - The way in which the PA 2-50 responds to the Trigger Input, audio signals, and the front panel Standby switch is determined by the setting of the Power Mode switch (the small bat switch on the rear panel below the speaker outputs, to the right of the Trigger and IR Inputs). -
Page 16: Remote Control Codes And Signal Specifications
Required cable is a “standard one-to-one male-to-female 9-pin D-sub serial cable”; the PA 2-50 requires pin 2 to pin 2, pin 3 to pin 3, and pin 5 to pin 5 (you may use a fully wired one-to-one cable; do NOT use a “null modem” cable) IR Remote Control Codes The Sherbourn PA 2-50 responds to “16-bit custom NEC style IR codes”... - Page 17 Sherbourn PA 2-50 IR Remote Control Codes (in “NEC Pronto” format) 0000 006D 0022 0002 0157 00AB 0016 0040 0016 0015 0016 0015 0016 0015 0016 0015 0016 0015 0016 0015 0016 0015 0016 0015 0016 0040 0016 0040 0016 0015 0016 0040 0016 0040 0016 0040 0016 0040...
-
Page 18: Performance Specifications
If a fault occurs, the PA 2-50 will automatically power down and the front panel Standby LED will flash red. To reset the protection, turn the PA 2-50 Off and then On again using the REAR PANEL POWER SWITCH after the fault has been removed. -
Page 19: Features
Rack mountable (individual or two units side by side in a single 19” rack mount) • 10 year Sherbourn Technologies Limited Warranty You can find more information about the PA 2-50 Two-Channel Flex Amplifier on our Web site at www.sherbourn.com Page 15... -
Page 20: Operation
When the PA 2-50 is in Standby mode, the single LED next to the front panel Standby switch will be lit red; when the PA 2-50 is On, the LED will be lit blue; if a fault occurs, the LED will flash red (and all other LEDs will be off). -
Page 21: Mute Control
Resetting a fault If the PA 2-50 experiences a short of other fault, the PA 2-50 will return to Standby mode and the Standby LED will flash red. To reset the protection, turn the PA 2-50 Off and then On again using the REAR PANEL POWER SWITCH after the fault has been removed. -
Page 22: Periodic Maintenance
If necessary, the Sherbourn PA 2-50 should be cleaned gently with a soft rag. • If something sticky gets on the front panel or case of the PA 2-50, it should be cleaned with a mild cleaning solution applied to a soft rag, followed by wiping with a clean rag dampened with plain water and drying with a soft dry rag or cloth. -
Page 23: Troubleshooting
Troubleshooting If problems occur, the first step should be to verify that the Sherbourn 2-50 is set to the proper line voltage for your AC power source, and that your power source is operating correctly. Problem: No sound is heard from either channel (the Standby LED is not lit). -
Page 24: Sherbourn Technologies, Llc Five-Year Limited Warranty
LIMITATION MAY NOT APPLY TO YOU. A claim under this warranty must be made by you within the Term. A claim shall not be valid (and Sherbourn has no obligation related to the claim) if it is not made within the Term and if it is not made in strict compliance with the requirements of the “How do you get service?”... -
Page 25: Notes
The CSR will provide you with a returned material authorization number (“RMA”). Ship the product to Sherbourn at the following address, with the RMA written in large, bold letters on the outside of the box, and with the letters “RMA” written before the number. Parcels arriving without a RMA number on the outside of the box will be refused.
Need help?
Do you have a question about the PA 2-50 and is the answer not in the manual?
Questions and answers