
Related Manuals for ZyXEL Communications AC240


Summary of Contents for ZyXEL Communications AC240
- Page 1 AC240 11ac Wireless LAN Dual Band USB Adapter Edition 1.0, 4/2013 www.zyxel.com Copyright © 2013 ZyXELCommunications Corporation...
-
Page 3: Table Of Contents
1 Contents 2 Product Information ..................1 2.1 Introduction and safety information ................1 2.2 Safety Information ....................... 2 2.3 System Requirements ......................3 2.4 Package Contents ......................... 4 2.5 Getting familiar with your new wireless network adapter ........5 3 Driver Installation and Configuration ............6 ... -
Page 4: Product Information
With an easy-to-install Super Speed USB 3.0 interface (a very common expansion port of computers), you can plug the AC240 into any empty USB 3.0 port of your computer, just that simple! Other features of the AC240 include: ... -
Page 5: Safety Information
2.2 Safety Information In order to maintain the safety of users and your properties, please follow these safety instructions: 1. This USB wireless network adapter is designed for indoor use only. DO NOT expose this network adapter to direct sun light, rain, or snow. 2. -
Page 6: System Requirements
2.3 System Requirements An empty USB 3.0/2.0 port (11ac mode requires USB 3.0 for maximum performance) Windows XP, Vista, Windows 7, or Windows 8 operating system CD-ROM drive At least 100MB of available disk space... -
Page 7: Package Contents
Before you start to use this wireless network adapter, please check if there are any items missing from the package and contact your dealer of purchase to claim any missing items: AC240 Wireless Network Adapter (1 pcs) ……...………………… 1 □ Quick Installation Guide (1 pcs)….………….…………………. -
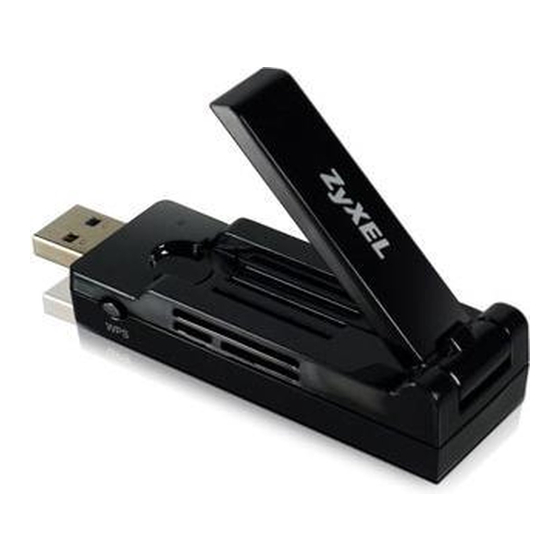
Page 8: Getting Familiar With Your New Wireless Network Adapter
2.5 Getting familiar with your new wireless network adapter 1. USB Connector 2. External Wireless Antenna 3. Power/Activity/WPS LED 4. WPS Button (Press 2 seconds to activate WPS pairing mode) LED Name Light Status Description Power/ 1) No wireless network adapter is installed Activity/ 2) Radio off mode. -
Page 9: Driver Installation And Configuration
If setup does not run automatically, click on “AC240”. Once the screen to the right is showing, click on “Setup” 2. The following will appear on the screen. Click “Next” to continue with installation. (Do not insert AC240 into USB 3.0 port yet) - Page 10 3. Once you get through this part of the installation process, you will be prompted to plug in the AC240. (Please be patient as this may take a few minutes) 4. Insert the USB wireless network adapter into an empty USB 3.0 port of your computer.
- Page 11 5. Follow the given instructions to set up your wireless network and continue with the installation process. On some computers there may be up to a 30 second wait between the end of installation and when the list of available wireless networks becomes available. 6.
- Page 12 You may be prompted to enter a network key in order to connect to a wireless access point. Once you are connected to a wireless access point, the following message should appear. 7. The wireless icon at the bottom of the screen will indicate the strength of your wireless connection and if it is connected at all.
-
Page 13: Connect To Wireless Access Point
3.2 Connect to Wireless Access Point To use your wireless network, you have to connect to a wireless access point first using Windows’ built-in Wireless Zero Config utility 3.2.1 Using Windows Zero Configuration (Windows XP) Windows has a built-in wireless network configuration utility called ‘Windows Zero Configuration’... - Page 14 2. Double click ‘Network Connections’. 3. Right-click ‘Wireless Network Connection’ (it may have a number as a suffix; if you have more than one wireless network adapter, please make sure you right-click the ‘Realtek 8812AU Wireless LAN 802.11ac USB NIC), then select ‘View Available Wireless Networks’.
- Page 15 4. All wireless access points in proximity will be displayed here. If the access point you want to use is not displayed here, please try to move your computer or notebook closer to the access point, or click ‘Refresh network list’ to rescan for access points. Click the access point you want to use if it is shown, then click ‘Connect’.
-
Page 16: Using Windows Zero Configuration (Windows 7)
6. If you can see ‘Connected’ message, the connection between your computer and the wireless access point is successfully established. 3.2.2 Using Windows Zero Configuration (Windows 7) Windows has a built-in wireless network configuration utility called ‘Windows Zero Configuration’ (WZC). You can also use WZC to configure your wireless network parameters: 1. - Page 17 in the notification area. (Bottom right corner of your desktop) 2. In the list of available wireless networks, click a network, and then click Connect. 3. Many networks will require you enter a security key or “password” in order to complete the connection. This is done to restrict access only to authorized users and to encrypt your data for privacy reasons.
-
Page 18: Establish Secure Connection With Ap By Wps
If prompted, please input the security key (password). 4. The network icon will change to once a connection has been successfully established 3.3 Establish secure connection with AP by WPS Wi-Fi Protected Setup (WPS) is the latest wireless network technology that makes wireless network setup as simple as ever. - Page 19 Most access points or routers will have a dedicated WPS light on the front of the unit which will begin blinking once WPS has been activated. You now have 2 minutes in which to activate WPS on the AC240 USB adapter.
-
Page 20: Appendix
4 Appendix 4.1 Hardware Specifications Standards: IEEE 802.11a/b/g/n/ac Interface: USB 3.0 (USB 2.0 Compatible) Frequency Band: 2.4000~2.4835GHz (subject to local regulations) 5.150~5.825GHz (subject to local regulations) Data Rate: 11a: 6/9/12/24/36/48/54Mbps; 11b: 1/2/5.5/11Mbps; 11g: 6/9/12/24/36/48/54Mbps 11n (20MHz): MCS0-15, up to 144Mbps 11n (40MHz): MCS0-15, up to 300Mbps 11ac (80MHz): VHTMCS0-9, up to 867Mbps Securities: WEP 64/128, WPA, WPA2 and IEEE 802.1x Antenna: 2 internal PIFA antennas (2.4G/5G 2dBi) -
Page 21: Troubleshooting
3. ‘Ad hoc’ function must be enabled on the wireless device you wish to establish a direct wireless link with. 4. Please adjust the position of AC240 (you may have to move your computer if you are using a notebook computer) and click ‘Rescan’... -
Page 22: Glossary
The objective is to enable wireless LAN hardware from different manufacturers to communicate. 3. What IEEE 802.11 features does the AC240 support? The AC240 supports the following IEEE 802.11 functions: CSMA/CA plus Acknowledge Protocol ... - Page 23 5. What is Infrastructure? An integrated wireless and wired LAN is called an Infrastructure configuration. Infrastructure is applicable to enterprise scale for wireless access to central database, or wireless applications for mobile workers. 6. What is BSS ID? A specific Ad hoc LAN is called a Basic Service Set (BSS). Computers in a BSS must be configured with the same BSS ID.
- Page 24 12. What is DSSS? What is FHSS? And what are their differences? Frequency-hopping spread-spectrum (FHSS) uses a narrowband carrier that changes frequency in a pattern that is known to both transmitter and receiver. Properly synchronized, the net effect is to maintain a single logical channel.
Need help?
Do you have a question about the AC240 and is the answer not in the manual?
Questions and answers