
Related Manuals for Kenwood DPX-3030


Summary of Contents for Kenwood DPX-3030
-
Page 1: Instruction Manual
DPX - MP4030 DPX - 3030S DPX - 3030 DOUBLE DIN SIZED CD/CASSETTE RECEIVER INSTRUCTION MANUAL © B64-2319-10/05 (M;TKR) -
Page 2: Table Of Contents
Contents Safety precautions...3 About CDs...5 About Cassette tape ...5 Notes on playing MP3 ...6 General features ...8 Power Selecting the Source Volume Attenuator Equalizer Control Adjustment of Equalizer type at EASY Adjustment of Equalizer type at PRO Memory preset of adjustment of Equalizer type Audio Control DSP System... -
Page 3: Safety Precautions
To connect a disc changer having the "O-N" switch to this unit, set the "O-N" switch to "N". Note that none of the KDC-C100, KDC-C302, C205, C705, and non-Kenwood CD changers can be connected. You can damage both your unit and the CD changer if you connect them incorrectly. - Page 4 Safety precautions NOTE • If you experience problems during installation, consult your Kenwood dealer. • If the unit does not seem to be working right, try pressing the reset button first. If that does not solve the problem, consult your Kenwood dealer.
-
Page 5: About Cds
About CDs Handling CDs • Don’t touch the recording surface of the CD. • CD-R and CD-RW are easier to damage than a normal music CD. Use a CD-R or a CD-RW after reading the caution items on the package etc. •... -
Page 6: Notes On Playing Mp3
Notes on playing MP3 (DPX-MP4030) This unit can play MP3(MPEG1, 2, 2.5 Audio Layer 3). Note, however, that the MP3 recording media and formats acceptable are limited. When writing MP3, pay attention to the following restrictions. Acceptable media The MP3 recording media acceptable to this unit are CD-ROM, CD-R, and CD-RW. - Page 7 MP3 playing order When selected for play, Folder Search, File Search, or for Folder Select, files and folders are accessed in the order in which they were written by the CD writer. Because of this, the order in which they are expected to be played may not match the order in which they are actually played.
-
Page 8: Equalizer Type
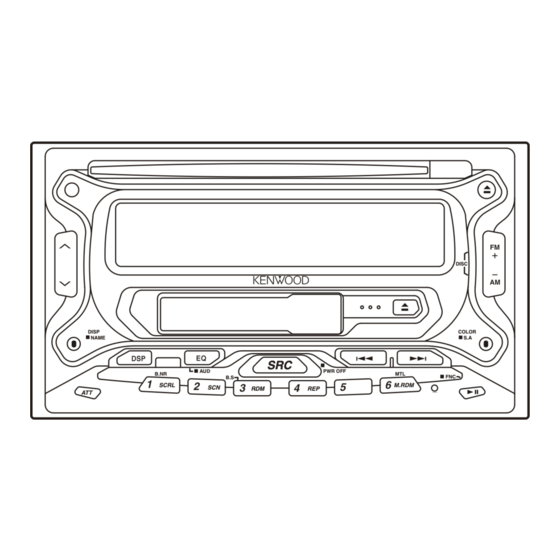
General features u / d EQ/AUD DISP NAME PWR OFF B.NR SCRL DISP/NAME #1 – 3 Equalizer type indicator ATT indicator Source indicator Power ¢ FM/AM Turning ON the Power Press the [SRC] button. Turning OFF the Power Press the [SRC] button for at least 1 second. DISC Selecting the Source Press the [SRC] button. -
Page 9: Equalizer Control
When it’s ON, the "ATT" indicator blinks. Equalizer Control You can recall the best sound setting preset for different types of the music. Enter the Equalizer Control mode Press the [EQ] button. "EQ EASY" or "EQ PRO" is displayed. Select the Equalizer type Press the [EQ] button. -
Page 10: Equalizer Control
General features Adjustment of Equalizer type at PRO Adjusting the effect of an Equalizer type selected in <Equalizer Control> when <Equalizer mode> is "PRO". Refer to <Equalizer Control> (page 9) to select the Equalizer type. Select the item for adjustment Press the [FM] or [AM] button. -
Page 11: Dsp System
Adjustment Item Display Balance "BAL" Fader "FAD" Non Fader Output "N-F" Exit the Audio Control mode Press the [AUD] button. DSP System Setting the simulated Sound field effects of Digital Signal Processor. Enter the DSP Control mode Press the [DSP] button. "DSP mode"... -
Page 12: Station/Disc Naming (Snps/Dnps)
General features Station/Disc Naming (SNPS/DNPS) Attaching a title to a Station or CD. Receive/play the station/disc you want to attach a title to • A title can't be attached to MD or MP3 media. • Disc Naming can't be done during clock display. Enter name set mode Press the [NAME] button for at least 2 seconds. -
Page 13: User Illumination Color Setting
In MP3 source (DPX-MP4030) Information Display Track Time "P-Time" Folder name "Folder" File name "File" Song title & Artist name "Title" Album name "Album" Charactor Clock In Tape source Information Play side & Tape counter Charactor Clock In ALL OFF Mode Information Charactor &... -
Page 14: User Illumination Color Setting
General features User Illumination Color Setting The Illumination Color by the adjustment of RGB can arbitrarily set. Enter the Illumination Color Select mode Press the [COLOR] button. "Illumi" is displayed. Select the Color for adjustment Press the [4] or [¢] button. Each time the button is pressed, the colors that can be adjusted switch as shown below: Adjustment Color... -
Page 15: Tuner Features
Tuner features DISP NAME PWR OFF B.NR SCRL #1 – 6 Band display Frequency display ST indicator Tuning ¢ FM/AM Selecting the station. Select tuner source Press the [SRC] button. Select the "TUNER" display. Select the band Press the [FM] or [AM] button. DISC Each time the [FM] button is pressed it switches between the FM1, FM2, and FM3 bands. -
Page 16: Station Preset Memory
Tuner features Station Preset Memory Putting the station in the memory. Select the band Press the [FM] or [AM] button. Select the frequency to put in the memory Press the [4] or [¢] button. Put the frequency in the memory Press the [#1] —... -
Page 17: Blank Skip
Cassette player features DISP NAME B.NR SCRL B.NR Dolby B NR indicator Tape counter display indicator Repeat indicator MTL indicator Playing Cassette Tapes ¢ FM/AM When the Cassette Tape is inserted Press the [SRC] button. Select the "TAPE" display. When you want to listen to the reverse side DISC Press the [38] button. -
Page 18: Blank Skip
Cassette player features Selecting the Tape type Press the [MTL] button. Each time the button is pressed the Tape type switches as shown below. "MTL" indicator Tape type (Type II), FeCr (Type III), Metal (Type IV) Normal (Type I) DPSS (Direct Program Search System) Indicating the songs to skip, and Fast Forwarding or Rewinding. -
Page 19: Cd/Mp3/External Disc Control Features
Music Repeat Repeating the present song. Press the [REP] button. Each time the button is pressed the Music Repeat turns ON or OFF. When it's ON, "Repeat" is displayed. CD/MP3/External disc control features DISP NAME B.NR SCRL SCRL RDM/#3 indicator Track number Track time Disc number... -
Page 20: Disc Search
CD/MP3/External disc control features Playing CD & MP3 When there is no disc inserted Insert a disc. • The models that can play MP3 is shown below. DPX-MP4030 During MP3 is playing, the "MP3" indicator is ON. • When a disc is inserted, the indicator is ON. -
Page 21: Track/ Disc/ Folder/ File Repeat
Folder Search (Function of MP3) Selecting the folder recorded on the MP3 media. Press the [DISC–] or [DISC+] button. When a disc is being played in an MP3-compatible Disc Changer, pause the play. Direct Track Search (Function of remote) Doing Track Search by entering the track number. Enter the track number Press the number buttons on the remote. -
Page 22: Folder Search
CD/MP3/External disc control features Random Play Play all the songs on the disc or MP3 folder in random order. Press the [RDM] button. Each time the button is pressed Random Play turns ON or OFF. When it's ON, "Random" is displayed. ¢... -
Page 23: Function Set
Function Set DISP NAME PWR OFF B.NR SCRL #1 – 4 Monaural indicator AUTO indicator Function display Function Set ¢ FM/AM Setting during operation beep sound etc. functions. The Function Set basic operation method is explained here. The reference for the Function items and their setting content is after this operation explanation. -
Page 24: Function Set
Function Set <In ALL OFF Mode> Illumination Color Mode Setting the Illumination Color Mode of your display. Display Setting "COL Sync" The color of your display changes from one color to another during volume adjustment and during Attenuator being ON. "COL Fix"... -
Page 25: Security Code
Display Setting "EQ EASY" The effects of Equalizer type can be adjusted among 3 levels. "EQ PRO" Equalizer types can be adjusted by Bass, Middle, and Treble. Security Code Because authorization by the Security Code is required when it's removed from the vehicle, personalizing this unit is by using the Security Code is a help in preventing theft. -
Page 26: Auto Memory Entry
Function Set Auto Memory Entry For the operation method refer to <Auto Memory Entry> (page 16). <In CD/MP3/External disc control mode> Text Scroll Setting the displayed text scroll. Display Setting "SCL Auto" Repeats scroll. "SCL Manu" Scrolls when the display changes. The text scrolled is shown below. -
Page 27: Loading And Replacing The Battery
Loading and Replacing the battery Use one lithium battery (CR2025). Insert the batteries with the + and – poles aligned properly, following the illustration inside the case. 2WARNING Store unused batteries out of the reach of children. Contact a doctor immediately if the battery is accidentally swallowed. -
Page 28: Basic Operations
Basic Operations of remote Accessory of the DPX-MP4030/ DPX-3030S In Disc source [4]/ [¢] buttons Doing track/ file forward and backward. [DISC+]/ [DISC–] buttons Doing disc/ folder forward and backward. [38] button Each time the button is pressed the song pauses and plays. [#0] —... -
Page 29: Accessories
Accessories External view External view ... Number of items (M5×6mm) ...6 ...1 The use of any accessories except for those provided might result in damage to the unit. Make sure only to use the accessories shipped with the unit, as shown above. Installation Procedure 1. -
Page 30: Connecting Wires To Terminals
Front right output (Red) Rear left output (White)/ Non-fading left output (White) Rear right output (Red)/ Non-fading right output (Red) KENWOOD disc changer control input NOTE To connect the Disc changer, consult your Disc changer manual. – To front left speaker –... -
Page 31: Installation
Installation 2CAUTION When performing a check of the CD operation prior to installation, place this unit in a horizontal position and perform a loading/eject of the CD. ■ Installation Install onto the car bracket using the supplied screws (M5 × 6 mm, M5 ×... -
Page 32: Troubleshooting Guide
Troubleshooting Guide What might seem to be a malfunction in your unit may just be the result of slight misoperation or miswiring. Before calling service, first check the following table for possible problems. General The power does not turn ON.01 ✔... - Page 33 Tuner source Radio reception is poor.39 ✔ The car antenna is not extended. ☞ Pull the antenna out all the way. ✔ The antenna control wire is not connected.40 ☞ Connect the wire correctly, referring to the section on <Connecting Wires to Terminals>. The desired frequency can’t be entered with the Direct Access Tuning.41 ✔...
- Page 34 Troubleshooting Guide Can’t remove disc.64 ✔ The cause is that more than 10 minutes has elapsed since the vehicle ACC switch was turned OFF. ☞ The disc can only be removed within 10 minutes of the ACC switch being turned OFF. If more than 10 minutes has elapsed, turn the ACC switch ON again and press the Eject button.
- Page 35 The songs in the selected folder aren’t played in Folder Select mode.77 ✔ There are no MP3 in the selected folder. ☞ Make sure there’s recorded content in the MP3 media. The MP3 File/Folder search takes time.78 ✔ Many files are recorded on the media. ☞...
- Page 36 Troubleshooting Guide Error 99: Something is wrong with the disc magazine. Or the unit is malfunctioning for some reason. ➪ Check the disc magazine. And then press the reset button on the unit. If the "Error 99" code does not disappear, consult your nearest service center.
-
Page 37: Specifications
Specifications Specifications subject to change without notice. FM tuner section Frequency range (50 kHz space) ...87.5 MHz – 108.0 MHz Frequency range (200 kHz space) ...87.9 MHz – 107.9 MHz Usable sensitivity (S/N = 30dB) ...9.3dBf (0.8 µV/75 Ω) Quieting Sensitivity (S/N = 50dB) ...15.2dBf (1.6 µV/75 Ω) Frequency response (±3.0 dB)...30 Hz –...
Need help?
Do you have a question about the DPX-3030 and is the answer not in the manual?
Questions and answers