Table of Contents
Advertisement
Advertisement
Table of Contents

Related Manuals for Cooper Menvier 40


Summary of Contents for Cooper Menvier 40
- Page 1 MENVIER SECURITY...
-
Page 2: Terminology
© Cooper Security Ltd. 2012 IN NO EVENT WILL COOPER BE LIABLE FOR ANY SPECIAL, CONSEQUENTIAL , OR INDIRECT LOSS OR DAMAGE, INCIDENTAL DAMAGES, STATUTORY DAMAGES, EXEMPLARY DAMAGES, LOSS OF PROFITS, LOSS OF REVENUE, LOSS OF ANTICIPATED SAVINGS, LOSS OF BUSINESS OR OPPORTUNTIY, LOSS OF GOODWILL OR INJURY TO REPUTATION, LIQUIDATED DAMAGES OR LOSS OF USE, EVEN IF INFORMED OF THE POSSIBILITY OF SUCH DAMAGES. -
Page 3: Table Of Contents
Menvier40/100 CONTENTS Wired Outputs on Expanders ....17 Wired External Sounders on Expanders 18 Remote Loudspeakers (Optional) ..18 Terminology ........ii Step 8. Connect the Internal Communicator 1. Introduction ........1 ............19 Communications ......... 1 Statutory Information ......19 Level Setting or Ward based system .. - Page 4 Menvier40/100 This page is intentionally blank. Page iv...
-
Page 5: Introduction
Menvier40/100 Communications 1. Introduction The control unit contains a built-in ATS2 communicator, allowing it to comply with The Menvier40 and Menvier100 are control EN50131 at Security Grade 2. units for hybrid wired/wirefree alarm systems intended for domestic, commercial The control unit also provides sockets for or industrial use. -
Page 6: Installer Programming Interface
USB port on the control into the Installer test menu and test the unit PCB and use Cooper Security‟s received signal strength from each radio Downloader software to program the transmitter. -
Page 7: Siting The Control Unit And Wired Zone Expanders
Menvier40/100 Before You Begin www.coopersecurity.co.uk for more Next to electronic equipment, information about the factors affecting particularly computers, photocopiers or radio signal strength. other radio equipment, CAT 5 data lines or industrial mains equipment. Siting the Control Unit and Wired Zone Note: Some window glasses, especially Expanders those sold as “insulating”... - Page 8 Before You Begin Menvier40/100 1. Case back. 2. Fixing holes. 3. Cable entry holes for detector and keypad wiring. 4. Transformer. 5. Fused mains connector. 6. Mains cable anchor point. 7. Cable entry hole for mains supply. 8. Hole for back tamper fitting. 9.
- Page 9 Menvier40/100 Before You Begin 1. Bus cable connector. 2. Aux power. 3. Wired zone connectors. 4. Aux power. 5. Outputs (relay and transistorised). 6. 12V Siren/Bell supply. 7. Siren and strobe. 8. Auxiliary tamper 9. Loudspeaker. Figure 4 Control Unit Main Connectors Page 5...
-
Page 10: I-Kp01 Controls And Displays
Before You Begin Menvier40/100 i-kp01 Controls and Displays 1. Central keyhole. 1. LCD display (2 x 20 characters). 2. Rear tamper shroud. 2. Programming keys. 3. Cable entry. 3. Navigation keys 4. Fixing holes. Figure 7 Keypad Rear Housing 4. Alert LEDs 5. - Page 11 Menvier40/100 Before You Begin 1. Cable entry (also behind PCB). 2. Fixing holes. 3. Addressing button. 4. Bus cable connector. 5. Central keyhole. 6. Outputs. 7. Aux power. 8. Lid tamper (rear tamper behind PCB). 9. Bus address display. 10. Zone connectors. 11.
-
Page 12: Power Availability
Before You Begin Menvier40/100 Power Availability CAUTION: Ensure that the system does not demand more than the maximum current available from the control unit during an Before connecting any external devices to alarm, see page 31. the control unit, you must make sure that the control unit can provide sufficient Bus Cabling current to power the system during a mains... -
Page 13: Bus Termination
10.5V even when running on the electrically noisy environments or where standby battery. Cooper Security there are long cable runs. The control unit. recommend that the voltage at each device expanders and keypads have a termination should stay above 12V. - Page 14 Reducing Voltage Drop - Method 2: to the network, otherwise an earth fault will Supply the detection devices from the Aux occur. Cooper Security recommend the output on separate cores. This is the EXP-PSU. When installing a remote power preferred method of reducing voltage drop...
-
Page 15: Installation
Menvier40/100 point where the tamper bracket touches the 3. Installation wall. see Figure 14 Note: The installation steps listed below assume that you have already decided on the required number and location for all keypads, expanders and power supplies. Caution: Static Electricity Like many other electronic products, the control unit, keypads and expanders contain components that are sensitive to... -
Page 16: Installing The Lid/Back Tamper
Installation Menvier40/100 carrier into the holes provided, see Figures 15 to 17. Figure 15 Insert Tabs Figure 17 Fit Securing Screw When the PCB is in place, connect the wires from the transformer to the 20Vac connector on the PCB (11 in Figure 3). Installing the Lid/Back Tamper Figure 18 Lid/Back Tamper Figure 16. -
Page 17: Step 2. Run Bus Cable
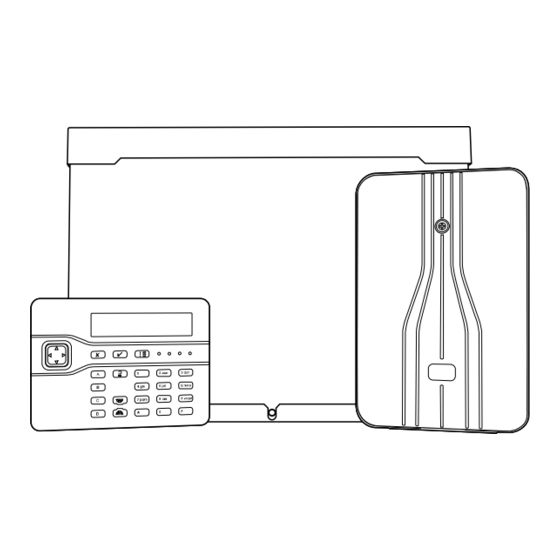
Menvier40/100 Installation Step 2. Run Bus Cable Please read “Cabling Requirements on page Step 3. Fit and Connect the Keypad(s) Siting the Keypad(s) Do site the keypad(s): Within the area protected by the alarm system. At a convenient height and location for Figure 20 Connecting a Keypad to the Bus the user. -
Page 18: Tone Volume
Installation Menvier40/100 Tone Volume To alter the volume of non-alarm tones from the keypad adjust the keypad sounder volume control (2 in Fig 8): Louder Note: This control changes the volume of non-alarm tones (for example Exit/Entry tone). The volume of alarm tones is fixed. -
Page 19: Step 6. Connect Wired Zones
Menvier40/100 Installation Mains Connection Figure 22 shows the mains connection. Connect to a suitable supply using a double pole disconnect (isolation) device in accordance with EN60950-1. Caution: Do not apply power at this point. Anchor the mains cable with a strain-relief tie. - Page 20 Installation Menvier40/100 Installer Menu – Detectors Devices – Wired Expanders - Edit Expander. If you wish to connect two or more detectors to a FSL zone, Figure 27 shows the connections required. Figure 27 Wiring Two Detectors per Zone FSL. Figure 28 shows an example of wiring double doors with two door contacts to one FSL zone.
-
Page 21: Step 7. Connect Wired Outputs
Menvier40/100 Installation Step 7. Connect Wired TR to 0V on the control unit. This prevents the control unit reporting Bell Tamper Outputs unnecessarily. Auxiliary Tamper The control unit provides two “AUX TAMP” terminals that you can connect to external equipment in order to detect a tamper. The terminals offer CCL connection only. -
Page 22: Wired External Sounders On Expanders
OR a 4k7 resistor if using 4k7/4k7 FSL. Do not use any other FSL resistor combinations. CC wiring Cooper Security does NOT recommend that you use CC wiring for this application. The maximum length of wire allowable is only 6m. Instead Cooper Security recommend using FSL wiring, as described above. -
Page 23: Step 8. Connect The Internal Communicator
• Connecting to a PC based at a remote successful operation on every PSTN engineering centre. Using Cooper network termination point. Downloader software, the remote PC The built-in communicator has been can upload and download system... -
Page 24: Safety Notice
Fit ADSL Filter If the telephone line is being shared by a broadband service then you should fit a broadband filter to the line. Cooper Security provide the ADSL01 filter that plugs onto TNV - Telephone line connector. pins provided for the purpose on the main SELV –... -
Page 25: Step 9. Fit A Plug-By Communicator
Menvier40/100 Installation Figure 36 Fitting the ADSL01 Filter. Note: If you remove the ADSL01 filter then re-fit the jumpers to the outermost pairs of pins. If you fail to re-fit the jumpers the internal communicator will not connect to the phone line. Step 9. -
Page 26: Step 10. Fit And Connect Battery
Installation Menvier40/100 7. Test communicator operation. material has a minimum rating of UL94V-2 in order to comply with EN60950 (this Note: You will need to speak to the ARC in standard applies because of the energy order to confirm that the communicator has content of 17Ah batteries). - Page 27 Menvier40/100 Installation followed by the words “Please wait...” 8. Press . for several seconds while the control The display shows: unit scans the bus. When the control unit has finished scanning the bus the keypads show: 9. Press . ...
-
Page 28: Transferring To Another Keypad
Installation Menvier40/100 Note: You can set the time and date from within the Installer Menu by using System The system is ready for further Options – Set Time & Date. programming. 15. At this point you should leave the 3. -
Page 29: Re-Entering The Installer Menu
Menvier40/100 Installation Factory Defaults, that change takes place access code is “5678”. At Security immediately. Grade 3 the code is “567800”. The display shows: Re-Entering the Installer Menu When you enter the Installer Menu from a 4. Press or to display more items keypad, the alarm system is effectively from the menu. -
Page 30: Restoring Factory Defaults Only
Installation Menvier40/100 The display shows the time and date, The system loads all defaults except for for example: Access Codes and the Log. The display briefly shows: 9. Key-in the default user 01 code to silence the sounders. Followed by: The display shows: ... -
Page 31: Program The System
Menvier40/100 Installation this.) See the installation instructions Handover to the User supplied with each detector or Instruct the user on how to operate the peripheral. system. See the Menvier40/100/300 Note: When checking signal strength from Administrator’s Guide. If necessary, show the User Menu the minimum acceptable them how to set the time and date on the signal strength from a detector is four... -
Page 32: Installer Menu
Menvier40/100 Installer Menu Siren time User reset Call Acknowledge 1 DETECTORS/ DEVICES Strobe on Set Zone alarms Detectors Strobe on Unset Zone tampers Call Mode Add/Del Detectors Part Set B System tampers Messages Program Zones Name Confirmation Phone Book Address Bus Device Exit Mode Confirmation Mode Triggers... - Page 33 Menvier40/100 Installer Menu Appears only when device learned in. Appears only in a Ward based system. Appears only in a Level Setting system. Appears only if Exit Mode is “Final Door Set”, “Lock Set” or “Exit Terminate”. Appears only if Exit Mode is “Timed Set” or “Silent Set”. Appears only when System Options –...
-
Page 34: Maintenance
40 zone/100 zone hybrid Description endstation with remote Check the condition of the control unit keypads. standby battery. Manufacturer Cooper Security Ltd. Check the cabling to the keypad(s) and Environmental Class II. expander(s) for signs of damage or Operating Tested -10 to +55°C. -
Page 35: Capacities (Menvier100)
Menvier40/100 Technical Specification Capacities (Menvier100) system. When used as a part setting system there are four setting levels available: Full Set and Part Sets B, C and Zones 100 max (with expanders) Outputs 100 max (with expanders) Expanders and 45 max devices (see note) Security Wired Keypads Radio Keypads... -
Page 36: Electromagnetic Compatibility
Technical Specification Menvier40/100 communicator fitted the requirement drops Standby Battery: 12V, 17Ah sealed to 30 hours. lead acid (not supplied). This means that all the devices powered by „Low battery‟ fault < 12V the backup battery, including the control unit and at least one keypad, should Aux power output <... -
Page 37: Other
Menvier40/100 Technical Specification Other a) It is installed in accordance with the installation instructions. If you wish to connect the control unit to a b) The connected PSTN is functioning PC using either the Ethernet or the USB normally. port then make sure that the cables have When fitted with an i-sd02 the control unit the following specifications: provides options A, B and C at Grade 2 as... - Page 38 Technical Specification Menvier40/100 08750EUR-00 Ethernet module (obsolete) 9040UK-00 Speaker boxed i-fb01 Four button remote control i-rc01 Relay Card i-rk01 Radio Keypad i-sd02 PSTN Communication module with speech dialling i-dig02 PSTN Communication (ARC only). i-gsm02 GSM communications module EXP-W10 10 zone wired expander EXP-R10 10 zone radio expander EXP-R30...
Need help?
Do you have a question about the Menvier 40 and is the answer not in the manual?
Questions and answers