
Related Manuals for Kroll Kozy


Summary of Contents for Kroll Kozy
- Page 1 Kroll Kozy Instruction Handbook 039 791 3082 e:sales@krollheat.com w:krollheat.com...
-
Page 2: Table Of Contents
Kroll Kozy Contents Contents............................2 Major Components..........................3 Assembly of Your Kozy........................4 Installation ............................4 Space Heating Principles ........................ 4 Fitting The Flue ..........................5 Operation & Starting ......................... 7 If using light oil eg: diesel [warning] ....................8 Turning off............................ -
Page 3: Major Components
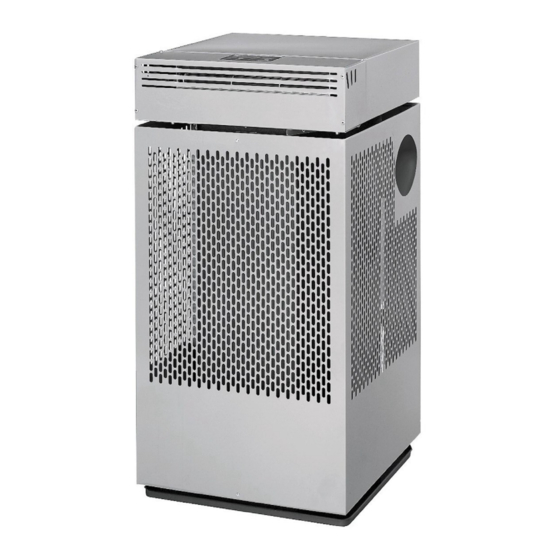
Kroll Kozy Major Components Tip: This manual was NOT written by a deskbound technician. It is in “plain English” and easy to follow. Please don’t file it with all your other owner’s manuals and “only read it when all else fails”. Please read it right through before even commencing installation. Take advantage of our . Start by looking at the major components experience and you’ll get the best out of your Kroll Kozy below? Page 3... -
Page 4: Assembly Of Your Kozy
Kroll Kozy Assembly of Your Kozy Remove these parts from inside the heater: Oil tank, pilot ring, baffle, lifting rod, and vapourising pans. In the tank you will find the oil strainer, a universal “pick up” tool, the oil feed line, a masonry drill, the aluminum cup, and attached to this manual, the fibre washer that goes between the oil feed line and the pump (plus a spare) The heater must be on a level surface. The bottom of the heater gets hot enough to scorch a wooden floor, so you must place the drip tray on a pad of bricks, or similar, in such a case. Sit the heater in the drip pan, so the wide end of the pan is under the oil tank, or what we might call the back of the heater. Hang the stainless steel baffle inside the heater, on the lip above the flue outlet. Hang the tank into the slits on the rear panel. (At the bottom it should rest against the small ledge, not sit on it). Screw the pear fitting at the lower end of the oil feed line onto the oil inlet pipe, and the upper end, using the fibre washer, to the pump outlet under the control box. Plug the five pin terminal into the socket at the back of the control box. Make sure the water drain cock is closed and that the aluminium cup is sitting freely in its seat. When you press it down and up, you should hear the “clickclack” of the microswitch underneath it. Installation Space Heating Principles The principle of space heating is that you “fill” your building with a body of warm air. As your Kroll blower fan “pulls” the heat off the furnace and pushes it out, the hot air naturally wants to rise. So whilst there is some extra warmth if you’re standing say 3 or 4 metres in front of the blower fan, most of the heat is rising by then. As it builds up under the roof, the warmth gradually reaches back to floor level. In high roofed buildings, a slow turning ceiling fan which pushes the warm air downwards can make a tremendous difference. Most Industrial buildings are not perfectly sealed, and your Kroll can cope with this. But, if you have large ventilators sucking the air out or an open ridge in the roof, then the heat will easily escape as quickly as it’s generated. If you want to get the best from your heater, then you’ll need to reduce this unchecked heat loss. Choose a Safe Location Because of the radiant heat given off from the sides and front of your KOZY, it must not be located within one metre of combustible material, such as wooden wall studs. At the rear of the heater, there is considerably less radiant heat, so 500mm clearance is adequate. However, you will need access to the back to fill the tank, and for routine maintenance from time to time, so this will need to be taken into consideration. Certainly, highly flammable material such as petrol, thinners, paint, cardboard boxes and packing material must not be stored within 3 metres of the heater. Page 4... -
Page 5: Fitting The Flue
Kroll Kozy If you are using your KOZY without the blower fan, then the radiant heat output is higher and ALL the above clearances should be doubled, to be on the safe side. Fitting The Flue The heater must be connected to a 150mm (6”) diameter stainless steel flue, of at least four metres in height. It is important, because it creates a draught which allows the heater to burn properly, enabling smokeless combustion. The flue consists of a Tpiece (which traps any condensation or rainwater that comes down the flue), some straight sections and a cowled “Chinaman’s hat” on top. The top of the flue should be in free air. The cowled hat ensures that the draught is less affected by strong winds. The top of the flue should extend at least one metre through the roof. If it’s near the ridge, half a metre will do. When installing the flue, it is preferable to maintain a good upwards slope, but if you must have a horizontal section, it must not exceed one third of the total flue length. Because your Kozy is not a temperamental heater, you can bend these guidelines a bit, but it’s best to adhere to them where possible. If in doubt, consult your dealer. If the length of your flue is more than 5 or 6 metres, it’s possible that the draught will be too high. This means too much heat may be “sucked” out of your KOZY, and lost up the flue. This can be easily fixed by fitting a simple draught control device We recommend that the overlap on the flue section connections is such that any moisture from condensation running down the inside of the flue does not leak to the outside, because it will cause unsightly streaks. If the appearance doesn’t bother you, suit yourself. Airtight flue connections are not critical. For joins outside the roof – use silastic to stop water entering the flue at the joint. The heat and upwards movement of the flue gas means the pressure in the flue is slightly lower than the pressure outside, so flue gas doesn’t leak out. But you shouldn’t have big gaps, or the air will be drawn in and affect your draught. The flue gets very hot. If you’re going through a ceiling, you must use a double skinned flue for that section. If your flue is likely to be touched by the general public (kids in particular), we strongly advise a heat shield. In fact, we recommend it for almost all installations. For a weatherproof seal where the flue goes through the roof, we recommend a DEKTITE DFS 160220 RE “rubber” roof collar. We recommend the SILICONE RED dektite, rather that the black one, as ... - Page 6 Kroll Kozy resistance. You should strap or secure your flue to support the vertical weight, so it’s not being supported by the heater. Not only does this take the load off the outlet spigot (which could otherwise eventually distort), but it enables you to take your heater away in Summer and just leave all or part of the flue hanging there, if you wish. Page 6...
-
Page 7: Operation & Starting
Kroll Kozy Operation & Starting Plug it in (240V). .Using the lifting rod, lower a clean vapourising pan into the burner basin, past the oil inlet pipe. Rotate it 90 or 180° and place as shown in diagram to the right. The inlet pipe must not be over the pan’s ‘V’ notch, so that the oil dripping from the pipe lands on the pan surface NOT the bottom of the burner basin! . Make sure that the water drain cock is closed, put oil in the tank (always through the strainer) and open the main stop cock [fig 2, overleaf]at least 2 or 3 full turns. Keep in mind that really thin oil can seep through the gear pump even if it’s not running, so make sure that you close the stop cock when you switch the heater off. Pour 1/3 of a litre [2 coffee mugs approximately] of starting fluid into the pan. Use a suitable container, and reach down into the heater so it doesn’t splash over the side of the pan. For starting fuel, you can use straight kerosene, diesel or heating oil or, any one of these, mixed with waste oil also works well. Make up a batch of it, so you do not have to do it every day. Using the half circle on the lifting rod, seat the pilot ring on the indented ledge in the burner basin. (If you picture it as a plate, it goes in upside down) The gear pump in the motor mount [fig 1, below] must be set on ‘LO’ for starting. To ensure proper engagement, you may need to reach under the control box housing and turn the pump/motor connection a little, until you feel the lever drop into place. Page 7... -
Page 8: If Using Light Oil Eg: Diesel [Warning]
Kroll Kozy Put a small piece of rag (about 100mm x 100mm) in the jaws of the supplied pickup tool, dip it in the pan, light it, and drop it back into the pan. You will get a little bit of smoke from this, but not for long. Place the cast iron lid on top. Switch the on/off switch to ON. [Push the switch ‘1’ position down] 10 After about 10 minutes, the starting fuel will generate enough heat for the thermostat to switch on the oil pump, the blower fan and the indicator light on the control box. When starting your KOZY for the first time only, you’ll get some smoke from the new paint, but it won’t last long. When the heater is up and running, you can peek through the hole in the lid and see the fingers of flame burning, like gas jets around the rim of the burner basin. 11 Leave the Kozy on LO for 20 minutes. Then you can switch it to HI if desired. When changing between HI& LO [high and low] while heater is running hold the lever straight and firmly, and sort of “feel” your way up, across and down, to ensure proper engagement. (If you don’t you won’t realize the pump is not working until the fire goes out about 15 minutes later). If using light oil eg: diesel [warning] If running on straight heating oil or diesel, use only on the LO setting. Because this oil is so thin compared to waste oil, it will flow through the oil pump at a faster rate. This can cause your KOZY to run much too hot and shorten its life. If you would like to use diesel fuel or heating oil in your KOZY, we have two recommendations. � Prop the blower fan lid open about 150mm with a noncombustible prop, (such as a piece of steel) to enable the fan to draw in some cooler air. � The stopcock is not usually used as a metering device. It is usually fully open or fully closed. However, you can restrict the flow by finding a partial opening point where the pump is delivering about 2 litres an hour. Use LOW only. Turning off ... -
Page 9: Cleaning & Maintenance
Kroll Kozy Cleaning & Maintenance When you burn waste oil in your kroll, there is no smoke or fumes, but you will get an accumulation of ash in the vapourising pan. The amount of ash you get depends upon how “dirty” your waste oil is – eg. Very thick, black oil from old diesel engines leaves lots of ash. Used transmission oil leaves very little. On a typical day, before starting your heater, you will take out “yesterday’s pan” and put in the clean one. At some convenient time, you can clean yesterday’s pan, ready for tomorrow. If you are finding some of the ash is difficult to remove, you can, after scraping out the “easy” stuff, place yesterday’s pan back in the heater, on its side, on the ledge. The heat turns that stubborn carbon into a whitish powder which is easy to remove. The principle of operation of your KOZY is that waste oil trickles onto the very hot cast iron pan and vapourises. If there is a thick layer of ash and solid carbon covering most of the surface, then the oil will not vapourise properly and you will get incomplete combustion, wet oil, smoke and a mess inside your burner basin. So, it’s important that you clean the pans properly. You also need to work out how much ash accumulates in the pan each day. If the pan is too full and there is a bit of wet oil present, you may need to switch it off earlier each day and/or run it on LOW only. If the burner basin needs to be cleaned, because of excessive build up in the bottom and on the wall, the best way is to take it out of the heater. This is not a difficult task if you follow these steps: 1. Unplug the power at the power point and disconnect the five pin terminal. 2. Remove the oil feed line, taking care not to lose the fibre washer. 3. Remove the aluminium overflow cup. 4. Remove the pan it sits in, but place it aside carefully, because it is still attached to the combustion fan. 5. Remove the oil inlet pipe and gasket, which is held to the back of the burner basin by two 6mm nuts (10mm socket required). ... - Page 10 Kroll Kozy When refitting the burner basin it is very important that it is screwed down again and seals fairly well around the rim. The combustion air that is being induced into the cavity around the burner basin must go through the holes in the burner basin to ensure good combustion. If this combustion air can find an easier path around the rim, your KOZY will not burn cleanly. This “major” cleaning of the burner basin should not be necessary more than once or twice each winter. Also, depending on your waste oil, you may need to ream out the oil inlet pipe using the masonry drill supplied. Carbon will build up inside, starting with the hot end, eventually blocking it completely. To reduce this build up, each time you’re taking out the pan, poke the end of the lifting rod into the pipe, and jiggle it around a bit. Once or twice each Winter, it will probably be necessary to remove the big nut, and run the masonry drill through from the outside. You should also poke a stiff piece of wire through the overflow pipe occasionally, to make sure it’s not blocked. If your silver overflow cup has any oil in it [due to a cracked pan for example] you must also clear the overflow pipe. The overflow pipe is the smaller pipe just above the oil inlet pipe and the pipe MUST BE CLEAR to function correctly! Page 10...
- Page 11 Kroll Kozy Sludge BuildUp In Tank Depending upon the quality of your oil, you may get a gradual buildup of sludge in the bottom of your Kroll’s oil tank. We recommend that at the end of the season, you run the tank empty, remove it from it’s mount, and flush out the sludge with a bit of kerosene. Leave it empty over Summer. Inspect Pans Regularly The cast iron vaporising pans should last 2 or 3 Winters depending on usage. Harsh treatment or dropping them can shorten their life. DO NOT USE CRACKED OR BADLY DISTORTED PANS. A FEW TIPS ON OIL QUALITY Your Kroll Kozy will burn just about any kind of oil, but the better it is, the less maintenance you have to do on your heater. The best waste oil is transmission oil. The worst is from diesel engines that do a lot of work between oil changes. Oil from diesels is OK if it’s been changed regularly, but if it’s very, very dirty, then it will leave a lot of ash. But even the worst oil can be used, if it’s mixed with better waste oil, or say 10 to 1 with new diesel fuel or heating oil. Alternatively, if it’s allowed to settle for 6 weeks or so, the top half becomes quite good and it gets progressively worse as you go down. So we suggest storing your waste oil over Summer, so it settles, and then discarding the last 10% or so, of each drum. This gets rid of excessive water also. Your Kroll is fairly tolerant of a bit of water in the oil, but it’s best to check and drain it off through the water drain cock, on a regular basis. It also pays to check both the fans for build up of dirt and lint on the blades, and clean them if necessary. Malfunctions #1 Heater won’t “cutin” before the starting fluid burns out. The overflow cup may have some oil in it, causing it to press down on the micro switch. Oil can accumulate gradually in the cup from “splashing” inside the furnace, or if spillage occurs down the back of the heater while filling the tank. � Heater not switched on at PowerPoint, or at the ON/OFF switch. � Not enough starting mixture. � Faulty thermostat. This is most unusual, but it can happen. #2 the Heater “cutsin”, but the fires dies out soon after. � Main stopcock still closed. �...
- Page 12 Kroll Kozy � � High/low selector not engaged properly. You can check if the pump is turning by feeling under the control box with your finger, after the thermostat has started the motor. � Grit in pump. This happens quite rarely, because anything that will go through the tank strainer will go through the pump. But if a bit of oil slops in over the side of the strainer, it’s possible some grit can jam the pump. Usually your attention is drawn to this because it makes a graunching noise. Sometimes you can free it up by switching it off, then turning the pump back and forth by hand. � d) Blocked oil inlet pipe. See the “Cleaning and maintenance”. If you suspect that this is the problem, take care when unscrewing the oil feed line, because it may contain hot oil under slight pressure. #3 Heater was running ok but goes out. � Tank Empty. � Oil in overflow cup See 1(a). � Grit in pump – See 2(a) � Too much water in oil. Uneven burning and a hissing sound are signs of water. #4 Oil is getting under the vapourising pan and/or the ash in the pan is wet and tarlike instead of dry and crusty. � This indicates incomplete combustion, which can be caused by: � Insufficient draught. Is the flue in good condition and breathing freely? Very strong winds can sometimes cause a down draught. A special antidown draught hat may be required in extreme cases � Combustion fan faulty. Is it spinning normally? Does it need cleaning? It’s surprising how lint and dirt can build up. Remove fan for thorough cleaning. ...
-
Page 13: Exploded View & Part Breakdown
Kroll Kozy Exploded View & Part Breakdown Page 13... -
Page 14: Components
Kroll Kozy Components Component parts Australian Kroll Part # German Part # Blower Fan assembly 000062 Cover right 001465 Cover left 001466 Fan assembly complete 005319 Bearing stocktaking 005524 Ballbearing 005338 Turbine 005384 Capacitor 2 µF 005385 Seal 005523 Coupling (8 mm) 005315 Blower Fan Motor 005382... - Page 15 Kroll Kozy Component parts Australian Kroll Part # German Part # Overflow protection cpl. 000718 Aluminium cup 005252 Strip terminal 006488 Thermostat 005439 Microswitch 025317 Spacer 006556 Holder for overflow protection 001461-01 Cable strain relief 006463 Cable strain relief 006464 Power cord with plug 006453 Motor mount complete...
-
Page 16: Kozy Circuit Schematic
Kroll Kozy Kozy Circuit Schematic Page 16... - Page 17 Kroll Kozy Page 18...
Need help?
Do you have a question about the Kozy and is the answer not in the manual?
Questions and answers