
Related Manuals for Horizon Fitness Elite T3000


Summary of Contents for Horizon Fitness Elite T3000
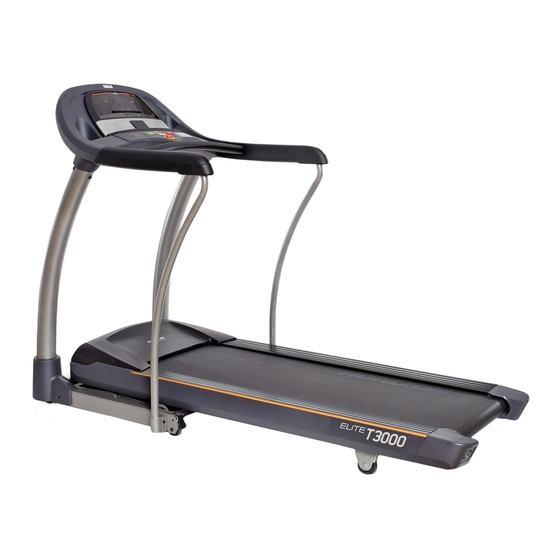
- Page 1 Elite T3000 Elite T4000 TREADMILL OWNER’S MANUAL Read the TREADMILL gUIDE before using this OWNER’S MANUAL.
- Page 2 ASSEMBLY WARNING There are several areas during the assembly process that special attention must be paid. It is very important to follow the assembly instructions correctly and to make sure all parts are firmly tightened. If the assembly instructions are not followed correctly, the treadmill could have frame parts that are not tightened and will seem loose and may cause irritating noises.
-
Page 3: Pre-Assembly
PRE ASSEMBLY TooLS INCLUDED: F 8 mm T-Wrench SPEAKERS F 5 mm T-Wrench UNPACKING USB PORT AND AUDIO IN JACK F 5 mm L-Wrench WATER BOTTLE HOLDER Place the treadmill carton on a level flat surface. It is recommended that you place a T4000 F Screwdriver protective covering on your floor. -
Page 4: Assembly Step
ASSEMBLY STEP 1-1 ASSEMBLY STEP 1-1 (T3000 ONLY) (T3000 ONLY) Slide main frame boot down over main frame HARDWARE foR STEP 1-1 : bracket. T3000 T3000 BOLT (A) SPRING WASHER (B) ARC WASHER (C) SCREW (D) Repeat steps D–F on other side. ONLY M8x20 mm Φ8.2xΦ17 mm Φ4x20 mm ONLY... - Page 5 ASSEMBLY STEP 1-2 ASSEMBLY STEP 1-2 (T4000 ONLY) (T4000 ONLY) Pull lead wire through right console mast. HARDWARE foR STEP 1-2 : After pulling the lead wire through the mast, the top of the console cable should be located at T4000 T4000 ONLY BOLT (A) SPRING WASHER (B) ARC WASHER (C) SCREW (D)
- Page 6 ASSEMBLY STEP 2 ASSEMBLY STEP 3 Open hardware for step 2. Open hardware for step 3. HARDWARE foR STEP 2 HARDWARE foR STEP 3 connect handlebar cables, and slide With the console upside down, attach the BOLT (E) SPRING WASHER (F) ARC WASHER (G) FLAT WASHER (I) handlebars into center bar. BOLT (J) SPRING WASHER (B) console mast caps to the console...
- Page 7 ASSEMBLY STEP 4 ASSEMBLY STEP 5 Open hardware for step 4. Attach console cables from handlebars HARDWARE foR STEP 4 : HARDWARE foR STEP 5 to console cables from console. gently gently place the console on top of the tuck excess cable into console before sliding the BOLT (H) SPRING WASHER (B) FLAT WASHER (I) BOLT (J)
- Page 8 ASSEMBLY STEP 6-1 ASSEMBLY STEP 6-2 (T3000 ONLY) (T4000 ONLY) Open hardware for step 6. Open hardware for step 6. HARDWARE foR STEP 6-1 HARDWARE foR STEP 6-2 : Attach left and right drop down Attach left and right drop down T3000 T4000 BOLT (K) SCREW (D) BOLT (K) handlebar to the long handlebar and handlebar to the long handlebar and ONLY...
-
Page 9: Treadmill Operation
• USING THE SAfETY KEY • foLDING THE TREADMILL • MoVING THE TREADMILL • LEVELING THE TREADMILL • T ENSIoNING THE RUNNING BELT Elite T3000 • CENTERING THE RUNNING BELT Max. User Weight: 160 kg / 350 lbs • USING THE HEART RATE fUNCTIoN Product Weight: 122kg / 268lbs Overall Dimension: 205 x 93.5 x 145 cm / 673” x 307” x 476”... -
Page 10: Console Operation
CoNSoLE oPERATIoN QUick adJUst keYpad (k) Note: There is a thin protective sheet of clear plastic on the overlay of the console that should be removed before use. A) LED DISPLAY WINDoWS: time, incline, distance, speed, date and clock. B) ALPHANUMERIC DISPLAY WINDoW: calories, heart rate, pace and PROFILE™ display information. T4000 C) DoT MATRIx DISPLAY WINDoW: displays workout level and progress. -
Page 11: Display Windows
GETTING STARTED DATE AND CLoCK SETUP T3000 DISPLAYS T4000 DISPLAYS 1) Check to make sure no objects are placed on the belt that 1) Enter Setup mode: Press and hold the 1 will hinder the movement of the treadmill. and 2 buttons for 3 seconds. 2) Plug in the power cord and turn the treadmill ON. -
Page 12: Program Information
PRoGRAM INfoRMATIoN NOTE: 1) If speed or incline are changed during your workout, the remaining segments will be affected accordingly. 4) STAMINA BUILDER: Promotes weight loss by increasing and decreasing the incline, while keeping you in your fat burning zone. 2) T3000 contains 10 programs: Manual, Speed Intervals, Peak Intervals, Stamina Builder, Weight Loss, golf Course, Foot Hills, Mountain Segments are repeated until selected time is reached. - Page 13 PRoGRAM INfoRMATIoN Segment Warm Up Cool Down Time 4:00 Each segment is 30 seconds 4:00 5) WEIGHT LoSS: Promotes weight Incline 7) fooT HILLS: Simulates a hill Segment Warm Up 9 10 11 12 13 14 15 Cool Down Level 1 Speed ascent and descent. This program Time 4:00 Each segment is 30 seconds...
- Page 14 PRoGRAM INfoRMATIoN 10-11) CUSToM PRoGRAMS: Lets you create and reuse a perfect workout for you with specific speed, incline and target heart workout example thr Your recommended for HEART RATE TRAINING rate Zone duration Zone (age 30) thr Zone time combination. The ultimate in personal programming. Time-based goal. VerY hard The first step in knowing the right intensity for your <...
- Page 15 HR INTERVALS(T4000 oNLY): Automatically adjusts peak and valley incline levels within your desired heart rate. Perfect for PRofILE™ PERfoRMANCE TRACKER providing an intense workout with recovery bursts. Time-based goal. Research shows that those who journal their fitness routines or workouts, on average, achieve greater success than those who do 1) Set WORK interval time using on the PROgRAMMINg BUTTON or the KEYPAD and press ENTER.
- Page 16 USING YoUR CD / MP3 PLAYER WEEKLY ToTAL: View your accumulated data from the last Sunday to the present day. 1) Connect the included AUDIO ADAPTOR CABLE to the AUDIO IN JACK on the top right of the console and the headphone jack on your CD / MP3 player. NOTE: This data is based on week to date NOT the previous seven days.
- Page 17 TREADMILL OWNER’S MANUAL T3000 & T4000 Owner’s Manual 0907’11 Rev. 2.0 © 2011 Horizon Fitness...
Need help?
Do you have a question about the Elite T3000 and is the answer not in the manual?
Questions and answers