Table of Contents
Advertisement
Advertisement
Table of Contents

Subscribe to Our Youtube Channel
Related Manuals for HTC Advantage X7500

Summary of Contents for HTC Advantage X7500
- Page 1 Quick Start Guide...
-
Page 2: Table Of Contents
Contents 1. What’s in the Box ....................3 2. The Pocket PC Phone ..................4 3. Getting Ready ....................8 4. Making a Call ....................12 5. Synchronizing Outlook Information ............. 13 6. Setting Up E-mail Accounts ................14 7. Sending a Message ..................16 8. -
Page 3: What's In The Box
1. What’s in the Box Battery AC Adapter Carrying Case User Manual and Quick Start Guide USB Sync Cable Getting Started and Application Discs Device VGA Out cable Extra Stylus Headset... -
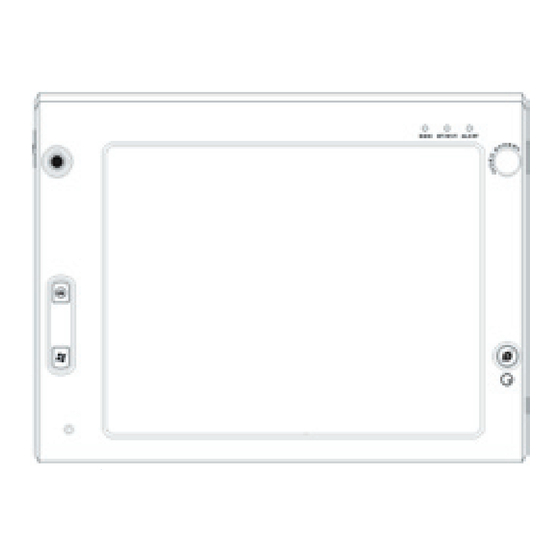
Page 4: The Pocket Pc Phone
2. The Pocket PC Phone... - Page 5 No. Item Function Navigation Control / Press this multi-directional control up, down, left, or right to move through menus and CENTER OK button program instructions; carry out the selection by pressing the CENTER OK button. Notification LED 1 This LED shows battery charging status. Touch Screen Tap the screen with the stylus to write, draw, or make a selection.
- Page 6 24 25...
- Page 7 Use this connection to output the contents on the screen to an external device using the provided VGA out cable. This also acts as a USB 1.1 port to connect USB peripherals. HTC ExtUSB™ Sync Use this connector to synchronize data by connecting the provided USB Sync cable or Connector/Earphone to recharge the battery via the provided AC adapter.
-
Page 8: Getting Ready
Accessory Function AC adapter Recharges the battery. USB Sync cable Connects your device to a PC and synchronize data. Stereo headset Provides a volume control slider and a Send/End button. Press the Send/End button to pick up a call or put a call on hold; press and hold the button to end the call. Carrying case Act as a protective carrying case for your device. -
Page 9: Install And Charge The Battery
Close the battery compartment. Install the miniSD card Make sure your device is turned off. Open the battery compartment at the bottom of the device. Insert the miniSD card into the card holder with its gold contacts facing up and close the battery compartment. To remove the miniSD card, press it to pop it out of the slot. - Page 10 Some batteries perform best after several full charge/discharge cycles. You can charge the battery in two ways: • Connect your device directly to an electrical outlet using the AC adapter. • Plug the sync cable to the USB port on your PC and to the sync connector on your device.
- Page 11 Check the battery power • Tap the battery level icon ( ) on the Today screen. The Power Settings screen will then open where you can see the current battery power level. Battery power indicator When the battery power gets very low, a warning message will be displayed. When you see this, immediately save your data by synchronizing with your PC, or save your data on a secondary storage card, and then turn off your device.
-
Page 12: Making A Call
4. Making a Call Like a standard mobile phone, you can use your device to make, receive, and keep track of phone calls and send SMS messages. IMPORTANT You need to have a wired or Bluetooth headset connected to your device to talk to or to hear the other party. -
Page 13: Synchronizing Outlook Information
5. Synchronizing Outlook Information Using Microsoft® ActiveSync®, you can synchronize information on your device with information on your PC, such as Outlook content. ActiveSync is already installed on your device, but you need to install it on your PC if you don’t already have it. Insert the Getting Started Disc into the CD drive of your PC. -
Page 14: Setting Up E-Mail Accounts
6. Setting Up E-mail Accounts The E-mail Setup Wizard makes it easy and simple to set up your Outlook e-mail and POP3/IMAP4 accounts on your device. Set up e-mail accounts using E-mail Setup Wizard Tap Start > Messaging. Tap Menu > Tools > New Account to access the E-mail Setup Wizard. The E-mail Setup Wizard guides you step-by-step through the setup process. - Page 15 Set up a POP3/IMAP4 e-mail account Set up a POP3 or IMAP4 e-mail account on your device if you have an e-mail account with an Internet service provider (ISP) or an account that you access using a VPN server connection (typically a work account).
-
Page 16: Sending A Message
7. Sending a Message Your device is capable of sending and receiving E-mail, SMS, and MMS messages as long as it is connected to the network. Although you can send text messages (SMS) to only mobile phone numbers, MMS messages can be sent to both mobile phone numbers and e-mail addresses. Compose and send a message In the message list, tap Menu >... -
Page 17: Browsing The Internet
8. Browsing the Internet You can set up connections to the Internet or to a corporate network to browse the Internet. The pre-loaded browser, Internet Explorer Mobile, is a full-featured Internet browser, and optimized for use on your device. Use Internet Explorer Mobile Tap Start >... -
Page 18: Using The Camera
9. Using the Camera Taking photos and recording video clips along with audio is easy with your device’s built-in camera. Launch the camera • Press the CAMERA button on your device. • Tap Start > Programs > Camera. • Tap Start > Programs > Pictures & Videos, then tap the Camera icon. -
Page 19: Using Pictures & Videos
10. Using Pictures & Videos The Pictures & Videos program collects, organizes, and sorts all of The down arrow your captured images and video clips on your device. You can use this program to view/play pictures, GIF animation, and video clips. You can even view pictures as a slide show, beam them, send them via e-mail, edit them, or Tap to view the... - Page 20 Play videos Tap Start > Programs > Pictures & Videos. By default, the contents of the My Pictures folder will be shown. To find the video clips that you captured, tap the down arrow ( ) next to the My Pictures folder and tap My Documents.
-
Page 21: Entering Information
11. Entering Information When you start a program or select a field that requires text or numbers, the Input Panel icon becomes available on the menu bar. Tap the Input Selector arrow (that appears next to the Input Panel icon) to open a menu where you can select a text input method and customize input options. -
Page 22: Customizing Your Pocket Pc Phone
12. Customizing Your Pocket PC Phone You can customize the look and feel of your device and set the time and date according to the current time zone. Customize the Today screen Tap Start > Settings > Personal tab > Today. -
Page 23: Securing Your Pocket Pc Phone
13. Securing Your Pocket PC Phone There are two kinds of security on your device. You can protect your SIM card from unauthorized use by assigning a (Personal Identification Number). Additionally, you can prevent unauthorized access to any part of the device by using password protection. Protect your SIM card with a PIN Tap Start >... -
Page 24: The Subdisplay
14. The Subdisplay The Subdisplay lets you view notifications, music info, weather, temperature and time on a designated area on the LCD screen when the keyboard is attached to the LCD screen of the main unit. The Subdisplay is automatically activated when the keyboard is pressed against the LCD screen. -
Page 25: Status Indicators
15. Status Indicators The Today screen displays important information, such as upcoming appointments and status indicators. Following are some of the status icons that you may see on your device: Icon Description New e-mail or text messages; SMS notification of voice mail New multimedia (MMS) message New MSN message There are more notifications. - Page 26 Icon Description Searching for phone service GPRS / EDGE available GPRS / EDGE connecting GPRS / EDGE in use 3G UMTS network available 3G UMTS connecting 3G UMTS in use Roaming Connection is active Connection is not active Synchronization in progress Synchronization error ActiveSync notification Wi-Fi function enabled, but device not connected to a wireless network yet...
- Page 27 Icon Description Synchronizing via Wi-Fi Sound on Sound off Alarm No SIM card inserted VueFLO activated Battery is fully charged Battery power is very low Battery charging Bluetooth headset detected QuickGPS update notification Serial USB connection active Note The USB to PC ( ) icon appears on the Today Screen when your device is connected to your computer and you enable a serial USB connection between them.
-
Page 28: More Information
16. More Information For more instructions, refer to the User Manual or contact your local dealer for assistance.
Need help?
Do you have a question about the Advantage X7500 and is the answer not in the manual?
Questions and answers