Clarke Clean Track 12 Operator's Manual
Hide thumbs
Also See for Clean Track 12:
- User and parts manual (81 pages) ,
- Manual (4 pages) ,
- Manual (4 pages)
Table of Contents
Advertisement
Available languages
Available languages
READ THIS BOOK
LEA ESTE MANUAL
LISEZ CE MANUEL
This book has important information for the use and safe operation of this machine. Failure to read this
book prior to operating or attempting any service or maintenance procedure to your Clarke machine
could result in injury to you or to other personnel; damage to the machine or to other property could
occur as well. You must have training in the operation of this machine before using it. If your operator(s)
cannot read this manual, have it explained fully before attempting to operate this machine.
All directions given in this book are as seen from the operator's position at the rear of the machine.
For new books write to: Clarke
Form No. 56041658
2/06 revised 10/08
Operator's Manual
Manuel d'utilisation
Libro de Instrucciones
®
, 2100 Highway 265, Springdale, Arkansas 72764.
Clarke
English (A-1 – A-10)
EN
Español (B-1 – B-10)
ES
Français (C-1 – C-10)
FR
®
®
Printed in the U.S.A.
Advertisement
Chapters
Table of Contents

Related Manuals for Clarke Clean Track 12


Summary of Contents for Clarke Clean Track 12
- Page 1 This book has important information for the use and safe operation of this machine. Failure to read this book prior to operating or attempting any service or maintenance procedure to your Clarke machine could result in injury to you or to other personnel; damage to the machine or to other property could occur as well.
-
Page 2: Table Of Contents
A-ii / ENGLISH TABLE OF CONTENTS Page Introduction ................... A-1 Parts and Service ................A-1 Nameplate ..................A-1 Uncrating the Machine ..............A-1 Cautions and Warnings ..............A-2 Grounding Instructions ..............A-3 Know Your Machine............. A-4 – A-5 Preparing the Machine for Use Filling the Solution Tank .............. -
Page 3: Introduction
Repairs, when required, should be performed by your Authorized Clarke Service Center, who employs factory trained service personnel, and maintains an inventory of Clarke original replacement parts and accessories. Call the CLARKE DEALER named below for repairs or service. Please specify the Model and Serial Number when discussing your machine. (Dealer, affi x service sticker here.) NAMEPLATE The Model Number and Serial Number of your machine are shown on the Nameplate, located on the rear base of the machine. -
Page 4: Important Safety Instructions
14. Do not use to pick up fl ammable or combustible liquids such as petrol or use in areas where they may be present. 15. If foam or liquid comes out with the vacuum exhaust, switch power off immediately. Contact Clarke if the problem persists. -
Page 5: Grounding Instructions
ENGLISH / A-3 120VAC GROUNDING INSTRUCTIONS This appliance must be grounded. If it should electrically malfunction, grounding provides a path of least resistance for electric current to reduce the risk of electric shock. This appliance is equipped with a cord having an equipment-grounding conductor and grounding plug. The plug must be plugged into an appropriate outlet that is properly installed and grounded in accordance with all local codes and ordinances. -
Page 6: Know Your Machine
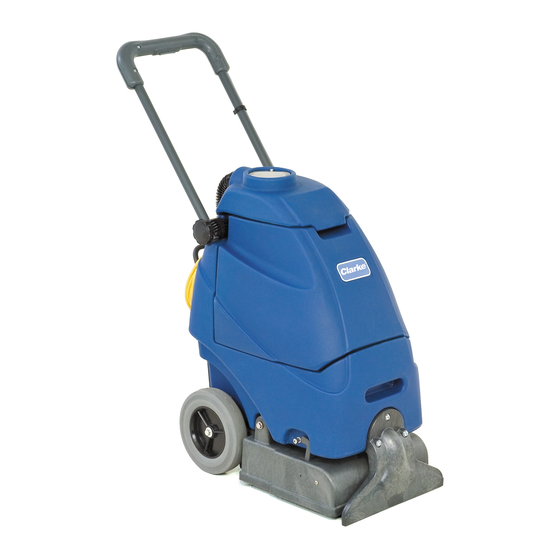
A-4 / ENGLISH KNOW YOUR MACHINE Solution/Brush Motor Switch Recovery Hose Recovery Tank Dome Lid Dome Lid View Port Recovery Tank Solution Tank Solution Screen Vacuum Shoe Brush Storage Position Lever Lift Location Vacuum Motor Filter revised 9/07 A-4 - FORM NO. 56041658 - Clean Track ®... - Page 7 ENGLISH / A-5 KNOW YOUR MACHINE (CONTINUED) Solution Drain Hose / Level Indicator Handle Assembly Handle Adjustment Knobs Brush Motor Circuit Breaker Power Switch Accessory Solution Port Power Cord Lift Handle FORM NO. 56041658 - Clean Track 12 - A-5 ®...
-
Page 8: Preparing The Machine For Use
A-6 / ENGLISH PREPARING THE MACHINE FOR USE FILLING THE SOLUTION TANK Turn the power switch to OFF (O) and then unplug the machine. Swing open the Recovery Tank Dome Lid (3). Lift the Recovery Tank (5) from the machine and set it off to the side. Read the dilution instructions on the chemical container. -
Page 9: Operating The Machine
Dome Lid in place of the machine’s recovery hose. Attach the accessory’s solution hose (waterline) to the machine’s Accessory Solution Port (F). See your Clarke Distributor for accessories that may be used with the Clean Track ®... -
Page 10: After Using The Machine
• *Check Carbon Brushes • * Have a Clarke service technician check the vacuum motor carbon brushes once a year or after 300 operating hours. The brush motor carbon brushes check every 500 hours or once a year. IMPORTANT! Motor damage resulting from failure to service the carbon brushes is not covered under warranty. -
Page 11: Spray Nozzle Maintenance
ENGLISH / A-9 SPRAY NOZZLE MAINTENANCE FIGURE 8 Remove the Spray Nozzle (J) once a month. See Figure 8. Soak the nozzle overnight in vinegar to remove chemical deposits. SOLUTION SCREEN MAINTENANCE Once a week (or more often if necessary), clean the Solution Screen (7). Drain the solution tank. Lift the recovery tank from the machine and set it off to the side. -
Page 12: Troubleshooting
A-10 / ENGLISH TROUBLESHOOTING If the possible causes listed below are not the source of trouble, it is a symptom of something more serious. Contact your Clarke Service Center immediately for service. TRIPPING THE CIRCUIT BREAKER The Circuit Breaker (D) is located on the Control Panel; it protects the electrical circuit and brush motor from damage due to overload conditions. If the circuit breaker is tripped try to determine the cause. - Page 14 B-ii / ESPAÑOL ÍNDICE Página Introducción .................. B-1 Componentes y servicio ..............B-1 Placa de identifi cación ..............B-1 Desembalaje de la máquina ............B-1 Precauciones y advertencias ............B-2 Instrucciones de conexión a tierra ..........B-3 Conozca su máquina ............B-4 – B-5 Preparación de la máquina para su utilización Llenado del depósito de solución ...........
-
Page 15: Introducción
Clarke originales. Llame al DISTRIBUIDOR CLARKE que se indica a continuación para lo referente a piezas de repuesto y servicio. Por favor, especifi que el Modelo y Número de Serie cuando hable de su máquina. - Page 16 15. Si sale espuma o líquido con el escape de aspiración, apague el aparato inmediatamente. Póngase en contacto con Clarke si el problema persiste. 16. El líquido eyectado por la boquilla de pulverización podría ser peligroso debido a su temperatura, presión o contenido químico.
- Page 17 ESPAÑOL / B-3 120VAC INTRUCCIONES PARA HACER LA TOMA A TIERRA Este aparato deberá ser conectado a tierra. En caso de malfuncionamiento o de desperfectos, la toma a tierra proporciona una vía de menor resistencia de la corriente eléctrica para reducir el riesgo de choques eléctricos. Esta unidad viene equipada con un cordón con conductores para toma a tierra y con un enchufe con toma a tierra.
-
Page 18: Conozca Su Máquina
B-4 / ESPAÑOL CONOZCA SU MÁQUINA Interruptor del motor del cepillo/solución Tubería de recuperación Tapa del depósito de recuperación Mirilla de la tapa Depósito de recuperación Depósito de solución Criba de la solución Zapata de aspiración Palanca de posición de almacenaje del cepillo Ubicación del elevador Filtro del motor de vacío revised 9/07... - Page 19 ESPAÑOL / B-5 CONOZCA SU MÁQUINA (CONTINUACIÓN) Tubería de drenaje de la solución / Indicador de nivel Conjunto de mango Botones de ajuste del mango Disyuntor del motor del cepillo Conmutador de corriente Puerto de solución del accesorio Cable de alimentación Mango del elevador FORM NO.
-
Page 20: Preparación De La Máquina Para Su Utilización
B-6 / ESPAÑOL PREPARACIÓN DE LA MÁQUINA PARA SU UTILIZACIÓN LLENADO DEL DEPÓSITO DE SOLUCIÓN Apague el conmutador de corriente (O) y desenchufe la máquina. Abra la tapa del depósito de recuperación (3). Levante el depósito de recuperación (5) de la máquina y apártelo a un lado. Lea las instrucciones que aparecen en el envase del producto químico. -
Page 21: Manejo De La Máquina
Fije la manguera de solución del accesorio (línea de agua) al puerto de solución del accesorio de la máquina (F). Póngase en contacto con su distribuidor Clarke en cuanto a los accesorios que pueden utilizarse con el Clean Track ®... -
Page 22: Después De La Utilización De La Máquina
• ** Haga que un técnico de mantenimiento de Clarke revise los cepillos de carbono del motor de aspiración una vez al año o después de 300 horas de funcionamiento. Compruebe los cepillos de carbono de los motores del cepillo cada 500 horas o una vez al año. -
Page 23: Mantenimiento De La Boquilla De Pulverización
ESPAÑOL / B-9 MANTENIMIENTO DE LA BOQUILLA DE PULVERIZACIÓN FIGURA 8 Retire la boquilla de pulverización (J) una vez al mes. Ver la Figura 8. Introduzca la boquilla en vinagre durante toda la noche para eliminar depósitos de productos químicos. MANTENIMIENTO DE LA CRIBA DE LA SOLUCIÓN Una vez por semana (o más si fuera necesario), limpie la criba de la solución (7). -
Page 24: Localización De Averías
Una vez corregido el problema, pulse el botón para volver a conectar el disyuntor. Si el botón no queda pulsado, espere 5 minutos e inténtelo de nuevo. Si el disyuntor se desconecta una y otra vez, póngase en contacto con su Centro de Servicio Clarke. - Page 26 C-ii / FRANÇAIS TABLE DES MATIÈRES Page Introduction ................... C-1 Pièces et service après-vente ............C-1 Plaque d’identifi cation ..............C-1 Déballage de la machine ..............C-1 Consignes de prudence et de sécurité ........... C-2 Instructions de mise à la terre ............C-3 Apprenez à...
-
Page 27: Introduction
Ce produit est uniquement destiné à un usage commercial. PIECES ET SERVICE APRES-VENTE Si nécessaire, les réparations doivent être effectuées par votre centre de service Clarke agréé. Ce dernier emploie du personnel formé en usine et maintient un inventaire des pièces de rechange et des accessoires originaux Clarke. - Page 28 15. Si de la mousse ou du liquide s’échappe avec l’air évacué, coupez immédiatement l’interrupteur principal. Adressez- vous à Clarke si le problème persiste. 16. Tout liquide éjecté du gicleur peut être dangereux en raison de sa température, de sa pression ou de sa nature chimique.
-
Page 29: Instructions De Mise À La Terre
FRANÇAIS / C-3 INSTRUCTIONS VISANT LA MISE À LA TERRE (120VAC) Cet appareil doit être mis à la terre. En cas de défaillance ou de panne éventuelles, la mise a la terre fournit au courant un chemin de moindre résistance qui réduit le risque de choc électrique. -
Page 30: Apprenez À Connaître Votre Machine
C-4 / FRANÇAIS APPRENEZ À CONNAÎTRE VOTRE MACHINE Interrupteur du moteur de la brosse/solution Tuyau de récupération Capot du réservoir de récupération Hublot du capot Réservoir de récupération Réservoir de solution Filtre de solution Embout d’aspiration Levier de position de rangement de la brosse Point de levage Filtre de moteur à... - Page 31 FRANÇAIS / C-5 APPRENEZ À CONNAÎTRE VOTRE MACHINE (SUITE) Indicateur de niveau/tuyau de vidange de la solution Ensemble poignée Boutons de réglage de la poignée Disjoncteur du moteur de brosse Interrupteur d’alimentation Orifi ce de solution accessoire Cordon d’alimentation Poignée de levage FORM NO.
-
Page 32: Préparation De La Machine
C-6 / FRANÇAIS PRÉPARATION DE LA MACHINE REMPLISSAGE DU RÉSERVOIR DE SOLUTION Mettez l’interrupteur d’alimentation sur OFF (O), puis débranchez la machine. Ouvrez le capot du réservoir de récupération (3). Soulevez le réservoir de récupération (5) de la machine et déplacez-le sur le côté. Lisez les instructions de dilution fi... -
Page 33: Fonctionnement De La Machine
Branchez le tuyau de récupération de l’accessoire (conduite d’eau) sur l’orifi ce de solution accessoire (F) de la machine. Consultez votre distributeur Clarke concernant les accessoires qui peuvent être utilisés avec le Clean Track ®... -
Page 34: Après Utilisation De La Machine
• * Demandez à un technicien d’entretien Clarke de vérifi er les balais de carbone du moteur d’aspiration une fois par an ou toutes les 300 heures de fonctionnement. Les balais de carbone des moteurs de brosses doivent être vérifi és une fois par an ou toutes les 500 heures de fonctionnement. -
Page 35: Maintenance Du Gicleur
FRANÇAIS / C-9 MAINTENANCE DU GICLEUR FIGURE 8 Retirez le gicleur (J) une fois par mois. Voir Figure 8. Laissez tremper le gicleur toute une nuit dans du vinaigre afi n d’éliminer les dépôts chimiques. MAINTENANCE DU FILTRE DE SOLUTION Une fois par semaine (ou plus souvent si nécessaire), nettoyez le fi... -
Page 36: Dépannage
Des débris sont enroulés autour de l’entraînement de la brosse (enlevez les débris) Court-circuit électrique (appelez votre Centre de service Clarke ou un électricien qualifi é pour qu’il vérifi e la machine) Une fois le problème résolu, appuyez sur le bouton pour réarmer le disjoncteur. Si le bouton ne reste pas armé, attendez 5 minutes, puis essayez à... - Page 37 ® Section II Parts Manual 56041658...
- Page 39 06-2 TABLE OF CONTENTS Clean Track ® 08-10 DESCRIPTION PAGE Back Panel Assembly ................2-3 Base System ................... 4-5 Brush System ..................6-7 Decal System ..................8-9 Handle System ..................10-11 Recovery System ................11-13 Solution System .................. 14-15 Wiring Diagram ................... 16-17 Accessories ....................
-
Page 40: Back Panel Assembly
06-2 BACK PANEL ASSEMBLY Clean Track ® 07-8 FORM NO. 56041658... - Page 41 06-2 BACK PANEL ASSEMBLY Clean Track ® 07-8 Item Ref. No. Qty Description 56265107 Switch, Rocker 56316322 Cord, Power 16/3, SJT NOTE 1 56755726 Barb, Hose Male 56009205 Wsh, Flt SS .219 x .500 x .047/.062 56002896 Scr, Pan Phil SS 10-24 x .62 56009078 Nut, Hex Jam SS 5/8-18 56265208...
-
Page 42: Base System
06-2 BASE SYSTEM 08-4 Clean Track ® FORM NO. 56041658... - Page 43 06-2 BASE SYSTEM Clean Track ® 08-10 Item Ref. No. Qty Description 56265393 Bushing .31 x .50 x 1.18 56264382 Adaptor, Barbed 56002082 Pin, Spr .19 x 1.00 56002836 Nut, Hex Nyl Loc SS 10-24 56002938 Wsh, Flt SAE SS 5/16 56003272 Nut, Hex Jam SS 5/8-11 56003333...
-
Page 44: Brush System
DECAL SYSTEM BRUSH SYSTEM 06-2 Clean Track ® FORM NO. 56041658... - Page 45 06-2 DECAL SYSTEM BRUSH SYSTEM Clean Track ® Item Ref. No. Qty Description 56265204 Bearing/Spindle Kit Spindle, Drive Washer, Bearing Bearing, Block Sheave Poly-V 6J17 Bearing, Ball Bearing, Ball 56265344 Bracket, Motor Tension 56265340 Brush Assembly 12 56265077 Motor, 115V, 1/4 HP 56265370 Sheave, Poly-V 56265043...
-
Page 46: Decal System
06-2 DECAL SYSTEM Clean Track ® 07-8 FORM NO. 56041658... - Page 47 06-2 DECAL SYSTEM Clean Track ® 08-4 Item Ref. No. Qty Description 56016745 Decal, Clarke 56265310 Decal, Main NOTE 1 56016771 Decal, Switch / Breaker NOTE 2 56016772 Decal, Operation Instructions 56317152 Decal, CRI Silver 56040958 Tag, CRI 56478523 Tie, Cable...
-
Page 48: Handle System 18
HANDLE SYSTEM 18 HANDLE SYSTEM 06-2 Clean Track ® FORM NO. 56041658... - Page 49 06-2 HANDLE SYSTEM 18 HANDLE SYSTEM Clean Track ® Item Ref. No. Qty Description 56002192 Scr, Pan Phil 10-24 x .75 56003092 Scr, Pan Phil Plastite 4-20 x .62 56264123 Ratchet 56265053 Button, Spray 56265098 Switch, SPDT Snapaction 56265357 Rod, Handle 56265374 Cover, Handle 56265375...
-
Page 50: Recovery System
RECOVERY SYSTEM RECOVERY SYSTEM 06-2 Clean Track ® 07-8 FORM NO. 56041658... - Page 51 06-2 RECOVERY SYSTEM RECOVERY SYSTEM Clean Track ® 08-10 Item Ref. No. Qty Description 56001972 Scr, Flt Phil 1/4-20 x 1.50 56265397 Tank, Recovery 12 56265346 Handle, Lid 56265398 Lid Assembly (includes item 5) 56109551 Gasket, Lid 56265244 Filter = Revised or new since last update FORM NO.
-
Page 52: Solution System
SOLUTION SYSTEM 06-2 Clean Track ® FORM NO. 56041658... - Page 53 06-2 SOLUTION SYSTEM Clean Track ® Item Ref. No. Qty Description 56002859 Wsh, Flt SAE SS 1/4 56002507 Scr, Pan Phil 1/4-20 x .75 56002896 Scr, Pan Phil SS 10-24 x .62 56002905 Scr, Pan Phil SS 1/4-20 x 1.50 56003067 Scr, Pan Phil SS 1/4-20 x 1.00 56003119...
- Page 54 SOLUTION SYSTEM WIRING DIAGRAM 06-2 Clean Track ® #10 RING TERMINAL (FASTEN TO CONROL PANEL) GRN/YEL (4 Cond Cable) MOTOR, VACUUM AMP = 7.7 ROCKER SWITCH BLK #3 (4 Cond Cable) MOTOR, PUMP AMP = 0.6 SOLENOID VALVE AMP = .06 DIODE BRIDGE E_GND MOTOR, BRUSH...
-
Page 55: Wiring Diagram
06-2 06-2 WIRING DIAGRAM Clean Track ® Item Ref. No. Qty Description 56265103 Rectifi er, 35 Amp 56265379 Circuit Breaker, W/Boot (3 Amp) 56265037 Valve, Solenoid 115V 56265380 Motor Vacuum, 115V 56203518 Carbon Brushes (set of 2) for use on 56265380 56265077 Motor, Brush 115 VDC, 1/4 HP 56265051... -
Page 56: Accessories
ACCESSORIES 06-2 Clean Track ® AVAILABLE BRUSH 56265340 Brush Assembly 12” ACCESSORY TOOLS 56314402 Wand Assembly w/Soft and Hard Floor Tools 56265173 Wand Assembly w/Soft Floor Tool 56262209 Stand Up Wand 56220109 Hand Tool 56220070 Upholstery Hand Tool 56265368 8’ Hose w/Waterline 56265174 15’... - Page 59 ALTO Cleaning Systems (UK) Ltd., Penrith (810) 544-6300 Gilwilly Industrial Estate Penrith ® American Lincoln / Clarke, Marietta, Georgia 30066 Cumbria CA11 9BN 1455 Canton Road +44 1768 868 995 (770) 973-5225 ALTO France S.A. Strasbourg B.P. 44, 4 Place d’Ostwald...
- Page 60 (c). Clarke will repair the product and or replace any defective parts without charge within a reasonable time after receipt of the product. Clarke's liability under this warranty is limited to repair of the product and/or replacement of parts and is given to purchaser in lieu of all other remedies, including INCIDENTAL AND CONSEQUENTIAL DAMAGES.
Need help?
Do you have a question about the Clean Track 12 and is the answer not in the manual?
Questions and answers