Table of Contents
Advertisement
Advertisement
Table of Contents

Related Manuals for GAS GAS TX RANDONNE 2014


Summary of Contents for GAS GAS TX RANDONNE 2014
- Page 1 TX RANDONNE 2014 TX RANDONNE 2014...
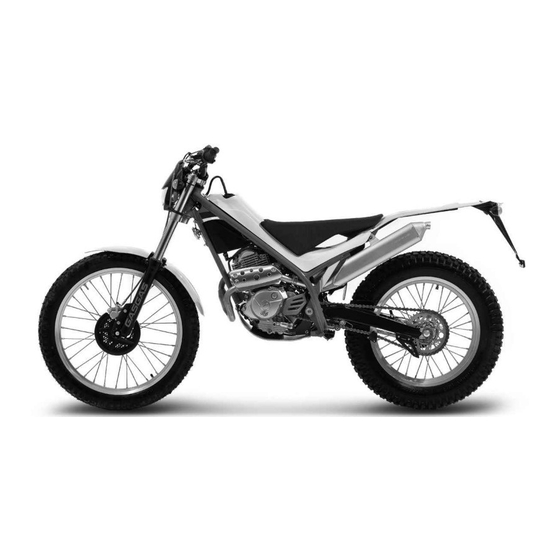
- Page 2 Thanks for your confidence and be welcome to GAS GAS Our TX RANDONNE 2014 is a bike to practice Trial-tour. MOTOS. It is a polyvalent model thought to make an amateur trial as well as excursion off road.
-
Page 3: Important Notice
Important notice Read this Manual carefully. You will find it contains all the necessary information for your safety, and that of third persons, as well as guaranteeing the correct conservation and maintenance of the GAS GAS motorbike you have just bought. You will find all the necessary instructions for the correct riding and control of this vehicle are set out below. -
Page 4: Table Of Contents
Contents Thanks to consumer Front suspension Important notice Rear suspension Warranty regulations 4 to 6 Swing-arm link Recommendations Articulation lubrication 28 to 30 Technical specifications 8 to 9 Chain fixing link position Electric scheme 10 to 11 Chain and wheel tension Component location 12 to 13 Tyres and tyre pression... - Page 5 (According to Law decree 23/2003 on the 10th of July, covering Warranties on Consumer Item Sales) Warranty terms of the manufacturer GASGAS Motos, S.A. The company GAS GAS MOTOS, S.A. (hereafter referred to as “GG”), with this present document guarantees the consumer, the purchaser of a vehicle manufactured by GG, that both the materials and the manufacturing are free of defects in accordance with the highest standards of quality.
- Page 6 Obligation of the purchaser GG will have the right to reject any claims under Warranty in the event that: a) The purchaser has failed to submit the vehicle to any of the inspections and/or maintenance work required in the Users’ Manual, or has exceeded the date set for such inspections or maintenance work.
- Page 7 e) Any damages caused as a result of the defects, as well as any expenses incurred either directly or indirectly as a consequence of the defects (for example, communication costs, accommodation expenses, car hire costs, public transport costs, breakdown truck fees,, courier costs, etc.), as well as other financial losses (for example, those caused by the loss of the use of the vehicle, loss of income, time lost, etc.) f) Any acoustic or aesthetic phenomenon that does not significantly affect the condition or use of the motorcycle (for example, small or hidden imperfections, noise or vibrations that are normal in use, etc.)
-
Page 8: Recommendations
Recommendations for the reliable operartion of your GAS GAS. •Eight hours of running-in are recommended in order to guarantee the correct operation of the engine. •It is important to warm the engine to the optimum operation temperature every time the motorbike is used. - Page 9 TECHNICAL SPECIFICATIONS MOTOR 4-stroke, single-cylinder, air-cooled 125cc. motor Capacity 123.3cc Diameter and stroke 54 x 54 200 cc. motor Capacity 179’2 cc. Diameter and stroke 65x54 Carburettor PTK 34 Lubrication system Wet sump Ignition system Electronic TRANSMISSION Transmission type 5-speed Clutch type Multi-disc system in oil bath Secondary transmission...
- Page 10 Primary reduction ratio 68/20 (3.400) 38/13 (2.111) Overall drive ratio Transmission oil Capacity 1,2 L Type SF 15W/40 FRAME Type Tubular profile made with Cr-Mo. Tyres Front 2,75 x 21” Trial Rear 4,00 x 18” Trial tubeless. Suspension Front Adjustable tele-hydraulic fork ø 40 mm. Rear Variable progressive system with mono-shock multiadjustable.
- Page 11 TX RANDONNÉ 125cc ELECTRICAL DIAGRAM -10-...
- Page 12 TX RANDONNÉ 200cc ELECTRICAL DIAGRAM -11-...
- Page 13 16 17 1 Front fender 12 Front brake disc 23 Frame 2 Front brake caliper 13 Cylinder 24 Head pipe 3 Front suspension left leg 14 Carburetor 26 Headlight 4 Front suspension bar 15 Chain guide 27 Front tyre air valve 5 Breather hose 16 Chain tensioner 28 Rear brake disc...
- Page 14 37 Excentric rear wheel 45 Clutch lever 38 Left foot peg 46 Light controls 39 Seat 48 Handlebar 40 Shift pedal 49 Right foot peg 42 Fuel tank 54 Throttle cover 50 Multifunction 55 Front brake lever 43 Fuel tank cap 51 Indicators 44 Left handlebar grip 53 Front brake pump...
- Page 15 The maintenance table and adjustments are easy to carry out and must be done to insure the motorcycle is in good running condition. MAINTENANCE TABLE Part Check / Adjust Replace / Clean Grease / Inspect Change Lubricate Rear shock absorber Every year Every 2 years Transmission oil...
- Page 16 MAINTENANCE TABLE Part Check / Adjust Replace / Clean Grease / Inspect Change Lubricate Exhaust Every race 500 hours Packing 100 hours Air filter Every race If is damaged Every race Every cleaning Steering assembly Every race If is necessary Brake hose Every race If is necessary...
-
Page 17: Serial Number
Enter the vehicle identification number (serial The new GAS GAS number), the particulars shown on the model R A N D O N N E label, and the ignition-key identification number carries the appropriate in the spaces provided, in order to simplify certification plate your future orders for spare parts or as a useful reference whose details should... - Page 18 The control panel includes The indicator lighting, turn signal, horn and control has been engine stop switches. located on the underside of the left-hand grip. To start the right-hand indicator, move this switch to the right; and likewise, to start the left-hand indicator, move this switch to the left.
-
Page 19: Fuel
L o c a t e d u n d e r t h e suspension lower right side Fuel tank capacity : 4 liters bracket. For correct operation, it is necessary Use premium gasoline with an octane rating equal to or higher to turn the handlebar completely than that shown in the table. -
Page 20: Fuel Tank Cap
The fuel tank cap is of the quick release type. To open the cap, lift the tab and turn it 1/4 turn in counterclockwise direc- tion. To close it, place cap with the words GAS GAS in the upper position, and turn the tab in clockwise direction. -
Page 21: Fuel Tap
The regulation idling en- gine can be adjusted by the screw B and the air regulation by the C The position of the fuel tap (A) screw. must be pointing down for Reserve Open Closed normal operation. When turned forwards, it opens the reserve, to the rear turns off the fuel. - Page 22 L i k e t h e c l u t c h lever, the front brake lever must be in the ideal position. Again, 3mm.mínimum the play must not exceed 3mm. The clutch lever must be This play must adjusted to your liking, but never be the free play should not...
- Page 23 Refill oil removing the cap (A). The cap to make the engine empty of oil is located at the botton left of engine. To check the oil level, fix the bike perpendicular to floor. If the engine was running wait few minutes. Check the level with the rod joined to the oil cap: remove oil cap, clean the rod, introduce and get out the rod, now you can see the oil level.
- Page 24 Is important to check periodically the air-filter. Get the saddle out removing the screw (A). Remove the screws (B) and take the cover out. Access to the air- filter (C). Remove screws (D) and pull the air-filter Remove screw (E) and filter foam is free.
- Page 25 It is necesassary to periodically check the spark plug condition. This must be done removing the spark plug from the upper part of the cylinder head. First disconnect the spark plug cap and remove area first. Clean the spark plug with compressed air to remove dirt and prevent foreign material from entering inside the engine compartment.
- Page 26 Level of air chamber 160 mm. 760 mm -25-...
- Page 27 REAR SUSPENSION The preloading of the damper spring is measured by the Free spring high: 140mm rotation of the toothed rings (C) Spring high preloaded (Lp): 134mm with the aid of a special wrench. Standard spring preload (P): 6mm - 26 -...
- Page 28 The linkage at the lower part of rear suspension must be p e r i o d i c a l l y c l e a n e d , inspected and lubricated with grease. Ii is very important to periodically remove and verify the condition of the swingarm bearings...
- Page 29 Use special oil to 2) The pivot of the lubricate the following: gear shift lever. 1) All pivot points of the brake and clutch levers. 4) Apply grease to 3) Also the rear brake the footrest springs p e d a l ( b e a r i n g s ) . and fixtures.
- Page 30 6) The drive chain must be c l e a n e d a n d l u b r i c a t e d thouroughly and frequently since it is exposed to the elements and constant abrassion. 5) Apply grease to the linkage of the engine starting pedal.
- Page 31 7) It is also recommended to Oil and clean the throttle control frequently; it is especially recommended to do so after the bike frequently lubricate the chain has been cleaned with water under high pressure. tensioner spring because it is under great stress.
- Page 32 To regulate the chain slack The chain and center the rear wheel master link use the shaft excentrics clip must be which can be easily placed in opposite adjusted. direction of the wheel travel. -31-...
- Page 33 A l l t y r e c o n d i t i o n s must checked to insure optimum. Fig. 1 - Bad condition Fig. 2 - Good condition Tyre pressure should be checked periodically to insure the best. Front wheel pressure: 1,5 bar - normal 1,5 bar - normal...
- Page 34 Brake pad wear, front and rear, must be checked from time to time to insure an efficient braking power under all circumstances. The brake calipers have been The front brake fluid level furnished with bleeder can be verified through the valves to eliminate the transparent inspection air trapped in the brake...
- Page 35 V e r i f y f l u i d l e v e l periodically and refill if necessary. To check the break liquid l e v e l , f i x t h e b i k e perpendicular to floor, the level must be between MAX and MIN marks.
- Page 36 STORAGE For extended storage of the motorcycle, you must do the following: - Clean the motorcycle thoroughly. - Start the engine for about 5 minutes to warm up the transmission oil and then drain it (see “crankcase drain cap” ) - Fill with new transmission oil.
- Page 37 Multifunction gauge (Only on certain models and markets) QUICK GUIDE: SETUP MENU The multifunction device is water resistant, has 3 buttons To enter into the setup menu endurance II, hold buttons 1, with a brightly lit LCD. 2 and 3 for three seconds. Be sure to hold the 3 buttons at the same time.
- Page 38 ADJUSTING the distance units: Select the units (kilometers or miles) with 1 or 2 buttons. SET the front tire size: Select the size with button 1 or 2 (2300m). ADJUST the clock format: Select the desired format using the buttons 1 or 2 (12H or 24H). SETTING the time: Set the clock to the desired time by pressing 1 to 2.
- Page 39 SCREENS IN NORMAL MODE: Screen 1: DST DST (Distance Traveled). DST function accumulates the distance data since the last reset while you’re riding a motorcycle. Press and hold buttons 1 and 2 for three seconds to reset DST (Distance 1 ). Hold the button 3 to set the DST.
-
Page 40: Starter
TROUBLESHOOTING NOTE This is not an exhaustive list of malfunctions, it only shows the most common problems. POSSIBLE CAUSE REMEDY MALFUNCTION Engine does not start - Seized crankshaft. - Go to a specialized workshop. - Seized cylinder / piston / jornal bearing. - Go to a specialized workshop. - Page 41 MALFUNCTION POSSIBLE CAUSE REMEDY The engine operates irregularly - Ignition rotor damaged. - Replace the rotor. - Water in fuel. - Drain the fuel tank and fill up with new fuel. Engine lacks power or poor - Fuel supply defective. - Clean the fuel system and verify its operation.
-
Page 42: Brakes
MALFUNCTION POSSIBLE CAUSE REMEDY The motorcycle is unstable - Cable interferes with the handlebar. - Move or loosen the cable just a little. - Steering stem locknut too tight. - Loosen the steering stem locknut. - Damaged or worn steering bearings. - Replace the steering bearings. - Page 43 MALFUNCTION POSSIBLE CAUSE REMEDY - Damaged cylinder. - Replace the damaged cylinder. Abnormal motorcycle noises - Brackets, nts, screws not tighted. - Check and adjust to the correct tightening torques. Handlebar vibration - Excessive steering axles tolerances. - Tighten steering bracket and steering stem locknut to the correct torque values.
- Page 44 FINAL RECOMMENDATIONS PREVENTIVE ADVICE Before you ride the vehicle, take all the time you may require to check your motorcycle, carry out the periodical upkeep and check all functions. In different sections of this manual you will find data and work specifications that must be done at an autorized GAS GAS dealer, because of this and to extend the useful life of the motorcycle, all periodical inspections must be carried out by specially trained professionals at a GAS GAS Post-Sale Service Shop.
Need help?
Do you have a question about the TX RANDONNE 2014 and is the answer not in the manual?
Questions and answers