Table of Contents
Advertisement
!
PLEASE READ CAREFULLY BEFORE USE
Additional information on this product and
answers to frequently asked questions
can be found at www.primos.com
© 2012 Primos
®
Hunting
Before Operation
Quick Start
Initial Camera Setup
Camera Menu Options
(Detailed Description)
Other Features/
Functions
Recommended
Accessories
Operating Tips
Customer Service &
Warranty
Advertisement
Table of Contents

Subscribe to Our Youtube Channel
Related Manuals for Primos 63065 Super Model II


Summary of Contents for Primos 63065 Super Model II
- Page 1 Before Operation Quick Start Initial Camera Setup Camera Menu Options (Detailed Description) Other Features/ Functions Recommended Accessories Operating Tips Customer Service & Warranty PLEASE READ CAREFULLY BEFORE USE Additional information on this product and answers to frequently asked questions can be found at www.primos.com ©...
- Page 2 PLEASE READ CAREFULLY BEFORE USE IMPORTANT For your protection, please carefully read these warnings, precautions and safety/operating instructions completely before operating the camera. Follow these instructions closely and keep this manual for future reference. WARNING To reduce the risk of fire, electrical shock or product damage/failure, - Do not expose unit with the door open to rain, moisture, dripping or splashing.
- Page 3 SUPER COMPACT, HIGH PERFORMANCE CAMERA..Yet Incredibly Simple to Use ONLINE SUPPORT Instructions Video Clips Visit www.primos.com/ for Instructional Video Clips. Visit primos.zendesk.com for FAQ, PDF Manuals, Camera Support or to open a Troubleshooting Ticket.
-
Page 4: Table Of Contents
Table of Contents Before Operation Needed to Operate Select SD Card Size Identify Parts Quick Start - Initial Camera Setup Initial Use/ Before Use Camera Settings Backup Battery Camera Status Lights Camera Menu Options Button Functions Sliding Switch Settings - Photo Mode Sliding Switch Settings - Video Mode Sliding Switch Settings - Time Lapse Camera Menu... - Page 5 Customer Service & Warranty Contact Info Warranty Protection Introduction The Primos SUPER MODEL II - Game Camera and Photo Viewer ® ™ Small in size but big on performance, the highly advanced SUPER MODEL ™ II game camera has a lightning fast .3 second trigger, and captures photos, videos and time lapse sequences with best-in-class 7 MP image clarity and a 50’...
-
Page 6: Before Operation
SUPER MODEL ™ INSTRUCTION MANUAL Included: 1. SUPER MODEL II Camera (1) ™ 2. Tree Mounting Bracket (1) 3. 72” Mounting Strap (1) 4. Instruction Manual 5. Warranty Card BEFORE OPERATION Needed to Operate: 1. Eight (8) “AA” size Alkaline, Lithium or Rechargeable Batteries 2. -
Page 7: Select Sd Card Size
Select SD Card Size This chart allows you to see the approximate capacity of 1GB, 2GB, 4GB, 8GB, 16GB & 32GB SD Memory Cards. Check to see what megapixel photos or resolution videos that will be best for your SD Card. Recommended for general use and optimal battery life. -
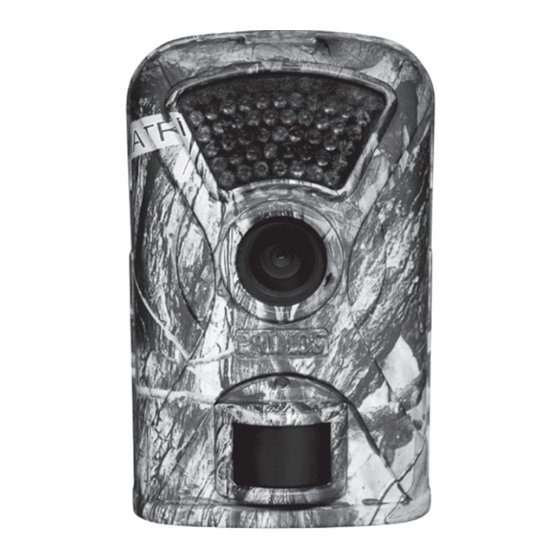
Page 8: Identify Parts
Identify Parts Infrared LED Lights Camera Lens PIR Motion Sensor Mounting Strap Slots SD Card Slot Brass Inserts (For optional Attachment Accessories) Through Housing Security Cable Hole “AA” Battery Tree Gripping Teeth External Battery Port Compartments (Optional 6V DC) Tree Mounting Bracket Bottom View... - Page 9 2.5” Viewing LCD Screen Power Button ENTER/RUN Button Arrow Buttons Up, Down, Right & Left Menu/Photo Viewer Button...
-
Page 10: Quick Start Initial Camera Setup
QUICK START INITIAL CAMERA SETUP Initial Use/Before Use Install Batteries - Uses eight (8) “AA” size Alkaline, Lithium or Rechargeable batteries. Install up to 32GB SD Memory Card (not included) into the card slot on the bottom of the camera. Secure Camera Bracket to Tree or Pole using included Mounting Strap. -
Page 11: Camera Status Lights
Camera Status Lights Your Super Model II Camera is equipped with 2 LED status indication ™ lights on the back of the camera (located right below the buttons). Red Light Green Light RED LIGHT Lights up when the camera detects motion. Visibility of this light is indication that your camera is ON and working. -
Page 12: Button Functions
CAMERA FEATURES & FUNCTIONS BUTTON FUNCTIONS - TURN ON: Press button to turn unit ‘ON’ - WAKE UP: Press to ‘Wake Up’ the camera from sleep mode (may need to press several times to wake up - camera cannot be woke up when green status POWER light is illuminated) BUTTON... -
Page 13: Sliding Switch Settings - Photo Mode
- ENTER MENU: Press to enter Camera Menu. - USE PHOTO VIEWER: Press and Hold Button for 2 seconds to quick start the Photo Viewer. M E N U / P H O T O VIEWER BUTTON - SELECT & SAVE SETTINGS: When in Camera Menu, press ENTER Button to select setting. - Page 14 - Mega Pixels (MP) are referring to the number of pixels in Photo Resolution an image, basically the higher the number, the more pixels. This DOES NOT mean more pixels is always better. Your Super Model II camera sensor is ™...
-
Page 15: Sliding Switch Settings - Video Mode
SLIDING SWITCH SETTING - VIDEO MODE NOTE: Use arrow buttons to move sliding switches. - Please use this guide to help you choose which video Video Resolution resolution setting will work best for your situation. Storage/ # of Resolution Battery Recovery Usage Guidelines Videos... -
Page 16: Sliding Switch Settings - Time Lapse
SLIDING SWITCH SETTING - TIME LAPSE MODE Setting - Time Lapse Captures time lapse photography automatically all day and saves footage in a video file. This mode has gained popularity for scouting further distances, such as big open areas (food plots, fields, etc) where you will capture footage automatically whether there is motion directly in front of the camera or not. - Page 17 Time Lapse Interval – The pre-set amount of time (seconds or minutes) you desire between each time lapse photo. Short intervals offer more constant surveillance but your AVI video file will be larger. Longer intervals will reduce the video file size and save battery life. **If you don’t want your camera taking Time Lapse ALL DAY, then move the slider switch to ‘CUSTOM’...
-
Page 18: Camera Menu (Date, Time, Sensitivity Formatting & Instant Trigger)
CAMERA MENU - Change to current date. Date in camera will be displayed on pictures Date and videos. - Change to current time. Time in camera will be displayed on pictures Time and videos. - Motion Detector Sensitivity. Use ‘Normal’ as default. Camera Sensitivity (Sensing) You can adjust the sensitivity of the Passive Infrared (PIR) Motion Sensor on your camera. - Page 19 High Sensitivity • Use when trying to detect game at further distances ( in fields or open areas with long-range visibility • May use in warmer months or high heat climates so it is easier for sensor to detect difference between body heat and outdoor temperature.
-
Page 20: Handheld Photo Viewer (Reviewing Photos & Videos)
Handheld Photo Viewer TIP: Hold Photo Viewer button down for 2 seconds to quick start Photo Viewer. SCROLL THROUGH STORED MEDIA NAVIGATE: Scroll from one picture to the next, left or right. TIP: Hold button down to quickly flip through photos. LEFT/RIGHT BUTTONS ORGANIZING MEDIA OPTIONS... - Page 21 EXIT PHOTO VIEWER EXIT PHOTO VIEWER: Press to exit Menu to main Sliding Switch Screen. MENU BUTTON REVIEWING PHOTOS ZOOMING & PANNING • ZOOMING: Use UP arrow to start zooming in and DOWN arrow to zoom back out. • PANNING IMAGE: Once in Zoom Mode, you can use LEFT, RIGHT, UP and DOWN buttons to pan photo (move picture around to see different areas of zoomed photo).
- Page 22 REVIEWING VIDEOS NOTE: Video clips will be identified with a little red Video Camera icon on the bottom left hand corner of the screen. PLAY OR PAUSE Press UP button to start playing video or press again to pause. BUTTON FAST FORWARD While video is playing, press RIGHT button to speed up playback speed.
-
Page 23: Clearing Sd Memory Card
Clearing SD Memory Card *** If SD card has been used in any other devices, format the card before use in SUPER MODEL ™ Formatting the SD Card erases all images and data. To clear photos, see ‘FORMAT’ on page 12. Active RUN Mode (Power Saving State) When on main sliding switch screen, press ‘RUN’... -
Page 24: Recommended Accessories
RECOMMENDED ACCESSORIES Featured Primos Camera Accessory ® • Makes Every Camera have Better Vision • Easily rotate your camera to get the PERFECT SHOT • Fits ALL camera brands • Install camera high in tree for better Included: view and security •... -
Page 25: Operating Tips
OPERATING TIPS IMPORTANT NOTES Learning to use your SUPER MODEL II – Visiting www.primos.com/Cameras and ™ watching our Instructional Video Clips is the ‘easiest way’ to learn ‘how to use’ your SUPER MODEL ™ Troubleshooting or Questions – Before calling customer service, visit www.primos. zendesk.com to find troubleshooting tips, frequently asked questions and answers, as well as any updates. - Page 26 Internal Rechargeable Backup Battery - With first use or after a long time period or camera storage, internal battery may initially take up to 30 hours to fully charge (charges only when “AA” batteries are installed when camera is turned ON). Once charged, this backup battery is dedicated to saving the date, time and menu settings when the main AA-cell batteries are removed.
- Page 27 following scenarios are most likely 1) an animal ran through the picture extremely fast or 2) a smaller animal/bird is around the camera/sensor but is not in the camera field of view or 3) the sunlight or heat in combination with moving elements (trees, brush, shadows) is causing a false trigger.
-
Page 28: Additional Ways To View/Retrieve Images
Additional Ways to View/Retrieve Images Explore these various methods for viewing TRUTH Camera photos/videos: ® 1. Remove SD Memory Card from slot in bottom of camera. 2. Replace with separate, fresh SD Card if you want camera to continue working. How to View Images/Videos 1. - Page 30 Primos Hunting will NOT be responsible for damage incurred ® in returning product for repair. 3. Include Return Form and “Proof of Purchase” in with return. 4. Send product prepaid to: Primos Hunting • 604 First St •Flora, MS 39071...
- Page 31 FCC STATEMENT This equipment has been tested and found to comply with the limits for a Class B digital device, pursuant to part 15 of the FCC Rules. These limits are designed to provide reasonable protection against harmful interference in a residential installation. This equipment generates, uses and can radiate radio frequency energy and, if not installed and used in accordance with the instructions, may cause harmful interference to radio communications.
- Page 32 IMPORTANT RETURN POLICY Please contact the Primos Customer Service Team with any comments, questions, ® problems or return requests. Call (601) 879-9323 or email service@primos.com. RETURN THIS PRODUCT TO PRIMOS HUNTING ® DO NOT SEND BACK TO THE STORE 604 First Street, Flora, MS 39071 • Office 601-879-9323 •...
Need help?
Do you have a question about the 63065 Super Model II and is the answer not in the manual?
Questions and answers