Table of Contents
Advertisement
Quick Links
Advertisement
Table of Contents
Troubleshooting

Related Manuals for Deltec Cozmo


Summary of Contents for Deltec Cozmo
- Page 1 User Manual Deltec Cozmo Insulin Pump ™...
- Page 2 Insulin Pump to help you in the treatment of your your health, contact your healthcare provider. diabetes. Our staff at Deltec is available to help you 24-hours a This manual provides information on programming, day with the programming and operation of your pump.
-
Page 3: Table Of Contents
Warnings ................1 History ................17 Cautions ................4 Description of pump display & menus ........18 Explanation of symbols ............6 Deltec accessories ..............20 Introduction ................7 Cartridge ................20 Indications ................. 7 Infusion sets ..............20 Contraindications .............. 7 Infrared (IR) adapter ............ - Page 4 2. Attaching an infusion set and loading a filled My DKA plan .............. 70 cartridge into the pump ..........36 Skin infections ..............71 3. Fill the tubing .............. 40 Tips for sick days ............. 71 4. Choosing an access site and inserting the access My sick day plan ............
- Page 5 Stopping an extended bolus ........88 History ..............111 Combination Bolus ..............89 Pump Settings ............112 Personalizing the combination bolus ........ 90 Pump Settings / Personalize / Alerts ......112 Delivering a combination bolus ........91 Regional Settings ............. 113 Stopping a combination bolus ........
-
Page 6: Important Information
What’s In This Section? Important Safety Information Warnings and Cautions Explanation of symbols Introduction Glossary of terms Pediatric use About this manual Important Information... -
Page 7: Important Safety Information
Monitor your blood glucose levels regularly (at least 4 to tact Deltec, Inc. Incorrect use of this pump, failure to fol- 6 times per day, or as your healthcare provider recommends) - Page 8 Deltec infusion sets are recommended for use with this is delayed or blocked, you may develop hyperglycemia. If pump. Pump operation and accuracy may not be assured desired, you can use the Glucose Reminder alert to remind if you use other manufacturers’...
- Page 9 of leakage can also mean opportunity for contamination lead- cant weight loss or weight gain, etc. In these cases your basal ing to infection. rates may need to be modified. Never use Fill tubing when the infusion set is connected When returning a pump for service, you must be pre- to your body, or you could deliver an unintended bolus.
-
Page 10: Cautions
Important Information vider for health advice and Deltec, Inc. for information on healthcare provider before attempting to use this feature. servicing your pump. Be prepared to inject insulin with an Discuss your individual insulin needs with your health- insulin syringe or pen. - Page 11 ™ Use only Deltec Cozmo 3mL Insulin Cartridges; other manufacturers’ products will not work with the Deltec pump. Strong household cleaners and chemicals will damage the pump’s outer shell if applied directly or indirectly (on your hands, for instance). Avoid the following in particular: ®...
-
Page 12: Explanation Of Symbols
Below is a list of symbols you will see on (or on the packaging gramming can continue ™ of) the Deltec Cozmo Insulin Pump and accessories, as well Appears in pump display, along with a message, as explanations of what the symbols mean. -
Page 13: Introduction
Basal Pattern (menu) Introduction Load (menu) Congratulations! You have selected the Deltec Cozmo ™ Insu- lin Pump to help you in the treatment of your diabetes. History (menu) Indications Pump Settings (menu) ™ The Deltec Cozmo Insulin Pump is a syringe infusion pump... -
Page 14: Meal Bolus
Important Information tion System to create a name for each pattern. Correction bolus • The pump also offers a “Temporary Rate” feature which al- • The correction bolus is used to lower high Blood Glucose lows you to program a temporary basal rate on the pump. (BG) levels. -
Page 15: Glossary Of Terms
Aseptic technique: Aseptic technique is used to minimize the the pump. risk of infection. Use aseptic technique when working with The pump requires the use of the Deltec Cozmo ™ 3mL Insulin the cartridge, infusion set, cannula/needle and preparing the Cartridge and one of the Deltec Insulin Infusion Sets. - Page 16 In Type 1 diabetes, the body no longer produces insulin. In Type 2 diabetes, the body loses Cartridge: The container that holds the insulin. The Deltec the ability to properly use insulin. ™...
- Page 17 To help protect against infection, never touch or blow ™ into the body in the treatment of diabetes. The Deltec Cozmo directly on any part of the fluid path. Insulin Pump systems are controlled by 2 microprocessors...
- Page 18 Windows ® -based) computer program designed ability to use that insulin. ™ for use with the Deltec Cozmo Insulin Pump. Through My ™ Treatment Assistant , you can perform pump programming, print or e-mail history reports and pump settings, and save pump and delivery history.
-
Page 19: Pediatric Use
™ by a parent or a designated caregiver. The Deltec Cozmo • Infusion set change reminder – alert that can be pro- sulin Pump has many safety features that are designed with... -
Page 20: About This Manual
Important Information bohydrate, the user’ s insulin to carbohydrate ratio is pro- About this manual grammed into the pump and used to calculate the amount The first part of this manual (Important Information, About of insulin needed for a specified amount of carbohydrates, the Pump, Using the Pump - Basics and Help) includes in- avoiding the paper and pencil calculations that are cur- formation on the basic operation and troubleshooting of the... -
Page 21: About The Pump
What’s In This Section? Pump Illustrations Description of features and buttons Description of pump display and menus Deltec Accessories Before using the pump for the first time Insert a battery Self tests Attach the belt clip (optional) Pump Settings Regional Settings... -
Page 22: Display
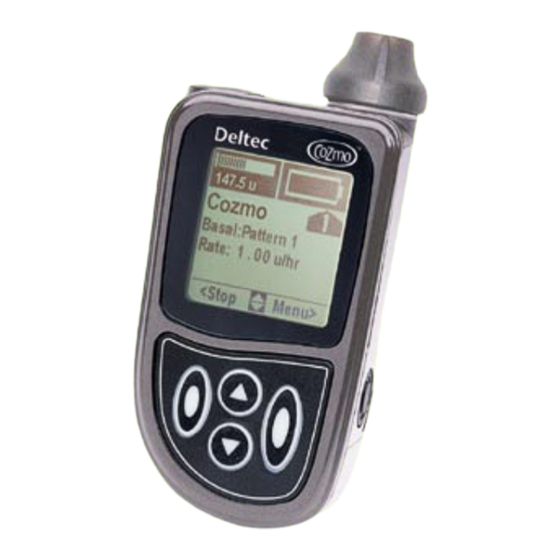
Pump illustrations Figure 1 Figure 2 Battery cap Cartridge cap (Cartridge viewing IR windows Display window) Up key Touch Bolus Left program button Right program Down key (backlight) About the Pump... -
Page 23: Infrared (Ir) Windows
About the Pump use the up and down keys, the symbol is shown in Description of features and buttons the bottom, middle part of the display. When you are at the top or bottom of a menu and only 1 of the keys can Battery cap (Figure 1) be used, and the symbol will change to Holds the battery in place in the battery compartment. -
Page 24: Features
Watertight As long as the pump’ s labels and outer shell are intact ™ the Deltec Cozmo Insulin Pump is watertight, so you do not have to remove the pump when showering or bathing, and allows unlimited swimming activities. -
Page 25: Description Of Pump Display & Menus
“Cozmo” name. On page 3 of the home screen, you To choose a menu item, press the key until can input important emergency information and phone the edit bar is over the item you want. - Page 26 In a menu, press Insulin remaining in the Power remaining in the battery to move the edit bar to the cartridge (approximate) (approximate) item you want, then press Cozmo ™ pump Meal Bolus Select name (or “Personal” Correction Bolus label, added using...
-
Page 27: Deltec Accessories
About the Pump Deltec accessories Deltec offers a variety of products for use with your Infrared (IR) adapter pump. A complete list of accessories with ordering In order to communicate with the pump using My information is included in the materials supplied with ™... -
Page 28: Before Using The Pump For The First Time
2002-09-16 D. Zurn things you need to do when you get your pump. During «cozmo-insert-AAA.eps» They will not power the typical use, you can expect an alkaline battery to last pump properly, and the approximately 1 month (the “Vibrate”... -
Page 29: Self Tests
About the Pump The first time you insert a battery and your new pump Self Tests performs the self tests, you will see the following alert During the self tests, the pump’ s internal computer screens: performs tests on all the major hardware, computer, and electronic systems. -
Page 30: Attach The Belt Clip (Optional)
Attach the belt clip (Optional) Slide the pump into the belt clip with Pinch the clip open and attach it to your clothing the keypad facing out (see Figure 6). waist band or belt (see Figure 8). D. Zurn, 2002-10-21 Figure 6 «belt-clip-rear.eps»... -
Page 31: Pump Settings
About the Pump cussed in chapter 6, page 99), programming the re- Pump settings gional setting, and setting up Delivery (Delivery settings are discussed in later chapters). The Pump Settings menu allows you to perform certain setup functions, such as setting the time and date, Regional settings setting up how the pump alarms, and personalizing The regional settings determine how certain things are... - Page 32 Select then press Select home screen press Select Press Pump Settings Personalize Menu Menu Menu Alerts Time and Date Cozmo History Basal Pattern Beep/Vibrate Load Regional Settings Basal: Pattern 1 Program Lock Press History Press Rate: 1.150 u/hr...
-
Page 33: Time And Date
Start at Choose Pump Settings, home screen Press Select then press Select Pump Settings Press Menu Menu Time and Date Cozmo Basal Pattern Beep/Vibrate Load Basal: Pattern 1 Program Lock History Rate: 1.150 u/hr Press Personalize Press... -
Page 34: Beep Or Vibrate
Choose Pump Choose Beep/Vibrate, Start at the Settings, then then press Select home screen press Select Press Pump Settings Menu Menu Cozmo Time and Date Basal Pattern Beep/Vibrate Alert Load Basal: Pattern 1 Program Lock History Rate: 1.150 u/hr Press... -
Page 35: Personalizing Alerts
About the Pump reminder; then, if Yes, decide when to give it (1 to 5 Personalizing alerts hours after loading a cartridge or delivering a bolus). It The pump allows you to set up certain alarms and alerts is factory preset to No (reminder not in use). the way you prefer. - Page 36 should occur. For example, if you eat breakfast every day between 7:00AM and 9:00AM, you could select 6:45AM for the “Start” time, and 9:15AM for the “End” time. Then if the pump detects that no bolus was delivered during that period, the pump will give an alert.
- Page 37 Select Press Pump Settings Personalize Menu Low Cartridge Menu Menu Choose when to give alert Alert Time and Date Cozmo Alerts (5 to 50 units), then Basal Pattern Beep/Vibrate History Load Basal: Pattern 1 Program Lock press Next Regional Settings History Rate: 1.150 u/hr...
- Page 38 Start at Stopping and restarting insulin Home screen delivery Cozmo Basal: Pattern 1 Rate: 1.150 u/hr You can stop and restart insulin delivery from the home <Stop Menu> screen. Press Stop Select delivery Warning: When stopping delivery, remember that to stop...
-
Page 39: Program Lock
Choose Pump Start at Choose Program Lock, Settings, then Home screen then press Select press Select Press Pump Settings Menu Menu Cozmo Time and Date Basal Pattern Beep/Vibrate Basal: Pattern 1 Load Program Lock Rate: 1.150 u/hr History Press Press... -
Page 40: Unlocking The Menu
Program Lock by following the procedure below. To Start at turn the Program Lock off, you need to follow the home screen procedure on page 32, but at the “Program Lock / Lock program” screen, choose No. Cozmo Press Basal: Pattern 1 Menu Rate: 1.150 u/hr <Stop Menu>... -
Page 41: Notes
About the Pump Notes: ______________________________________________ ______________________________________________ ______________________________________________ ______________________________________________ ______________________________________________ ______________________________________________ ______________________________________________ ______________________________________________ ______________________________________________ ______________________________________________ ______________________________________________ ______________________________________________ ______________________________________________ ______________________________________________ ______________________________________________ ______________________________________________ ______________________________________________ ______________________________________________ ______________________________________________ ______________________________________________ ______________________________________________ ______________________________________________ ______________________________________________ ______________________________________________ ______________________________________________ ______________________________________________ ______________________________________________ ______________________________________________ ______________________________________________ ______________________________________________ ______________________________________________ ______________________________________________... -
Page 42: Using The Pump -Basics
What’ s In This Section? Loading a cartridge Meal bolus Standard bolus (units of insulin): setup Standard bolus: delivery Carbohydrate bolus: setup Carbohydrate bolus: delivery Basal patterns Personalizing basal patterns Editing basal patterns Using basal patterns Using the Pump -Basics... -
Page 43: Loading A Cartridge
If ™ any other accessory used with the Deltec Cozmo desired, you can use the Glucose Reminder alert to Insulin Pump. remind you to test your BG level (see Personalizing Alerts, page 28). -
Page 44: Attaching An Infusion Set And Loading A Filled Cartridge Into The Pump
Using the Pump - Basics tridge; remove the protective 2. Attaching an infusion set and loading a filled car- cap from the luer end of the tridge into the pump infusion set and insert the luer Warning: To avoid accidentally infusing insulin, through the hole in the cap and disconnect the infusion set tubing from the access D. - Page 45 20 units (the sensor may have trouble sensing the cartridge amount). Start at Choose Load, then Home screen press Select Cartridge Cartridge Press Menu Menu Cozmo Menu Load Load Correction Bolus Fill tubing Fill tubing Temporary Rate Basal: Pattern 1 Fill cannula Fill cannula Rate: 1.150 u/hr...
- Page 46 Using the Pump - Basics *In order for the pump to assure that the cartridge is correctly connected Not ready FastForward to the pushrod, the pushrod must start in a forward position. If it is Pushrod must move not far enough forward when you press Load, or if you attempt to load a forward.
- Page 47 5. Verify, by looking through the cartridge viewing window, that the cartridge is properly attached to the pushrod. Fasten the cartridge cap back onto the pump. Make sure the rib on the cap lines up with the rib on the pump, indicating the cap is secured (see Figure 12).
-
Page 48: Fill The Tubing
Using the Pump - Basics 3. Fill the tubing Filling forces insulin from the cartridge into the infusion Warning: Never use Fill tubing when the infusion set tubing and pushes air out of the tubing. Filling is set is connected to your body, or you could deliver complete when you see insulin come out of the end of an unintended bolus. -
Page 49: Choosing An Access Site And Inserting The Access Device
4. Choosing an access site and inserting the access device • Choose an access site. Anywhere you would normally Warning: Always remove all air from the cartridge inject insulin can be used as an access site, including and infusion set before starting insulin delivery. your abdomen, hips, buttocks, upper thighs, etc. - Page 50 Using the Pump - Basics 5. Fill cannula Filling the cannula is an important step if you are using an infusion set that has a separate access device (needle or cannula). It delivers a small amount of insulin that fills the access device. If you do not fill the cannula, there is a delay in insulin delivery once the pump is started as the access device fills.
-
Page 51: Fill The Cannula
(or vibrate) to remind you that it is time to change your infusion set and access site. sure insulin is being properly delivered. Press Select Cartridge Cartridge Menu Cozmo Menu Load Press Correction Bolus Press Load Fill tubing... -
Page 52: Meal Bolus
Using the Pump - Basics Meal Bolus Warning: You should receive specific training on done to your pump. programming and delivering a meal bolus. Please NOTE: Many of the settings you program here will be carefully read all instructions and talk to your health- used by all of the meal bolus types available on the care provider. -
Page 53: Standard Bolus (Units Of Insulin): Setup
Select then press Select Press Select press Select Pump Settings Press Personalize Delivery Setup Menu Menu Menu Menu Cozmo Time and Date Alerts Program bolus Meal Bolus Basal Pattern Beep/Vibrate History using: Correction Bolus Basal: Pattern 1 Load... -
Page 54: Standard Bolus: Delivery
Using the Pump - Basics Standard bolus: delivery Start at (Menu appears only if Home screen more than one bolus type is available) Bolus Menu Cozmo Press Meal Bolus Press Standard Correction Bolus Menu Basal: Pattern 1 Select Extended Bolus Temporary rate Rate: 1.150 u/hr... -
Page 55: Carbohydrate Bolus: Setup
Select Program bolus Pump Settings using: Press Delivery Setup Personalize Menu Menu Menu Menu Alerts Time and Date Cozmo Meal Bolus Grams-Carbs Basal Pattern Beep/Vibrate History Correction Bolus Load Basal: Pattern 1 Regional Settings Program Lock Basal Pattern History Rate: 1.150 u/hr... -
Page 56: Carbohydrate Bolus: Delivery
Using the Pump - Basics Carbohydrate bolus: delivery Start at (Menu appears only if Home screen more than one bolus type is available) Bolus Menu Press Cozmo Press Standard Meal Bolus Menu Select Correction Bolus Basal: Pattern 1 Extended Bolus Temporary rate Rate: 1.150 u/hr... -
Page 57: Basal Patterns
Basal patterns Warning: You should receive specific training on programming and using basal patterns. Please carefully read all instructions and talk to your health- care provider. These settings should be programmed before you actually program (edit) the individual basal patterns. The pump allows up to 4 basal patterns, each of which can contain up to 48 time/rate “segments.”... -
Page 58: Personalizing Basal Patterns
Select then press Select press Select Menu Pump Settings Personalize Delivery Setup Menu Menu Menu Alerts Time and Date Cozmo Meal Bolus Basal Pattern History Beep/Vibrate Correction Bolus Load Basal: Pattern 1 Regional Settings Program Lock Basal Pattern History... -
Page 59: Editing Basal Patterns
Editing basal patterns Warning: It is vital to get the basal patterns correct. If a basal rate is too high or too low, all your insulin delivery throughout the day and night will be incorrect, including boluses. Warning: Many things can affect how your body uses insulin. - Page 60 Select* press Select* press Select Press Edit Menu Basal Pattern Pattern 2 Pattern 2 Menu Total 15.90 u Pattern 2 Start using Cozmo Pattern 1 Time u/hr Total 35.25 u Meal Bolus Pattern 2 Edit Midnight 1.20 Time u/hr...
-
Page 61: Using Basal Patterns
Start at Pattern, then . Select pattern you want, home screen press Select to use, then press Select Basal Pattern Press Menu Cozmo Menu Pattern 1 Meal Bolus Pattern 2 Correction Bolus Basal: Pattern 1 Pattern 3 Temporary Rate Rate: 1.150 u/hr... -
Page 62: Notes
Using the Pump - Basics Notes: ______________________________________________ ______________________________________________ ______________________________________________ ______________________________________________ ______________________________________________ ______________________________________________ ______________________________________________ ______________________________________________ ______________________________________________ ______________________________________________ ______________________________________________ ______________________________________________ ______________________________________________ ______________________________________________ ______________________________________________ ______________________________________________ ______________________________________________ ______________________________________________ ______________________________________________ ______________________________________________ ______________________________________________ ______________________________________________ ______________________________________________ ______________________________________________ ______________________________________________ ______________________________________________ ______________________________________________ ______________________________________________ ______________________________________________ ______________________________________________ ______________________________________________ ______________________________________________... -
Page 63: Help
What’s In This Section? About the alarms (beep/vibrate settings) Personal pump removal guidelines Troubleshooting Your pump & Alarms Extreme temperatures Alerts Water Other Messages Contact sports Cleaning your pump Your basal rates, boluses & Servicing your pump Your weight Troubleshooting health problems Your level of exercise Low blood glucose Your growth... -
Page 64: About The Alarms (Beep/Vibrate Settings)
ume, low battery, etc. About the alarms (Beep/Vibrate Beep: 4 double-beeps, repeated once per minute. settings) Vibrate: 4 double-vibrations, repeated once per minute. • Single alarm: This is a notification alert. The pump can be set to “Beep” or “Vibrate” when an Beep: pump beeps once. -
Page 65: Troubleshooting
Help Troubleshooting Alarms Message in display What it means / Alarm How to make it stop Delivery stops. The battery does not You must change the battery immediately. If the Battery depleted have enough power for the pump to repeating 2 beep alarm occurs, power may be so Delivery stopped work. - Page 66 Remove the battery to silence the alarm and has detected a problem with the Call for service contact Deltec, Inc. to initiate pump service. Do pump. Continuous alarm. not use the pump. You must be prepared to inject insulin until a replacement pump arrives.
-
Page 67: Alerts
Help Alarms - continued Message in display What it means / Alarm How to make it stop Delivery will stop in 30 seconds Press Cancel. This is the notification of the unless you press Cancel. Attention Automatic Off alarm. If you do not press Cancel, No key pressed in xx:xx alarm. - Page 68 Alerts - continued Message in display What it means / Alarm How to make it stop The amount of insulin left in the car- Press OK. Replace the cartridge as soon as Cartridge tridge is low. Alert repeats at intervals practical.
- Page 69 Help Alerts - continued Message in display What it means / Alarm How to make it stop The pump has calculated that the Press OK. Due to “insulin on board” (from 1 or Alert “Current Blood Glucose” you entered more previous boluses which are still affecting BG is below target or would result in a BG level below your BG level), the pump has calculated a 0...
- Page 70 Alerts - continued Message in display What it means / Alarm How to make it stop All pump settings have been reset to Remove the cartridge (if present), then press Program Defaulted the default values, and the cartridge Next. Setup of cartridge volume needs to be rechecked to make volume required sure it will be displayed correctly on...
-
Page 71: Other Messages
Help Other messages Message in display What it means / Alarm How to make it stop Your pump was delivering a To continue delivering the temporary rate, press Temp. Rate Incomplete Temporary Rate when power was Yes. If you do not want to continue the tempo- Remaining lost. - Page 72 Messages - continued Message in display What it means / Alarm How to make it stop You have attempted to use the “Load” If a cartridge is installed (and with the infusion set No cartridge detected portion of the load cartridge menu, attached to the cartridge) press down gently on Cartridge missing or but no cartridge is detected.
- Page 73 Help Messages - continued Message in display What it means / Alarm How to make it stop You have attempted to edit a basal Press OK to cancel the temporary rate and edit Temporary Rate Active pattern while a temporary rate is basal pattern, or press Cancel to continue Editing basal pattern active.
-
Page 74: Cleaning Your Pump
Cleaning your pump ® ) and gently clean inside the compartment. Use the Routinely clean your pump to prevent buildup of dirt or dried fluids. Try to wipe spills off the pump right away to dry end of the swab to dry the compartment. avoid a sticky buildup, which will be harder to wipe off Caution: Never use abrasive cleaners, solvents, later. -
Page 75: Servicing Your Pump
Before sending the pump, make sure that you have a com- plete record of all your pump settings so that you can not working properly, you will need to call Deltec, Inc. to arrange to have the pump replaced. program the replacement pump correctly when it arrives. -
Page 76: Troubleshooting Health Problems
Troubleshooting health problems Low blood glucose (hypoglycemia) Blood glucose lower than target. Signs and symptoms may If you have frequent low blood glucose, especially if at about the same time every day, talk to your healthcare include: shakiness, sweating, dizziness, cold or clammy skin, looking pale, tingling and numbness in hands or provider. -
Page 77: High Blood Glucose (Hyperglycemia)
Help High blood glucose (hyperglycemia) Problem Corrective Action Blood glucose level higher than target. Signs and symp- Blockage See Troubleshooting Pump Alarms, toms include: increased thirst, frequent urination, blurred (occlusion) this chapter. vision and high BG reading upon testing. See the table at Increased food/ Deliver a Correction bolus to lower right and on the following pages for some possible causes... - Page 78 Infusion Set and/or Access Site problems : Problem Corrective Action Problem Corrective Action Poor insulin absorption Check access site for lumps, Needle/cannula If needle/cannula is dislodged, scarring or bruising dislodged change infusion set and access (hypertrophied areas). Move the site. access site, if necessary.
-
Page 79: Diabetic Ketoacidosis (Dka)
Help Diabetic Ketoacidosis (DKA) My DKA plan A serious condition that occurs when there is not enough insulin to allow the glucose in the blood to be used by the ______________________________________________ cells in your body for energy. The cells begin to burn the ______________________________________________ body’... -
Page 80: Skin Infections
Skin infections Tips for sick days Skin infections may be experienced when using an insu- lin pump because the cannula or needle remains in place During illnesses like colds and flu, controlling your BG for 2 to 3 days. It is vital that proper aseptic technique be level may be more difficult. -
Page 81: My Sick Day Plan
______________________________________________ • dressing and tape ______________________________________________ • spare alkaline AAA (IEC LR03) batteries ______________________________________________ • spare Deltec cartridge(s) and infusion set(s) ______________________________________________ As always, discuss with your healthcare provider any spe- cial supplies you might need in your emergency kit. -
Page 82: Personal Pump Removal Guidelines
Personal pump removal guidelines Your pump &: ______________________________________________ Extreme temperatures Insulin in the cartridge can freeze if exposed to tempera- ______________________________________________ tures below 32˚F (0˚C) and can lose its potency. If you are ______________________________________________ outside in very cold temperatures for any length of time, ______________________________________________ keep the pump next to your body and covered by warm clothing. -
Page 83: Contact Sports
Help minutes. Dry the pump off with a clean towel when you men (or discontinuing one), contact your healthcare pro- are finished. If swimming in salt water, rinse the pump in vider. Your basal pattern(s) and boluses may need to be tap water and then dry it off with a clean towel to prevent modified. -
Page 84: If You Drop Your Pump Or Hit It Hard
Look over the pump’ s outer shell carefully, checking for Deltec, Inc. for information on servicing your pump. cracks or chips. If there are cracks or chips, the pump will Be prepared to inject insulin with an insulin syringe or no longer be watertight. -
Page 85: Notes
Help Notes: ______________________________________________ ______________________________________________ ______________________________________________ ______________________________________________ ______________________________________________ ______________________________________________ ______________________________________________ ______________________________________________ ______________________________________________ ______________________________________________ ______________________________________________ ______________________________________________ ______________________________________________ ______________________________________________ ______________________________________________ ______________________________________________ ______________________________________________ ______________________________________________ ______________________________________________ ______________________________________________ ______________________________________________ ______________________________________________ ______________________________________________ ______________________________________________ ______________________________________________ ______________________________________________ ______________________________________________ ______________________________________________ ______________________________________________ ______________________________________________ ______________________________________________ ______________________________________________... -
Page 86: Using The Pump -More Features
What’s In This Section? Programming and using these features Combination bolus Correction bolus Making combination bolus available Personalizing the correction bolus Delivering a combination bolus Delivering a correction bolus Stopping a combination bolus Touch bolus Temporary rate Making touch bolus available Personalizing the temporary rate Delivering a touch bolus Using the temporary rate... -
Page 87: Programming And Using These Features
Programming and using these Correction Bolus features The Correction Bolus is designed to lower a high BG level. You determine where the correction bolus ap- pears; in the main menu, as part of your meal bolus, Warning: Programming and using the features de- both, or neither. - Page 88 Using the Pump - More Features Once your duration of insulin action is correctly pro- grammed, when you use the correction bolus feature any still active insulin in your Bolus to adjust BG body from a previous bolus will 9 mg/dl plus be taken into consideration and 2.50u meal the screen that tells you the...
-
Page 89: Personalizing The Correction Bolus
Select home screen then press Select press Select Press Menu Pump Settings Personalize Delivery Setup Menu Menu Menu Cozmo Alerts Time and Date Meal Bolus Basal Pattern History Beep/Vibrate Correction Bolus Correction Basal: Pattern 1 Load Regional Settings... -
Page 90: Delivering A Correction Bolus (Main Menu)
Using the Pump - More Features Delivering a correction bolus (main menu*) Start at Home screen Cozmo Press Meal Bolus Menu Correction Bolus Basal: Pattern 1 Temporary Rate Rate: 1.150 u/hr Basal Pattern Choose Correction Bolus, <Stop Menu> Select> <Home... -
Page 91: Touch Bolus
Touch Bolus The Touch Bolus feature allows you to bypass the menu when delivering a meal bolus. It is called the Touch Bolus since you can program and deliver a bolus using sound or vibrations, without having to look at the pump’... -
Page 92: Making Touch Bolus Available
Select Press Select press Select Press Pump Settings Personalize Delivery Setup Menu Menu Menu Menu Alerts Cozmo Time and Date Program bolus Meal Bolus Basal Pattern History Beep/Vibrate using: Correction Bolus Basal: Pattern 1 Load Regional Settings Program Lock Basal Pattern Rate: 1.150 u/hr... -
Page 93: Delivering A Touch Bolus
1. Press the Touch Bolus button once to activate the touch Delivering a Touch Bolus bolus (2 beeps or 2 vibrations). Delivering a Touch Bolus is performed by pressing the Touch Bolus button on the side of the pump. A Touch NOTE: If you press and hold the button for longer than 2 Bolus can only be initiated when the pump is at the seconds, the pump will automatically return to the... - Page 94 Using the Pump - More Features 4. When the number of beeps or vibrations is correct, press and hold the Touch Bolus button until it beeps or vi- brates once (to indicate delivery has started and you can let go of the button). After the bolus delivers, the pump returns to the home screen and beeps or vibrates twice to indicate that the bolus is complete.
-
Page 95: Extended Bolus
Extended Bolus Some meals release glucose into the bloodstream slowly. When an extended bolus is in use, page Cozmo The extended bolus is designed to deliver the bolus of 2 of the home screen will show that it is Last Program Bolus 0.80 u - 09:30 AM... -
Page 96: Personalizing The Extended Bolus
Press Select press Select Press Pump Settings Personalize Delivery Setup Menu Menu Menu Menu Alerts Time and Date Program bolus Cozmo Meal Bolus Basal Pattern History Beep/Vibrate using: Correction Bolus Load Basal: Pattern 1 Regional Settings Program Lock History Basal Pattern Rate: 1.150 u/hr... -
Page 97: Delivering An Extended Bolus
Delivering an extended bolus Choose Extended Bolus,t Start at Press Select hen press Select Home screen Bolus Menu Press Extended Extended Standard Cozmo Bolus Menu Bolus Meal Bolus Extended Correction Bolus Basal: Pattern 1 Amount: 1.70 Combination Amount: Temporary rate Rate: 1.150 u/hr... -
Page 98: Stopping An Extended Bolus
Using the Pump - More Features Stopping an extended bolus Start at Home screen Select delivery to stop Cozmo All Delivery Press Stop Temporary Rate Basal: Pattern 1 Extended Rate: 1.150 u/hr <Home Select> <Stop Menu> Choose Extended, then press Select... -
Page 99: Combination Bolus
Combination Bolus When a combination bolus is in use, The combination bolus combines the features of the Cozmo standard and extended bolus, which can be used when page 2 of the home screen will show Last Program Bolus that it is active. -
Page 100: Personalizing The Combination Bolus
Press Select press Select Press Pump Settings Personalize Delivery Setup Menu Menu Menu Menu Alerts Time and Date Cozmo Program bolus Meal Bolus Basal Pattern History Beep/Vibrate using: Correction Bolus Load Basal: Pattern 1 Regional Settings Program Lock Basal Pattern History Rate: 1.150 u/hr... -
Page 101: Delivering A Combination Bolus
Start at Choose Combination, Press Select Home screen Then press Select Combination Combination Bolus Menu Bolus Bolus Press Standard Amount: Cozmo Menu Amount: 1.70 Meal Bolus Extended Duration:00:30 hr Duration:00:30 hr Correction Bolus Basal: Pattern 1 Combination Immediate: 50% Immediate: 50% Temporary rate Rate: 1.150 u/hr... -
Page 102: Stopping A Combination Bolus
Using the Pump - More Features Stopping a combination bolus Start at Home screen Select delivery to stop Cozmo All Delivery Press Stop Temporary Rate Basal: Pattern 1 Combination Rate: 1.150 u/hr <Home Select> <Stop Menu> Choose Combination, then press Select... -
Page 103: Temporary Rate
Temporary Rate Temporary Rate allows you to temporarily raise or lower In this menu, you can also set up customized temporary your basal rate. This feature can be useful when you rates, choose which ones you want displayed in the need less insulin (for example, during exercise), or Temporary Rate menu, and also choose a name for each when you need more insulin (for example, when you... -
Page 104: Personalizing The Temporary Rate
Select press Select Press Pump Settings Personalize Delivery Setup Menu Menu Menu Menu Temporary Rate Alerts Cozmo Time and Date Meal Bolus Basal Pattern History Beep/Vibrate Correction Bolus Load Basal: Pattern 1 Regional Settings Program Lock In menu:... -
Page 105: Using The Temporary Rate
Start at Select Temporary Rate, Select type, Home screen then press Select then press Select * Press Temporary Rate Menu Menu Cozmo Meal Bolus Standard Basal: Pattern 1 Correction Bolus Exercise Temporary Temporary Rate Temporary Rate: 1.150 u/hr Temp Rate 3... -
Page 106: Stopping A Temporary Rate
Using the Pump - More Features Stopping a temporary rate Start at Home screen Select delivery to stop Cozmo All Delivery Press Stop Temporary Rate Basal: Pattern 1 Extended Rate: 0.950 u/hr Temp Rate Active <Home Select> <Stop Menu> Choose Temporary Rate,... -
Page 107: Notes
Notes: ______________________________________________ ______________________________________________ ______________________________________________ ______________________________________________ ______________________________________________ ______________________________________________ ______________________________________________ ______________________________________________ ______________________________________________ ______________________________________________ ______________________________________________ ______________________________________________ ______________________________________________ ______________________________________________ ______________________________________________ ______________________________________________ ______________________________________________ ______________________________________________ ______________________________________________ ______________________________________________ ______________________________________________ ______________________________________________ ______________________________________________ ______________________________________________ ______________________________________________ ______________________________________________ ______________________________________________ ______________________________________________ ______________________________________________ ______________________________________________ ______________________________________________ ______________________________________________ Using the Pump - More Features... - Page 108 Using the Pump - More Features Notes: ______________________________________________ ______________________________________________ ______________________________________________ ______________________________________________ ______________________________________________ ______________________________________________ ______________________________________________ ______________________________________________ ______________________________________________ ______________________________________________ ______________________________________________ ______________________________________________ ______________________________________________ ______________________________________________ ______________________________________________ ______________________________________________ ______________________________________________ ______________________________________________ ______________________________________________ ______________________________________________ ______________________________________________ ______________________________________________ ______________________________________________ ______________________________________________ ______________________________________________ ______________________________________________ ______________________________________________ ______________________________________________ ______________________________________________ ______________________________________________ ______________________________________________ ______________________________________________...
-
Page 109: History & Communications
What’s In This Section? History Personalizing history Viewing history on the pump Communications ™ My Treatment Assistant PC Communications System History & Communications... -
Page 110: History
daily total for a number of days (you specify 2 to 30 History days), and calculates an average. The available history reports are: The pump stores history in 2 ways: Delivery Summary & Average Delivery Summary: • by the delivery date; the pump stores delivery infor- this is a daily breakdown of insulin delivery, and in- mation for the previous 90 days cludes the daily total, meal bolus, carbs (if in use),... -
Page 111: Personalizing History
Select then press Select press Select Press Menu Delivery Personalize Pump Settings Menu Summary Menu Alerts Cozmo Time and Date In menu: Basal Pattern History Beep/Vibrate Load Basal: Pattern 1 Regional Settings Program Lock History Rate: 1.150 u/hr... -
Page 112: Viewing History On The Pump
Choose a report, then press Select then press Select Home screen Press History Menu Delivery Summary Cozmo Temporary Rate Avg Delivery Summary 05/25/02 Basal: Pattern 1 Basal Pattern A sample report screen. You can press the Basal as % of TDD... -
Page 113: Communications
History & Communications You can perform all of the pump programming tasks in Communications ™ My Treatment Assistant , then send it to the pump. Or, if you want to keep a written record of your pump’ s ™ My Treatment Assistant PC Communica- program, you can download the pump’... - Page 114 For specific information on installing My Treatment ™ Assistant on your computer and connecting your pump to the computer, please see the Getting Started ™ booklet supplied with My Treatment Assistant In order for the pump to communicate with a computer, your computer must have an IR adapter.
-
Page 115: Notes
History & Communications Notes: ______________________________________________ ______________________________________________ ______________________________________________ ______________________________________________ ______________________________________________ ______________________________________________ ______________________________________________ ______________________________________________ ______________________________________________ ______________________________________________ ______________________________________________ ______________________________________________ ______________________________________________ ______________________________________________ ______________________________________________ ______________________________________________ ______________________________________________ ______________________________________________ ______________________________________________ ______________________________________________ ______________________________________________ ______________________________________________ ______________________________________________ ______________________________________________ ______________________________________________ ______________________________________________ ______________________________________________ ______________________________________________ ______________________________________________ ______________________________________________... -
Page 116: Technical Information
What’s In This Section? Pump development standards Pump specifications Description of pump safety systems Inspecting the pump Myriad Technical Information... -
Page 117: Pump Development Standards
ments for safety. 2. Collateral standard: Electromagnetic com- Pump development standards patibility — Requirements and tests IEC 60601-1-4 (1996) - Medical Electrical Equipment, Part AAMI ID26: 1998 - Medical Electrical Equipment — Part 2: 1: General requirements for safety — 4. Collateral standard: Particular requirements for the safety of infusion pumps and Programmable electrical medical systems controllers... -
Page 118: Specifications
Technical Information ment 1 (1996; Amendment 2 (1996) Weight: Approximately 3.2 ounces (90g) including battery and CISPR14 (1993) - International Special Committee on Radio cartridge Interference, limits and methods of measurement of radio in- terference characteristics of household electrical appliances, Classification: portable tools and similar electrical apparatus. - Page 119 30 days. The life of the in- ™ ™ Deltec Cozmo Insulin Pump with Deltec Cozmo 3 ml ternal battery is 10 years minimum under normal use con- Insulin Cartridge and a Deltec Cozmo ™ Essential Infusion ditions. Technical Information...
-
Page 120: Delivery Specifications
Technical Information Blockage (occlusion) alert: displayed, any custom boluses appear in menu 18 psi ± 5psi Delivery Specifications: Bolus accuracy at set value of 0.1u: Programming/delivering a bolus (Standard, Extended, ± 15% (measurement error ± 10%) and Combination): Units - Insulin: 0 units to selected maximum bolus Bolus accuracy at set value of 25u: Default: 0 units ±... -
Page 121: Correction Bolus
Bolus increment: 0.05 units, 0.10 units, 0.50 units or Correction Bolus 1.00 units If displayed, user can program and deliver a correction Default: 0.10 units bolus Carb ratio: 1u per 2grams to 1u per 50grams in incre- Delivery Specifications: ments of 1 gram Current blood glucose: Default: 1u per 15grams mg/dl: 30 to 600 mg/dl in 1 mg/dl increments... -
Page 122: Temporary Rate
Technical Information mmol/L: 0.2 to 12 mmol/L in the following increments: Default: current basal rate • 0.2 to 1.5 mmol/L in increments of 0.05 mmol/L Duration: 00:30 to 72:00 hours in 00:30 increments • 1.5 to 5 mmol/L in increments of 0.25 mmol/L Default: 00:30 minutes •... -
Page 123: Basal Pattern
Basal Pattern Load Cartridge User can edit (4 patterns, each with a possible 48 time/rate User loads cartridge, fills tubing, fills cannula, and selects segments) and start using basal patterns site change alarm (if displayed) Delivery Specifications: Fill tubing: Fills in 1.0 unit increments until Stop is Time: Midnight to 11:30PM in 00:30 increments or pressed (automatically stops at 30 units). -
Page 124: Pump Settings
Technical Information Averages: User chooses number of days to average over: Default: Beep 2 to 30 days in 1 day increments If beep, choose volume: Low, Medium or High Default: 7 days Default: High Pump Settings / Personalize / History Program Lock: Yes or No Display in menu: Default: No... -
Page 125: Regional Settings
Default: 08:00 Personalization Using My Treatment ™ Assistant Display site reminder: Yes or No Default: No Pump label: User can create name or other label on home screen pages Missed Meal Bolus Alerts: User can program up to 4; active alerts indicated by : Yes or No Home screen label: User can create personal information Default: No... -
Page 126: Accuracy Test Results
The following graphs are designed to show flow accu- Mean flow error: 0.18% racy of the pump against given time periods. All graphs ™ were plotted using a Deltec Cozmo 3mL Insulin Cartridge (21-1750) and Deltec Cozmo ™ Essential Trumpet Curve Infusion Set (21-7200). - Page 127 Flow T (min) 0.0005 of Flow (ml/hr) 0.0004 0.0003 0.0002 0.0001 0.0000 Epmin 2002-Nov-25 D. Zurn Trumpet Curve 200 300 400 500 600 700 800 900 1000 1100 1200 1300 1400 1500 «Graph Trumpet Cozmo slow.eps» T (min) Technical Information...
-
Page 128: Safety Features And Fault Detection
Technical Information By setting a flag in the memory and not strobing the Safety features and fault detection watchdog, the microprocessor can force a watchdog time out. After being reset, the microprocessor checks Hardware safety features the status flag to see if this was a time out test. If it was, Key hardware safety features include a watchdog timer the microprocessor continues it’... -
Page 129: Voltage Detection Circuit
verifies this function during the watchdog test described microprocessor operation as the battery voltage contin- above. ues to decay. The hardware reset continues until the battery is completely depleted or it is removed. Once Voltage detector circuit the pump controller goes into low battery shutdown, Low voltage detection is performed by part of the only replacing the depleted battery with a new battery watchdog circuit and by the microprocessor via soft-... -
Page 130: Motor Circuit Check
Technical Information ent from the written data, the software stops insulin Data handling and software safety delivery, initiates an alarm (either beep or vibrate) and a system fault alarm message appears in the display. features Motor circuit check At power up and at regular intervals thereafter, the Data stored in RAM motor circuit is checked to ensure that no power is Before use, data associated with delivery and stored in... -
Page 131: Data Used In Calculations
Data used in calculations Inspecting the pump Calculations on data used in some way to control delivery of insulin are performed redundantly. Other than periodic visual inspection and cleaning of The 2 calculated values are then compared. If the 2 the pump, no testing of the pump is required. -
Page 132: Index
Index Automatic Off alarm 28, 58 Bolus 10 Index Data handling and software safety features 118 Backlight 18, 55 Cannula 10 data stored in NOVRAM Basal Rate 9 Carb ratio 11, 47 & medication / supplements Cartridge 10, 20, 35 Access site 9, 41, 69 data stored in RAM 118 filling 35... - Page 133 display in menu 86 air in tubing 3, 41 stopping 92 Pump Settings 24 stopping 88 Leaks at connectors Extended bolus 8, 11, 85 Beep/Vibrate 27 3, 41, 75 delivering 87 Lockout 32 Inspecting and testing the display in menu 86 Time and date 2, 24, 26 pump 119 stopping 88...
- Page 134 Index Delivery 108 hyperglycemia 68 General 106 hypoglycemia 67 Regional Settings 24 Sports 74 sick days 71 date format 24 Subcutaneous 12 skin infections 71 number format 24 Suspending delivery 31 infusion set problems 69 time format 24 Symbols 6, 18 Restarting delivery 31 System fault alert 57 Unlocking the pump 33...
-
Page 135: Limited Warranty
Limited Warranty Deltec, Inc. (the “Manufacturer”) warrants to the Original end-user Conditions of Warranty: ™ Purchaser that the Deltec Cozmo Insulin Pump (the “Pump”), ex- This warranty is valid only if the Pump is used in accordance with cluding accessories, shall be free from defects in materials and work- this User’... - Page 136 Warranty Procedure Notice of the claimed warranty defect must be made in writing, fax or by telephone to the Manufacturer as follows: Attention: Deltec, Inc., 3183 Riverport Tech Center, Maryland Heights, MO 63043 U.S.A. Telephone: 1.800.826.9703. Facsimile: 1.800.209.2145 or if outside the USA contact your local distributor.
- Page 137 1-800-826-9703 Fax: 1-800-209-2145 European Representative: Graseby Medical Ltd. WD24 4LG, UK Tel. +44 (0)1923 246434 Deltec Cozmo, Deltec Cozmo logo design, The Freedom to Be You and My Treatment Assistant are Deltec, Inc. trademarks. Microsoft ® and Microsoft ® Windows ®...
Need help?
Do you have a question about the Cozmo and is the answer not in the manual?
Questions and answers