Table of Contents

Related Manuals for Kenmore 790. 4045


Summary of Contents for Kenmore 790. 4045
- Page 1 ® ELECTRIC Ui LT-I HORNO ... i Models, Modelos 790. 4045_',-" Color number, nL_mero de color PIN 318205132 Rev. A (0805) Sears Roebuck and Co., Hoffman Estates, IL 60179 U.S.A. www.sears.com...
-
Page 2: Table Of Contents
Common sense and caution must be practiced when installing, operating and maintaining any appliance. Kenmore Warranty When installed, operated and maintained according to all instructions supplied with the product, if this appliance fails due to a defect in material and workmanship within one year from the date of purchase, call 1-800-4-MY-HOME®... -
Page 3: Important Safety Instructions
• Remove the oven door from any unused appliance it is to be stored or discarded. _ens can tip. • injury to persons could result. -
Page 4: Safety Instructions
Exposed fat and grease could ignite. = Do not touch a hot oven light bulb with a damp cloth. Doing so could cause the bulb to break. Disconnect the appliance or shut off the power to the appliance before removing and replacing the bulb. -
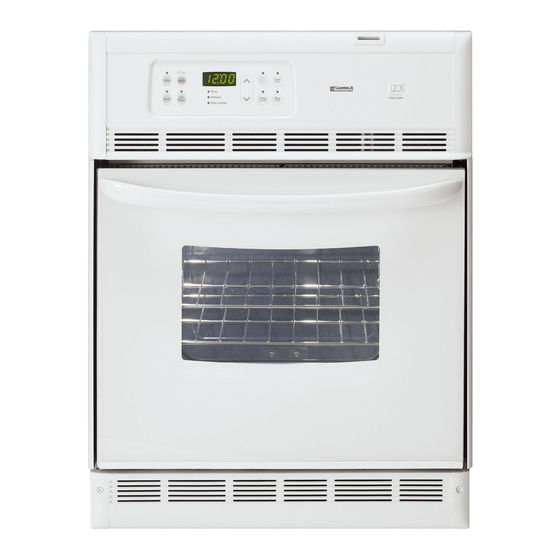
Page 5: Wall Oven Features
Your Electric Wall Oven Features At a Glance Electronic Oven Controls with Clock and Kitchen Timer Broil Element Self-Clean Glass Oven Door Decorative Bottom Trim -- Wall Oven Features Oven Vent Oven Light Interior Oven Light Adjustable Racks Door Handle iiil ... -
Page 6: Oven Vent And Racks
ALWAYS ARRANGE OVEN RACKS WHEN THE OVEN IS COOL (PRIOR TO OPERATING To remove an oven rack, pull the rack forward until it stops. Lift up front of rack and slide out. To replace an oven rack, fit the rack onto the guides on the oven walls. Tilt the front of the rack upward and slide the rack back into place. -
Page 7: Control Pad Features
It glows constantly *Note: The OVEN indicator light on the electronic display wi!l turn ON and OFF when using the Bake feature and during preheati This is normal and indicates that the oven is cycling t0 maintain the selected baking temperaturel Whe n the preheat indicator light turns OFF, your oven is ready. -
Page 8: Setting The Oven Controls
Note: The minute timer does not start or stop cooking. It serves as an extra timer in the kitchen that will beep when the set time has run out. The minute timer can be used alone or during any of the other oven functions. When the minute timer is in use with any other function, the minute timer will be shown in the display. - Page 9 Continuous The oven control has a built-in 12 Hour Energy Saving feature that will shut off the oven if the control is left on for more than 11 hours and 5g minutes. The oven can be programmed to override this feature for continuous baking.
- Page 10 The c00,T, oo COOK TiME and _'°"T,,,o STOP TiME pads operate the features that will turn the oven ON and OFF at the times you select in advance. The oven can be programmed to start immediately and shut off automatically begin baking at a later time with a delayed start time (Delay Start).
- Page 11 Setting Oven Controls Oven Baking For best cooking results, heat the oven before baking cookies, breads, cakes, pies or pastries, etc. There is no need to preheat the oven for roasting meat or baking casseroles. The cooking times and temperatures...
- Page 12 Preheating Preheating the oven is suggested when searing rare steaks. (Remove all utensils from the oven before preheating. Foods will stick if placed on hot metal.) To preheat, Broil Stop Position set the control(s) to BROIL as instructed in this Use & Care Guide. Wait for the ele- ment to become red-hot, usually about 2 minutes.
- Page 13 ON and OFF whenever the oven door is closed. The interior oven light is located at the upper left rear wall of the oven interior and is covered with a glass shield held by a wire holder.
-
Page 14: Self=Cleaning
Cleaning While the oven is in operation, the oven heats to temperatures much higher than those used in normal cooking. Sounds of metal expansion and contraction are normal. Odor is also normal as the food soil is being removed. Smoke may appear through the oven vent. -
Page 15: Self=Cleaning
As soon as the controls are set, the motor driven lock will begin to close automatically and the "Door locked" indicator light will flash. DO NOT open the oven door while the light is flashing (it takes about 15 seconds for the oven door to lock). -
Page 16: General Care & Cleaning
General Care & Cleaning Cleaning Various Parts of Your Oven Before cleaning any part of the oven, be sure all controls are turned OFF and the oven is COOL. REMOVE SPILLOVERS AND HEAVY SOILING AS SOON AS POSSIBLE. DIFFICULTY OF MAJOR CLEANING LATER. -
Page 17: General Care & Cleaning
On some models an interior oven light will turn automatically door is opened. The oven light may be turned on when the door is closed by pushing the knob located on the control panel. On some models, the lamp is... -
Page 18: Troubleshooting
Adjust until the desired amount of offset appears in the display• When lowering the oven temperature, a minus sign (-) will appear before the number to indicate that the oven will be cooler by the displayed amount of degrees• When you have made the desired adjustment, Note: Oven temperature adjustments Before you call for service, review this list. -
Page 19: Before You Call
Light to replace or tighten the bulb. A cooling fan may automatically turn on and off to cool internal parts. This is normal, and the fan may continue to run even after oven is turned off. Oven door is closed. Door should be open during broiling. -
Page 20: Notes
Notes... -
Page 21: Protection Agreements
PROTECTION AGREEMENTS Acuerdos maestros de proteccibn Enhorabuena Your new Kenmore®esta diseSado y fabricado para brindarle aSos de funcionamiento for years of fiable. Pero, como cualquier producto, puede necesitar mantenimiento preventivo o reparaciones de protecci6n podria ahorrarle dinero y molestias. can save you money El Acuerdo maestro de protecci6n tambien sirve para prolongar de su nuevo producto. -
Page 22: Installation
For expert troubleshooting For repair - in your home - of all major brand appliances, lawn and garden equipment, no matter who made it, no matter who sold it! For the replacement owner's manuals that you need to do-it-yourself. For Sears professional and items like garage door openers and water heaters. - Page 23 ELECTRIC Models, Modelos 790. 4045_',_" Sears Roebuck and Co., Hoffman www.sears.com ® .,_ = Color number, nL_mero de color Estates, IL 60179 U.S.A. P/N 318205132 Rev. A (0805)
-
Page 24: Registro Del Producto
Antes de Solicitar Servicio ... Notas ..6 ACUERDOS DE PROTECCION Servicio Sears ... y guardar estas instrucciones Kenmore Ubicaci6n placa de serie Encontrara el nOmero de serie y modelo impresos en la placa de serie, que estA ubicada en el borde lateral interior, y se puede ver cuando se abre la puerta. -
Page 25: Instrucciones Importantes De Seguridad
Instrucciones Importantes de Seguridad Lea todas Guarde estas instrucciones Este manual contiene s[mbolos e instrucciones de seguridad importantes. Preste mucha atenci6n a estos s[mbolos y siga todas las instrucciones. Este s[mbolo le advertirA sobre situaciones que pueden causar lesiones corporales graves, muerte o daRos materiales. - Page 26 Instrucciones Irnportantes de Seguridad • Use una vestimenta apropiada= No use ropa que es suelta u holgada cuando utilice el aparato. la ropa u otros materiales inflamables en contacto con las areas calientes. Nunca utilice su aparato calentar o entibiar la pieza.
- Page 27 Caracteristicas Caracteristicas de su Homo Electrico de Pared Controles Eiectr6nicos del Horno con Reloj y Contador de Tiempo Elemento -- de Asar Homo Auto -- Limpieza Puerta Delantera de Vidrio del Horno Banda decorativa de abajo del homo de pared Ubicaci6n del Respiradero del Homo Apagador...
- Page 28 Respiradero del Homo y las Parrillas del Homo Ubicaci6n del Respiradero del Homo trabaja bajo el ciclo de horneado componentes trabajando totalmente Ubicaci6n El horno se ventila en la moldura caliente se libera a traves de la ventilaci6n. Esta ventilaci6n es necesaria para que el aire circule en el homo y para que el horneado sea correcto.
- Page 29 • Deer Locked PUERTA CERRADA Y CUBIERTA -- La luz 'OVEN' (Homo) se enciende cada vez que el homo se se encender_, cuando el homo se programa o si la temperatura despu_s del cierre de la puerta. es normal e indica que el h0rn0 est_ haciend0 su ciclo para mantener AI apagarse la luz indicadora de precalientamiento;...
-
Page 30: Ajuste De Los Controles Del Homo
Para apagar o eric°rider exhibicCn de la hora del alia optima sanarA Una vez ) y suelte: Esta caracteristica APAGA la e×hibiciCnde la h0ra eel era, la h0ra se m0strarA ® Oven Q Preheat • Deer Lacked hasta que aparezca la hora correcta en el display•... - Page 31 Ajuste de los Controles del Homo Prograrnar o cambiar la ternperatura El homo se puede programar para cocer a cualquier temperatura Regular los mandos para cooer: Apretar _ " " aparece en el display• Dentro de 5 segundos, apretar A la temperatura se podrA regular con incrementos de 5°F (1°C si el control estA programado para mostrar grados Celsius) a la vez.
- Page 32 Ajuste de los Controles del Horno Para regular las funciones Los mandos _CookT,,,o TIEMPO DE COCCION y ENCENDER o APAGAR el homo a los momentos precedentemente [niciar inmediatamente y apagarse autom&ticamente con un tiempo de encendido diferido (Delay Start). h0rnead0 €_0n0metrad0 (Timed Para programar el homo para que inicie a cocer inmediatamente (Cocci6n programada): Asegurarse de que el reloj muestre la hora correcta.
- Page 33 Ajuste de los controles del homo Horneado Para mejores resultados, caliente el horno antes de hornear galletas, panes, tortas, pasteles o dulces, etc. No necesita precalentar el homo para rostizar la came o para cocer caserolas. Los tiempos de cocido y las temperaturas que se necesitan para hornear un producto pueden variar lijeramente de sus aparatos antiguos.
- Page 34 Ajuste de los Controles del Horno Asar es un metodo para cocer cortes finos de came aplicando el calor directo debajo del elemento asador del homo. Precalentarniento El precalentamiento es sugerido cuando grille pedazos de biftec (retire la parilla antes de precalentar. La comida puede adherirse si es colocada en el metal caliente).
- Page 35 Ajuste de los Controles del Horno Broil (Asar a la parrilla) Asar es un metodo para cocinar cortes tiernos de came por medio del calor directo debajo del elemento para asar del horno. Para obtener los mejores resultados, verificar que la asadera este centrada directamente debajo del elemento para asar. Colocar la parrilla del homo mientras el homo estA frio.
- Page 36 Io usual. Esto es normal y seguro, y no es para alarmarse. De ser posible, usar un ventilador durante el ciclo de autolimpieza. i¢_,_ i ® Oven . r0,,0o, • Door Locked la suciedad o la reduce a una ceniza fina que se de la limpieza.
-
Page 37: Limpieza Del Homo
Limpieza del Homo Duraci6n de un ciclo de autolimpieza Para obtener resultados satisfactorios, haga uso de un ciclo de autolimpieza de dos horas de duraci6n para manchas promedio y manchas dificiles. NOTA: El Area de la cocina debe estar bien ventilada empleando una ventana abierta, ventilador o campana de escape durante el ciclo de autolimpieza. - Page 38 Cuidado y Limpieza General Limpieza de diferentes Antes de limpiar cualquier parte del homo, aseg_rese que todos los controles estb.n apagados y que el horno este fria. RETIRE LOS DERRAMES Y LAS MANCHAS DIFfCILES TAN PRONTO COMO PUEDA. LA LIMPIEZA CONSTANTE DISMINUIRA EL ESFUERZO DE UNA LIMPIEZA A FONDO.
-
Page 39: Limpieza General
Cuidado Limpieza General Agujero para la bisagra puerta quitada deJ homo Figura 1 Cierre en posici6n enganchada, para sacar la puerta Figura 2 Cierre en posici6n normal Figura 3 Para retirar o remplazar La puerta es pesada. segura, deposite la puerta horizontalmente, Para retirar [a puerta del homo: Abra la puerta completamente. -
Page 40: Ajuste De La Temperatura
Ajuste de la temperatura El control del homo ha sido fijado de manera precisa en f_brica. Sin embargo, esta configuraci6n homo anterior, de manera que sus horas de receta pueden no darle los resultados que espera. Si cree que el homo est&... - Page 41 SITUACI6N POSIBLE El horno no funciona. Se ha quemado un fusible de la casa o el disyuntor salt6 de inmediato despues de la instalaci6n. El fusible puede no estar bien conectado. Verificar el fusible y activar el disyuntor correctamente. Se ha quemado un fusible de la casa o el disyuntor salt6 de inmediato despues de que el homo fue instalado y estaba funcionando.
- Page 42 Notas...
- Page 43 Enhorabuena por haber hecho una compra inteligente. Su nuevo producto Your new Kenmore®esta dise_ado y fabricado para brindarle a_os de funcionamiento for years of liable. Pero, como cualquier producto, puede necesitar mantenimiento preventivo o reparaciones de protecci6n podria ahorrarle dinero y molestias.
- Page 44 For expert troubleshooting For repair - in your home - of all major brand appliances, lawn and garden equipment, no matter who made it, no matter who sold it! For the replacement owner's manuals that you need to do-it-yourself. For Sears professional and items like garage door openers and water heaters.
Need help?
Do you have a question about the 790. 4045 and is the answer not in the manual?
Questions and answers