Table of Contents
Advertisement
Advertisement
Table of Contents

Related Manuals for Vantech VP-454CVI


Summary of Contents for Vantech VP-454CVI
- Page 1 Vantech HD-CVI User Manual VP-454CVI VP-854CVI VP-1654CVI...
-
Page 2: Table Of Contents
INDEX Chapter 1 Products Introduce ........................3 1.1 Technical Parameter ................................3 1.2 Performance ..................................4 Chapter 2 Hardware ............................5 2.1 H.264 standalone 4CH/8CH DVR ..........................5 Chapter 3 Operation ............................9 3.1 Operation instruction ................................ 9 3.2 Powering On ..................................11 3.3 Shutdown ..................................... -
Page 3: Chapter 1 Products Introduce
Power This DVR select the adaptor is DC12V; please make sure the power supply voltage before use the machine. If do not use the machine for a long time, please turn off the power of DVR machine, and let the electric plug away from power socket. -
Page 4: Performance
RJ45(10M/100M self-adapting) PTZ control Communication RS485×1,USB2.0×2 USB mouse control Hard disk drive 4x SATA(4TB or bellow) Remote control unit Dimension Main board size : 230mm x 110mm Power supply AC110-230V 1.2 Performance Turn-by-turn analog video output and VGA interface, according to TV monitor Internal 4 SATA interface, MAX or VGA monitor to live view in 1/4/8/9 or 4TB hard disk drive, the file of hard disk... -
Page 5: Chapter 2 Hardware
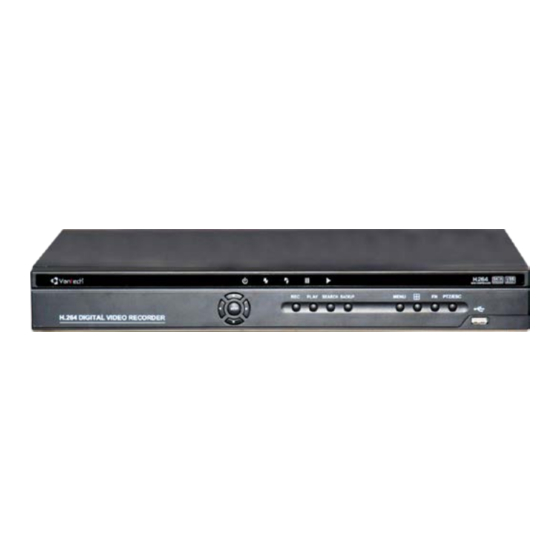
4ch alarm input (alarm event mode can be set normal open or normal close selection), and turn-by-turn video loss alarm, dynamic detection alarm, the alarm device may be smoke detection * Possess specific interface, achieve Alarm censer, temperature detector, alarm input and PTZ control; Communication linkage detector. - Page 6 2.1.2 Rear panel Item Interface Description VIDEO-IN 4ch video input AUDIO IN 4ch audio input HD-OUT HDMI output A/V OUT AUDIO and VIDEO output VGA monitor NETWORK RJ45 for internet First USB for backup or upgrade system of DVR; Second USB for mouse ON/OFF Power supply switcher...
-
Page 7: Alarm Input Port
NETWORK RJ45 for internet First USB for backup or upgrade system of DVR; Second USB for mouse ON/OFF Power supply switcher DC-12V Power adaptor port ALARM IN:1 2 3 4 alarm input port RS-485:A, B ALARM OUT: N1 alarm output port, every channel connect GND、OUT、COM;... -
Page 8: Alarm Output Port
for example, smoke detector. When you select the external power supply, please share the GND with DVR; Alarm input circuit: Alarm inlet connection: 2.1.4 Alarm output port 4 way switching value alarm output, selectable in normally open contact, also selectable in normally closed contact, the external... -
Page 9: Chapter 3 Operation
Chapter 3 Operation 3.1Operation instruction 3.1.1 Remote control AND Front panel keypad Table: Operating Operating Keypad Keypad instruction instruction Name Name Power ON/OFF This button is used as “ enter ” 【 】 【 ENTER 】 and “ ok ” key in most 【OK】... - Page 10 【MENU】 Access main menu Exit operation or enter upper menu Close soft keyboard Close current window Access/exit from PTZ control 【ESC】 【PTZ】 Exit from current control under preview state Return to last menu Exit from PTZ control under preview state Volume or number Switching of 1/4/8/9 Preview 【...
-
Page 11: Powering On
Change again select frame or motion detection piece mode Click the assemble frame popping to pull down the list In the input frame, can select digit, character, lowercase, block letter, left click mouse on the keyboard of character input, that’s. ← say move back, _ say blank,Shift say switch case . -
Page 12: Main Menu
The video output mode of DVR ’s the default setting is multi picture channel mode after starting the DVR , if the time of start the DVR is in the Timing Recording Setting, the DVR will automatically to start the Timing Recording function, the corresponding channel’s recording pilot lamp will be light, the DVR is normal operation. -
Page 13: Shutdown
Generally,the hisilicon system includes the following 22 kinds of languages: simplified Chinese, English, Italian, Turkish, Thai, Russian, Japanese, French, Portuguese, Spanish, Hebrew, Traditional Chinese, Polish, Korean, Persian, German, Srpski, Czech, Greek, Arabic, Indonesia, Vietnamese language and so on. 3.3 Shutdown ... -
Page 14: Multi Channel
3.4 Multi Channel 1/4/8/9 preview screen mode switch 3.5 Preview After log in system of DVR, system will automatically directly enter the preview mode In the preview picture, you can see the overprint date, time, channel name, if the date and time is not correct show on the picture, re setting the date. -
Page 15: Playback Video
2) The explanation of manual recording operation menu 【Manual Rec】 Priority level highest, no matter currently what status of every channel, after carry out the manual press, corresponding channel will be record common in progress; 【Automatically】 Setting channel recording by setting condition to record under Timing, Motion detection and Alarm in Recording Setting;... -
Page 16: How To Control Ptz
1/4/8/9/16/24/32 screen(switch image) Note: 1) During playback the Playback Tool will show the file playback speed, channel, timing, playback speed etc. information in the Playback control panel; 2) Can’t same time to select the Fast forward operation function in over 2 channel, only progress in anyone channel; 3) Can drag the Playback Speed toolbar by mouse;... - Page 17 position. Click【clear】button, this preset points will be cleared 【Setup】Click 【Pattern Start】 the trajectory of said no corresponding, click the 【 Add Preset 】 and 【 Delete Preset】, 【Clear Tour】 the cruise lines. 【Pattern Start】 begin to track record, was registered date 【Pattern Stop】 , thus set up from the corresponding track circuit.
-
Page 18: Alarm Control
3.9 Alarm control 【Set Alarm】Selection need protection channel, click confirm corresponding channel after in protection status 【Clear Alarm】Remove protection condition, not alarm input to react 【Alarm Output】Open the alarm output. In the premise of no trigger alarm input, user can operate the output. for example, some alarm switch is connected with a lamp, lamp is open when alarm is triggered 【All】Can choose all the channels 3.10 Display Adjust... -
Page 19: Chapter 4 Menu Operation Guide
【Device】Optional: VGA output, TV output etc display output device. 【Default】Restoring default display parameters. Through the slider fluctuation sliding, respectively adjustable brightness, contrast and saturation, tonal, etc. (3)Setup 【Device】VGA Output + HDMI Output + TV Output. 【Resolution】Setting the resolution of the display device. The default VGA resolution is 1280 x 1024;... - Page 20 【Channel】Choose the need to install passage "whole" says setting all channels. 【Encoding Type】720P 【Encoding Mode】Including fixed rate, dynamic rate. 【Image Quality】Client-side image quality, the higher the quality the clearer. Choice scope: minimum, low, general, high, highest 【Frame Rate】Can click on the button manually input, 1 ~ 25 frames per second (PAL) or 1 ~ 30 frames per second (NTSC) continuous adjustable.【Audio】Can select close, open according to requirements 【Pre-Alarm Rec】Can select close, open according to requirements (2)Sub-Stream...
-
Page 21: Camera
【Channel】Choose the need to install passage "whole" says setting all channels. 【Channel Name】Can manual corresponding input channel's name 【Channel Display】Can choose according to the requirements of users don't use, the top-left corner, left, lower, middle and downward, upper, right, and lower. 【Time Display】Can choose according to the requirements of users don't use, the top-left corner, left, lower, middle and downward, upper, right, and lower. - Page 22 (1) PTZ Setup 【Channel】Choose regional channels, Settings "whole" says setting all channels 【PTZ Protocol】PTZ equipment communication protocol It contains these options: Pelco_D、Pelco_P、LILIN、MINKING、STAR、VIDO、NEON、DSCP、HY、N-control、 RM110、SAMSUNG,the default option is Pelco_D. ★Note: PTZ parameter Settings every channel need after completion in Settings of gc1318 alone. 【PTZ Address】PTZ equipment address, digital range 0 to 255.
- Page 23 【Video Mode】Provide PAL and NTSC both formats video formats choice, modify after you must restart your system can take effect. 【Channel】Choose to set the video Settings area passage "whole" says setting all channels 【Reserved Section】Click Settings enter. The white areas for privacy area 【Buzzer Alarm】Happen when video lost choice whether or not to allow buzzer warning 【Alarm Output】Happen when video lost upcoming linkage selected channel corresponding alarm output (3)Motion Detection...
-
Page 24: Network Setup
(4)SEQ Display 【Time】Screen switching interval. 4.3 Network Setup (1)General Setup 【DHCP】 After checked automatic assignment device will get IP address, subnet mask, the default gateway, the DNS server, etc 【UPnP】Can choose according to the requirement 【IP Address】Network logic address can according to the requirements set 【Subnet Mask】Server subnet mask 【Default Gateway】Server gateway 【DNS Server】DNS server addresses... - Page 25 【Server Port】Data port, initial socket for 7777 【HTTP Port】the default port for 80. If change, when using IE browser, need to monitor the IP address, adding new socket. If use IP address to 82, from the original browsing http://192.168.0.19, change for http://192.168.0.19:82. 【Handset Port】Network phones socket, the default is 5800.
- Page 26 (3)DDNS Setup 【DDNS Service】Dynamic DNS provider website, Via DDNS server, it compatible with SODDNS,TODDNS, no-ip, DYNDNS.ORG. if you select toddns or soddns, you can customize your favorite domain name. it shows as following picture.
- Page 27 【DDNS Domain】Dynamic domain name, soft keyboard and hard keyboard can be input. 【User】Login domain name service provider website user name 【Password】Login domain name service provider website password : through the dynamic DNS server. Support dynamic DNS. (4)Email 【SSL Protocol】Sending E-mail in use safety network connection 【Test Email】Send an email to the recipient mailbox test 【Email Address】The recipient's email address.
- Page 28 Two can also choose. Note : your sender email must support SMTP. (5)P2P Client 【Cloud ID】This ID is use for the mobile and the PC login. 【IE Web】You can download the .apk from here. (6)Access Control 【List Rule】According to the requirement to choose: don't use, allow access, refused to visit. 【Starting IP】Display IP address started section 【Ending IP】Display IP address end segments 【Add】On the basis of the need for added...
-
Page 29: System Setup
4.4 System Setup (1)Time 【Remote Controler】Used in a remote device , remote control more hard disk video recorder occasions, only in remote controls address and hard disk video recorder Numbers identical to remote operation. 【Device Name】According to the requirement to change name, easy to manage. 【Date Mode】To choose Date display modes include MM/DD/YY,DD/MM/YY,YY/MM/DD. - Page 30 【Disk Full】When video disk full system how to deal with, "said system will be automatic coverage the earliest video files continue covering video," stop video "says system to stop the current video. 【File Time】Says automatic generation video files interval, the set range 5-120 minutes. 【Recording Bit-rate】Said the total rate of current coding 【Recording Time】Said the storage devices systems installed in accordance with the current rate can store video of time.
- Page 31 【System Privileges】According to the requirements set of functions need checked 【Add User】 Input need to add user, and input the account password and passwords. According to the button 【save】 to add user. 【Delete User】Select the users need to delete, and click on the "yes" button to remove users 【Edit User】...
-
Page 32: System Management
【Buzzer Output】In the chosen time intervals have alarm input will start buzzer output. 【Send Email】In the chosen time intervals have alarm input which will send relevant information, such as the alarm events, paparazzi pictures, equipment name, device ID, etc sent to user specifies the mailbox. 【Alarm Output】In the chosen time intervals have alarm input will start alarm output (6)Margin Adjust By the function, you can adjust the distance between the display device and the picture edge. - Page 33 Show the system hardware versions, software version, serial number, release date, cloud id and the two-dimensional code. Click 【software upgrade】, the system began to automatically detect and upgrade file. Cloud id and the two-dimensional code: mobile can use this to login DVR. Note : Currently support upgrades: local USB mode, IE mode, the client software.
- Page 34 (3)Default Restoring default can restore selected according to need. The system restore to the default configuration state out, can according to the menu options choose to restore the corresponding Settings. : menu color, language, time date format, video format, IP address, the user account, etc will not be restored.
-
Page 35: Chapter 5 Ie Preview
【Exception Type】Choose abnormalities: hard disk full, hard disk errors, network connection. 【Buzzer】When abnormality, choose whether to allow the buzzer hints. Chapter 5 IE Preview 5.1 Logging on interface To input the IP address Pretermission IP address is 192.168.0.20... -
Page 36: System Settings
5.2 System Settings Point , As the picture ,You can set up language directly, After all to save you set. -
Page 39: State Control
5.3 State control In state control you can set reboot server, close server, remote to go up Remote upgrade: let PC file load in the system Log: to inquire sometime the server’s action... -
Page 43: Chapter 6 Qmeye Phone Software For Use
Chapter 6 QMEYE Phone Software This cloud service platform is the best mobile phone video during the internet era. It consists of front-end acquisition devices, platform servers, and remote view of three parts. 1) The acquisition of client software: The client software can be got from the CD or http://www.qmeye.net . - Page 44 6.1.3 Login interface 6.1.3.1 Login interface Open the software into the login interface, inputting the username and password and click button “login”, then it will be login the application. Icon description: icon Function description After select, it will go directly to the main menu when you log in again. 6.1.3.2 User register Click the button “register”...
- Page 45 Enter the register information, click “register” then will be registered. Note: please enter the valid E-mail address in order to retrieve your password when you lost it. 6.1.3.3 Retrieve the password On the register clicking the button “login” and jump to “retrieve password” interface.
- Page 46 Input the username, click button “retrieve password”. If you have entered your name and email address when registering and the username has been occupied, then “retrieve password” information will be sent to the email address. 6.1.4 Real-time preview In the main menu, clicking “real-time preview Click “Favorites”...
- Page 47 Click on the icon , favorites list change into editing state, click icon , you can delete your favorites. Select one of the devices on “Live list” enters the video preview interface.
- Page 48 Button instruction: icons function instruction return to main menu move to the left move to the right move down move up enlarge narrow zoom out zoom in aperture enlarge aperture narrow start/ close intercom start/ close speakers stop/ start snapshot start / close the local video favorites channel switcher...
- Page 49 Icon instruction: Icon Function instruction return to the main menu click on the pop-up menu, such as modifying parameters, name options shot catalogue device after pop-up, add the catalogue,, device and shot menu search the local shot 6.1.5.1 Modify the connection parameter Click on the icon , select “modify connect parameter”, then into “modify device”...
- Page 50 A)Click on the icon , return to the device management lists. B)Click on the icon , save the current configuration. 6.1.5.2 Modify the name Click on the icon , select the option “modify Alias”, then pops up “modify Alias” dialog box. A)Click “OK”...
- Page 51 A)Click “OK” button, it will be saved the current configuration. Then will be showed in the device management list. B)Click button “Cancel” to cancel to add the catalogue. 6.1.5.5 Add device Click on the icon to select “add device” option. Icon instruction Icon Function instruction...
- Page 52 6.1.5.7 Search the local device Click on the icon to enter “search” dialog box. If there are some devices in local place, you would search out the corresponding device. Icon instruction Icon Function instruction return to device management pop up the option of “add menu” search the device again Click on the icon , then pop up the menu as follows:...
- Page 53 6.1.6 Server Video Click button “Server Video” option in the main menu, and then select to playback the video. After select an event type, start time and end time, clicking on the icon will list out the remote video lists, and then click on the item will be selected to play or download videos.
- Page 54 Icon instruction: Icon Function instruction No guard Guarded Click the pop-up menu options 6.1.7.1 Alarming Click on the icon to select “Alarming” option, pop up the dialog box as follows: Select the option those need to alarm and click the button “setup” to save the current settings; Click the button “cancel”...
- Page 55 B)Push Message: open/ close the news push setting In the notification interface, and then into “SMS notification” interface Icon instruction Icon Function instruction return to the alarm management Add the number of SMS Delete the current number 6.1.7.4 Record Click on the icon to select “record” option , and then pop up the dialog of “alarm record”...
- Page 56 The icons instruction Icon Function instruction return to the alarm management search the alarm record page up page down 6.1.8 Local video Click on “local video” option in the main menu, and then into the interface as follows Click on the icon , the local playback video list change to editing states.
- Page 57 Select the video options that you want to delete, and then click the icon ; you can delete the selected local video. 6.1.9 Screenshot Click on “Screenshot” option Click on the icon , the local playback video list change to editing states. Select the image options that you want to delete , and then click on the icon to delete the selected local images.
- Page 58 Click on the icon to save the current modified password 6.1.11 Local configuration Click on “local configuration” option in the main menu, and then into the interface as follows Function instruction: Function Instruction PTZ length The camera rotation rate setting Do not disturb Alarm Info Tips switch Alarm voice...
- Page 59 6.1.12 Help Click on “help” option in the main menu, and then into the interface as follows 6.1.12.1 Help Click on the button “ Help” , and then into the interface as follows...
- Page 60 6.1.13 Login out Click on “login out” option in the main menu, and then into the interface as follows...
-
Page 61: Instructions Of Iphone
Function instruction: Function Instruction Login out Log off the current user Cancel Cancel log off the current user 6.2 Instructions of IPhone 6.2.1 Essential condition 1) Support the version ios5.0 to ios7.0 of IPhone system. 2) Support DVR platform versions: Hisilicon v2.0.0.81 and higher. - Page 62 1. Install online Run the App Store program of iPhone. Switch to the search tag page, and input QMEYE in the search box to find the application installation package, then click <install> .After finishing installation, there will be QMEYE program icon on the mobile phone desktop. 6.2.3 Login register 6.2.3.1 Login interface Open the software into the login interface, inputting the username and password and click button “login”, then it will...
- Page 63 Enter the register information, click “register” then will be registered. Note: please enter the valid E-mail address in order to retrieve your password when you lost it. 6.2.3.3 Retrieve the password On the register clicking the button “Retrieve password” and jump to “Retrieve password” interface.
- Page 64 Input the username, click button “retrieve password”. If you have entered your name and email address when registering and the username has been occupied, then “retrieve password” information will be sent to the email address. 6.2.4 Live view In the main menu, clicking “Live view”, Click “Favorites” button, go to “collection management” interface...
- Page 65 Select one of the devices on “Live list” enters the video preview interface. Button instruction: icons function instruction...
- Page 66 return to main menu move to the left move to the right move down move up enlarge narrow zoom out zoom in aperture enlarge aperture narrow start/ close intercom start/ close speakers stop/ start snapshot start / close the local video favorites channel switcher 6.2.5 Device manage...
- Page 67 Icon instruction: Icon Function instruction return to the main menu click on the pop-up menu, such as modifying parameters, name options shot catalogue device after pop-up, add the catalogue,, device and shot menu search the local shot 6.2.5.1 Editing server connection parameter Click on the icon , select “Editing server connection parameter”, then into “modify device”...
- Page 68 A)Click on the icon , return to the device management lists. B)Click on the icon , save the current configuration. 6.2.5.2 Modify Device Name Click on the icon , select the option “Modify Device Name”, then pops up “Modify Device Name” dialog box. A)Click “OK”...
- Page 69 Click on icon , select “add the Node” option, then pops up “add Node” dialog box A)Click “OK” button, it will be saved the current configuration. Then will be showed in the device management list. B)Click button “Cancel” to cancel to add the catalogue. 6.2.5.5 Add device Click on the icon to select “add device”...
- Page 70 6.2.5.6 Add Camera Please see the operation introduction of “add device”. 6.2.5.7 Search the local device Click on the icon to enter “Device search” dialog box. If there are some devices in local place, you would search out the corresponding device. Icon instruction Icon Function instruction...
- Page 71 C)Modify the name: modify the name of the device or shot D)Modify IP: Modify the IP address, subnet mask, gateway information E)Modify the device password 6.2.6 Remote Video Click button “Remote Video” option in the main menu, and then select to playback the video. After select an event type, start time and end time, click the button OK will list out the remote video lists, and then click on the item will be selected to play or download videos.
- Page 72 Icon Function instruction No guard Guarded Click the pop-up menu options 6.2.7.1 Arming Click on the icon to select “Arming” option, pop up the dialog box as follows: Select the option those need to alarm and click the button “OK” to save the current settings; Click the button “Cancel” to cancel the current settings.
- Page 73 A)SMS notification: set the cell phone number of alarm notification B)Message push: open/ close the news push setting In the notification interface, and then into “SMS notification” interface Icon instruction Icon Function instruction return to the alarm management Add the number of SMS Delete the current number 6.2.7.4 Alarm Log Click on the icon to select “Alarm Log”...
- Page 74 The icons instruction Icon Function instruction return to the alarm management search the alarm record page up page down 6.2.8 Local Video Click on “Local Video” option in the main menu, and then into the interface as follows Click on the icon , the local playback video list change to editing states.
- Page 75 Select the video options that you want to delete, and then click the button "delete"; you can delete the selected local video. 6.2.9 Photos Click on “Photos” option Click on the icon , the local playback video list change to editing states. Select the image options that you want to delete, and then click on the button delete to delete the selected local images.
- Page 76 Click on the icon to save the current modified password. 6.2.11 Local config Click on “local config” option in the main menu, and then into the interface as follows Function instruction: Function Instruction PTZ length The camera rotation rate setting Do not disturb Alarm Info Tips switch...
-
Page 77: Chapter 7 Faq (Frequently Asked Questions)
Alarm voice Close the alarm voice Alarm language Alarm push language Click on the icon to save the current configuration. Chapter 7 Frequently Asked Questions 01:Why the DVR did not run after connect the power supply? ①Please check the power switch turn on or off at the rear panel of DVR. ②Please check if the turn on DVR operation correct or not? ③If you select the adaptor +12V, 5A or above? (8ch 5A, 16ch 220V 200W) 02:Still stop over on the boot-strap frame? - Page 78 Is there any heaven current installation surrounding and external video device, heavy current surging video cable, caused the DVR can not work properly and the system halted; 06:Firmware upgrade failure? U drive is not good compatible with the DVR, cause the DVR can not detected it, suggested to try one or two more different kind of U drive in the market;...
- Page 79 Video out 1HDMI/ 1VGA 1HDMI/ 1VGA 1024x768/800x 1024x768/800x resolution ratio 600/1280x1024 600/1280x1024 Record encoded 720P 720P Record play Roll rate PAL:1~25P/S;NTSC:1~30P/S PAL:1~25P/S;NTSC:1~30P/S Audio in 0 or RCA×4 RCA×8 0 or 1*RCA/1*HDMI 1*RCA/1*HDMI Audio out E-SATA support support Audio encoded ADPCM ADPCM Audio encoded 32Kbps...
- Page 80 USB mouse,USB disc backup、USB USB mouse,USB disc backup、USB mobile hard USB interface mobile hard disk disk Remote control 12V/2A DC 12V/4A DC Power adapter ( according to the sum of DISK) ( according to the sum of DISK) Working 0℃~+60℃ 0℃~+60℃...
Need help?
Do you have a question about the VP-454CVI and is the answer not in the manual?
Questions and answers