Table of Contents
Advertisement
Advertisement
Table of Contents

Related Manuals for True 15 Series


Summary of Contents for True 15 Series
- Page 1 15 Series Installation Guide ALL REFRIGERATOR WINE CABINET BEVERAGE DISPENSER...
-
Page 2: Thank You
This guide will answer most of your questions about the installation of your True Professional unit. If you have questions that are not answered here, contact... - Page 3 67 Y E A R S of T R U E I N N OVAT I O N , E X P E RT I S E a n d P E R F O R M A N C E . W W W.T R U E - R E S I D E N T I A L .CO M...
- Page 4 True Professional 15 Series...
- Page 5 15 Series Stainless Solid Door Stainless Glass Door Solid Panel Ready Glass Framed Panel Ready (SS) (SG) (OG) (OP) ALL REFRIGERATOR ALL REFRIGERATOR TUR-15-R/L-SS-A (Overlay Panel) TUR-15-R/L-SG-A TUR-15-R/L-OP-A TUR-15-R/L-OG-A WINE CABINET WINE CABINET TWC-15-R/L-SG-A (Overlay Panel) TWC-15-R/L-OP-A TWC-15-R/L-OG-A BEVERAGE DISPENSER...
-
Page 6: Table Of Contents
Electrical Specifications Leveling Refrigerator Installing Anti-Tip Brackets Installing the Door Stop Installation Specifications 8-12 Installation Specifications for 15 Series Solid Panel Ready (OP) and Glass Framed Panel Ready (OG) 13-20 Installation Specifications for Beverage Dispenser Units 23-30 Installation of Castors... -
Page 7: Ownership
Junked or abandoned refrigerators are the delivery freight carrier. True is not responsible for still dangerous... even if they will sit for “just a few damage incurred during shipment. -
Page 8: Uncrating
NOTE: KEYS FOR UNIT ARE PROVIDED WITH THIS PACKET A. Remove nails securing cardboard box to the wooden skid. Then discard any outer packaging (cardboard, clear plastic). packing material Grill is attached to back of unit True Professional 15 Series Installation Guide... -
Page 9: Electrical Specifications
If the outlet is a standard 2-prong outlet, it is your personal responsibility and obligation to have it replaced with the properly grounded 3 prong wall outlet. Do not use an extension cord or two prong adaptor. Electrical ground is required on this appliance. True Professional 15 Series Installation Guide... -
Page 10: Leveling Refrigerator
1. Set unit in its final location. Be sure there is adequate ventilation in your room. 2. Proper leveling of your True unit is critical to operating success (for non-mobile models). Effective condensate removal and door operation will be effected by leveling. Adjust leg levelers on the front and back of the cabinet if it needs to be lowered or raised. -
Page 11: Installing Anti-Tip Brackets
C. Move unit into final position making sure rear leveling legs slide into the anti-tip brackets. ANTI-TIP BRACKET LOCATOR - TOP VIEW 27/32” 27/32” Back of the unit 20 1/2” 13 3/16” 22 25/32” Overlay Panel 22 1/32” Cabinet Front True Professional 15 Series Installation Guide... -
Page 12: Installing The Door Stop
120º to prevent damage to surrounding cabinets. To install the door stop, use the 2 screws provided and secure the bracket to the bottom of the door on the same side as the hinge. Hinge Door stop Cabinet door Door stop installed Cabinet grill True Professional 15 Series Installation Guide... - Page 13 NOTES...
-
Page 14: Installation Specifications
True Professional 15 Series Installation Specifications True Professional 15 Series Installation Guide... - Page 15 INSTALLATION SPECIFICATIONS-STAINLESS SOLID & GLASS DOOR BEVERAGE ALL REFRIGERATOR WINE CABINET DISPENSER TUR-15-R/L-SS-A TUR-15-R/L-SG-A TWC-15-R/L-SG-A TUR-15BD-R/L-SS-A ” ” ” VIEW FRONT SIDE ” VIEW VIEW ” ” ” ” ” Dimensions may vary by ± 1/8” True Professional 15 Series Installation Guide...
- Page 16 " " " VIEW " " FRONT SIDE VIEW VIEW " " " " " Dimensions may vary by ± 1/8” 15” Single tap unit accommodates (1) slim 1/4 barrel or (1) 1/6 barrel. True Professional 15 Series Installation Guide...
- Page 17 Below are recommended dimensions for rough opening. ROUGH OPENING HEIGHT ” ROUGH OPENING DEPTH 24” ROUGH OPENING WIDTH 15” Front view of unit between cabinets True Professional 15 Series Installation Guide...
-
Page 18: Installation Specifications
INSTALLATION SPECIFICATIONS - OUTDOOR True’s stainless steel cabinets are UL rated for use in outdoor settings. In outdoor locations where the ambient temperature regularly exceeds 95˚F, it is recommended to vent the rear of the cut out opening in the area shown below for optimum performance. The recommended cut out size is 4”... - Page 19 True Professional 15 Series Installation Specifications for Solid Panel Ready (OP) Glass Framed Panel Ready (OG) True Professional 15 Series Installation Guide...
- Page 20 INSTALLATION SPECIFICATIONS-SOLID & GLASS FRAMED PANEL READY NOTE: These units are shown with optional panel/handle provided by others BEVERAGE ALL REFRIGERATOR DISPENSER TUR-15BD-R/L-OP-A TUR-15-R/L-OP-A TUR-15-R/L-OG-A WINE CABINET TWC-15-R/L-OP-A TWC-15-R/L-OG-A True Professional 15 Series Installation Guide...
- Page 21 ” ” ” ” ” ” ” ” ” VIEW FRONT SIDE ” VIEW VIEW ” ” ” ” ” ” ” ” ” VIEW FRONT SIDE ” VIEW VIEW ” ” ” ” True Professional 15 Series Installation Guide...
- Page 22 " " " VIEW " " FRONT SIDE VIEW VIEW " " " " " Dimensions may vary by ± 1/8” 15” Single tap unit accommodates (1) slim 1/4 barrel or (1) 1/6 barrel. True Professional 15 Series Installation Guide...
- Page 23 Door Panel Weight Glass Door Panel Dimensions Door Panel Width ” 29/32" Door Panel Height 23/32 ” 10 5/8" VIEWABLE Door Panel Depth 3/4” AREA 10 lb. max Door Panel Weight 2” min Rail/Style Dimension True Professional 15 Series Installation Guide...
- Page 24 True’s units with Solid Glass Framed Panel are designed to be inserted into a cabinet opening. ROUGH OPENING HEIGHT ” ROUGH OPENING DEPTH 24” ROUGH OPENING WIDTH 15” Front view of unit between cabinets True Professional 15 Series Installation Guide...
- Page 25 The clamp ensures the overlay panel and door stay aligned with each other while installing. Once panel is clamped in place, pilot holes may be drilled into the panel from the rear side of the door. True Professional 15 Series Installation Guide...
- Page 26 Overlay panel and door stay aligned with each other while installing. Image A Door Layers - General View Gasket Door Overlay Panel Handle Reinstall screws on top and bottom hinge Solid Overlay Panel Glass Overlay Panel True Professional 15 Series Installation Guide...
- Page 27 NOTES...
- Page 28 NOTES...
-
Page 29: Installation Specifications For Beverage Dispenser Units
True Professional 15 Series Installation Specifications for Beverage Dispenser Units True Professional 15 Series Installation Guide... - Page 30 Silicone caulk around the edge of the PVC pipe after it has been installed. 7 7/16" 2 11/16" 6 3/32" 5/16" 8 15/16" 10 9/32" 2 11/16" 13 5/8" 12 9/32" Drip tray 2 3/8" O.D. True Professional 15 Series Installation Guide...
- Page 31 Assemble drip tray (Image 2) and place it on top of unit as shown in image 1 (dashed line). 25/32” 8” 12” 2” Diameter PVC Pipe True Professional 15 Series Installation Guide...
- Page 32 INFORMATION FROM YOUR CO SUPPLIER. 1. Place rubber washer over draft standard mounting holes. (Image 1) 2. Secure the draft standard to the cabinet with the screws provided. (Image 2) 3. Install the draft head. (Image 3) True Professional 15 Series Installation Guide...
- Page 33 (Image 10) 11. Install the beer tapper onto the keg. The tapper has notches that must line up. Once the notches are lined up, turn the tapper to secure it to the keg. (Image 11) True Professional 15 Series Installation Guide...
- Page 34 Faucet in bad or worn condition. • Kinks, dents, twists or other obstructions in line. • Traps in beer lines. • Beer too warm in kegs or lines. • Too much pressure. • Creeping gauge causing too much pressure. True Professional 15 Series Installation Guide...
- Page 35 • Close regulator shut-off "C" and set pressure by turning regulator key clockwise. Check setting by opening and closing valve "C". • Close tap head "D". (put in "OFF" position) • Tap barrel at "D" and open regulator shut-off "C". True Professional 15 Series Installation Guide...
- Page 36 AND FOLLOW THEIR INSTRUCTIONS. IF YOU ARE 8. Pump excess solution through lines. USING THE CLEANING KIT PURCHASED FROM TRUE FOLLOW THESE INSTRUCTIONS: 9. Rinse bucket, pump bottle and hose thoroughly with clean cool water.
-
Page 37: Installation Of Castors
True Professional 15 Series True Professional 15 Series Installation of Castors True Professional 15 Series Installation Guide... -
Page 38: Installation Of Castors
Lower Rail Assembly For leveling, insert the shim between the castor and frame rail. Rail End Snug Fit Her e Bearing Race Leveling Shim Castor Use the tool provided to tighten the castor into place. True Professional 15 Series Installation Guide... -
Page 39: True Precision Control Operation Tm
True Professional 15 Series True Precision Control Operation and Cabinet Components True Professional 15 Series Installation Guide... - Page 40 Display for Temperature Additional Control Features: Power + = Offset mode = Lock / Unlock Keypad + Light = Sabbath Mode + Light = Color Change Power + Light = Showroom Mode Power + = Alarm True Professional 15 Series Installation Guide...
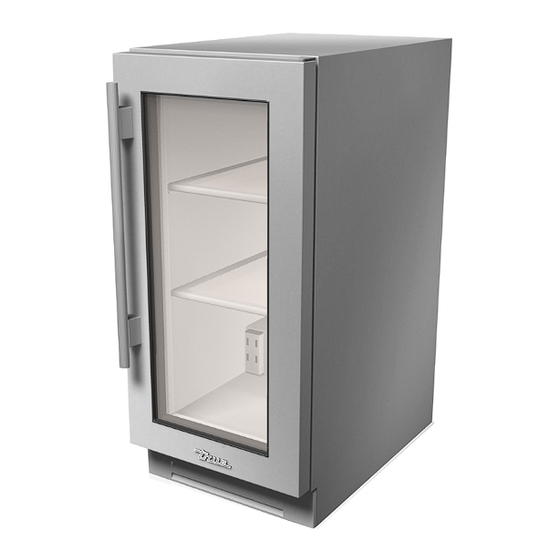
- Page 41 TRUE ALL REFRIGERATOR COMPONENTS Location of Serial Tag Adjustable Spill Proof Glass Shelves (2) Removable Kickplate for easy cleaning Door Lock True Professional 15 Series Installation Guide...
- Page 42 TRUE BEVERAGE DISPENSER COMPONENTS Draft Tower Spill Grate (Top) Drip Pan (Bottom) Location of Serial Tag Black Grommet for Chill Hose Removable Kickplate for easy cleaning Door Lock True Professional 15 Series Installation Guide...
- Page 43 TRUE WINE CABINET COMPONENTS Location of Serial Tag Adjustable Slide Out Wine Shelves (5) Floor Wine Cradle (1) Removable Kickplate for easy cleaning Door Lock True Professional 15 Series Installation Guide...
- Page 44 True Professional 15 Series Shelving Adjustments True Professional 15 Series Installation Guide...
- Page 45 When reinstalling the wine rack, be sure that the back of the rack hooks underneath the tab on the glide. anti-vibration bumpers True Professional 15 Series Installation Guide...
-
Page 46: Stacking Kit Instructions
True Professional 15 Series Stacking Kit Instructions True Professional 15 Series Installation Guide... - Page 47 Step 8 Place set in final spot. Level both top and bottom unit. Use a level on the inside of the cabinets. Check front to back and side to side. See image 2. Image 2. True Professional 15 Series Installation Guide...
- Page 48 Door must be open for installation. Slide louver grill into place and snap both sides into the unit. See image 4. Step 11 Installation is complete. See image 5. Image 5. Image 3. Side View Image 4. True Professional 15 Series Installation Guide...
- Page 49 TRUE STACKING KIT FOR UNITS WITH OVERLAY PANELS REQUIRED TOOLS: • 1/4 inch socket and ratchet • Level • Floor protector KIT: • (2) Stacking Brackets • (4) 1/4” Hex Head Screws Step 1 Lay floor protectant down. Step 2...
- Page 50 See images 4 and 5. Air Flow Out Air Flow In Image 4. Image 3. " Image 5. Approximate distance from bottom of door to bottom of cabinet. Side View True Professional 15 Series Installation Guide...
-
Page 51: Warranty
True Professional 15 Series General Maintenance Replacement Parts Installation Checklist Frequently Asked Questions Warranty True Professional 15 Series Installation Guide... - Page 52 Warranty does not cover cleaning the condenser coil. REPLACEMENT PARTS True maintains a record of the cabinet serial number for your unit If at any time during the life of your unit, a part is needed, you may obtain that part by furnishing the model number and serial number to the company from whom you purchased the cooler.
- Page 53 FREQUENTLY ASKED QUESTIONS Q. How do I adjust the temperature? A. Refer to True Precision Control Operation on page 31. Q. Why isn’t my unit cooling properly? A. Check to see that there are no obstructions to the condenser coil (behind front grill).
- Page 54 TERMS APPLICABLE TO EACH WARRANTY Any part covered under the above warranties that is determined by TRUE to have been defective within the time frame is limited to the repair or replacement, including labor charges, of defective parts or assemblies. The labor warranty shall include standard straight time labor charges only and reasonable travel time, as determined by TRUE.
- Page 55 NOTES...
- Page 56 NOTES...
- Page 57 15 Series Installation Guide ALL REFRIGERATOR WINE CABINET BEVERAGE DISPENSER KEY PACKET LOCATION 2001 East Terra Lane O’Fallon, MO 63366 phone: 888.616.8783 parts: 800.424.8783 email: info@true-residential.com web: true-residential.com 962791 AD 8.2013...
Need help?
Do you have a question about the 15 Series and is the answer not in the manual?
Questions and answers