
Subscribe to Our Youtube Channel
Related Manuals for Janome 9102D


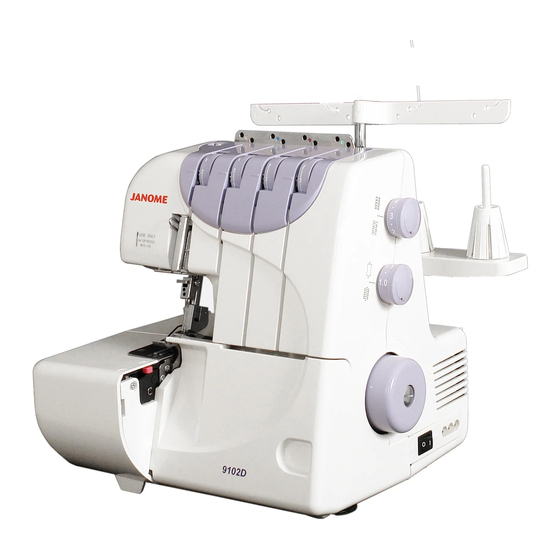
Summary of Contents for Janome 9102D
- Page 1 INSTRUCTION BOOK MANUAL DE INSTRUCCIONES LIVRET D’INSTRUCTIONS MODEL 9102D MODELO MODÈLE...
- Page 2 If it still does not fit, contact a qualified electrician to install the proper outlet. Do not modify the plug in any way. Foot Controller YC-482J or TJC-150 for use with Sewing Machine 9102D (for U. S. A. market only) INDICACIONES PARA EL FUNCIONAMIENTO: Para los aparatos eléctricos con enchufe polarizado (una pata más ancha de...
-
Page 3: Important Safety Instructions
IMPORTANT SAFETY INSTRUCTIONS Your sewing machine is designed and constructed only for HOUSEHOLD use. Read all Instructions before using this appliance. DANGER – To reduce the risk of electric shock: 1. An appliance should never be left unattended when plugged in. Always unplug this appliance from the electrical outlet immediately after using and before cleaning. -
Page 4: Instrucciones Importantes De Seguridad
INSTRUCCIONES IMPORTANTES DE SEGURIDAD Su máquina de coser está diseñada y construida solo para uso DOMÉSTICO. Lea todas las instrucciones antes de utilizar este aparato. PELIGRO - Para reducir el riesgo de una descarga eléctrica: 1. Un aparato eléctrico nunca se debe dejar desatendido cuando está enchufado. Siempre desenchufe este aparato del tomacorriente inmediatamente después de usarlo, y antes de limpiarlo. - Page 5 ´ ´ DIRECTIVES IMPORTANTES SUR LA SECURITE Cette machine a coudre est con ue et fabriquee uniquement pour l’usage DOMESTI UE. ´ Lire toutes les instructions avant d’utiliser la machine a coudre. DANGER DANGER : Pour reduire le risque de secousse electrique : ´...
- Page 6 Do’s and Don’ts 1. Always be aware of the up-and-down movement of the needle and do not turn your attention away from the machine while it is running. 2. When leaving the sewing machine unattended, the main switch of the machine must be switched off or the plug must be removed from the socket-outlet.
-
Page 7: Table Of Contents
TABLE OF CONTENTS PREPARATION ROLLED HEMMING, PICOT EDGING AND NARROW HEMMING Names of Parts ........... 8 Machine Setting and Thread, Fabric and Standard Accessories ........8 Range of the Tension Dial ........ 62 Connecting the Machine to the Power Supply..10 Thread Tension .......... - Page 8 ÍNDICE PREPARACIÓN DOBLADILLO ENROLLADO, BORDE PICOT Y DOBLADILLO ANGOSTO Nombres de las piezas ..........9 Graduación de la máquina, el hilo, la tela y el Accesorios estándar ............ 9 alcance del regulador de tensión ......63 Conectar la máquina a la energía eléctrica ....11 Tensión del hilo ............
- Page 9 TABLE DES MATIERES ´ PRÉPARATION ROULEAUTÉ, REVERS A PICOT ET OURLET ÉTROIT Nom des pièces ............9 Réglage de la machine et fil, tissu et portée Accessoires standard ..........9 du cadran de tension ..........64 Branchement de la machine au bloc Tension des fils ............
-
Page 10: Preparation
PREPARATION Names of Parts Left needle thread tension dial Right needle thread tension dial Upper looper thread tension dial Lower looper thread tension dial Side cover Looper cover Handwheel Power switch Machine socket Differential feed dial Stitch length dial Spool stand Spool holder Spool pin Thread guide bar... -
Page 11: Preparación
PRÉPARATION PREPARACIÓN Nom des pièces Nombres de las Piezas Cadran de tension du fil de l’aiguille gauche Regulador de tensión de hilo de la aguja izquierda Cadran de tension du fil de l’aiguille droite Regulador de tensión de hilo de la aguja derecha Cadran de tension du fil du boucleur supérieur Regulador de tensión de hilo del enhebrador Cadran de tension du fil du boucleur inférieur... -
Page 12: Connecting The Machine To The Power Supply
Connecting the Machine to the Power Supply Before connecting the machine to the power supply, make sure the voltage and frequency shown on the machine conform to your electrical power. 1. Turn off the power switch, and connect the machine plug to the machine socket. 2. -
Page 13: Conectar La Máquina A La Energía Eléctrica
Conectar la máquina a la energía eléctrica Branchement de la machine au bloc d’alimentation 1. Apague el interruptor de energía, y conecte el 1. Éteindre l’interrupteur et brancher la prise de la enchufe de la máquina al tomacorriente de la machine dans la douille de la machine. -
Page 14: How To Turn The Handwheel
How to Turn the Handwheel Always turn the handwheel toward you (Counter- clockwise). Handwheel Opening and Closing the Side Cover To open: Push the side cover to the left. To close: Push the side cover to the right. Side cover Opening and Closing the Looper Cover To open: A While pushing with the thumb to the right as far as it... -
Page 15: Cómo Girar El Volante
Cómo girar el volante Comment tourner le volant Siempre gire el volante hacia usted (en sentido contrario Tourner toujours le volant vers soi (dans le sens al reloj). antihoraire). Volante Volant Abrir y cerrar la cubierta lateral Ouverture et fermeture du couvercle latéral Para abrir: Pour ouvrir: Empuje la cubierta lateral hacia la izquierda. -
Page 16: The Position Of Thread Guide Bar
The Position of Thread Guide Bar 1. Pull the thread guide bar up as far as it will go. 2. Turn the thread guide bar so that the thread guides are right above the spool pins. Thread guide bar Thread guide Stoppers Spool pin Make sure to lock the thread guide of guide pole... -
Page 17: La Posición De La Barra Guía-Hilos
La posición de la barra guía-hilos Position de la barre de guide-fil 1. Hale la barra guía-hilos hacia arriba lo más que 1. Tirer la barre de guide-fil aussi haut que possible. pueda. 2. Tourner la barre de guide-fil pour que les guide-fils 2. -
Page 18: Changing Needle
Changing Needle Turn off the power switch and unplug the machine. Raise the needle to its highest position. Then loosen the left or right needle clamp screw for the needle you are going to remove. Needle clamp screw on the left Needle clamp screw on the right Use HA-1SP #14 Needle or #11. -
Page 19: Cambiar La Aguja
Cambiar la aguja Changement de l’aiguille Apague el interruptor de corriente y desenchufe la Éteindre l’interrupteur et débrancher la machine. máquina. Soulever l’aiguille à sa position la plus haute. Levante la aguja a su posición más alta. Desserrer la vis de pince-aiguille gauche ou droite de Luego afloje el tornillo de sujeción de la aguja, izquierda l’aiguille à... -
Page 20: Removing The Presser Foot
Removing the Presser Foot 1. Turn off the power switch and unplug the machine. 2. Raise the needle and the presser foot. 3. Press the lever located on the back of the foot holder. The presser foot will drop off. Needle Presser foot lifter Foot holder... -
Page 21: Retirar El Pie Prensatela
Retirar el pie prensatela Retrait du pied presseur 1. Apague el interruptor de corriente y desenchufe la 1. Éteindre l’interrupteur et débrancher la machine. máquina. 2. Soulever l’aiguille et le pied presseur. 2. Levante la aguja y el pie prensatela. 3. -
Page 22: Adjustment Of Stitch Length
Adjustment of Stitch Length To select stitch length, turn the dial. The larger the number, the longer the stitch. The stitch length can be adjusted from 1 to 4 mm. Position “R” is for rolled and narrow hemmings. Stitch length dial Setting mark Adjustment of Differential Feed Ratio The differential feed ratio can be altered by turning... -
Page 23: Ajuste Del Largo De Puntada
Ajuste del largo de puntada Réglage de la longueur des points Seleccione el largo de la puntada girando el regulador. Pour sélectionner la longueur des points, tourner le cadran. Cuanto más alto el número más larga será la puntada. Plus le chiffre est élevé, plus le point est long. Se puede graduar el largo de la puntada de 1 a 4 mm. -
Page 24: To Deactivate The Upper Knife
To Deactivate the Upper Knife 1. Turn off the power switch and unplug the machine. 2. Open both the looper cover and side cover. 3. Turn the upper knife release knob toward you while pushing it to the right, then guide the hole on the upper knife to the pin to lock the upper knife in the down position. -
Page 25: Para Desactivar La Cuchilla Superior
Para desactivar la cuchilla superior sactivation du couteau sup rieur é é 1. Apague el interruptor de corriente y desenchufe la 1. Éteindre l’interrupteur et débrancher la machine. máquina. 2. Ouvrir le couvercle du boucleur et le couvercle 2. Abra la cubierta del enhebrador y la cubierta latéral. -
Page 26: Adjustment Of Cutting Width
Adjustment of Cutting Width When cutting width is too narrow or too wide against seam width, adjust it as follows. 1. Turn off the power switch and unplug the machine. 2. Open the looper cover and side cover. 3. Set the upper knife to down position 4. -
Page 27: Ajuste Del Ancho Del Corte
Ajuste del ancho del corte Réglage de la largeur de coupe Cuando el ancho del corte es muy angosto o muy ancho Lorsque la largeur de coupe est trop étroite ou trop large en relación con el ancho de la costura, ajústelo como par rapport à... -
Page 28: Adjustment Of Needle Plate Setting Knob
Adjustment of Needle Plate Setting Knob (Changing to Standard Serging or Rolled Hemming) 1. Turn off the power switch and unplug the machine. 2. Open the looper cover and side cover. 3. Deactivate the upper knife. 4. Push the cutting width adjusting dial to the right as far as it will go, then, move the needle plate setting knob to the guide line of S (for Standard Serging) or R (for Rolled Hemming). -
Page 29: Ajuste De La Perilla De Graduación De La Plancha De Aguja
Ajuste de la perilla de graduación de la plancha Réglage du bouton de réglage de la plaque á de aguja aiguille (Cambio a sobrehilado estándar o dobladillo enrollado) (Changement pour le surfilage standard ou le rouleauté) 1. Apague el interruptor de corriente y desenchufe la 1. -
Page 30: Threading The Machine
Threading the Machine The left illustration shows the completed threading conditions of four threads. Lower looper thread Upper looper thread Right needle thread Left needle thread Thread guide Thread guide plate Threading chart The machine is pre-threaded to make threading easier. -
Page 31: Enhebrar La Máquina
Enhebrar la máquina Enfilage de la machine La figura a la izquierda muestra la condicion del L’illustration de gauche montre conditions d’enfilage enhebrado de los cuatro hilos. terminé des quatre fils. Hilo del enhebrador inferior Fil du boucleur inférieur Hilo del enhebrador superior Fil du boucleur supérieur Hilo de la aguja derecha Fil de l’aiguille droite... -
Page 32: Threading The Lower Looper
• Threading the Lower Looper Open the looper cover and side cover. Place the spool of thread on the right side spool pin. The points to thread for lower looper are marked in green. A convenient threading chart is placed on the machine body inside the looper cover. -
Page 33: Enhebrar El Enhebrador Inferior
• Enhebrar el enhebrador inferior • Enfilage du boucleur inférieur Abra la cubierta del enhebrador y la cubierta lateral. Ouvrir le couvercle du boucleur et le couvercle latéral. Coloque el carrete de hilo en la espiga para carrete en el Placer la bobine de fil sur la broche à... - Page 34 3. Hold the thread at both ends and tug gently to ensure the thread is correctly inserted between the tension discs. (If the presser foot lifter is raised, the thread easily inserts between the tension discs.) Lower looper thread tension dial 4.
- Page 35 3. Sujete el hilo em ambos extremos y lo hala 3. Tenir le fil aux deux extrémités et tirer délicatement ligeramente para asegurarse de que el hilo está pour s’assurer que le fil soit inséré correctement entre insertado correctamente entre los discos de tensión. les disques de tension.
- Page 36 10. Pull the threader to pass the thread through the hole of lower looper thread guide (4). Remove the thread from the threader, and draw the thread through the hole on the lower looper 10 cm (4˝) or more with a pair of tweezers. For threading without the looper threader, draw the thread from the right side of lower looper thread guide (4) with a pair of tweezers.
- Page 37 10. Tire del enfilador para pasar el hilo por el agujero 10. Tirer l’enfileur pour passer le fil dans le trou du del guía-hilo del enhebrador inferior (4). guide-fil du boucleur inférieur (4). Saque el hilo del enfilador, y con unas pinzas hale Retirer le fil de l’enfileur et tirer le fil dans le trou du unos 10 cm (4 pulgadas) o más de hilo por el boucleur inférieur sur environ 10 cm (4˝) ou plus à...
-
Page 38: Threading The Upper Looper
• Threading the Upper Looper Place a spool of thread on the spool pin second from the right. The points to thread for upper looper are marked in red. A convenient threading chart is placed on the machine body inside the looper cover. 1. -
Page 39: Enhebrar El Enhebrador Superior
• Enhebrar el enhebrador superior • Enfilage du boucleur supèrieur Coloque el carrete de hilo en la segunda espiga para Poser la bobine de fil sur la deuxième broche à bobine à carrete de la derecha. partir de la droite. * Los puntos para enhebrar el enhebrador inferior * Les points à... - Page 40 3. Hold the thread at both ends and tug gently to ensure the thread is correctly inserted between the tension discs. (If the presser foot lifter is raised, the thread easily inserts between the tension discs.) Upper looper thread tension dial 4.
- Page 41 3. Sujete el hilo em ambos extremos y lo hala 3. Tenir le fil aux deux extrémités et tirer délicatement ligeramente para asegurarse de que el hilo está pour s’assurer que le fil soit inséré correctement entre insertado correctamente entre los discos de tensión. les disques de tension.
-
Page 42: Threading The Needle On The Right
• Threading the Needle on the Right Place the spool of thread on the spool pin second from the left. The points to thread for needle on the right are marked in blue. A convenient threading chart is placed on the machine body inside the looper cover. -
Page 43: Enhebrar La Aguja De La Derecha
• Enhebrar la aguja de la derecha Coloque el carrete de hilo en la segunda espiga para Placer la bobine de f’il sur la deuxième broche à bobine carrete desde la izquierda. à partir de la gauche. * Los puntos para ensartar la aguja de la derecha * Les points à... - Page 44 3. Hold the thread at both ends and tug gently to ensure the thread is correctly inserted between the tension discs. (If the presser foot lifter is raised, the thread easily inserts between the tension discs.) Right needle thread tension dial 4,5,6.
- Page 45 3. Sujete el hilo em ambos extremos y lo hala 3. Tenir le fil aux deux extrémités et tirer délicatement ligeramente para asegurarse de que el hilo está pour s’assurer que le fil soit inséré correctement entre insertado correctamente entre los discos de tensión. les disques de tension.
-
Page 46: Threading The Needle On The Left
• Threading the Needle on the Left Place the spool of thread on the left side spool pin. The points to thread for needle on the left are marked in orange. A convenient threading chart is placed on the machine body inside the looper cover. 1. -
Page 47: Enhebrar La Aguja De La Izquierda
• Enfilage de l’aiguille gauche • Enhebrar la aguja de la izquierda Coloque el carrete de hilo en la espiga de carrete del lado Placer la bobine de fil sur la broche à bobine gauche. izquierdo. * Les points à enfiler pour l’aiguille gauche sont * Los puntos para ensartar la aguja de la izquierda marqués en orange. - Page 48 3. Hold the thread at both ends and tug gently to ensure the thread is correctly inserted between the tension discs. (If the presser foot lifter is raised, the thread easily inserts between the tension discs.) Left needle thread tension dial 4,5 Slide the thread from the bottom of front cover thread guide (2) and the take-up lever cover right to left.
- Page 49 3. Sujete el hilo em ambos extremos y lo hala ligeramente 3. Tenir le fil aux deux extrémités et tirer délicatement para asegurarse de que el hilo está insertado pour s’assurer que le fil soit inséré correctement entre correctamente entre los discos de tensión. les disques de tension.
-
Page 50: Test Stitching Starting Sewing
TEST STITCHING Starting Sewing 1. Insert the fabric under the toe of the foot. (It is not necessary to raise the foot.) 2. Turn the handwheel gently toward you a couple of turns and check the thread chain. Then start sewing slowly. -
Page 51: Costura De Prueba
COSTURA DE PRUEBA POINTS D’ESSAI Comenzar la costura Commencer coudre à 1. Introduzca la tela bajo la punta del pie. 1. Insérer le tissu sous le pied. (No es necesario levantar el pie.) (Il n’est pas nécessaire de soulever le pied). 2. -
Page 52: Securing Ends
Securing Ends To avoid unravelling, it is necessary to leave a thread chain about 5 cm (2´´) long at the beginning and at the end of a seam. To secure the beginning and end of a seam choose one of the following methods. -
Page 53: Cómo Asegurar Los Cabos
Cómo asegurar los cabos Nouer les extrémités Para evitar que se desenreden, es necesario dejar una Pour éviter tout effilochage, il est nécessaire de laisser cadeneta de hilo de unos 5 cm (2 pulgadas) de largo, al une chaîne de fils d’environ 5 cm (2˝) de longueur au comienzo y al final de una costura. -
Page 54: Thread Tension (4 Threads)
Thread Tension (4 threads) Correct tension The illustration at left shows sewing results with correct tension settings. However, adjusting the thread tension may be required depending upon the type of fabric and thread being used. Wrong side of fabric Right side of fabric Right needle thread Left needle thread Upper looper thread... -
Page 55: Tensión Del Hilo (4 Hilos)
Tensión del hilo (4 hilos) Tension des fils (4 fils) La tensión correcta Bonne tension La figura a la izquierda muestra el resultado de la costura L’illustration à gauche montre les résultats de couture con una graduación correcta de la tensión. avec les bons réglages de tension. - Page 56 Looper thread tension is out of balance (1) The illustration shows sewing results when the lower looper thread tension is too tight and/or upper looper thread tension is too loose. Remedy: Loosen lower looper thread tension and/or tighten upper looper thread tension. Wrong side of fabric Right side of fabric Right needle thread...
- Page 57 La tensión del hilo del enhebrador no está equilibrada (1) La tension du fil du boucleur est de l’équilibrée (1) L’illustration montre les résultats de couture lorsque la La figura muestra el resultado de la costura cuando la tensión tension du fil du boucleur inférieur est trop serrée et/ou del hilo del enhebrador inferior está...
-
Page 58: Threading The Machine (3 Threads)
Threading the Machine (3 threads) Using the needle on the right only (for regular three-thread serging) Turn off the power switch and unplug the machine. Remove the needle and the thread on the left. Then retighten the needle clamp screw on the left to prevent losing the screw. -
Page 59: Enhebrar La Máquina (3 Hilos)
Enhebrar la máquina (3 hilos) Enfilage de la machine (3 fils) Utilisation de l’aiguille droite seulement Usando la aguja de la derecha solamente (pour surfilage régulier a trois fils) (para sobrehilado común de 3 hilos) Apague el interruptor de corriente y desenchufe la Éteindre l’interrupteur et débrancher la machine. -
Page 60: Thread Tension (3 Threads)
Thread Tension (3 threads) Correct tension The illustration at left shows sewing results with correct tension settings. However, adjusting the thread tension may be required depending on the type of fabric and thread being used. Wrong side of fabric Right side of fabric Right or left needle thread Upper looper thread Lower looper thread... -
Page 61: Tensión Del Hilo (3 Hilos)
Tension des fils (3 fils) Tensión del hilo (3 hilos) Bonne tension La tensión correcta L’illustration à gauche montre les résultats de couture La figura a la izquierda demuestra el resultado de la avec les bons réglages de tension. Cependant, un réglage costura con una graduación correcta de la tensión. -
Page 62: Thread And Needle Chart
Thread and Needle Chart Type of fabric Type of thread Needle Stitch length Differential feed ratio Lightweight Cotton: No. 80 – 100 Organdy, HA-1 SP 2.0 – 3.0 0.5 – 1.0 Silk: No. 80 – 100 Georgette, No. 11 Synthetic: No. -
Page 63: Cuadro De Hilos Y Agujas
Cuadro de hilos y agujas Tipo de tela Tipode hilos Agujas Largo de Proporción del puntada avance deferencial Algodón: N° 80 – 100 Peso Organdí, crepé HA-1 SP 2.0 a 3.0 0.5 a 1.0 Seda: N° 80 – 100 Liviano georgette, N°... -
Page 64: Rolled Hemming, Picot Edging And Narrow Hemming Machine Setting And Thread, Fabric And Range Of The Tension Dial
ROLLED HEMMING, PICOT EDGING AND NARROW HEMMING Machine Setting and Thread, Fabric and Range of the Tension Dial The setting of tension dials may vary depending on the type and thickness of fabric and thread being sewn. Picot Edging Narrow Hemming Rolled Hemming Stitch Length... -
Page 65: Dobladillo Enrollado, Borde Picoty Dobladillo Angosto
DOBLADILLO ENROLLADO, BORDE PICOT Y DOBLADILLO ANGOSTO Graduación de la máquina, el hilo, la tela y el alcance del regulador de tensión La graduación de los reguladores de tensión pueden variar dependiendo del tipo y grosor de la tela y el hilo que se usa. Dobladillo enrollado Borde picot Dobladillo angosto... -
Page 66: Rouleauté Revers A Picot Et Ourlet Étroit
ROULEAUTÉ REVERS A PICOT ET OURLET ÉTROIT Réglage de la machine et fil, tissu et portée du cadran de tension Le réglage des cadrans de tension peut varier selon le tissu, l'épaisseur du tissu et le fil utilisés. Revers à picot Ourlet étroit Rouleauté... - Page 67 (Blank page)
-
Page 68: Thread Tension
Thread Tension For rolled hemming and picot edging Correct tension The illustration at left shows sewing results with correct tension settings. Adjusting the thread tension may be required depending on the type of fabric and thread being used. Wrong side of fabric Right side of fabric Right needle thread Upper looper thread... -
Page 69: Tensión Del Hilo
Tensión del hilo Tension du fil Para el dobladillo enrollado y el borde picot Pour le rouleauté le revers à picot Tensión correcta Bonne tension La figura a la izquierda muestra el resultado de la costura L’illustration à gauche montre les résultats de couture con la graduación correcta de tensión. -
Page 70: For Better Results
For Better Results Rolled hemming Pull the end of thread chain to the back lightly in the beginning and end of sewing. Fabric Thread chain Picot edging Pull the fabric lightly to the back while sewing. Fabric For narrow hemming Correct tension The illustration at left shows sewing results with correct tension settings. -
Page 71: Para Obtener Mejores Resultados
Para obtener mejores resultados Pour obtenir les meilleurs résultats Dobladillo enrollado Rouleauté Tirer l’extrémité de la chaîne de fils légèrement vers Hale el extremo de la cadeneta de hilo ligeramente hacia l’arrière au début et à la fin de la couture. atrás al comienzo y al final de la costura. -
Page 72: Thread And Fabric
DECORATIVE OVEREDGING Refer to pages 52, 54, 58 for thread tension balance adjustment. For the best results, pull the thread chain to the back lightly at the beginning and end of sewing. Overedging Thread and Fabric Thread Fabric Synthetic : No. 60~80 Needle threads Silk : No. -
Page 73: Sobreborde Decorativo
SOBREBORDE DECORATIVO SURJET DÉCORATIF * Remítase a las páginas 53, 55, 59 para hacer los * Se référer aux pages 53, 55, 59 pour le réglage de ajustes del equilibrio de tensión del hilo. l’équilibre de la tension des fils. * Para obtener mejor resultado, hale la cadeneta de * Pour obtenir les meilleurs résultats, tirer la chaîne hilo ligeramente hacia atrás al comienzo y final de... -
Page 74: Pin Tucking Thread And Fabric
PIN TUCKING Refer to page 62 (Narrow Hemming) for thread tension balance adjustment. 1 Pin tucking Thread and Fabric Thread Fabric Synthetic : No. 60~80 Needle thread on the Light to Silk : No. 50~80 right Medium Synthetic : No. 60~100 Upper looper thread Fabric Silk... -
Page 75: Alforzas Hilo Y Tela
ALFORZAS NERVURE * Remítase a la página 63 (dobladillo angosto) para * Se référer aux pages 64 (ourlet étroit) pour le hacer los ajustes del equilibrio de la tensión del réglage de l’équilibre de la tension des fils. hilo. Nervure Alforzas Hilo y Tela Fil et tissu... -
Page 76: Care Of Your Machine Replacing The Upper Knife
CARE OF YOUR MACHINE Replacing the Upper Knife To remove: 1. Turn off the power switch and unplug the machine. 2. Open the looper cover and side cover. 3. Deactivate the upper knife. 4. Remove the hexagonal bolt, and remove the upper knife. -
Page 77: Cuidado De Su Máquina
CUIDADO DE SU MÁQUINA ENTRETIEN DE LA MACHINE Reemplazo de la cuchilla superior Remplacement du couteau supérieur Para sacarla: Retrait: 1. Apague el interruptor de corriente y desenchufe 1. Éteindre l’interrupteur et débrancher la machine. la máquina. 2. Ouvrir le couvercle du boucleur et le couvercle 2. -
Page 78: Replacing The Light Bulb
Replacing the Light Bulb 1. Turn off the power switch and unplug the machine. 2. Loosen the face plate set screw, and remove the face plate. Face plate Set screw To remove: Push and twist to the left. To attach: Push and twist to the right. -
Page 79: Reemplazo De La Bombilla De Luz
Reemplazo de la bombilla de luz Remplacement de l’ampoule 1. Apague el interruptor de corriente y desenchufe la 1. Éteindre l’interrupteur et débrancher la machine. máquina. 2. Desserrer la vis de réglage de la plaque frontale et 2. Afloje el tornillo de la plancha frontal, y retire la retirer la plaque frontale. -
Page 80: Oiling The Machine
Oiling the Machine Apply a few drops of fine quality sewing machine oil to the parts indicated with arrows. It is recommended to apply oil once a week in normal use, once in ten hours in continuous use. Open the side cover and apply oil. Open the looper cover and apply oil. -
Page 81: Aceitado De La Máquina
Aceitado de la máquina Lubrification de la machine Aplique unas cuantas gotas de aceite de buena calidad Poser quelques gouttes d’huile de bonne qualité pour para máquina de coser en todas las partes indicadas por machine à coudre sur les sections indiquées par des una flecha. -
Page 82: Troubleshooting
Troubleshooting Condition Cause Reference 1. The feed dog is packed with lint. See page 76. The fabric is not 2. The presser foot has been raised. Lower the presser foot. being fed smoothly. 3. Pressure of the foot is too weak. See page 18 The needle 1. -
Page 83: Solución De Problemas
Solución de problemas Condición Causa Referencia La tela no avanza 1. Los dientes de avance están llenos de pelusa Vea la página 77. suavemente 2. El pie prensatela está levantado Baje el pie prensatela. 3. La pression del pie está demasiado débil. Vea la página 19 La aguja se 1. -
Page 84: Recherche Des Pannes
Recherche des pannes Condition Cause Référence Le tissu n’est pas 1. La griffe d’entraînement est remplie de charpie. Se référer à la page 77. entraîné 2. Le pied presseur n’a pas été soulevé. Abaisser le pied presseur. régulièrement. 3. La pression du pied est trop faible. Se référer à... - Page 85 (Blank page)
-
Page 86: Optional Parts
OPTIONAL PARTS Blind stitch foot Use to blind stitch a cuff or a skirt. Taping foot with Use for sewing tape on a tape reel shoulder or armpit line to protect from stretching or to decorate. Works well with the taping foot or the cording foot. -
Page 87: Piezas Opcionales
PIEZAS OPCIONALES PIECES FACULTATIVES Pie para puntada Se usa para la puntada invis- Pied à ourlet Pour coudre des points ible en puños o faldas. invisibles sur un revers de invisible invisible pantalon ou une jupe. Pie para cinta con Se usa para coser cintas en la carrete línea del hombro o sisa para... - Page 88 Printed in Taiwan Impreso en Taiwán Imprimé à Taiwan 793-800-007 (E/S/F)
Need help?
Do you have a question about the 9102D and is the answer not in the manual?
Questions and answers