Table of Contents
Advertisement
Advertisement
Table of Contents

Related Manuals for Pantech Caper


Summary of Contents for Pantech Caper
- Page 1 USER GUIDE...
- Page 2 User Guide...
-
Page 3: Table Of Contents
CHAPTER 1. BEFORE USING USING AUTO KEYPAD LOCK FUNCTION ..............31 AVAILABLE OPTIONS DURING A CALL ..............32 BEFORE USING ....................8 MAKING AN EMERGENCY CALL ................33 HANDSET DESCRIPTIONS ..................8 DIALING LETTERS ....................34 DISPLAY INDICATORS ....................12 INSTALL BATTERY ....................16 CHAPTER 3. MEMORY FUNCTION REMOVE BATTERY ....................17 MEMORY FUNCTION ..................36 CHARGING YOUR BATTERY ................... - Page 4 DIALED ........................59 CHAPTER 5. MEDIA CENTER BLOCKED ....................... 60 MEDIA CENTER ..................106 ALL ........................61 TUNES & TONES ....................106 VIEW TIMERS ......................62 PICTURES ......................109 TOOLS ......................63 GAMES ........................ 111 VOICE COMMANDS....................63 MOBILE WEB ...................... 112 CALCULATOR ......................
-
Page 5: Before Using
SAFETY INFORMATION FOR WIRELESS HANDHELD PHONES ......129 BEFORE USING SAFETY INFORMATION FOR FCC RF EXPOSURE ..........134 This chapter provides important information SAR INFORMATION ..................... 135 about using the CAPER including: HEARING AID COMPATIBILITY (HAC) FOR WIRELESS TELECOMMUNICATIONS DEVICES ..............136 Handset Descriptions FDA CONSUMER UPDATE ................... -
Page 6: Handset Descriptions
HANDSET DESCRIPTIONS 7. Notepad Key/Space Key: Press to access the Notepad menu or to add a space between characters. 8. TXT Composer Key: Press to access the New TXT Message screen. 9. CLR Key: Press to clear a character from the display. Press and hold to clear all characters. - Page 7 HANDSET DESCRIPTIONS *. Internal Antenna Area Correct Incorrect Holding the device by the internal antenna area might affect the quality of all calls. 20. Self-Portrait Mirror: Displays your reflection when taking pictures. 21. Camera Lens: The lens of the built-in camera. 22.
-
Page 8: Display Indicators
DISPLAY INDICATORS Icon Icon Descriptions Icon Icon Descriptions Location On: GPS is set to On for Location Service and E911 calls. 1X Signal Strength: Indicates your phone is in the CDMA 1X network. Keypad Lock: Indicates the keypad and external keys are locked. More bars indicate a stronger signal. - Page 9 Icon Icon Descriptions Message Icons Calendar Appointment: Event Alarm is active. Unread EMS Corrupt Message Read EMS Pending Message Send Voicemail: Indicates you have a voicemail message. New/Unread Message Unread MMS Alarm On: Appears when an alarm is set. Opened/Read Message Read MMS Recent Call Icons Message Delivered...
-
Page 10: Install Battery
INSTALL BATTERY REMOVE BATTERY 1. Insert your fingernail into the slot(1), then push down on 1. To remove the battery cover, insert your fingernail into top of the battery cover and slide it off to remove (2). the slot(1), then push down on top of the battery cover and slide it off (2). -
Page 11: Before Using
BATTERY HANDLING INFORMATION DO’S • Only use the battery and charger approved for use with the Caper • Only use the battery for the system for which it is specified. • Only use or replace the battery with a charging system or another battery that has been qualified with the system per this standard, IEEE-Std-1725-2006. -
Page 12: Basic Operation
CODE” appears on the display, press the OK Key to unlock the keypad, T his chapter addresses and explains the basic features and enter your 4-digit lock code. for CAPER including: • The default lock code is the last 4 digits of your phone number. -
Page 13: Quick Switching Between The Main Menus
QUICK SWITCHING BETWEEN THE MAIN MENUS MENU SUMMARY While a menu is being accessed, you can quickly switch between the other menu Main Menu DEPTH DEPTH DEPTH options. 1. Media Center 1. Tunes & Tones 1. Get New Ringtones 1. Get New Applications 1. - Page 14 Main Menu DEPTH DEPTH DEPTH Main Menu DEPTH DEPTH DEPTH 3. Contacts 3. Backup Assistant 9. Settings & Tools 4. Bluetooth 1. Add New Device 4. Groups 5. Sounds Settings 1. Easy Set-up 2. Call Sounds 1. Call Ringtone 5. Speed Dials 2.
-
Page 15: Making A Call
Main Menu DEPTH DEPTH DEPTH Main Menu DEPTH DEPTH DEPTH 9. Settings & Tools 6. Display Settings 8. Dial Fonts 9. Settings & Tools 9. Memory 1. Phone Memory 1. Memory Usage 2. My Pictures 9. Menu Font Size 3. My Ringtones 0. -
Page 16: Answering Calls
ANSWERING CALLS 2-Sec Pause (p) The phone waits 2 seconds before sending the next string of digits automatically. 1. When a call comes in, press SEND Key . 1. From the home screen, enter the area code and phone number . •... -
Page 17: Call Waiting Function
2. Select one of the following options and press the OK Key [SET] to save it. 3. When you’re connected to the second party, press the SEND Key again to All Sounds Off Alarm Only Vibrate Only Medium Low Medium begin your 3-Way call. -
Page 18: Available Options During A Call
AVAILABLE OPTIONS DURING A CALL NOTEPAD To compose notes during a call: During a phone call, you can access the following features by pressing the Right Soft 1. Press the Right Soft Key [Options], select Notepad and press the OK [Options]: Key. -
Page 19: Dialing Letters
DIALING LETTERS Allows you to dial the number associated with a specific word. For example, to call “1-800-HELLO”: MEMORY FUNCTION 1. Enter “1-800”, then press the Mode Change Key 2. Enter “HELLO” with the QWERTY Keypad and press the SEND Key to connect. This chapter addresses memory functions including: •... -
Page 20: Storing A Phone Number
STORING A PHONE NUMBER ADDING OR CHANGING GROUPS To organize your Contacts into groups: The Contact List stores up to 1000 entries. 1. From the home screen, press the Right Soft Key [Contacts], then ADDING A NEW CONTACT highlight the desired Contact entry. 1. -
Page 21: Editing Contact Entries
3. Highlight Picture, and press the Left Soft Key [Set]. EDITING CONTACT ENTRIES 4. Press the Directional Key up, down, left or right to select a picture then ADDING A PHONE NUMBER FROM THE HOME SCREEN press the OK Key. 1. -
Page 22: Default Numbers
EDITING STORED NAMES 5. Press the Right Soft Key [Options], select 1. Remove Speed Dial press the OK Key. 1. From the home screen, press the Right Soft Key [Contacts]. 6. Highlight and press the OK Key. A confirmation message appears. Your Contacts are displayed alphabetically. -
Page 23: Entering Letters, Numbers & Symbols
ENTERING LETTERS, NUMBERS & SYMBOLS 4. [ ] Symbols Key: Press to open the symbols list. 5. [ ] Caps Key: Press to select a letter case for the standard text [Abc] input Your device has a QWERTY Keypad that provides a superior typing experience on a small mode. -
Page 24: Chapter 4. Menu Function
MENU FUNCTION 411: Speed Dial entry 411 (Directory Assistance) is already assigned. This chapter addresses accessing the menu and using its functions and features to customize your CAPER CONTACTS RECENT CALLS TOOLS SETTINGS New Contact... -
Page 25: New Contact
NEW CONTACT • By pressing the Right Soft Key [Options], you can choose from the following: New Contact: Add a new contact to your contact list. To add a new number to your Contact List: Erase: Deletes the contact from your contact list. Using this submenu, the number is saved as a new Contact. -
Page 26: Groups
GROUPS ERASE GROUP 1. From the home screen, press the [MENU], then select Contacts, Groups allow you to classify phone entries into groups with up to 20 members in each group. The default groups include Family and Work and they cannot be erased or Groups. -
Page 27: Speed Dials
6. Under Sound, press the Left Soft Key [Sounds], select the sound you up or down to highlight a desired contact or contacts, then press the would like to send then press the OK Key. Press the Directional Key down. OK Key [MARK]. -
Page 28: In Case Of Emergency
“REMOVE SPEED DIAL?” appears on the screen. 3. To select a contact from the Contacts List, press 1. From Contacts, select the Highlight and press the OK Key. A confirmation message appears. Contact entry, and then press the OK Key. To re-assign a new contact as an ICE CONTACT, press 2. -
Page 29: Favorites
TO EDIT SAVED PERSONAL INFO • Send Email: Allows you to send an Email message to the contact. Only available when an Email address is set for the contact. 1. From the home screen, press the [MENU], then select Contacts, 6. -
Page 30: My Name Card
MY NAME CARD 2. When “PLACE DEVICE YOU ARE CONNECTING TO IN DISCOVERABLE MODE” appears, press the OK Key to start searching Bluetooth devices. A Name Card with the handset’ s mobile number automatically appears. 3. Press the Directional Key up or down to select a desired device and press the OK Key [PAIR]. -
Page 31: Recent Calls
RECENT CALLS After 90 missed calls, the oldest call will automatically be erased from the history. The Recent Calls menu is a list of the last phone numbers or Contact entries for calls you RECEIVED placed, accepted, missed, or blocked. It is continually updated as new numbers are added to the beginning of the list and the oldest entries are removed from the bottom Displays information about the 90 most recently received calls. -
Page 32: Blocked
Picture Message: Allows you to send a Picture Message to the contact. • Press the Right Soft Key [Options] to select: Voice Message: Allows you to send a Voice Message to the contact. Save to Contacts: Stores the phone number to your Contacts. Details: View contact information stored in your Contact List. -
Page 33: View Timers
VIEW TIMERS VOICE COMMANDS Checks the usage time and manages your calls within the limit you set. To view 11 Your phone is equipped with an Advanced Voice Commands (AVC) feature. This feature timers (Last Call, All Calls, Received Calls, Dialed Calls, Roaming Calls, Transmit Data, allows you to make calls or use the phone’... - Page 34 2. If calling a contact from your Contact List, say Call <Name>. Your phone will Status Voicemail Messages Missed Calls Time Signal Strength ask you to confirm the name you said. Say “Yes“ if it was repeated correctly. Battery Level Volume Balance Minutes...
-
Page 35: Tools
2. Say “Help”. 3. Select More Sensitive, Automatic Less Sensitive, then press the OK Key [SET]. 3. The Help guide will be displayed on your phone. ADAPT VOICE VOICE COMMANDS SETTINGS Voice Commands are speaker independent, which means that no training CONFIRM CHOICES or adaptation is required. -
Page 36: Calculator
• Mode: Select the voice command system mode from the following: • Input 5 and then press the OK Key and you will see the answer (9.5). Prompts: For handset to prompt for required information. 3. To reset, press the Left Soft Key [Clear]. -
Page 37: Calendar
CALENDAR ALERT TONE The Calendar tool provides easy and convenient access to your schedule. Simply store Press the Left Soft Key [Set] to select a new ringtone. Highlight a desired your appointments and your phone will alert you. ringtone then press the OK Key [SET]. Press the Left Soft Key [Play] to 1. -
Page 38: E-Diary
3. Press the Left Soft Key [Erase], select Yes, then press the OK Key. BACKGROUND Press the Directional Key left or right to select one of the following ERASE ALL PAST EVENTS backgrounds: Allows you to delete past events from today. Blackboard Essay Letter... -
Page 39: Alarm Clock
3. Select 3. Erase to erase an E-diary or 4. Erase All to erase all the E-diary 4. Press the OK Key [SAVE] to set the alarm. entries, then press the OK Key. TURN ON/OFF THE ALARM SETTING 4. Select and press the OK Key. -
Page 40: World Clock
4. To resume it, press the OK Key [START]. 4. Under DST, press the Directional Key left or right to turn or Off. Press 5. To reset it, press the Right Soft Key [Reset]. the Directional Key down. 5. Under Start Date, use the keypad to change or enter the start date and then TO TIME UP TO EIGHT EVENTS AT ONCE press the Directional Key down. - Page 41 VIEW SAVED MEMO 2. Select a note, press the Right Soft Key [Options] select 3. Erase and press the OK Key. To view a saved memo: 1. From the home screen, press [MENU], then select 9. Settings & Tools, 3. Select and press the OK Key.
-
Page 42: My Verizon
MY VERIZON ADD NEW DEVICE Pairing is the process that allows the handset to locate, establish and register a 1-to-1 To access your Verizon account information: connection with the target device. 1. From the home screen, press [MENU], then select 5. - Page 43 OPTIONS SETTINGS 1. From the home screen, press [MENU], then select 9. Settings & Tools, MY PHONE NAME Bluetooth. To edit the Bluetooth® name of your phone: 2. Select the paired device. 1. From the home screen, press [MENU], then select 9.
-
Page 44: Sounds Settings
AUTO PAIR HANDSFREE CALL SOUNDS To set Auto Pair Handsfree On/Off: To set ringtones for types of incoming calls: 1. From the home screen, press [MENU], then select 9. Settings & Tools, CALL RINGTONE Bluetooth. 1. From the home screen, press [MENU], then select 9. - Page 45 2. Adjust the volume by pressing the Directional Key up or down, then press • Reminder: Press the Directional Key up or down to select Once, Every 2 Minutes, Every 15 Minutes or Off, then press the OK Key [SET]. the OK Key [SET] to save the setting.
-
Page 46: Display Settings
POWER ON/OFF • FONT TYPE: Select Font, Sleek Modern Font Dandy Round Font, then press OK Key [SET]. Press the Left Soft Key [Preview] to preview the selected font type, To set the phone to sound a tone when the phone is powered on or off: or press the Right Soft Key [Skip] to go to the next setting. - Page 47 BACKLIGHT MAIN MENU SETTINGS To set the duration for backlight illumination of the Main Screen and Keypad: To change Main Menu layout and type: 1. From the home screen, press [MENU], then select 9. Settings & Tools, 1. From the home screen, press [MENU], then select 9.
-
Page 48: Phone Settings
2. Select Font, Sleek Modern Font Dandy Round Font, then press the Large Digital 12 is the default setting for this device. OK Key [SET]. To preview the selected font type, press the Left Soft Key BALANCE DISPLAY [Preview]. You can view your balance and expiration date on your phone at any time. 1. - Page 49 3. Press 1. Reset (UP, LEFT or DOWN) 2. Reset Directional Keys. From the home screen, pressing the Directional Key right will display the SHORTCUTS screen. On the MY SHORTCUTS screen, you can select a function and 4. Select and press the OK Key. then press the OK Key to access the Function.
- Page 50 CURRENT COUNTRY RESTRICTIONS Allows you to set the country of your current location so that your phone works properly Use the following procedure to configure Location Setting, Calls and Messages while you travel. restrictions. 1. From the home screen, press [MENU], then select 9.
-
Page 51: Call Settings
LOCK PHONE NOW The automatic setting can be displayed as Automatic B and Automatic A depending on PRL. Lock the phone now. 1. From the home screen, press [MENU], then select 9. Settings & Tools, NAM SELECTION 7. Phone Settings, Security. - Page 52 2. Select Key, Send Key Only Auto with Handsfree, then press the OK 2. Select or Off, then press the OK Key [SET]. Key [MARK]. If One Touch Dial is disabled, a speed dial call will function by entering the speed dial number on the QWERTY Keypad, and then press the SEND Key .
-
Page 53: Memory
MEMORY PHONE INFO PHONE MEMORY MY NUMBER Allows you to manage the memory usage for pictures, ringtones, sounds and contacts To view your phone number: on your Phone Memory. 1. From the home screen, press [MENU], then select 9. Settings & Tools, 0. -
Page 54: Set - Up Wizard
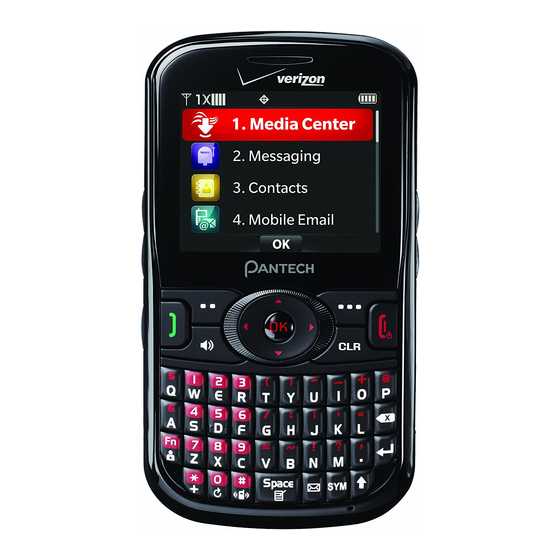
STATUS Check the latest Software Download/Update status. 1. From the home screen, press [MENU], then select 9. Settings & Tools, MEDIA CENTER 0. Phone Info, 4. Software Update. 2. Select Status. Your phone provides a unique feature - Media Center - that enables you to download ringtones, wallpapers, games and more from your CHECK NEW network to your phone. -
Page 55: Media Center
TUNES & TONES 2. Select the tune or tone you want to play, then press the OK Key [PLAY]. 3. To stop, press the OK Key [STOP]. The Tunes & Tones menu allows you to manage ringtones, and sound files. It also allows you to get new ringtones. -
Page 56: Pictures
• Send via Email: Allows you to send the sound via Email. • Alert Sounds: Press the corresponding number key to set the ringtone for one of the • To Online Album: Allows you to upload the selected tone to the online server. following options: All Messages TXT Message... -
Page 57: Games
• File Info: Displays the following information about the selected picture: 6. Color Effects: Press the Directional Key left or right to select color effects from the File Name Date Time Resolution Size following: Normal Antique Black and White Negative 7. -
Page 58: Mobile Web
2. Select the application you want to remove, then press the Right Soft Key EXTRAS [Options]. DOWNLOADING NEW APPLICATIONS 3. Select Erase Cancel Subscr. and press the OK Key. With highlighted, To download Applications: press the OK Key to remove the application. 1. -
Page 59: Messaging Menu
WHEN A NEW MESSAGE ARRIVES 1. The following display appears when a new message arrives. 2. To display the message, select View Now and then press the MESSAGING MENU OK Key. This chapter addresses Voicemail, TXT, Picture, NEW MESSAGE Voice Messaging functions including: TXT MESSAGE When a New Message Arrives Erase All... - Page 60 PICTURE MESSAGE • Remove Slide: Removes an inserted slide message. • Cancel Message: Cancel the message and select whether to save it in Drafts. 1. From the home screen, press [MENU], then select Messaging, 1. New 10. When completed, press the OK Key [SEND] to send the picture message. Message.
-
Page 61: Messages
9. When completed, press the OK Key [SEND] to send the voice message. Lock: Locks the messages. Unlock: Unlocks the messages. Mark as Read Mark as Unread: Marks the messages as read or unread. MESSAGES • Sort Alphabetically Sort By Time: Sorts the list in alphabetical order or by time. -
Page 62: Inbox
INBOX • Sort By Sender: Sorts the list by sender. • Sort By Time: Sorts the list by time. Inbox menu is displayed when Messages View is set to Time. The Inbox • Sort By Size: Sorts the list by size. manages received text, picture and web alert messages. -
Page 63: Drafts
• Forward: Forwards the message to another recipient. ERASE ALL • Resend: Resends the message. To erase all messages stored in your phone: • Lock Unlock: Locks or unlocks the message. 1. From the home screen, press [MENU], then select Messaging. -
Page 64: Mobile Im
MOBILE IM ENTRY MODE Allows you to set the default Entry Mode for messaging. For example, if Abc mode is set Mobile IM menu allows you to send and receive instant messages using one of the to Entry Mode, its icon will appear in the text entry field as default. following messenger services: 1. - Page 65 QUICK TEXT DELIVERY RECEIPT Allows you to create a new Quick Text or edit the predefined Quick Text. Allows you to set delivery receipts for sent messages. 1. To create a new Quick Text, press the Right Soft key [Options], then select 1.
-
Page 66: Chapter 7. Safety And Warranty
SAFETY INFORMATION FOR WIRELESS HANDHELD PHONES READ THIS INFORMATION BEFORE USING YOUR HANDHELD SAFETY AND WARRANTY PORTABLE CELLULAR TELEPHONE EXPOSURE TO RADIO FREQUENCY SIGNALS This chapter addresses the safety guidelines and precautions to follow when Your wireless handheld portable telephone is a low power radio transmitter operating your phone. - Page 67 Do not use the phone with a damaged antenna. If a damaged antenna comes PACEMAKERS into contact with the skin, a minor burn may result. Please contact your local The Health Industry Manufacturers Association recommends that a minimum dealer for replacement antenna. separation of six (6”) inches be maintained between a handheld wireless phone and a pacemaker to avoid potential interference with the pacemaker.
- Page 68 VEHICLES Areas with a potentially explosive atmosphere are often, but not always, clearly marked. They include fueling areas such as gas stations; below deck on boats; RF signals may affect improperly installed or inadequately shielded electronic fuel or chemical transfer or storage facilities; vehicles using liquefied petroleum systems in motor vehicles.
-
Page 69: Safety Information For Fcc Rf Exposure
SAFETY INFORMATION FOR FCC RF EXPOSURE SAR INFORMATION WARNING! READ THIS INFORMATION BEFORE USING THIS MODEL PHONE MEETS THE GOVERNMENT’S REQUIREMENTS FOR EXPOSURE TO RADIO WAVES. CAUTIONS Your wireless phone is a radio transmitter and receiver. It is designed and In August 1996 the Federal Communications Commission (FCC) of the United manufactured not to exceed the emission limits for exposure to radiofrequency States with its action in Report and Order FCC 96-326 adopted an updated safety... -
Page 70: Hearing Aid Compatibility (Hac) For Wireless
depending upon available accessories and FCC requirements). While there may We are committed to providing a selection of compatible devices for our be differences between the SAR levels of various phones and at various positions, customers who wear hearing aids. they all meet the government requirement for safe exposure. -
Page 71: Fda Consumer Update
hearing aid professional about the extent to which your hearing aids are immune suggested that some biological effects may occur, but such findings have not to interference, if they have wireless phone shielding, and whether your hearing been confirmed by additional research. In some cases, other researchers have aid has a HAC rating. - Page 72 • Occupational Safety and Health Administration 4. What are the results of the research done already? • National Telecommunications and Information Administration The research done thus far has produced conflicting results, and many studies have suffered from flaws in their research methods. Animal experiments The National Institutes of Health participates in some inter-agency working group investigating the effects of radiofrequency energy (RF) exposures characteristic of activities, as well.
- Page 73 that is directly applicable to human populations, but 10 or more years’ follow-up 7. How can I find out how much radiofrequency energy exposure I can get may be needed to provide answers about some health effects, such as cancer. by using my wireless phone? This is because the interval between the time of exposure to a cancer-causing All phones sold in the United States must comply with Federal Communications...
- Page 74 greatly improve the consistency of measurements made at different laboratories reduce RF exposure. Some groups sponsored by other national governments on the same phone. SAR is the measurement of the amount of energy absorbed have advised that children be discouraged from using wireless phones at all. in tissue, either by the whole body or a small part of the body.
-
Page 75: Avoid Potential Hearing Loss
12. Where can I find additional information? The amount of sound produced by a portable audio device varies depending on the nature of the sound, the device, the device settings and the headphones. You For additional information, please refer to the following resources: should follow some commonsense recommendations when using any portable •... -
Page 76: Fcc Compliance Information
YOU CAN OBTAIN ADDITIONAL INFORMATION ON THIS SUBJECT FROM FCC COMPLIANCE INFORMATION THE FOLLOWING SOURCES: This device complies with Part 15 of FCC Rules. Operation is subject to the following two conditions: AMERICAN ACADEMY OF AUDIOLOGY (1) This device may not cause harmful interference, and 11730 Plaza America Drive, Suite 300 (2) This device must accept any interference received. -
Page 77: 12 Month Limited Warranty
12 MONTH LIMITED WARRANTY (f) Product damaged from external causes such as fire, flooding, dirt, sand, weather conditions, battery leakage, blown fuse, theft or improper usage of Personal Communications Devices, LLC. (the “Company”) warrants to the original any electrical source. retail purchaser of this handheld portable cellular telephone, that should this product or any part thereof during normal consumer usage and conditions, be The Company disclaims liability for removal or reinstallation of the product,... - Page 78 THE EXTENT OF THE COMPANY’S LIABILITY UNDER THIS WARRANTY IS LIMITED TO IN USA: Personal Communications Devices. THE REPAIR OR REPLACEMENT PROVIDED ABOVE AND, IN NO EVENT, SHALL THE 555 Wireless Blvd. COMPANY’S LIABILITY EXCEED THE PURCHASE PRICE PAID BY PURCHASER FOR Hauppauge, NY 11788 THE PRODUCT.
Need help?
Do you have a question about the Caper and is the answer not in the manual?
Questions and answers