
Related Manuals for LG Cloud T Series CBT42


Summary of Contents for LG Cloud T Series CBT42
- Page 1 OWNER'S MANUAL LG CLOUD T SERIES BOX Please read the safety information carefully before using the product. LG Cloud T Series Box Model List CBT42 www.lg.com...
-
Page 2: Table Of Contents
Table of Contents ASSEMBLING AND PREPARING Unpacking Parts and Buttons Product Installation - Using in Horizontal Position - Using in Vertical Position - Mounting on the Back of the Monitor CONNECTING LAN/ PERIPHERALS - LAN Connection - DVI Connection - Extended Monitor Connection - Peripheral device connection TROUBLESHOOTING SPECIFICATIONS Power Indicator... -
Page 3: Assembling And Preparing
ASSEMBLING AND PREPARING ASSEMBLING AND PREPARING Unpacking Please check whether all the components are included in the box before using the product. If there are missing components, contact the retail store where you purchased the product. Note that the product and components may look different from those shown here. Owner's Manual/Card Power Cord AC/DC Adapter Four Screws Main Unit Stand Base Mount Bracket CAUTION Only use an approved LG power adapter. Damage caused by other power adapters is not covered by warranty. NOTE Note that the components may look different from those shown here. Without prior notice, all information and specifications in this manual are subject to change to improve the performance of the product. To purchase optional accessories, visit an electronics store or online shopping site or contact the retail store where you purchased the product. -
Page 4: Parts And Buttons
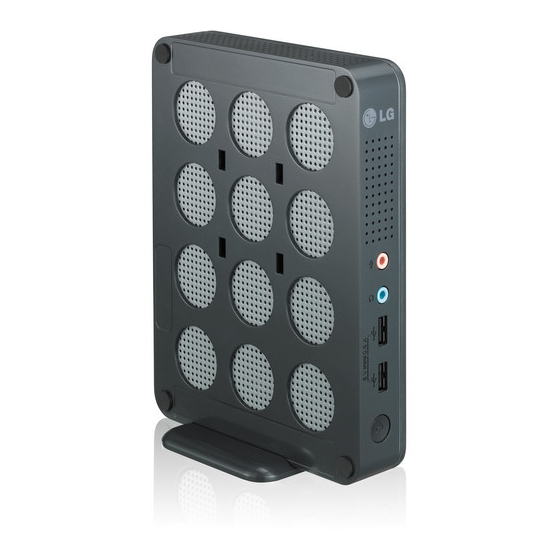
ASSEMBLING AND PREPARING Parts and Buttons Power Indicator & Power Button On: Power On Off: Power Off Front Side Rear Side Input Connectors... -
Page 5: Product Installation
ASSEMBLING AND PREPARING Product Installation Mounting on the Back of the Monitor Using in Horizontal Position Fix the mount bracket on the back of the monitor with 4 screws as illustrated below. NOTE If this product is used with upside down, it may not work properly. Use the product with the Kensington lock facing upward. Using in Vertical Position Firmly attach the stand on the bottom of the product as illustrated below. Using a coin, turn the screw clockwise to secure the stand base. Put the product on the two latches as illustrated below. Assemble the product by aligning the below two holes out of 4 holes on the product. NOTE CAUTION Attach the stand base to the The product may not be mounted on some stand hinge with monitors with mount bracket. -
Page 6: Connecting Lan/Peripherals
Connecting LAN/Peripherals CONNECTING LAN/PERIPHERALS LAN Connection DVI Connection Connect the router or switch to the monitor using a Transmits digital video signals to the monitor. Con- LAN cable as illustrated below. nect the product using the DVI cable as illustrated below. CAUTION NOTE Connect the input signal cable The LAN cable is sold separately. and turn in the direction of the The following LAN cable type can be used: arrow. To prevent disconnection Standard: IEEE 802.3 ETHERNET secure the cable tightly. Connect the LAN cable and the peripheral de- vices to use the CITRIX cloud monitor. NOTE When connecting the power cord to the outlet, use a grounded (3-hole) multi-socket or a grounded power outlet. DVI cable is not included in the basic com- ponents. Use the DVI cable provided with the monitor or the standard DVI cable. -
Page 7: Extended Monitor Connection
Connecting LAN/Peripherals Extended Monitor Connection Peripheral device connection Transmits analog signals to the monitor. Connect Use the USB, microphone, and headphone port to the product using the D-sub cable as illustrated connect a peripheral device to the BOX. Connect below. as illustrated. Front Side Rear Side NOTE If the main/sub screen was changed after extended monitor was connected, the main/ sub can be changed in Setup. - Page 8 Connecting LAN/Peripherals NOTE Peripheral devices are sold separately. The USB ports can be used to connect the keyboard, mouse, and other USB devices. For an angle plug earphone/microphone, it is difficult connect it with a peripheral device, so use a straight type. Angle Type Straight Type NOTE The cloud server settings may affect the perfor- mance of the headphones, earphones or speak- ers depending on the connected cloud server. The cloud server settings may affect the functions or speed of the specific USB stor- age device depending on the connected cloud server.
-
Page 9: Troubleshooting
TROUBLESHOOTING TROUBLESHOOTING Nothing is displayed on the screen Is the power adapter of the Box y Check if the power cord is correctly plugged in to the power outlet. plugged in ? Is the power indicator on? y Check the power indicator. Is the power indicator displaying as y Adjust the brightness and the contrast of the connected monitor. red? y Check whether the monitor and the Box are properly connected to DVI Are the BOX and the monitor con- nected with the signal cable? cable or D-SUB cable (using DVI to D-Sub gender). NOTE This box type product is used by connecting the monitor. If the monitor does not work normally, the screen may not be displayed correctly. -
Page 10: Specifications
Recommended Resolution 1920 x 1200 @ 60 Hz (D-SUB, DVI-D) Power Voltage 19 V 1.2 A Power consumption (Typ.) Cloud Mode 8 W (Cloud) Off Mode ≤ 0.5 W Dimension Dimensions (Width x Height x Depth) With stand 70.3 mm x 189.3 mm x 143.6 mm Without Stand 185 mm x 30.5 mm x 143.6 mm Weight (Without 0.65 kg Packaging) AC/DC adapter Type ADS-40SG-19-3 19025G, manufactured by SHENZHEN HONOR ELECTRONIC Or Type LCAP21, manufactured by LIEN CHANG ELECTRONIC ENTERPRISE Or Type PSAB-L203A, manufactured by LG Innotek Co.,Ltd Output: 19 V 1.3 A Environmental Operating Condition Temperature: 10°C to 35°C; Humidity: 10% to 80% Conditions Storing Condition Temperature: -20°C to 60°C; Humidity: 5% to 90% The specifications are subject to change without notice. Power Indicator Mode LED Color On Mode Off Mode... - Page 11 Declaration of Conformity Trade Name: LG Model : CBT42L Responsible Party: LG Electronics Inc. Address : 1000 Sylvan Ave. Englewood Cliffs NJ 07632 U.S.A TEL: 201-266-2534 *above information is only for USA FCC Regulatory This device meets the EMC require- ments for home appliances (Class B) and is intended for home use.