
Related Manuals for LG Centric PCS150R Pro


Summary of Contents for LG Centric PCS150R Pro
- Page 1 ® PCS150R Pro:Centric Server Installation & Setup Guide Warranty P/N: 206-4157 (Rev B) © Copyright 2013 LG Electronics U.S.A., Inc.
-
Page 2: Safety Warnings
CAUTION: Do not attempt to modify this product in any way without written authorization from LG Electronics U.S.A., Inc. Unauthorized modification could void the user’s authority to operate this product. -
Page 3: Important Safety Instructions
When a cart is used, use caution when 20. Test Equipment moving the cart/apparatus combination in In some cases, LG has supplied or recom- order to avoid injury from tip-over. mended the use of test equipment and 13. Refer all servicing to qualified service devices for the setup and testing of the equip- personnel. - Page 4 IMPORTANT SAFETY INSTRUCTIONS 24. Safety Check (Continued from previous page) Upon completion of any service or repairs to 21. Damage Requiring Service this product, ask the service technician to Unplug this product from the wall power out- perform safety checks to determine that the let and refer servicing to qualified service product is in proper operating condition.
-
Page 5: Important Safety Instructions
IMPORTANT SAFETY INSTRUCTIONS (Continued from previous page) E. Mains Outlet Earthing The apparatus with Class I construction must B. Reduced Air Flow be connected to a mains socket outlet with a Installation of the equipment in a rack should protective earthing connection. be such that the amount of air flow required for safe operation of the equipment is not PCS150R Installation on a Flat Surface... -
Page 6: Table Of Contents
Table of Contents Safety Warnings ..... . . 2 Set the Time Zone ....24 Important Safety Instructions. -
Page 7: Pcs150R Product Description
PCS150R Product Description ® The LG PCS150R Pro:Centric server is a stand-alone, remotely-controlled processor and controller for the Pro:Centric system. The server can be used to capture data from an Internet source, assemble the data as display pages, and output the pages in DTV format over an ASI or RF interface or an IP stream. -
Page 8: Setup Information
Setup Information Check the following items before you begin the PCS150R installation and setup procedures. ASI Output (Optional) __ If the system is using ASI ouput, install the modulator and upconverter that will receive the ASI output signal from the PCS150R. Refer to the manufacturer’s documentation. PCS150R __ Unpack the PCS150R Pro:Centric server unit and all accessories. -
Page 9: Rear And Front Panel Overviews
Rear and Front Panel Overviews PCS150R Rear View MODEL: PCS150R DATE: xx/xx/xx I IIIII IIIIIIII IIIIIIIIIIIIII IIIIII IIIIIIIIIIIIIII IIIIIII *201-121 50025* RF-O UT FIRMW ARE VER: ASI- OUT R 4.6 MAC ADDRE SS: <Eth0> xx:xx:xx :xx:xx:x x <Eth1> xx:xx:xx :xx:xx:x x RF OUT ASI OUT USB Ports... -
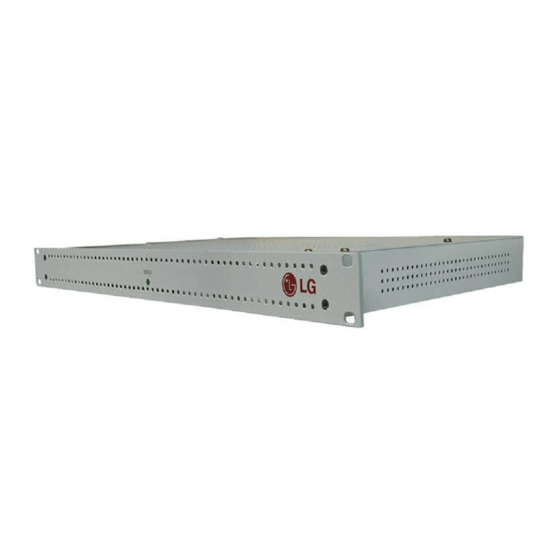
Page 10: Rack Installation
Rack Installation Typical Rack Installation 1. Carefully slide the chassis into a standard 19-inch equipment rack. 2. Use all four mounting screws to secure the chassis to the rack. STAT US STATUS LED Rack-mount Considerations A. Elevated Operating Ambient If installed in a closed or multi-unit rack assembly, the operating ambient temperature of the rack environment may be greater than room ambient. -
Page 11: System Setup
System Setup Refer to the following diagrams, and complete the system installation as described on pages 14 to 17. Caution: Do NOT make system connections until instructed to do so during the system installation procedure. In some instances, configuration steps must be performed before physical connections are made. -
Page 12: Typical Setup Flow Chart For Pcs150R
System Setup (Cont.) Typical Setup Flow Chart for PCS150R with RF Output Network Laptop PCS150R RS-232 Port Connection eth0 eth1 ASI Out RS-232 Combiner Distribution RF Out System Cable 206-4157... -
Page 13: Typical Setup Flow Chart For Pcs150R With Ip Output
System Setup (Cont.) Typical Setup Flow Chart for PCS150R with IP Output Network PCS150R eth0 eth1 ASI Out Distribution RS-232 Network CAT5E Cable RF Out Laptop RS-232 Port Connection VPN Network Connections Overview Pro:Centric VPN Server VPN Client Internet/ PCS150R Laptop VPN Client 206-4157... -
Page 14: Typical System Installation
System Setup (Cont.) Typical System Installation (see also Typical Setup Flow Charts and VPN Network Connections Overview diagrams) 1. If your system is using ASI output, make the following two connections; otherwise, go to step 2. • Connect a 75 ohm BNC-to-BNC coaxial cable between ASI OUT on the PCS150R and ASI IN on the modulator. - Page 15 Enter to refresh the screen.) At the login as: prompt, type admin and press Enter. Then, type the admin user password (provided by LG) at the password: prompt. b) At the Command > prompt, type setip and press Enter. The system will display the current network configuration, followed by the Network Configuration Menu.
- Page 16 At the login as: prompt, type admin and press Enter. Then, type the admin user password (provided by LG) at the password: prompt. b) Use the PCS150R “tz” and/or “time” commands, as necessary, to set the date and time on the PCS150R.
-
Page 17: System Setup
System Setup (Cont.) (Continued from previous page) c) If you changed the time zone and/or the NTP configuration, you will be prompted to reset the system. When you have completed your date and time configuration activities, at the Command > prompt, type reset and press Enter. The reset process may take up to two minutes, after which the PCS150R resumes normal operation. -
Page 18: Network And Communication Setup
Network and Communication Setup This section describes PCS150R communication options for configuration purposes. Note: Before you proceed with any additional server configuration, the system should be installed and operating as described in the system setup procedure on pages 14 to 17. Also note that configuration updates periodically require that you reset the PCS150R. -
Page 19: Pcs150R Configuration Options
PCS150R Configuration Options (Cont.) Log In to the PCS150R and Access the Main Menu Note: The PCS150R must be connected to an IP network for SSH client access. For direct access to the PCS150R RS-232 port, use a DB9 Male-to-DB9 Female RS-232 straight- through serial cable. -
Page 20: View System Information
PCS150R Configuration Options (Cont.) View System Information 1. Log in to the PCS150R as described on the previous page. 2. At the Command > prompt, type info and press Enter. The System Information display identifies important information about the PCS150R, including the unit serial number, hardware ID (firmware version), software versions, MAC addresses, and IP addresses, for example: PCS150R Pro:Centric Server v5.2... - Page 21 PCS150R Configuration Options (Cont.) (Continued from previous page) 3. To return to the Command > prompt without making any changes, you can simply press Enter. Otherwise, select the appropriate option, depending on the parameter you wish to change: • Program Number: Type 1 and press Enter to change the video program number. At the Enter new value for Program number [47]: prompt, type a new program number and press Enter.
-
Page 22: Configure Network Settings
PCS150R Configuration Options (Cont.) Configure Network Settings This option enables you to configure the network settings of the PCS150R Ethernet ports. ETHERNET-0 (eth0) is used for remote communication purposes, while ETHERNET-1 (eth1) is designated for PCS150R IP output. 1. Log in to the PCS150R as described on page 19. 2. - Page 23 PCS150R Configuration Options (Cont.) (Continued from previous page) 5. At the Host name [pcs150r]: prompt, either press Enter to accept the default value in square brackets, or type a new host name and then press Enter. 6. At the Using DHCP (Y/N) [Y]: prompt, type y to use DHCP, or type n to specify the network IP addresses.
-
Page 24: Set The Time Zone
PCS150R Configuration Options (Cont.) (Continued from previous page) New Network Configuration Interface eth0 Host name: pcs150r Using DHCP: Interface eth1 Host name: pcs150r Using DHCP: Host IP address: 10.165.60.92 Network mask: 255.255.255.0 Gateway IP address: DNS servers Primary DNS: 68.94.156.1 Secondary DNS: 68.94.157.1 Do you want to save the new configuration? (Y/N):... -
Page 25: United States
PCS150R Configuration Options (Cont.) (Continued from previous page) 4. The system displays the following prompt for a location, followed by a list of options: Please identify a location so that time zone rules can be set correctly. Please select a continent or ocean. At the #? prompt, type the number that corresponds to the appropriate option for your location, and then press Enter. -
Page 26: Set The Date And Time
PCS150R Configuration Options (Cont.) Set the Date and Time Note: This command is available only with PCS150R version 5.2 or later software. By default, the PCS150R is synchronized with an NTP client and configured for the US Eastern time zone. If the PCS150R is connected to the Internet, the NTP client will periodically update the time setting on the PCS150R. -
Page 27: Change The Login Password
PCS150R Configuration Options (Cont.) (Continued from previous page) a) At each of the following prompts, type the year, month, and day, respectively. Note that all three of these fields require numerical values. Press Enter after each entry. If applicable, you can also press Enter at each prompt to accept the default value in square brackets. -
Page 28: Via Ethernet
PCS150R to cease normal operation. This option enables you to update the PCS150R application or OS software via the Ethernet. The appropriate update file must be provided by LG; the system will not download an improper file. -
Page 29: Update The Vpn Setup
This option enables you to update the VPN client via a serial link to the PCS150R. The appropriate update file must be provided by LG; the system will not transfer an improper file. 1. Log in to the PCS150R as described on page 19. -
Page 30: Troubleshooting
Troubleshooting PCS150R Setup The following sections provide basic troubleshooting information for the PCS150R. Equipment Setup Review Make sure all connectors and connections are tight and secure on all entertainment system components. Network Setup If the network is configured for DHCP but the PCS150R has not been assigned an IP address, i.e., the Eth0 IP field in the PCS150R System Information display is blank: 1. -
Page 31: Pcs150R Communication
Note: For example, if the PCS150R is is on the same subnet as the configured with IP address: 192.168.1.x PCS150R’s IP address. If and Network mask: 255.255.255.0, the necessary, adjust and then PC’s IP address cannot be: 192.168.2.x. reattempt communication. Problem solved? Contact LG. 206-4157... -
Page 32: Specifications
Specifications Dimensions Height: 1.692 inches (42.977 mm) Width: 19.0 inches (482.6 mm) (for EIA standard 19-inch rack mount) Depth: 8.5 inches (215.9 mm) Weight: 3.45 pounds (1.56 kgrms) rack-only weight Environmental Storage Conditions Temperature: -20° to 70° Celsius -4° to 158° Fahrenheit Humidity: 95% non-condensing Environmental Operating Conditions... -
Page 33: Document Revision History / Notes
Document Revision History / Notes Document Revision History Date Description May 2011 Revision A: New document June 2013 Revision B: Configuration and specifications updates Product documentation is available online at: www.LGsolutions.com. Notes 206-4157... -
Page 34: Open Source Software Notice
Copyright © 1996-1998, 2003 William Allen Simpson all referenced license terms, warranty disclaimers and copy- Copyright © 2003 Peter Stuge right notices are available for download. LG Electronics Copyright © 2005 Reyk Floeter will also provide open source code to you on CD-ROM for a Copyright ©... -
Page 35: Warranty
God or other causes beyond the control of LG. Any alteration of the product after manufacture voids this warranty in its entirety.
Need help?
Do you have a question about the Centric PCS150R Pro and is the answer not in the manual?
Questions and answers