
Related Manuals for Tusa B.C.J.


Summary of Contents for Tusa B.C.J.
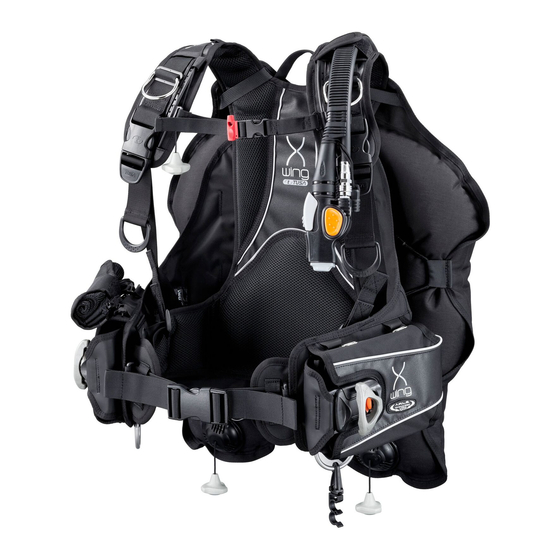
- Page 1 BUOYANCY COMPENSATOR JACKET OWNER’S MANUAL BEFORE USING ANY TUSA B.C.J. READ THIS MANUAL COMPLETELY. 201312v4...
- Page 3 NOT A LIFEJACKET: IT DOES NOT GUARANTEE A HEAD UP POSITION OF THE WEARER AT THE SURFACE. IMPORTANT NOTICE : TUSA BCJ is intended to be used down to a 50 meter (164 feet) maximum water depth and can be used in cold water with temperature below 10°C.
- Page 4 NOTICE: The PPE (Personal Protective Equipment) mentioned in this User’s Manual was submitted to tests for validation of the design and certified according to Art. 10 of Directive 89/686/EEC by ITALCERT - Viale Sarca 336, 20126 Milano ITALY, Notified body n 0426.
-
Page 5: Warning Statements
It is also strongly recommended to have your B.C.J. checked regularly by your authorized TUSA dealer/service center to ensure that the inflator and/or other mechanical devices are operating properly. - Page 6 Buoyancy Compensator Jacket (B.C.J.). If you have any questions concerning the use or care of your B.C.J. contact your TUSA Dealer, your diving instructor, or the nearest TUSA Distributor.
- Page 7 Check your system before dive: a low pressure gauge connected to LP Ports must not read over 1.2MPa (12bar), and under 0.8MPa (8bar) if tank is full. It is recommended that your TUSA dealer installs your QD Hose on your regulator. WARNING: Do not connect QD Hose to Regulator High Pressure(H.P.) Port.
- Page 8 To Your B.C.J. (Fig. 1) Connect QD Hose Inflator by pulling Quick-Disconnect Collar back with thumb and forefinger, while pushing Hose Coupling onto Inflator Plug. Release Collar when Coupling is engaged fully. Pull gently but firmly on Hose to check if Coupling is securely joined to Plug.
- Page 9 B.C.J. DEFLATION Rapid Exhaust Deflation (Fig. 7) Rapid Exhaust feature is a standard item on the TUSA B.C.J.’s allowing the diver to vent air rapidly from the B.C.J. Procedure for activating valve is as follows: 1. Pull gently on forward Inflator Assembly to activate Exhaust Valve.
- Page 10 It is also possible to deflate rapidly by pressing the APA deflation button. Of course, it is equipped with the Rapid Exhaust Deflation, which is a feature of TUSA BCJs. This function “enables you to exhaust rapidly by grasping the APA inflator main unit with one hand and just pulling in forward direction”.
-
Page 11: Pre-Dive Inspection
2. Inflate B.C.J. until it feels firm. Let stand for 30 minutes. If the bag is not as firm as when inflated, do not use. Return B.C.J. to the nearest TUSA Dealer for inspection and/or repair. 3. It is important to have the APA system serviced every 12 month or after 100 dives (whichever comes first). - Page 12 Shoulder Strap Adjustment (BC0501) ● The shoulder belt webbing may be adjusted to best fit each individual’s needs (1) The webbing may be fed through the D-ring and keeper until proper length is desired (2) The D-ring attached to the sternum strap should be positioned at the lower edge of the divers chest.
- Page 13 (3) Now pass the webbing up through the #4 (largest) slot at the end of the buckle. Feed the webbing back underneath the buckle and push it up through slot #1. (Fig. 13B) (5) Excess webbing material may be cut from the (Fig.
- Page 14 Loss of the tank could result in loss of buoyancy control, and/or air supply and personal injury could result. If you have any questions about proper use for this product, ask your diving instructor, your TUSA dealer, or your TUSA distributor.
- Page 15 LOADING THE WEIGHTS (BCJ-8000C) The BCJ-8000C is equipped with a weight loading system. If the weights are loaded into the weight loading system, the underwater trim and balance of the BCJ is ideal. Load the weights as outlined below. The photos are for reference only. When loading weights, do so only after attaching the BCJ onto the tank.
- Page 16 6. After securely inserting the weight cartridge up to the back of the mounting holder, close the holder by snapping shut the buckle of the cover section on the mounting holder.(Fig. 29) (Fig. 29) ※ Do not place any objects on the weight release knob as the buckle could slip, causing the weight to fall out.
- Page 17 LOADING THE WEIGHTS (ex. BCJ-2100, 1800, 8000C) Except for the BCJ-2100, 8000C and 1800 are equipped with a weight loading system. The weight loading system loads weights to optimize the balance of the BCJ in the water. Use the following procedure to load weights. The photographs were specially made to use for the explanation.
- Page 18 6. After inserting the weight cartridges all the way into the holder, close the weight holder’s cover buckle as shown in Fig. 40 and Fig. 41 until it locks closed. 7. Finally, lock the safety lock lever to complete insertion of the weights. (Fig. 42). (Fig.
- Page 19 LOADING THE WEIGHTS (BCJ-1800) The BCJ-1650 has a weight loading system. Use the following procedure to mount weights. * The strength of the Hook & Loop fastener is set on the condition that it be used underwater. Therefore, you will encounter strong resistance when carrying out setting it out of the water.
- Page 20 ON DEMAND WEIGHT RELEASE PROCEDURE (BCJ-1800) 1. Securely grab hold of the weight release knob as in the photograph. (Fig. 53) 2. When you pull on the knob forcefully, the Hook and Loop fastener of the cartridge closure cover peel apart. (Fig. 54) 3.
- Page 21 REMOVABLE ROLL OUT MESH POCKET (BCJ-8000C) Located above the right pocket on the BCJ-8000C is a removable mesh pocket. (Fig. 57, 58) (Fig. 57) (Fig. 58) Release the two hook pins on the top of the main pocket as shown in the photograph to remove the mesh pocket.
- Page 22 *ADJUSTING THE ANCHOR BELT LENGTH (BCJ-9300, 5560, 3860, 4000) If you fill the cartridge up completely with weights, the pocket of the bladder tends to hang down under the weight. To compensate for this, tighten the strap on the anchor belt so that you feel a little weight.
- Page 23 How to Mount Single and Twin Tanks to BC0501 (1) Remove the top back pad velcro strap from the BC harness D-ring exposing the back plate wing nuts. (Fig. 68A) (2) Remove both wing nuts, freeing the dual tank bands or single tank adapter.
-
Page 24: Dump Valve
(3) Do up the waist buckle (Fig. 71), pulling evenly on both ends of the waist strap to tighten it (Fig. 72). (Fig. 71) (Fig. 72) (4) Finally, do up the chest buckle (Fig. 73), pulling the end of the chest strap to one side to tighten it. (Fig. - Page 25 ADJUSTABLE STERNUM STRAP (BCJ-8000C) The position of the sternum strap on the BCJ-8000C can be adjusted vertically. By sliding on both sides of the sternum strap you can adjust the sternum height to the desired position. (Fig. 78) (Fig. 79) (Fig.
- Page 26 CHEST BELT POSITION ADJUSTER (BCJ-9300, 7000) The position of the BCJ-9300 and 7000 chest belt can be adjusted up and down. The product is set in the upper position when it is shipped. (Fig. 84) In the lower position fits better, slip the Slick Clip of the chest belt from the ®...
- Page 27 ROLLUP BUCKLE (BCJ-1800) The BCJ-1800 weighs less than 2kg/4.4lbs and is designed for destination diving. A buckle located behind the right side pocket can be used to roll and pack the BCJ-1800 for travel. Usage Method 1. Slide the female buckle on the right side of the waist belt (left side from your perspective) to the end of the webbing.
- Page 28 Be sure to store the equipment in the normal fashion except when transporting. CARE AND MAINTENANCE OF YOUR B.C.J. With proper care and maintenance, your TUSA B.C.J. should provide years of trouble-free service. 1. Rinse the B.C.J. thoroughly inside and out with fresh water after every use as follows.
- Page 29 4. Never rest sharp or heavy objects on the B.C.J. After every use: Rinse inside and out with fresh water and drain. Inflate for storage. TUSA strongly recommends inspection, overhaul and scheduled parts replacement at least once a year in order to ensure the optimum functioning of the BCJ.
- Page 32 TOKYO LOS ANGELES SYDNEY AMSTERDAM T.E.C. [TABATA EUROPE CORPORATION] B.V. Den Brielstraat 2b, 1055RV, Amsterdam, The Netherlands TEL 020-58-11-280/FAX 020-58-11-285 (Country Code=31) TABATA U.S.A. INC. 2380 Mira Mar Ave., Long Beach, CA 90815, U.S.A. TEL 562-498-3708/FAX 562-498-1390 (Country Code=1) TABATA AUSTRALIA PTY. LTD. 4D James Ruse Business Park 6 Boundary Road, Northmead, Sydney, NSW 2152, Australia TEL 02-9890-4555/FAX 02-9890-5222 (Country Code=61) TABATA CO., LTD.
Need help?
Do you have a question about the B.C.J. and is the answer not in the manual?
Questions and answers