Table of Contents

Related Manuals for Tusa DC-Solar IQ 1204


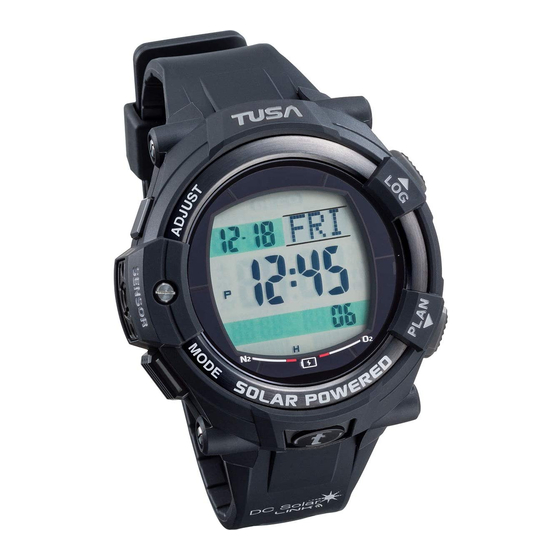
Summary of Contents for Tusa DC-Solar IQ 1204
- Page 1 DC-Solar IQ 1204 Dive Computer Owner’s Manual EN60950-1/EN300 328/EN301 489-1/EN301 489-17/EN62479/ EN13319* * when you switch to Manual Dive Mode The CE mark is used to mark conformity with the European Union EMC directive 2004/108/EC. 1st.
- Page 2 Thank you for your selection of the TUSA IQ-1204 Dive Computer. ◆ This dive computer does not conform to the diver watches(100m) stated in the ISO6425 and JISB7023. Applications This is a dive computer to support no decompression dive safely.
-
Page 3: Safety Precautions
Safety Precautions Please read the followings before use. TUSA shall assume no responsibility on damages, lost profit and/or any claims caused in use or by malfunctions of this dive computer from customers and any third parties. Danger • Make sure to understand how to use, warnings, and cautions of this dive computer with this Instruction Manual completely before use. - Page 4 • Check the battery power level is “H” before dive. If power level gets low and warning (WARNING!! BATT) is released while dive, exit as soon as possible and recharge the dive computer. ● Even this warning is released in dive, enough power for dive remains.
- Page 5 • The dive computer is applicable to the air with FO 21 % and Nitrox (EANx) gas with FO 22-100%. (4 mixture gases are available). The dive computer can not be used with any other mixed gas. • Each diver should be responsible in planning and conducting of safety dive according to each diver’...
-
Page 6: Table Of Contents
Contents 1. About This Instruction Manual ..........10 2. Things To Check Before Using The Dive Computer ..10 3. Charging the Dive Computer ..........11 Charging Guide ..................11 Power Levels ................... 13 Power Recovery Mode ................14 Charging Times ..................15 Power Saving ................... - Page 7 Warning Of Three Minutes To Decompression........32 Decompression Dive ................32 Decompression Stop Violation ..............33 Out Of Measurement Range ..............34 Indicator (OLI) ..................35 ......................35 M Value ....................36 Nitrox (EANx) Dive ................... 36 End Of Dive ....................37 Dive At High Altitude ................
- Page 8 Multiple Gas Settings Diving (Accelerated Decompression) ....57 How to switch the gas ................57 Regarding The Accelerated Decompression Log ........58 Set Safety Factor ..................58 Safety Factor setting ................59 Set M Value Warning ................60 Depth Interval Alarm ................61 Setting Of Depth Interval Alarm ...............
- Page 9 To Stop The Alarm ................... 77 16. Checking The Current Time In A Different Time Zone ..78 To Enter The World Time Mode ............... 78 To View The Time In Another Time Zone ..........78 To Specify Standard Time Or Daylight Saving Time (DST) For A City ....................
- Page 10 World Time Mode ..................99 Charging ....................99 23. Specification................ 101 Accuracy at normal temperature ............101 Timekeeping ..................101 Calendar system ..................101 Other ...................... 101 Sensor precision: ................... 101 % ....................101 Water proof .................... 102 Max. dive log ..................102 Digital Compass..................
-
Page 11: About This Instruction Manual
1. About This Instruction Manual • Button operations are indicated using the letters shown in the illustration. • Note that the dive computer illustrations in this Instruction Manual are intended for reference only, and so the actual dive computer may appear some what different than depicted by an illustration. -
Page 12: Charging The Dive Computer
2. Check the Home City and the daylight saving time (DST) setting. Use the procedure under "To configure Home City and summer time settings" to configure your Home City and daylight saving time settings. Important! World Time Mode data depends on correct Home City, time, and date settings in the Time mode or Surface Mode. - Page 13 When wearing the dive computer, make sure that its face is not blocked from light by the sleeve of your clothing. • The dive computer may enter a sleep state if its face is blocked by your sleeve even only partially. Warning! Leaving the dive computer in bright light for charging may make it become quite hot.
-
Page 14: Power Levels
Power Levels You can get an idea of the dive computer's power level by observing the battery power indicator on the display. Battery power indicator Level Battery Power Indicater Function Status All functions enabled. All functions enabled. Mode cannot be changed to Dive Mode. ・... -
Page 15: Power Recovery Mode
Once the battery reaches Level 2 (M) after falling to Level 6, reconfigure the current time, date, and other settings. • Display indicators reappear as soon as the battery is charged from Level 6 to Level 2 (M). • Leaving the dive computer exposed to direct sunlight or some other very strong light source can cause the battery power indicator to show a reading temporarily that is higher than the actual battery level. -
Page 16: Charging Times
• Even if battery power is at Level 1 (H) or Level 2 (M), the Digital Compass Mode, Dive Mode sensor may be disabled if there is not enough voltage available to power it sufficiently. This is indicated when all of the battery power indicators (H, M, L) are blinking. -
Page 17: Power Saving
Power Saving When turned on, Power Saving enters a sleep state automatically whenever the dive computer is left for a certain period in an area where it is dark. The table below shows how dive computer functions are affected by Power Saving. •... -
Page 18: Low Power Alarm
Low Power Alarm For safe dive, when power becomes too low to dive, Low power alarm is on with message to urge divers to recharge the power. Since sensors of the dive computer would not function when power level becomes (L), dive is not allowed. Suppose you started dive with the power level (M), and it becomes (L) while dive, no information related the dive is shown anymore.To avoid this dangerous situation, when power becomes too low to dive, you... -
Page 19: Mode Reference Guide
4. Mode Reference Guide Your dive computer has 13 "modes". The mode you should select depends on what you want to do. Mode types and how to switch them: The below shows mode types and how to switch them. Modes Functions Ref. -
Page 20: Selecting A Mode
Selecting A Mode • The illustration below shows which buttons you need to press to navigate between modes. Time Mode Countdown Stopwatch Mode Digital compus Mode Timer Mode World Time Alarm Mode Mode Dive Mode Free Diving Mode Log Mode Plan mode Hold(1.5 sec.) -
Page 21: General Functions (All Modes)
General Functions (All Modes) The functions and operations described in this section can be used in all of the modes. Auto Return Features • The dive computer will automatically return to the Time mode if you do not perform any button operation for a particular amount of time in below mode. -
Page 22: Timekeeping
5. Timekeeping Use the Time mode (TIME) to set and view the current time and date. • Each press of A in the Time mode will change screen contents as shown below. Date Day of week Hour : Minutes World time Seconds t... -
Page 23: Configuring Home City Settings
6. Configuring Home City Settings There are two Home City settings: actually selecting the Home City and selecting either standard time or daylight saving time (DST). City code DST indicator To configure Home City and Daylight Saving Time Settings 1. In the Time mode, hold down A for at least 2 seconds. First, SET Hold will blink on the display, and CITY will be displayed in the upper right display. -
Page 24: Configuring Current Time And Date Settings
7. Configuring Current Time and Date Settings You can use the procedure below to adjust the Time mode time and date settings if they are off. City code To Change The Current Time And Date Settings 1. In the Time mode, hold down A for at least 2 seconds.First, SET Hold will blink on the display, and CITY will be displayed in the upper right display. -
Page 25: Specifying Temperature And Depth Display Units
Note • For information about selecting a Home City and configuring the DST setting, see "Configuring Home City Settings".While the 12-hour format is selected for timekeeping, a P (PM) indicator will appear for times from noon to 11:59 p.m. No indicator appears for times from midnight to 11:59 a.m. - Page 26 1. In the Time mode or Surface Mode, hold down A for at least 2 seconds. First, SET Hold will blink on the display, and CITY will be displayed in the upper right display. After that, the currently selected city code and city name will scroll across the upper right display.
-
Page 27: Displays In The Surface Mode
8. Displays In The Surface Mode Surface Mode is to display the necessary information when nitrogen remains in the body after dive. It displays current time, date, day shown in the Time mode and desaturation time (DESAT time) and surface time. 〔Surface Mode〕... -
Page 28: Dive Mode (Dive)
9. Dive Mode (DIVE) In the Dive Mode, important information for scuba dive is shown. How To Switch The Mode To Dive Mode After entering water, and in max. 20 seconds after the dive computer senses pressure of 1.6m depth, the mode will be changed to Dive Mode automatically. -
Page 29: No Decompression Mode
No Decompression Mode Stopwatch Digital compus Mode Mode Basic No decompression display limit Dive time Depth decompression limit Max.depth Water Current time temperature (when the gas switching) Current time Max.depth No decompression limit (NDL) Time you can stay at the current depth without decompression. -
Page 30: Safety Stop
Safety Stop The dive computer has functions to urge divers to do [Safety stop]. After dive in 10m or deeper, and ascending with no decompression stop, the 3 minutes count-down timer will be on automatically at the depth of 6m. This will be on during you are in the depth of 1.6m to 6m. -
Page 31: No Decompression Limit (Ndl) Warning
No Decompression Limit (NDL) Warning The dive computer has the functions to urge divers to ascend when no decompression limit (NDL) is getting less. When it becomes less than 3 minutes, the dive computer will urge divers to ascend as shown below. -
Page 32: The Below Information Is Shown In Decompression Dive
The Below Information Is Shown In Decompression Dive. Depth to stop for decompression It is shown in every 3m depending on the dive condition. DECO Decompression dive mark. It is shown when NDL is exceeded. Current depth (DEPTH) Current depth is shown per 0.1m after depth of 1.6m. * Max. -
Page 33: Warnings In Dive
Warnings In Dive Ascent Rate Ascending speed is monitored and warning is given when ascending speed exceeds than set speed. The ascending speed set in this dive computer is 10m/minutes • When ascending speed exceeds than 10m/minutes, warning of [SLO] is shown in the center of the main display and it will blink for 6 seconds. -
Page 34: Decompression Stop Violation
• When you stopped for decompression at the indicated depth, DECO will be off, N indicator will change from blinking to ON, Current depth blinking will be canceled, and dive will become No decompression dive. • If the warning is given even 1 time, it will be recorded in the dive log. -
Page 35: Out Of Measurement Range
Out Of Measurement Range Warning is given in the following conditions. 1) When depth exceeds 99.9m 2) When decompression stop is needed at 33m or deeper in decompression dive 3) When decompression stop time exceeds 99 minutes or when total ascending time exceeds 99 minutes in decompression dive. •... -
Page 36: O 2 Indicator (Oli)
Indicator (OLI) Warning is given when oxygen accumulated in the body exceeds the tolerance. • O indicator and its PO indicator will blink. • Alarm will be on for 6 seconds. • Warning continues until OLI inside the body goes back within the tolerance. -
Page 37: M Value
M Value Warning is given if the bodily nitrogen pressure value for the compartment that determines the no decompression diving time reaches the set value (80%, 90%, 95% of M value). M Value = Maximum allowable pressure value=No decompression limit. •... -
Page 38: End Of Dive
The longer the surface rest time you take, the longer the no decompression dive time for the next dive will be. TUSA recommends that you take at least 90 minutes’ surface rest time due to nitrogen elimination time. -
Page 39: Dive At High Altitude
Dive At High Altitude Air pressure (Ambient pressure) at high altitude is lower than one on sea surface. Higher the altitude in dive is, more difficult the decompression condition becomes compared to the sea surface. The dive computer auto-measures air pressure in every 20 seconds and sets the current air pressure properly to calculate for decompression. -
Page 40: Log Mode (Log)
10. Log Mode (LOG) It is available on Time mode and Surface Mode. Dive logs of last 30 logs are shown in the latest to earliest order. After 30 logs, next dive log will be added, and oldest (earliest) log will be deleted. You can see the depth variation over dive time on the simple dive profile. -
Page 41: (Scuba) Dive Log Mode
Additionally, if the number of dives is edited, the latest diving log number is the same as the edited number.(see page 48) • TUSA recommends clearing the history data prior to use and matching the log number to your own number of dives. (see P. -
Page 42: Dive Log Confirmation
Dive log confirmation Press L once in Time Mode or Surface Mode to display a scuba diving log data and free diving log data (P.92) mixed in chronological order. Free diving logs are recorded every session (* series of free dives in Free Diving Mode from start to finish). In diving logs, a maximum of 30 log data’s can be recorded for only the number of dives (one session of free diving counts as one log). -
Page 43: Button Operation
Button operation Each time you press L, a new dive log is called up in the order of new logs. Each time you press P, conversely, an older dive log is called up in the order of old logs. Press and hold the L or P to fast forward. * The last dive log (the next oldest log before the latest log) is the dive history data (P.46) and free diving history data (P.47). -
Page 44: Oxygen Concentration
Oxygen concentration Oxygen concentration Press A again and [L-2] is displayed on the screen, and after about 1 s the information is displayed. On this screen you can confirm the set value of the Safety factor, settings, CNS and OTU.Press P or L to call up one newer or one older log. -
Page 45: Dive Profile Mode
Dive Profile Mode The dive profile taken in the water is very important from the viewpoint of prevention of decompression sickness. TUSA recommends that you check the last dive before diving. By following a dive profile such the recommended profile (model diving pattern) on P.45, you can reduce the risk of... - Page 46 3) Display the dive log that you want to check the profile of on the screen, press M. [ PROF] displays on the screen and after about 1 s the profile screen displays. Log Display Water depth transition display YEAR Water depth DIVE/GAUGE chart...
-
Page 47: Dive History Mode / Free Diving History Mode
5) When you press M, [LOG] displays and the dive profile display exits. Or, if you leave the dive computer for 2 to 3 minutes, it returns to Time Mode or Surface Mode. Dive History Mode / Free Diving History Mode Dive History Mode is a function where you can confirm the diving history data saved in the memory = the total number of dives to date, the total dive time, the maximum water depth and the longest... -
Page 48: Free Diving History
Free Diving History FHIST Total number of dives Total dive time Longest dive time Maximum water depth Total dive hours The display of total time of free diving up to now. (0 h to 99h59min) Total number of dives The display of total number of free dives up to now. (0 to 9999) Maximum water depth The maximum water depth free dived to up to now. -
Page 49: Dive History Clear / Dive Number Edit Function
Dive history clear / Dive number edit function 1) Press and hold A from the Time Mode or Surface Mode to display the basic operation screen of various settings (page 18). While holding down t, press A and M at the same time, a beep sounds and all history data is cleared. -
Page 50: O 2 Profile Save Settings
Since the dive computer switches to the sampling time setting screen when you press and hold (2 seconds) A, press L or P, to switch to the setting of your choice. Press A to return to the log mode screen. profile save settings The computer can transfer the log data using Bluetooth to your smartphone (requires free dedicated app). -
Page 51: Bluetooth (Ble) Data Transfer Mode
Bluetooth (BLE) data transfer mode The computer uses the Bluetooth SMART function and a free downloadable app for smartphones to transfer information measured by the dive computer to a smartphone. In addition to being able to record basic log data information recorded on the dive computer such as the dive start time, dive time and maximum water depth in the smartphone app as a diving log, you can also record the dive location (map) information, an instructor signature... - Page 52 Attention • You may not be unable to connect with certain smartphone models and operating systems. Please check the TUSA website for more information. • The dive computer and smartphone may not be unable to communicate properly when there are multiple THE COMPUTER units set to Bluetooth transfer mode at the same time close to each other.
-
Page 53: Plan Mode (Plan)
11. Plan Mode (PLAN) You can plan dive applied to safety factor of 3 types of dives; initial dive, repetitive dive, and Nitrox dive (EANx). By monitoring M value (no decompression limit), risk to develop the decompression illness can be reduced. No decompression limit at every 3 m from the depth of 9 m is shown. -
Page 54: Enriched Air, Nitrox Diving
2) Press P or L to set the planned dive depth (9 to 48m). The depth is shown in multiples of 3m such as 9m, 12m, 15m, etc and NDL calculated for each depth will be shown. 3) Press M for about 2 seconds to go back to Time mode or Surface Mode. -
Page 55: Fo 2 % Setting
% Setting 1) In Time mode or Surface Mode, press P once and the [PLAN] screen is displayed on the screen, and after about 1 second the dive computer switches to Plan Mode. (* The dive computer does not switch when Gauge Mode is ON.) Gas No. -
Page 56: Default
5) Press and hold M for about 2 seconds to return to Time mode or Surface Mode. After [SET] [Hold] [TIME] flashes, remove your finger when [TIME] is displayed. Attention • Be sure to check the oxygen percentage for each dive. Default If the date changes (goes past 0:00) with GAS1-GAS4 FO % set in... -
Page 57: Bodily Oxygen Quantity Warning
In Dive Plan Mode, the no decompression dive time at a depth lower than the fixed maximum water depth is displayed as 0. Please dive after memorizing the water depth limit in advance. * If FO % are set for GAS2 to GAS4 as well as GAS1, the GAS1 no decompression dive time is displayed in Dive Plan Mode. -
Page 58: Multiple Gas Settings Diving (Accelerated Decompression)
Warning! • In Nitrox diving, coming close to or exceeding the maximum water depth or dive time for the set FO % increases the oxygen partial pressure value and bodily oxygen quantity. The effects on the human body due to oxygen become larger and become very dangerous so be sure to avoid this. -
Page 59: Regarding The Accelerated Decompression Log
Also, if you dive deeper than the allowable dive water depth for the currently selected gas displayed on the gas switch screen, an alarm sounds and the gas is automatically changed to an allowable one (lower FO * However, you can ascend to a water depth where switching is possible and change the gas No. -
Page 60: Safety Factor Setting
Attention Safety factor you select will be effective until changed. It will effect calculation on dive and after dive. Safety Factor setting 1) Make the mode Plan Mode Press P once in Time mode or Surface Mode. [PLAN] is shown in the display, and the mode will be changed to Plan Mode in approx. -
Page 61: Set M Value Warning
Set M Value Warning You can set the warning to release when nitrogen is accumulated at the specific % of the M value (no decompression limit) to reduce the risk to develop decompression illness. Set the M value (no decompression limit) warning. You can select % for M value warning as below. -
Page 62: Depth Interval Alarm
4) Press A 3 times to go back to Plan Mode. 5) Press M for about 2 seconds to go back to Time Mode or Surface Mode Depth Interval Alarm The dive computer features a Depth interval alarm function in normal Dive mode, Free diving mode and Gauge mode that gives a warning sound of three beeps for each set water depth during diving. -
Page 63: Setting Range
Dive Mode, Free Diving Mode and Gauge Mode. The default setting is OFF so please use if necessary. TUSA recommends a maximum water depth for recreational diving of 30 m. -
Page 64: Setting Range
OFF or set number 4) Press P and the set depth increases from 3 m in 1 m increments, press L to decrease the depth. You can fast forward by pressing and holding either. If you set the water depth you want a warning for during diving, the alarm sounds when the set water depth is reached other than OFF. - Page 65 Total per day Total per week 4) Press A again to return to Dive Plan Mode. Or, press and hold M for about 2 seconds to switch to Time mode.
-
Page 66: Using The Compass
12. Using The Compass The Digital Compass Mode uses a built-in direction sensor to take direction readings and display the results. The dive computer also displays literal indications of direction that its 12 o’clock position is currently pointed. • For information about what you can do to improve digital compass reading accuracy, see "Calibrating the Bearing Sensor"... -
Page 67: Digital Compass Readings
Digital Compass Readings • When you press M to start digital compass reading operation, COMP will initially appear on the display to indicate that a digital compass operation is in progress. • After the first reading is obtained, the dive computer will continue to take digital compass readings automatically each second for up to 60 seconds. -
Page 68: Calibrating The Bearing Sensor
illumination is turned on (by pressing t). The direction reading operation resumes for its remaining duration after the operation that caused it to pause is finished. • See "Digital Compass Precautions" (page 69) for important information about taking direction readings. Calibrating The Bearing Sensor You should calibrate the bearing sensor whenever you feel that the direction readings being produced by the dive computer are off. -
Page 69: To Perform Bidirectional Calibration
To Perform Bidirectional Calibration Turn 180° 1. In the Digital Compass Mode, hold down A for at least 2 seconds First, SET Hold will blink on the display. After that, CALIBRATION will scroll across the upper right display. Keep A depressed until CALIBRATION starts scrolling. -
Page 70: Digital Compass Precautions
Digital Compass Precautions Magnetic North And True North True north Magnetic north Earth • The northerly direction can be expressed either as magnetic north or true north, which are different from each other. Also, it is important to keep in mind that magnetic north moves over time. •... -
Page 71: Storage
Storage • The precision of the bearing sensor may deteriorate if the dive computer becomes magnetized. Because of this, you should store the dive computer away from magnets or any other sources of strong magnetism, including: permanent magnets (magnetic necklaces, etc.) and household appliances (TVs, personal computers, washing machines, freezers, etc.). -
Page 72: Using The Stopwatch
13. Using The Stopwatch The stopwatch measures elapsed time, split times, and two finishes. Current time Hours Minutes Seconds 1/10second To Enter The Stopwatch mode Press M 2 times to select the Stopwatch Mode (STW) as shown on page 19. To Perform An Elapsed Time Operation Start Stop... - Page 73 To measure two finishes Split Stop Start Split release Reset First runner finishes. Second runner Display time of ( SPLIT appears in finishes. second runner. the upper part of the display.) Display time of first runner Note • The Stopwatch Mode can indicate elapsed time up to 999 hours, 59 minutes, 59.9 seconds •...
-
Page 74: Using The Countdown Timer
14. Using The Countdown Timer The countdown timer can be configured to start at a preset time, and sound an alarm when the end of the countdown is reached. Current time Minutes Countdown time (Hour,minutes,seconds) To Enter The Countdown Timer Mode Press M 3 times to select the Countdown Timer Mode (TMR) as shown on page 19. -
Page 75: To Perform A Countdown Timer Operation
4. Use P (+) and L (–) to change the blinking item. • To set the starting value of the countdown time to 24 hours, set 0H 00’00. 5. Press A to exit the setting screen. To Perform A Countdown Timer Operation To pause at a split time Stop (Restart) -
Page 76: Using The Alarm
15. Using The Alarm Alarm name Current time (AL - or SIG) Alarm time (Hour : Minutes) You can set five independent daily alarms. When an alarm is turned on, an alarm will sound for about 10 seconds each day when the time in the Time mode reaches the preset alarm time. -
Page 77: To Set An Alarm Time
To Set An Alarm Time Alarm ON/OFF indicator 1. In the Alarm Mode, use A and L to scroll through the alarm screens until the one whose time you want to set is displayed. AL-1 AL-2 AL-3 SIG* AL-4 * There is no time setting for the hourly time signal. 2. -
Page 78: To Turn An Alarm And The Hourly Time Signal On And Off
To Turn An Alarm And The Hourly Time Signal On And 1. In the Alarm Mode, use P and L to select an alarm or the Hourly Time Signal. 2. When the alarm or the Hourly Time Signal you want is selected, press A to turn it on and off. -
Page 79: Checking The Current Time In A Different Time Zone
16. Checking The Current Time In A Different Time Zone You can use the World Time Mode to view the current time in one of 31 time zones (48 cities) around the globe. The city that is currently selected in the World Time Mode is called the "World Time City". -
Page 80: To Specify Standard Time Or Daylight Saving Time (Dst) For A City
To Specify Standard Time Or Daylight Saving Time (DST) For A City DST indicator Hold(+1.5 sec.) 1. In the World Time Mode, use P(East) and L(West) to scroll through the available city codes. • Keep scrolling until the city code whose Standard Time/Daylight Saving Time setting you want to change is displayed. -
Page 81: Illumination
17. Illumination The display of the dive computer is illuminated for easy reading in the dark. The dive computer’ s auto light switch turns on illumination automatically when you angle the dive computer towards your face. • The auto light switch must be turned on (page 83) for it to operate. -
Page 82: To Change The Illumination Duration
To Change The Illumination Duration 1. In the Time mode or Surface Mode, hold down A for at least 2 seconds. First, SET Hold will blink on the display, and CITY will be displayed in the upper right display. After that, the currently selected city code and city name will scroll across the upper right display. -
Page 83: About The Auto Light Switch
About The Auto Light Switch More than More than 40° 40° Wear the watch on the Wear the watch on the outside of your wrist outside of your wrist Turning on the auto light switch causes illumination to turn on, whenever you position your wrist as described below in any mode. -
Page 84: To Turn The Auto Light Switch On And Off
Note • This dive computer features a "Full Auto Light", so the auto light switch operates only when available light is below a certain level. It does not illuminate the display under bright light. • The auto light switch is always disabled, regardless of its on/off setting, when any one of the following conditions exists. -
Page 85: Illumination Precautions
Illumination Precautions • The LED that provides illumination loses power after very long use. • Illumination may be hard to see when viewed under direct sunlight. • Illumination turns off automatically whenever an alarm sounds. • Frequent use of illumination runs down the battery. Auto Light Switch Precautions •... -
Page 86: Other Settings
• You may notice a very faint clicking sound coming from the dive computer when it is shaken back and forth. This sound is caused by mechanical operation of the auto light switch, and does not indicate a problem with the dive computer. 18. -
Page 87: To Turn Power Saving On Or Off
To Turn Power Saving On Or Off 1. In the Time mode or Surface Mode, hold down A for at least 2 seconds. First, SET Hold will blink on the display, and CITY will be displayed in the upper right display. After that, the currently selected city code and city name will scroll across the upper right display. -
Page 88: Dive Mode Screen Setting (To Select The Basic Screen In Dive)
Dive Mode Screen Setting (To select the basic screen in dive) You can select basic Dive Mode screen used for dive. There are 3 types of screens to select. Main 7-segment display area Dot area at the upper right 1. NDL current depth 2. -
Page 89: Free Diving (Free) Mode
19. Free Diving (FREE) Mode The computer features a Free Diving Mode for use during skin diving and free diving. Because nitrogen gas fluctuation is not calculated as during normal diving mode, the bar graph of the amount of nitrogen gas in the tissues (N indicator) is not displayed. -
Page 90: End Of Free Diving Mode
End of Free Diving Mode While Free Diving Mode is displayed on the water surface, press t while pressing the M to switch to Surface Mode. Note that if you do not dive to a depth of 1m or more for 60 minutes, the dive computer automatically switches to Surface Mode. -
Page 91: Button Operation (Underwater / Water Surface)
Button operation (underwater / water surface) The operation of the computer's buttons in Free Diving Mode is as follows. Dive time, minutes, seconds FREE Dive No. in the session Every second Current water depth Maximum depth of Current current dive water temperature Compass Stop Watch... -
Page 92: Session History
Session history History Current time Total dive time Time when switch to Total No. of dives Free Diving Mode in the session Sessions history is being displayed in Free Diving Mode by pressing L. With the function to display a simple history of free dives in that session, the dive computer displays the total dive time, start time of first dive, number of dives and the current time. -
Page 93: Log Of Longest Dive Time For Session
Log of longest dive time for session Total dive time Dive time Maximum Water temperature at water depth maximum depth Press A twice while the session history screen is displayed to display the log data of the dive that recorded the session’s longest dive time via displaying the maximum water depth time. -
Page 94: How To Read Log Data
How to read log data Log No. Start time Dive time Maximum Water temperature at water depth maximum depth Press L in Time Mode or Surface Mode to display the most recent log data of either (scuba) diving or free diving (1 session). Press P to scroll back through previous log data, and stop at the free diving session you wish to see. -
Page 95: Gauge Mode
20. Gauge Mode In Gauge mode, the unit does not calculate non-decompression dive time or decompression dive time, but only displays water depth and diving time information etc. as a simple gauge. When you select Gauge mode and dive to a depth of 1.6m or more for 3 minutes or more, the unit is fixed to Gauge mode for 48 hours after the dive ends and you cannot switch to Dive mode (computer function) or Free diving mode. -
Page 96: Canceling Gauge Mode
4) By pressing and holding M for about 2 seconds, the unit is going to be fixed to Gauge mode and displays Time mode. In addition, the unit switches to Plan mode if left for about three minutes. Important! If Gauge mode is turned ON, the user safety factor, FO % and M value warning settings screens are not displayed. -
Page 97: Troubleshooting
21. Troubleshooting Time Setting ■ The current time setting is off by hours. → Your Home City setting may be wrong (page 23). Check your Home City setting and correct it, if necessary. Dive Mode and Surface Mode ■ Display is too light →... - Page 98 setting (FO : 21% that is the % in the compressed air). When you dive with Nitrox gas, reset the FO % for sure. 100% in every 1% (4mix gases are available) Ref. Set FO %...P.54 ■ Cannot make Dive Mode - Either [Decompression stop violation] or [Out of measurement range] warning is released.
- Page 99 • If ERR keeps appearing, contact the shop you purchased the dive computer. Whenever you have a sensor malfunction, take the dive computer to nearest authorized TUSA distributor as soon as possible. ■ What causes incorrect direction readings? •...
-
Page 100: World Time Mode
■ What causes different direction readings to produce different results at the same location? → Magnetism generated by nearby high-tension wires is interfering with detection of terrestrial magnetism. Move away from the high-tension wires and try again. ■ Why am I having problems taking direction readings indoors? →... - Page 101 Recovery Mode. In this mode, all of the battery power indicators (H, M, and L) will be blinking. It is the same situation of [Low power] and available functions will be limited. After recovery, the functions are enabled again. Ref: Power recovery mode ...P.14 •...
-
Page 102: Specification
23. Specification Accuracy at normal temperature ±15 seconds a month Timekeeping Hour, minutes, seconds, p.m. (P), year, month, day, day of the week Time format: 12-hour and 24-hour Calendar system Full Auto-calendar pre-programmed from the year 2000 to 2099 Other Home City code (can be assigned one of 48 city codes);... -
Page 103: Water Proof
Water proof 100m Max. dive log 30 dives Digital Compass 60 seconds continuous reading; 16 directions; Angle value 0° to 359°; Calibration (bidirectional) Bearing Sensor Precision Direction: Within ±10° Values are guaranteed for a temperature range of –10°C to 60°C (14°F to 140°F). -
Page 104: Other
Other Daylight Saving Time/Standard Time Illumination LED light; Selectable illumination duration (approximately 1.5 seconds or 3 seconds); Auto Light Switch (Full Auto Light operates only in the dark) Other: Battery power indicator; Power Saving; Low-temperature resistance (–10°C/14°F); Button operation tone on/off Power Supply Solar panel and one rechargeable battery Approximate battery operating time: 1 month (from full charge to... -
Page 105: City Code Table
City Code Table City UTC Offset/ City UTC Offset/ City City Code GMT Differential Code GMT Differential Pago Pago Karachi Honolulu +5.5 Delhi Anchorage +5.75 Kathmandu Vancouver Dhaka Los Angeles +6.5 Yangon Edmonton Bangkok Denver Singapore Mexico City Hong Kong Chicago Beijing New York... - Page 106 TABATA U.S.A. INC. 2380 Mira Mar Ave., Long Beach, CA 90815, U.S.A. TEL 562-498-3708/FAX 562-498-1390 (Country Code=1) TABATA AUSTRALIA PTY. LTD. 4D James Ruse Business Park 6 Boundary Road, Northmead, Sydney, NSW 2152, Australia TEL 02-9890-4555/FAX 02-9890-5222 (Country Code=61) T.E.C. [TABATA EUROPE CORPORATION] B.V. Den Brielstraat 2b, 1055RV, Amsterdam, The Netherlands TEL 020-58-11-280/FAX 020-58-11-285 (Country Code=31) TABATA CO., LTD.
Need help?
Do you have a question about the DC-Solar IQ 1204 and is the answer not in the manual?
Questions and answers