Sign In
Upload
Download
Table of Contents
Contents
Add to my manuals
Delete from my manuals
Share
URL of this page:
HTML Link:
Bookmark this page
Add
Manual will be automatically added to "My Manuals"
Print this page
×
Bookmark added
×
Added to my manuals
Manuals
Brands
Kawai Manuals
Musical Instrument
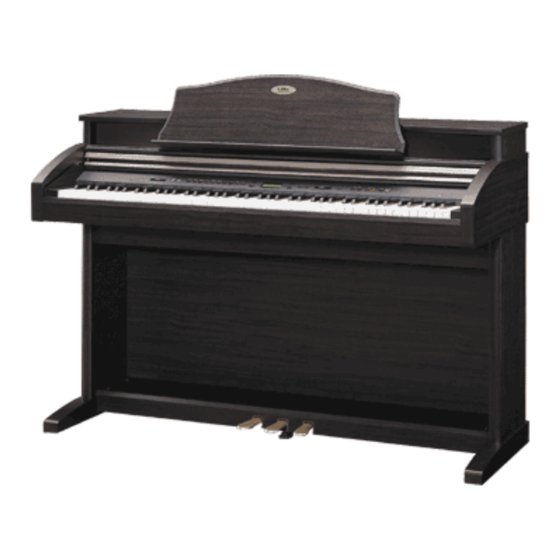
CA1000
Owner's manual
Kawai CA1000 Owner's Manual
Kawai america corporation owner's manual digital piano ca1200,ca1000
Hide thumbs
1
2
3
4
5
6
7
8
9
10
11
12
13
14
15
16
17
18
19
20
21
22
23
24
25
26
27
28
29
30
31
32
33
34
35
36
37
38
39
40
41
42
43
44
45
46
47
48
49
50
51
52
53
54
55
56
57
58
59
60
61
62
63
64
65
66
67
68
69
70
71
72
73
74
75
76
77
78
79
80
81
82
83
84
85
86
page
of
86
Go
/
86
Contents
Table of Contents
Bookmarks
Table of Contents
Ca1200, Ca1000 Digital Piano Tutorial Section
Important Safety Instructions
Instructions Pertaining to a Risk of Fire, Electric Shock, or Injury to Persons
Parts Provided
The Music Rack
Table of Contents
Basic Operations
Assembling the Stand
Supplying Ac Power
Using the Headphones
Setting U P the Piano
Playing the Piano
Using the Pedals
Playing with more Sounds
About Polyphony
Adding the Effects
Using the Metronome
Starting the Metronome
Changing the Time Signature
Adjusting the Metronome Volume
Next Step to Make
Using the Recorder
Recording a Song
Playing Back a Song
Basics of the Recorder
Recording Capacity
Recording more than One Song
Recording the Tracks Separately
Erasing Unnecessary Song Data
Erasing All Data
Using MIDI
Understanding MIDI
What Is MIDI
MIDI Channel
Using the Ca Piano as Controller
MIDI Connection
Audio Connection
Program Change
Local Control
Using the Ca Piano as a Multi - Timbral Sound Module
Selecting a Song
Concert Magic
Listening to the Song
Performing a Song
Concert Magic Song Arrangement Types
Steady Beat
Ca1200, Ca1000 Digital Piano Reference Section
Reference Section
1 Concert Magic Button
Selected Song
Concert Magic Song Arrangement Types
2 Demo Button
Concert Magic Song Demo
3 Sound Select Buttons
4 Menu Buttons
Common Operation
Lower Octave Shift
Lower Pedal O N /Off
MIDI C Hannel
Program Change Numbers
Local Control On/Off
Transmit Program Change O N /Off
Multi -Timbral Mode
Channel Mute
User Memory
5 Value Buttons
6 Effect Buttons
Effect (Effects Button )
Electing an
Reverb (Reverb Button )
7 Dual / Split Balance Slider
8 Split Button
Split Point
9 Metronome Buttons
Changing Tempo (Tempo Button )
Concert Magic Songs
Etronomev Olume (Tempo & Beat Buttons )
Changing the Time Signature (Beat Button )
Hanging the
10 Ecorder Uttons
Recording (Rec Button )
Recording a Second Part
Recorded Information
Memory Capacity
Playing Back a Song
Laying Ack Aong (Play/Stop Button )
11 Transpose
12 Virtual Technician Button
Sympathetic Resonance
Brief Explanation of Temperaments
13 Power Witch
14 Volume Slider
Overall Volume
15 Pedals
Sustain Pedal
Sostenuto Pedal
Soft Pedal
16 Jacks
Line out J
Line in Jacks
MIDI Jacks
MIDI Information
Program Change Number Mapping
MIDI Exclusive Data Format
MIDI Implementation Chart
Oncert Agic Ong ist
Front Panel
Demo Songs
Specifications
Advertisement
Quick Links
1
Basic Operations
Download this manual
Digital Piano
CA1200
CA1000
Owner's Manual
Table of
Contents
Previous
Page
Next
Page
1
2
3
4
5
Advertisement
Chapters
Ca1200, Ca1000 Digital Piano Tutorial Section
12
Ca1200, Ca1000 Digital Piano Reference Section
43
Table of Contents
Need help?
Do you have a question about the CA1000 and is the answer not in the manual?
Ask a question
Questions and answers
Related Manuals for Kawai CA1000
Musical Instrument Kawai CA1200 Owner's Manual
Kawai america corporation owner's manual digital piano ca1200,ca1000 (86 pages)
Musical Instrument Kawai CA 111 Owner's Manual
Kawai electronic keyboard user manual (50 pages)
Musical Instrument Kawai CA18 Owner's Manual
(30 pages)
Musical Instrument Kawai Concert Artist CA15 Owner's Manual
(54 pages)
Musical Instrument Kawai CA17 Owner's Manual
(52 pages)
Musical Instrument Kawai CA17W Owner's Manual
(52 pages)
Musical Instrument Kawai CA130 Owner's Manual
(30 pages)
Musical Instrument Kawai Digital Piano CA750 Owner's Manual
Kawai america corporation ca950/ca750 digital piano owner's manual (76 pages)
Musical Instrument Kawai CA950 Owner's Manual
(77 pages)
Musical Instrument Kawai Concert Artist CA95 Owner's Manual
Digital (136 pages)
Musical Instrument Kawai Concert Artis CA61 Owner's Manual
Digital (98 pages)
Musical Instrument Kawai CA48 Setting Manual
Midi settings (9 pages)
Musical Instrument Kawai Concert Artist CA98 Owner's Manual
(176 pages)
Musical Instrument Kawai CA901 Owner's Manual
(110 pages)
Musical Instrument Kawai CA501 Midi Settings Manual
(8 pages)
Musical Instrument Kawai CA800 Owner's Manual
(34 pages)
This manual is also suitable for:
Ca1200
Table of Contents
Print
Rename the bookmark
Delete bookmark?
Delete from my manuals?
Login
Sign In
OR
Sign in with Facebook
Sign in with Google
Upload manual
Upload from disk
Upload from URL


Need help?
Do you have a question about the CA1000 and is the answer not in the manual?
Questions and answers