Pioneer MCS-333 Operating Instructions Manual
Blu-ray disc surround system
Hide thumbs
Also See for MCS-333:
- Operating instructions manual (576 pages) ,
- Operating instructions manual (176 pages)

Related Manuals for Pioneer MCS-333


Summary of Contents for Pioneer MCS-333
- Page 1 MCS-333 Blu-ray Disc Surround System Discover the benefits of registering your product online at http://www.pioneer.co.uk (or http://www.pioneer.eu). Operating Instructions...
-
Page 2: Safety Information
Safety Information Thank you for buying this Pioneer product. Please read through these operating instructions so you will know how to operate your model properly. After you have finished reading the instructions, put them away in a safe place for future reference. - Page 3 Information for users on collection and disposal of old equipment and used batteries Symbol for These symbols on the products, packaging, and/or accompanying documents mean equipment that used electrical and electronic products and batteries should not be mixed with general household waste. For proper treatment, recovery and recycling of old products and used batteries, please take them to applicable collection points in accordance with your national legislation.
- Page 4 Notes on Copyrights For Wireless product European Union Notice PIONEER hereby declares that this/ • Because AACS (Advanced Access Content these product(s) is/are in compliance System) is approved as content protection with the essential requirements and system for Blu-ray Disc format, similar to use...
- Page 5 Important Notice for TV colour system The colour system of this player differs according to currently playing discs. For example, when the player plays the disc recorded in the NTSC colour system, the image is output as an NTSC signal. Only the multi system colour TV can receive all signals output from the player.
-
Page 6: Table Of Contents
Table of Contents Playback Playing discs or files – Forward and reverse scanning Before you start – Playing specific chapters, tracks or files Introduction – Skipping content – Supplied accessories – Playing in slow motion – Accessories of speaker box –... - Page 7 Playing the web contents Available web contents Playing the items Enjoying YouTube Other Operating Recording Audio CD to a USB device Radio Operations – Listening to the radio – Presetting the radio stations – Deleting all the saved stations – Improving poor FM reception –...
-
Page 8: Before You Start
Before you start Chapter 1 Before you start Introduction Supplied accessories Remote control (1) Battery (2) FM antenna (1) Power cord • Software license notice • Warranty card (1) • Operating instructions (This document) Accessories of speaker box Screws M3.5x12 Non-skid pads (5) [Taping type] (4) [2 cm x 2 cm] (These screws are used to fix the speakers to the stands.) WARNING... -
Page 9: Putting The Batteries In The Remote Control
This can cause batteries to leak or overheat. Software update Insert the Product information on this player is provided negative (*) on the Pioneer website. Check this website for side first. update and service information on your Blu-ray disc player. IN Europe: http://www.pioneer.eu/... -
Page 10: Types Of Discs/Files That Can Be Played
Before you start Types of discs/files that can be played Playable discs Discs with the logo marks below indicated on the disc label, package or jacket can be played. Caution • Only the discs that have been finalized can be played. Application format Disc type Logo... - Page 11 Before you start • “Blu-ray Disc”, “Blu-ray” and “Blu-ray About audio formats Disc” logo are trademarks of Blu-ray Disc The following audio formats are supported on Association. this player: • is a trademark of DVD Format/Logo • Dolby TrueHD Licensing Corporation.
- Page 12 Before you start Playing DVDs “BONUSVIEW” is trademark of Blu-ray Disc Association. This label indicates playback compatibility with BD-LIVE functions such as downloading DVD-RW discs recorded in VR format (Video movie trailers or additional audio and Recording format). However, for discs recorded subtitle languages and playing on-line with a record-only-once encrypted program, games can be enjoyed over the Internet.
-
Page 13: Playing Cds
Before you start Playing CDs About video, audio, and image files and folders Regarding copy protected CDs: This player is designed to conform to the specifications Audio and image files can be played on this of the Audio CD format. This player does not player when the folders on the disc or USB support the playback or function of discs that device are created as described below. -
Page 14: Playable Files
Before you start Playable files Note Video, image and audio files recorded on ® • This DivX Certified device must be registered in order to play DivX Video-on-Demand (VOD) DVDs, CDs or USB devices can be played. content. First generate the DivX VOD registration ... - Page 15 Before you start Table of Playable Files Playable media BD-R/RE/-R DL/ Playable files RE DL/-R LTH, File specifications (Extensions) DVD-R/RW/-R DL/ USB devices Network +R/+RW/+R DL, CD-R/RW Sampling frequencies: Up to 48 kHz Bit rate: Up to 320 kbps (.mp3) Audio type: MPEG-1 Audio Layer 3 Sampling frequencies: Up to 48 kHz...
- Page 16 Before you start Playable media BD-R/RE/-R DL/ Playable files RE DL/-R LTH, File specifications (Extensions) DVD-R/RW/-R DL/ USB devices Network +R/+RW/+R DL, CD-R/RW Video: H.263, MPEG4, H.264 (.3gp) Audio: MPEG-4 AAC Video: Sorenson H.263 (FLV1), VP6 (FLV4), H.264 (.flv) Audio: MP3, AAC 1.
-
Page 17: Trademarks And Licenses
Before you start Trademarks and licenses YouTube™ is a trademark of Google Inc. The terms HDMI and HDMI High-Definition Multimedia Interface, and the HDMI Logo are trademarks or registered trademarks of HDMI Licensing, LLC in the United States and other countries. -
Page 18: Remote Control
Before you start Remote control • • • • • • • • • 1 • • • • • • • • • (STANDBY/ON): Press to turn the power on and off. FUNCTION: Changes the input source or function. When switching while viewing the display window on the player 1. - Page 19 Before you start • • • • • • • • • 3 • • • • • • • • • • • • • • • • • • 6 • • • • • • • • • HOME MEDIA GALLERY: See page 43. 0-9 numerical buttons: Selects numbered options in a menu or inputs letters in the VIRTUAL 3D SOUND: Switch VIRTUAL 3D keypad menu.
-
Page 20: Front Panel
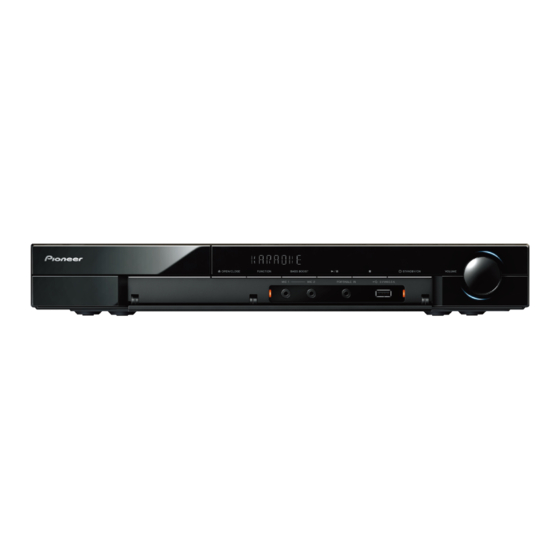
Before you start Front panel 1 Disc tray 4 Remote control sensor Point the remote control to this, then 2 Operation buttons operate it within approximately 7 m. The (OPEN/CLOSE) player may have trouble capturing remote FUNCTION control signals if there is a fluorescent light Changes the input source or function. -
Page 21: Rear Panel
Before you start Rear panel 1 AC IN 6 USB Port Plug into the power source. 7 LAN port 2 SPEAKERS connectors 8 HDMI IN 1/2/3/4 3 Cooling Fan 9 HDMI OUT 4 Antenna Connector a OPTICAL IN 5 AUX IN (L/R) -
Page 22: Connecting
Caution • If you are unsure of the qualities and strength of the wall, consult a professional for advice. • Pioneer is not responsible for any accidents or damage that result from improper installation. Mounting screw (not supplied) 3.5 mm... -
Page 23: Additional Notes On Speaker
Connecting Additional notes on speaker Install the main front left and right speakers at an equal distance from the TV. Precautions: These speakers are not magnetically shielded and so should not be placed near a TV or monitor. Magnetic storage media (such as floppy discs and tape or video cassettes) should also not be kept close to these speakers. -
Page 24: Connecting To Your Tv
Connecting Connecting to Your TV When connected to a DVI device • It is not possible to connect DVI devices (computer displays, for example) that are Note not compatible with HDCP. HDCP is a • Please refer to the manuals of your TV, stereo specification to protect audiovisual content system or other devices as necessary to make the across the DVI/HDMI interface. -
Page 25: Antenna Connection
Connecting Antenna connection Connections with external device Connect the supplied antenna for listening to the radio. AUX connection You can enjoy the sound from an external component through the speakers of this system. Connect the analog audio output terminals of your component into the AUX L/R (INPUT) on this unit. -
Page 26: Portable In Connection
Connecting PORTABLE IN connection OPTICAL IN connection You can enjoy the sound from your portable You can enjoy the sound from your component audio player through the speakers of this with a digital optical connection through the system. speakers of this system. Connect the headphones (or line out ) terminal Connect the optical output terminal of your of the portable audio player into the PORTABLE... -
Page 27: Hdmi In 1/2/3/4 Connection
Connecting HDMI IN 1/2/3/4 connection You can enjoy the pictures and sound from your component through this connection. Connect the HDMI OUT terminal of your component into the HDMI IN 1, 2, 3 or 4 terminal on this unit. And then select the [HDMI IN 1/2/3/4] option by pressing FUNCTION and ENTER. -
Page 28: Connecting To Your Home Network
Connecting Connecting to your Home Network Broadband service This player can be connected to a local area network (LAN) via the LAN port on the rear panel or the internal wireless module. By connecting the unit to a broadband home network, you have access to services such as BD-LIVE interactivity and Online content services. - Page 29 Connecting Notes on Network Connection: • xDSL modem is required to use xDSL service and a cable modem is required to use cable • Many network connection problems during modem service. Depending on the access set up can often be fixed by re-setting the method of and subscriber agreement with router or modem.
-
Page 30: Usb Device Connection
Connecting USB device connection Connecting the USB device A USB device connected to the unit can Caution perform the following operations. • Be sure to turn the player’s power off before connecting or disconnecting USB devices. • File Playback Playback files recorded on the front USB • When using an external hard disk as the external storage device, be sure to turn on the hard disk’s device or rear USB device, such as video,... -
Page 31: Getting Started
HDMI OUT • After Initial Setup format. terminal, language settings are imported • After updating the player’s software. from the Pioneer Flat Screen TV’s language settings before Setup Navigator begins. Caution 5. Select the appropriate output resolution • Before turning on the power, check that the... -
Page 32: Operating The Tv With The Player's Remote Control
Press the number buttons (0 to 9) to input the code while pressing TV CONTROL . Note y The factory default setting is 00 (PIONEER). y If you make a mistake when inputting the code, release TV CONTROL then start over from the beginning. -
Page 33: Tv Preset Code List
Getting Started TV preset code list Manufacturer Code(s) PIONEER 00, 31, 32, 07, 36, FRONTECH 31, 42, 46 MAGNAVOX 07, 10, 03, 12, SAISHO 39, 44, 46 42, 51, 22, 91, 92 FRONTECH/PROTECH 32 29, 81 SALORA 31, 32, 42, 43... -
Page 34: Playback
Playback Chapter 4 If the disc menu is displayed Playback For some discs, the disc menu is displayed automatically when playback starts. The contents of the disc menu and the way to Playing discs or files operate depend on the disc. ... -
Page 35: Forward And Reverse Scanning
Playback Forward and reverse scanning Step forward and step reverse During playback, press REV or While playback is paused, press / or /. FWD. y The scanning speed switches each time y The picture moves a step forward or the button is pressed. -
Page 36: Playing Repeatedly (Repeat Play)
Playback Playing repeatedly Playing in the desired order (Repeat Play) (Programmed Play) Use this procedure to play the currently playing 1 During playback, press PROGRAM. disc, title, chapter, track or file repeatedly. y The program screen is displayed. During playback, press REPEAT. 2. -
Page 37: Making Bookmarks
Playback Making bookmarks Playing photos as slideshows You can make bookmarks on the video This function plays the photos, switching them currently playing and play back the scene later. automatically. During playback, press BOOKMARK. During playback, press INDEX. y The bookmark is made. -
Page 38: Switching The Subtitles
Playback Switching the subtitles Switching the audio For discs or files on which multiple subtitles For discs or files on which multiple audio are recorded, the subtitles can be switched streams/channels are recorded, audio streams/ during playback. channels can be switched during playback. ... -
Page 39: Enjoying Bonusview Or Bd-Live
Playback Enjoying BONUSVIEW or Note BD-LIVE • Operation of USB flash drives is not guaranteed. • Playback of BD-LIVE function data differs This player is compatible with BD-Video depending on the disc used. For details, consult BONUSVIEW and BD-LIVE. the user instructions supplied with the disc. When using BD-Video discs compatible with • To enjoy the BD-LIVE function, a network BONUSVIEW, you can enjoy such functions... -
Page 40: Playback Functions
Playback Playback functions The functions that can be used differ according to the type of disc and file. In some cases, some of the functions cannot be used. Check the usable functions on the table below. Disc/file type DVD-R Function BD-R DVD- /-RW... -
Page 41: Using The Tools Menu
Playback Using the TOOLS menu Item Description Still off Switch off the BD-ROM’s still picture. Various functions can be called out according Ins Search Skip forward 30 seconds. to the player’s operating status. Ins Replay Skip backward 10 seconds. 1. Display the TOOLS menu. 2D To 3D Convert 2D image into a pseudo 3D Press TOOLS during playback. -
Page 42: Playing A Specific Title, Chapter, Track Or File
Playback Continuing playback Playing a specific title, chapter, track or file (Search) from a specified position (Continued Viewing Playback) 1. Select Title or Chapter (track/file). Use / to select, then press ENTER. This function allows you to continue playback 2. Input the Title or Chapter (track/file) from a position you specify to be played next number. -
Page 43: Playback From Home Media Gallery
Playback from Home Media Gallery Chapter 5 Note Playback from Home • The Home Media Gallery allows you to play files on media servers connected to the same Local Area Media Gallery Network (LAN) as the unit. • The following files are allowed to be played from Home Media Gallery: About Home Media –... - Page 44 Pioneer is not responsible for any malfunction • Supported file formats vary by server. As of the player and/or the Home Media Gallery such, files not supported by your server features due to communication errors/ are not displayed on this unit.
-
Page 45: Playback File On The Network
Playback from Home Media Gallery Playback file on the Playing back image files network About Slideshow A display of the files on the disc or in the folder 1. Press HOME MEDIA GALLERY to switches automatically. display the Home Media Gallery. The Home Media Gallery can also be Note displayed by selecting [Home Media Gallery]... -
Page 46: Playing In The Desired Order (Playlist)
Playback from Home Media Gallery Playing in the desired Playing the playlist order (Playlist) 1. Press HOME MEDIA GALLERY to display the Home Media Gallery. The discs that can add tracks and files to the The Home Media Gallery can also be Playlist are as shown below. -
Page 47: Copy Files To A Usb
Home Menu, then pressing ENTER. • When copying starts, a [File] folder will be created in the [Pioneer] folder on the rear USB device. 2. Select [Disc] or [Front USB]. • The maximum number of [File] folders is 99. Use / to select, then press ENTER. -
Page 48: Playing The Web Contents
Playing the web contents Chapter 6 Pioneer does not represent or warrant that content services will continue to be provided or available for Playing the web contents a particular period of time, and any such warranty, express or implied, is disclaimed. -
Page 49: Other Operating
[256kbps] d [320kbps] (PLAY/PAUSE) on the device to start • When you start recording, a [CD] folder will be playback. created in the [Pioneer] folder on the unit's rear USB device. 4. Press USB REC during CD playback. [CD RIP] will be displayed. • The maximum number of folders that can be created is 100. -
Page 50: Radio Operations
• When you start recording, a [FM] folder will be Improving poor FM reception created in the [Pioneer] folder on the unit's rear USB device. Press AUDIO on the remote control. This will • The maximum number of files that can be created change the tuner from stereo to mono and is 100. -
Page 51: Karaoke
Other Operating Karaoke Note • Karaoke can only be used with disc playback or USB playback. Enjoying Karaoke • Depending on the song, Vocal Cancel may not be effective. 1. Press KARAOKE on the remote control. • When inserting the MIC terminal, support the The Karaoke setting screen will be displayed top of the unit with your hand to prevent it from on the TV screen. - Page 52 Other Operating Setting Options Explanation Karaoke Switch Select when not using Karaoke. Select when using Karaoke. Microphone Setup Mic Volume Select to adjust the volume of your microphone. to perform the adjustment on the mic volume adjustment screen. Mic Echo Select to adjust the level of microphone echo.
-
Page 53: Sound
Other Operating Sound Press SOUND on the remote control to display the sound select menu on the TV screen. Use cursor button to make a selection, then press ENTER. Press SOUND to exit the Sound Menu. Note • When HDMI IN 1, 2, 3 or 4 is selected, the Sound Menu cannot be displayed. Switch to other input source and then switch the Sound. • When disc/file is stopped, SOUND menu cannot be displayed. Please switch SOUND when disc/file is being played. -
Page 54: Advanced Settings
Advanced settings Operating the initial setup Chapter 8 Advanced settings screen 1. When playback is stopped, display the Changing the settings Home Menu screen. HOME MENU. Press 2. Select and set Initial Setup. Use / to select, then press ENTER. 3. - Page 55 Advanced settings Setting Options Explanation DRC (Dynamic Range Select this to output audio signals without using the DRC function. Control) Select this to adjust the range between the loudest and softest sounds (dynamic range) for playback at average volume. Use this when it is hard to hear dialog or when watching movies at midnight.
- Page 56 Advanced settings Setting Options Explanation IP Address Setting Select this to set the IP address of the player and DNS server (page 58). Proxy Server Only set the proxy server if so instructed by your Internet service provider (page 59). Information Displays the values of the MAC address, IP address, subnet mask, default gateway, DNS server (primary) and DNS server (secondary).
- Page 57 Advanced settings Setting Options Explanation Change Password Register (change) the password for parental lock settings or for unlocking to play DVD-Videos with the parental lock feature (page 60). The default password is “0000”. Parental Control Change the player’s parental lock level (page 60). Country Code Change the Country/Area code (page 60).
- Page 58 Advanced settings Adjusting the video Adjust speaker settings while listening to a sound 1. Select and set Display Setting d Video Adjust d Custom. 1. Select and set Audio Output d Test Use / to select, then press ENTER. Tone d Next Screen.
-
Page 59: Language Setting
Advanced settings Setting the proxy server Testing the network connection Only set the proxy server if so instructed by Select and set Network d Connection your Internet service provider. Test d Start. Use / to select, then press ENTER. 1. - Page 60 Advanced settings Registering or Changing the password Changing the Parental Lock level for viewing DVDs/BD-ROMs Use this procedure to register or change the code number required for the Parental Some DVD-Video discs containing scenes Lock settings. of violence, for example, have Parental Lock About default password of this unit levels (check the indications on the disc’s jacket or elsewhere).
-
Page 61: Software Updating
Product information on this player is provided provided on the Pioneer website. on the Pioneer website. Check the website y Store the update file in the root directory of the shown on page 9 for update and service USB flash drive. -
Page 62: Restoring All The Settings To The Factory
Advanced settings Restoring all the settings to the factory default settings 1. Check that the player’s power is turned 2. When playback is stopped, display the Home Menu screen. Press HOME MENU. 3. Select and set Initial Setup. Use / to select, then press ENTER. 4. -
Page 63: Language Code Table And Country/Area Code Table
Advanced settings Language code table and country/area code table Language code table Language name, language code, input code Abkhazian, ab/abk, 0102 French, fr/fra, 0618 Malagasy, mg/mlg, 1307 Slovenian, sl/slv, 1912 Afar, aa/aar, 0101 Galician, gl/glg, 0712 Malay, ms/msa, 1319 Somali, so/som, 1915 Afrikaans, af/afr, 0106 Georgian, ka/kat, 1101... -
Page 64: Troubleshooting
Sometimes the trouble may lie in another component. Inspect the other components and electrical appliances being used. If the trouble cannot be rectified even after checking the points below, ask your nearest Pioneer authorized service center or your dealer to carry out repair work. -
Page 65: Sound
Troubleshooting Sound Problem Check Remedy y No sound is output. y Is the disc played back in No sound is output during slow motion play and forward and reverse slow motion? scanning. y Sound is not output properly. y Is the disc played back in fast forward or fast reverse? Are the cables properly y Connect the cable properly according to the connected devices... -
Page 66: Control Function
Control function are connected between the Control-compatible device and the player. y See page 15. y Even when connected to a Pioneer product compatible with the Control function, some of the functions may not work. Also refer to the operating instructions for the connected device. -
Page 67: Network
Troubleshooting Problem Check Remedy The component connected to If the client is automatically authorized, you need to enter the the network is not properly set. corresponding information again. Check whether the connection status is set to “Do not authorize”. There are no playable audio Check the audio files stored on the component connected to the files on the component network. -
Page 68: Others
Please set the USB device to the correct format. set correctly. Display window is dark. Press the DIMMER on the remote and select the desired display brightness. “OC ERROR” is displayed Unplug the unit and contact the Pioneer Customer Support Center. on the unit’s display window. -
Page 69: Appendix
Appendix Chapter 10 Appendix Specifications General Power requirements AC 220 V to 240 V, 50 Hz/60 Hz Power consumption 145 W (In Standby mode: Less than 0.5 W) Dimensions (W x H x D) Approx. 430 mm x 63 mm x 349 mm Net Weight (Approx.) 3.1 kg Operating temperature... - Page 70 Appendix Speakers • Front/Surround speaker (Left/Right) Net Dimensions Type 1 Way 95 mm x 80 mm x 90 mm (W x H x D) Impedance Rated 4 Ω Net Weight 0.4 kg • Center speaker Net Dimensions Type 1 Way 230 mm x 80 mm x 90 mm (W x H x D) Impedance Rated 4 Ω...
-
Page 71: Maintenance
Appendix Maintenance Notes on discs Handling discs Handling the unit Do not touch the playback side of the disc. Hold the disc by the edges so that fingerprints When shipping the unit do not get on the surface. Never stick paper or Please save the original shipping carton and tape on the disc. -
Page 72: Important Information Relating To Network
Content or Services should be made directly to the respective Content and Service Providers. Please note that PIONEER is not responsible for any Content or Services provided by the Service Provider or any changes to, removal of,... - Page 73 1999/5/CE. Español: Svenska: Härmed intygar Pioneer att denna Por medio de la presente Pioneer declara que el MCS-333 cumple con los MCS-333 står I överensstämmelse med de väsentliga egenskapskrav och requisitos esenciales y cualesquiera otras disposiciones aplicables o övriga relevanta bestämmelser som framgår av direktiv 1999/5/EG.
- Page 74 Português: Pioneer declara que este MCS-333 está Pioneer izjavlja, da je ta MCS-333 v conforme com os requisitos essenciais skladu z bistvenimi zahtevami in e outras disposições da Directiva ostalimi relevantnimi določili direktive 1999/5/CE. 1999/5/ES. Pioneer tímto prohlašuje, že tento Prin prezenta, Pioneer declara ca acest MCS-333 je ve shodě...
- Page 76 253 Alexandra Road, #04-01, Singapore 159936 TEL: 65-6472-7555 PIONEER ELECTRONICS AUSTRALIA PTY. LTD. 5 Arco Lane, Heatherton, Victoria, 3202, Australia, TEL: (03) 9586-6300 PIONEER ELECTRONICS DE MEXICO S.A. DE C.V. Blvd.Manuel Avila Camacho 138 10 piso Col.Lomas de Chapultepec, Mexico, D.F. 11000 TEL: 55-9178-4270 K002_B3_En Printed in China <72-MCS838-GB0B2>...
Need help?
Do you have a question about the MCS-333 and is the answer not in the manual?
Questions and answers