Table of Contents
Advertisement
Quick Links
Advertisement
Table of Contents

Related Manuals for Concept Pro H.264


Summary of Contents for Concept Pro H.264
-
Page 1: User Manual
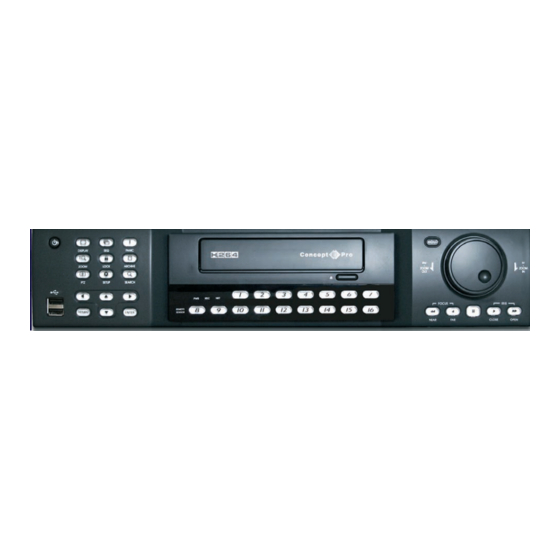
H 264 16 Channel Digital Recording System V X H 2 6 4 - 1 6 HOLD DISPLAY PANIC ± ZOOM LOCK ARCHIVE ZOOM ZOOM SETUP SEARCH FOCUS IRIS RETURN ENTER NEAR CLOSE OPEN User Manual... -
Page 2: Table Of Contents
CONTENTS Before installing Key features Front panel description Rear panel description Getting started Connect and switch on Configuring the live display Multi-screen mode Choosing channels Digital zoom Playback Search Pano Event Search Instant Playback Archiving Telemetry Control Key lock function Panic recording Sequence mode Shutdown... - Page 3 CONTENTS Event / Sensor HDD Event Alarm Input Alarm Out Buzzer Out Email Noti PTZ Preset Disk Manage Recording Continuous / Motion Setup Size / FPS / Quality Schedule Alarm setup Panic setup Connecting to the VXH264 remotely Connect using Internet Explorer How to connect Remote client controls Using the remote client...
-
Page 4: Before Installing
BEFORE INSTALLING BEFORE INSTALLING • Installation should be carried out only by qualified personnel and in accordance with electrical regulations in force. • The DVR must be placed on a stable surface or mounted in an approved cabinet. Adequate ventilation must be provided, taking particular care not to block any of the air vents on the DVR. Adequate protection against lightning strikes and power surges must be installed to prevent •... -
Page 5: Key Features
KEY FEATURES KEY FEATURES ENHANcEd GRApHIcAL USER INTERFAcE (GUI) The VXH264 menu structure and on-screen display is presented in a simple to use and logical GUI format. ENHANcEd REcORdING Any operation performed on the VXH264 will not affect the recording including local playback, local set-up, multi-user remote viewing and playback, remote setup and archiving. -
Page 6: Front Panel Description
FRONT PANEL DESCRIPTION SySTem conTRol keyS SHUTTle wHeel PoweR bUTTon lock Used to quickly adjust (page 6 & page 15) locks the front panel buttons playback speed and direction (page 15) (page 10). It is used to control DISPlAy camera zoom when in PTZ Selects various display ARcHIVe mode (page 15), and digital... -
Page 7: Rear Panel Description
REAR PANEL DESCRIPTION cAmeRA InPUTS and comPoSITe AnD S-VIDeo SPoT monIToR PAnIc / ReSeT mAIn monIToR looP oUTPUTS oUTPUTS Panic button & Alarm Reset connect up to 16 camera inputs connecTIonS Up to 4 spot monitors can be both outputs can be used at the RS485 RelAy oUT loop outputs can be used for... -
Page 8: Getting Started
GETTING STARTED PleASe noTe: All neceSSARy connecTIonS mUST be mADe beFoRe APPlyInG PoweR To THe VXH264! THe VXH264 IS PRe-conFIGUReD wITH THe FollowInG SeTTInGS: 25FPS continuous recording rate per channel at cIF (352 x 288) resolution and highest image quality. •... -
Page 9: Connect And Switch On
GETTING STARTED connecT AnD SwITcH on • connect up to 16 cAmeRA InPUTS. The VXH264 also has looP oUTPUTS so that any signals can be fed to other equipment if required. Termination is automatically set by the VXH264 depending on connection type •... -
Page 10: Configuring The Live Display
CONFIGURING THE LIVE DISPLAY mULTI ScREEN mOdE 7 different display modes are supported by the 16 channel VXH264. by repeatedly pressing the DISPLAY button, the operator can choose between single, 4, 6, 8, 9, and 16 screen as well as basic sequence modes. All the display modes are static with the exception of the sequence mode. -
Page 11: Digital Zoom
CONFIGURING THE LIVE DISPLAY dIGITAL ZOOm when viewing a channel in full screen, the operator can zoom in to a particular area by up to 14 times. To use digital zoom, select the required channel and press the ZOOm button. The small window at the bottom right of the screen shows the full image whilst the main display area shows the zoomed portion. -
Page 12: Playback
PLAYBACK SEARcH To search for a particular section of recorded footage, press the SEARCH button. To protect unauthorised viewing of footage, only authorised users can playback footage. To log-in as ADmIn, enter the default password of 1234 and press ENTER The VXH264 uses a calendar and timeline search method for quick access to recorded footage. -
Page 13: Pano
PLAYBACK SEARcH continued During playback, turning the SHUTTLE wHEEL steadily clockwise increases the playback speed by up to 64 times. Turning steadily anticlockwise will reverse play by up to 64 times. when the SHUTTLE wHEEL is released, playback is paused. If the HOLD button is pressed and released during... -
Page 14: Event Search
PLAYBACK EVENT SEARcH The VXH264 event log stores events such as motion and alarm activated recording and video loss. To search for an event and playback the recorded footage, press the SEARCH button and log in as ADmIn with the default password of 1234 / or authorised user. To display the event log screen, press the right CURSOR KEY to select SeARcH by eVenT... -
Page 15: Instant Playback
PLAYBACK INSTANT pLAYBAcK For quick review of recent footage, this feature allows the operator to bypass the search screen and playback footage beginning five minutes earlier. To use instant playback, press the FORwARD PLAY button. During instant playback, the SHUTTLE wHEEL, JOG RING and playback buttons can be used as normal. -
Page 16: Archiving
ARCHIVING To archive recorded footage to USb memory stick or cD, press the ARCHIVE button. To protect unauthorised viewing and distribution of footage, only the authorised user or ADmIn user can archive footage. To login as ADmIn, enter the default password of 1234 and press ENTER. - Page 17 ARCHIVING A small window opens showing: TAG nAme: The name of the Archive DeVIce: choose between DVD or USb bURnInG TyPe: choose between bURnInG or eRASe & bURn. Press START to begin the archive process. The footage is extracted to a temporary area on the hard drive. once extracted, the footage is copied to DVD or USb.
-
Page 18: Telemetry Control
TELEmETRY CONTROL TELEmETRY cONTROL Speed domes and other telemetry devices connected to the VXH264, can be fully controlled from the front panel. In live display mode, press the button. To select a camera to control, use the CHANNEL SELECTION buttons. when PASSwoRD is set to on only authorised users or ADmIn users can control the PTZ. -
Page 19: Quick Menu
QUICK mENU If you are using the USb mouse to control the VXH264 pressing the right hand mouse will bring up the Quick menu. FReeZe: Selecting FReeZe on will freeze the live view picture for the selected channel. To go back to live view select FReeZe oFF. PTZ: Selecting PTZ will bring up the PTZ control screen. -
Page 20: Configuring The Vxh264 - System Setup
CONFIGURING THE VXH264 Press the SETUP button to bring up the SySTem / RecoRD setup option on screen. (If the status bar is not visible you will need to press the setup button twice). Use the CURSOR KEYS to select SySTem SeTUP and press ENTER. only authorised users or ADmIn users can configure the VXH264. -
Page 21: Audio
CONFIGURING THE VXH264 CAmERA cAmeRA: cAmeRA AUDIo If audio devices are connected to the VXH264, any audio channel can be assigned to any video channels. cAmeRA: coloUR SeTUP brightness, contrast, tint and colour can be adjusted for each individual channel. Highlight which channel to modify and press ENTER. -
Page 22: Motion Sensor
CONFIGURING THE VXH264 CAmERA cAmeRA: moTIon SenSoR SenSITIVITy: between 1 (lowest) and 10 (Highest) determines the degree of motion required before recording is activated. AReA SeTUP AReA SeTUP: choosing this option allows the operator to define which areas of the image are monitored for motion detection. - Page 23 CONFIGURING THE VXH264 CAmERA Use the CURSOR KEYS to increase the size of the motion cursor as required. Press ENTER to change from selected to deselected (or vice versa). Repeat the above sequence as necessary to mask-off or include other areas of the image. once the detection area has been defined, press RETURN and choose SAVe &...
-
Page 24: Display
CONFIGURING THE VXH264 DISPLAY To set-up the various display options, highlight DISPlAy and press ENTER. DISPlAy: oSD STATUS bAR: Turns the status bar at the bottom of the live display AlwAyS on or auto off delay time. cAmeRA TITle: Determines whether the camera title is displayed. RecoRDInG moDe Icon: Determines whether the VXH264 recording status is shown at the top right of each channel display window. -
Page 25: Sequence
CONFIGURING THE VXH264 DISPLAY DISPlAy: SeQUence when the button is pressed, the default sequence will cycle through all 16 channels, one by one. Sequence setup allows the operator to define a custom sequence using mixed multi screen views and any desired channels. To add a new sequence, highlight ADD and press ENTER. -
Page 26: Spot Out
CONFIGURING THE VXH264 DISPLAY DISPlAy: SeQUence continued when all the channels have been completed, press CONFIRm to save the sequence screen and begin creating the next one. Up to 16 different sequence screens can be created. To finish editing the sequence, press CLOSE and then APPLY... -
Page 27: Sound
CONFIGURING THE VXH264 SOUND To set-up the various sound options, highlight SoUnD and press ENTER. SoUnD: AUDIo lIVe AUDIo: when set to on, the selected audio channel can be monitored on the AUDIo oUTPUT when the VXH264 is in any multi screen mode. DeFAUlT AUDIo cHAnnel: Specify which one of the 4 AUDIo InPUTS is routed to the AUDIo oUTPUT when the VXH264 is in ... -
Page 28: System
CONFIGURING THE VXH264 SYSTEm To set-up the various system options, highlight SySTem and press ENTER SySTem: DATe/TIme DATe TIme: Allows the operator to set or modify the current date & time. DATe FoRmAT: Determines how the date is displayed. TIme FoRmAT: Determines how the time is displayed. neTwoRk TIme SeRVeR SeTUP: If the VXH264 is connected to the Internet, the time and date can be accurately set by selecting Sync and pressing ENTER. -
Page 29: Control Device
Please note: Password must be selected to ‘on’ if USeR mAnGemenT options are required. SySTem: conTRol DeVIce The VXH264 can be remotely controlled using a concept Pro VA-kbDPRo+ keyboard. Up to 254 VXH264s can be controlled using a single VA-kbDPRo+ PTZ controller. -
Page 30: User
CONFIGURING THE VXH264 USER To set-up User management options, highlight USeR and press ENTER. USeR: USeR mAnAGemenT by default the VXH264 is configured with a USeR ID of ADmIn belonging to the ADmIn group and with a password of 1234. As well as the ability to add new users, existing users defaults can be modified. The maximum number of users that can be created is 8. -
Page 31: Authority
CONFIGURING THE VXH264 USER USeR: USeR AUTHoRITy User authority (except ADmIn) can be selected. Using the CURSOR KEYS select the functions you want and the mAnAGeR and USeR groups to have. (blue square = on) Press APPLY to save settings. PleASe noTe: Any user can be deleted except the default ADmIn user. USeR: loG oUT AUTo loGoUT: Selects if auto log-out is on or oFF. -
Page 32: Network
CONFIGURING THE VXH264 NETwORK To set-up network options hightlight neTwoRk and press ENTER. neTwoRk: IP SeTUP DHcP: when selected the DVR will obtain an IP address automatically if connected to a DHcP server or router. IP ADDReSS: If DHcP is not being used the IP address can be manually set. GATewAy: If DHcP is not being used the Gateway IP address can be manually set. -
Page 33: Hdd Event
Determines the behaviour and actions that will trigger each of the 16 alarm outputs or 4 relay outputs. Behaviour settings cHAnnel: choose which alarm output to configure including relay outputs R1 to R4. oPeRATIon: The selected alarm output can be enabled or disabled. moDe: can be either TRAnSPARenT (the output is active only when the trigger criteria is present) or lATcHeD. -
Page 34: Event / Sensor
CONFIGURING THE VXH264 EVENT / SENSOR eVenT / SenSoR: bUZZeR oUT Determines the behaviour and actions that will trigger the internal buzzer. Behaviour settings oPeRATIon: The internal buzzer can be enabled or disabled. HDD eVenT: Determines whether a hard drive event sounds the buzzer. moDe: can be either TRAnSPARenT (the buzzer sounds only when the trigger criteria is present) or lATcHeD. -
Page 35: Disk Manage
DISk mAnAGe To manage the internal hard drives, highlight DISk mAnAGe and press ENTER. RecoRD TIme lImIT: In certain circumstances, it may be necessary to limit the amount of footage stored on the VXH264 (to comply with data protection laws for example). Recording can be limited to 12 hours, 1 day, 2 days, 3 days, 4 days, 5 days, 6 days, 1 week, 2 weeks, 3 weeks 1 month or 2 month. -
Page 36: Continuous / Motion Setup
RECORDING conTInUoUS / moTIon SeTUP This setup screen allows the operator to configure scheduled and motion detection recording. There are 2 sections: SIZe / FPS / QUAlITy: Recording settings for each channel can be defined across a 24 hour period, in blocks (for example between 09:00 and 18:00) or for each individual hour. -
Page 37: Schedule
RECORDING ReSolUTIon: Recording resolutions of cIF (352x288), 2 cIF(704x288) or D1 (704x576) can be selected for each channel. FPS: Frame rates between 0 and 25 can be set for each channel. QUAlITy: Five different picture recording qualities can be set for each channel. AUDIo: If audio devices are connected to the VXH264 then you can select them to be on or oFF. - Page 38 RECORDING ScHeDUle continued Press ENTER. Using the CURSOR KEYS, highlight moTIon and press ENTER again. The small box next to motion will turn blue. Then press ok. The selected area now displays a blue block for motion recording. Repeat the above procedure to set different recording schedules for individual channels and time periods.
-
Page 39: Alarm Setup
RECORDING AlARm SeTUP This setup screen allows the operator to configure alarm input activated recording. SIZe / FPS / QUAlITy: Recording settings for each channel can be defined across a 24 hour period, in blocks (for example between 09:00 and 18:00) or for each individual hour. -
Page 40: Connecting To The Vxh264 Remotely
CONNECTING TO THE VXH264 REmOTELY The VXH264 can be viewed on a remote connection either on a direct lAn connection or over the Internet, simply by using Internet explorer. The remote browser allows full live viewing of the VXH264 including telemetry control of PTZ cameras. - Page 41 CONNECTING TO THE VXH264 REmOTELY A security window will then appear asking for log In credentials. Default ID and password are ‘ADmIn’ &’1234’. you will need to install Active-X, click Run Add-on as shown in the image. Please note, you will not have to repeat this step each time you connect remotely, unless a different computer is used.
-
Page 42: Remote Client Controls
REmOTE CLIENT CONTROLS RemoTe clIenT conTRolS lIVe VIew SeARcH RemoTe SeTUP InFoRmATIon... -
Page 43: Using The Remote Client
USING THE REmOTE CLIENT After successful connection, the remote client displays the current live view from the VXH264. For each channel, the title, time / date and resolution are displayed. lIVe DISPlAy moDeS Use the DISPLAY buttons to switch from a single, quad, 8, 9 or 16 split display. To sequence, select the screen you require (single or multi mode) and click the SEQUENCE button. -
Page 44: Saving To Avi File
USING THE REmOTE CLIENT SAVInG To AVI FIle The operator can choose to record all channels currently being displayed on the live view directly to the local Pc hard drive. click the button to immediately start recording. click the button to end recording. by pressing the printer symbol you can print the current view. -
Page 45: Ptz
USING THE REmOTE CLIENT Internet explorer allows all telemetry control of devices connected to the VXH264, provided that the correct user authority has been set-up. click the appropriate channel and use the on screen directional buttons to control pan & tilt movements. -
Page 46: Remote Client Playback Controls
USING THE REmOTE CLIENT RemoTe clIenT PlAybAck click the search tab to switch to search mode. The timeline at the bottom of the display shows a graphical overview of recorded footage for a particular day. Different colour blocks represent different types of recording. oRAnGe: continuous PInk: Panic PURPle: Alarm... -
Page 47: Controlling Playback
REmOTE CLIENT PLAYBACK CONTROLS conTRollInG PlAybAck During playback at anytime click to pause the footage. click again to resume playback. Footage can be played in reverse by clicking Then to return playing back the footage normally click Fast Forward and Rewind can be clicked to speed up playback. -
Page 48: Backup
REmOTE CLIENT PLAYBACK CONTROLS bAckUP Pre-recorded footage on a VXH264 can be archived to the local Pc hard disk or removable media depending on where the save destination is set. click the bAckUP button to show the archiving screen. choose start time, end time and which channels to archive. click START to begin archiving data to the Pc hard drive or removable media. -
Page 49: Remote Vxh264 Setup
REmOTE VXH264 SET-UP only authorised users or ADmIn users can configure a VXH264 remotely. with the exception of network settings and certain display options, any of the VXH264 settings can be changed. enTeRInG SeTUP click the SETUP tab to switch to the setup menu. The remote setup screen is displayed and the VXH264 settings can be changed as necessary using the main menu selection on the left hand side. -
Page 50: Vxh264 Smart Phone Remote Viewing
VXH264 SmART PHONE REmOTE VIEwING The VXH264 can be viewed remotely via smart phones such as the iPhone or blackberry. Select the web browser on the Smart Phone menu. iPhone Blackberry Select the Safari browser. Select the web browser. enter the IP address or URl into the web browser address bar example http:// 192.168.2.19:8080 or http:// 1234.dvrlink.net:8080 Please replace 1234 with the default mAc address of the DVR and press... -
Page 51: Appendix A: The Archive Set
APPENDIX A: THE ARCHIVE SET After footage has been archived from a VXH264, it can be reviewed on a Pc system. Insert the backup cD or USb stick in the Pc and view the contents using windows explorer. The following files are included in the backup: Arch_info: This file contains detailed information about the archive set. -
Page 52: Controls
REmOTE CLIENT PLAYBACK CONTROLS bAckUP PlAyeR During playback, a still image can be save to the local Pc hard disk by clicking the SNAPSHOT button located in the top left corner. Specify the file location, file name and choose bmP or JPG format. click ‘Save’. TAke ScReen SHoT oF cAmeRA cHAnnel / nAme cURRenT ScReen... -
Page 53: Appendix B: Configuring A Netgear Dg834
APPENDIX B: CONFIGURING A NETGEAR DG384 ROUTER FOR USE wITH VXH264 ReQUIRemenTS 1. netgear DG834 router 2. A laptop or Pc to configure the DG834 3. An Internet connection and all required login details (username and password provided by your ISP) SeTUP STePS FoR InTeRneT connecTIon 1. - Page 54 APPENDIX B: CONFIGURING A NETGEAR DG384 ROUTER FOR USE wITH VXH264 SeTTInG-UP PoRT FoRwARDInG This section assumes that you have already established a successful connection locally. log-on to the DG834 and select ‘Services’ from the menu. click ‘Add custom Service’ and enter the following values: name: VXH264 (or any other name of your choice) Type: TcP Start Port: 6200...
- Page 55 APPENDIX B: CONFIGURING A NETGEAR DG384 ROUTER FOR USE wITH VXH264 USInG DDnS To connecT DDnS (Dynamic Domain name Server) is generally used when your ISP provides you with a dynamic public IP address. The problem with a dynamic IP address is that because it can change regularly, any remote users that need to connect to the VXH264 do not know what IP address to enter in the remote client! Using DDnS solves this problem.
-
Page 56: Appendix C: Connecting External Devices
APPENDIX C: CONNECTING EXTERNAL DEVICES ALARM IN A12 A13 A14 GND AlARm InPUTS connect voltage free contacts from PIRs and beam break detectors etc. to the ‘GnD’ terminal and ‘AIXX’ terminals of choice. A15 A16 A17 A18 GND A19 A20 A21 A22 GND A113 A114 A115 A116 GND AlARm oUTPUTS connect the ‘GnD’... -
Page 57: Appendix D: Specifications
Control Mouse, Front panel, IR Remote and / or VA-KBDPRO+ PTZ Keyboard Recording Video CODEC H.264 Resolution options for each channel CIF (352 x 288), 2 CIF (704 x 288), D1 (704 x 576) Maximum total frame rate 400 FPS (CIF) -
Page 58: Notes
Notes... - Page 59 Notes...
- Page 60 HOLD DISPLAY PANIC ± ZOOM LOCK ARCHIVE ZOOM ZOOM SETUP SEARCH FOCUS IRIS RETURN ENTER NEAR CLOSE OPEN ALARM IN + ARI / PANIC 100-240V AC, 50/60HZ NO COM NC NO COM NC NO COM NC NO COM NC ARI PANIC NTSC e-SATA HD MONITOR...
Need help?
Do you have a question about the H.264 and is the answer not in the manual?
Questions and answers