Table of Contents
Advertisement
Quick Links
Advertisement
Table of Contents

Related Manuals for Kathrein MobiSet 3 Digital CAP 700


Summary of Contents for Kathrein MobiSet 3 Digital CAP 700
- Page 1 Installation and operating manual MobiSet 3 digital CAP 700...
-
Page 2: Table Of Contents
SAFETY INSTRUCTIONS - IMPORTANT NOTES INSTALLATION AND CONNECTION INSTALLATION OF CABLE GLAND AND MOUNTING PLATE INSTALLATION OF TURNTABLE BRIEF INSTRUCTIONS FOR INSTALLING THE TURNTABLE INSTALLATION OF THE UFS 740SW RECEIVER LAYING CABLES AND CONNECTING THE TURNTABLE CONNECTING TO THE UFS 740SW... -
Page 3: Foreign Language Installation Manuals/Disposal
(http://www.kathrein.de/en/sat/products/franzoesisch.htm). Lei puo avvere la versione italiana delle istruzioni di montaggio dalla nostra rapresentanza (http://www. kathrein.de/include/kontakte_groups_eng.cfm?kontinent=1&gruppe=SAT) piu vicina della sua citta´, oppure scaricarla dalla nostra hompage http://www.kathrein.de/en/sat/products/italienisch.htm) Para obtener la versión española de nuestro manual de instalación, contacte nuestros representantes en su país (http://www.kathrein.de/include/kontakte_groups_eng.cfm?kontinent=1&gruppe=SAT) o bajela de... -
Page 4: Mobiset 3 Cap 700 Components/Scope Of Delivery
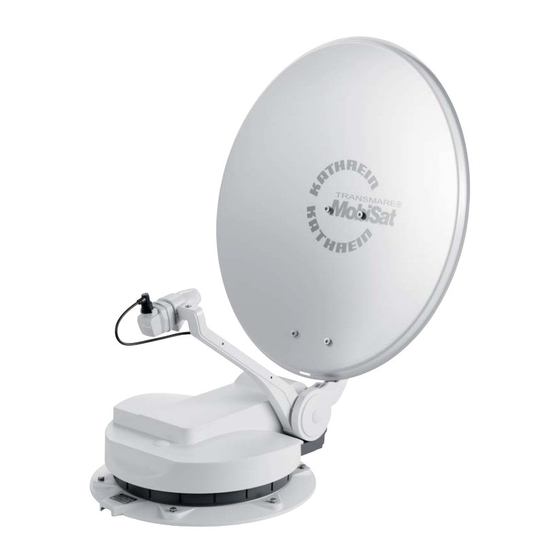
291 adhesive sealant (100 ml tube) • UFS 740sw DVB-S receiver with connecting cables, infrared sensor and infrared remote control • MobiSet 3 digital CAP 700 installation and operating instructions • UFS 740sw satellite receiver operating manual UFS 740sw (Front view) -
Page 5: Proper Use
PROPER USE (USE FOR THE INTENDED PURPOSE) The MobiSet 3 digital CAP 700 is designed to receive digital TV and radio programs via satellite. The automatic positioner is intended to be used as a turntable for the parabolic refl ector. -
Page 6: Safety Instructions - Important Notes
Do not make any unauthorised changes to the turntable. Adhesive sealant The turntable is attached to the roof of the vehicle by adhesive and is secured by additional screws. Note that the curing of the adhesive sealant is temperature-dependent. It reaches its full strength only after approximately fi... - Page 7 SAFETY INSTRUCTIONS - IMPORTANT NOTES Road Traffi c Licensing Regulations (StVZO) The applicable regulations of the StVZO must be observed in respect of fi xed installation of the turntable on a vehicle which is driven on public highways. In particular, §§ 19/2; 30 C; 32 (2) and the EC directive 74/483 EEC are applicable.
- Page 8 Safety precautions during operation During operation of the turntable, make sure that no persons, in particular children, are in the immediate vicinity of the turntable and that they cannot touch any moving parts – crush hazard! Always unplug the power supply during installation work.
-
Page 9: Installation And Connection
Loosen the six fastening screws (width A/F: 10 mm). Carefully lift the turntable off the mounting plate and place it on the prepared wooden supports. Make sure that the cables are not crushed where they emerge from the underside of the turntable. - Page 10 INSTALLATION AND CONNECTION • When selecting the installation position, take into account the range of movement of the turntable (see graphics and the “Technical Data” chapter). There must be no structures on the roof that would obstruct this range of movement (risk of collision). For safety, keep at least the required area free (for ease of installation and any subsequent dismantling).
-
Page 11: Installation Steps
If you prefer a different method of laying the cables, they can be run from the rear of the turntable via the channel provided in the mounting plate. The cables must then be run along the roof of the vehicle in a protective cable duct (not supplied). - Page 12 INSTALLATION AND CONNECTION Figure: B • Mark out the positions of the six fastening holes on the roof of the vehicle in a circular pattern. Note: The size of the holes and the choice of fastening screws to be used (not supplied) depend on the type and thickness of the materials used in the roof structure.
- Page 13 INSTALLATION AND CONNECTION • Create the holes necessary to secure the mounting plate (Fig. C). • In addition to the screwed connection, the mounting plate and roof gland must be bonded to the roof with adhesive and sealed. This is done using the Sikafl ex ® 291 adhesive sealant supplied, which is ideally suited for this purpose thanks to its broad range of adhesion.
-
Page 14: Installation Of Turntable
INSTALLATION OF TURNTABLE VARIANT WITH CABLE GLAND UNDERNEATH THE TURNTABLE • Feed the ends of the cables with the connectors as far as possible through the cable gland into the... - Page 15 • Lift up the turntable and place it carefully on the mounting plate facing in the direction of travel (see illustration Fig. E) (do not step on the plug connector and do not kink/crush the cables!) The through holes on the turntable must be perfectly aligned with the threaded holes on the mounting plate.
- Page 16 • Arrange the cables in the cable duct when placing the turntable on to the mounting plate. Make sure that the cables are not crossed over and that they are taut so that they cannot be crushed. Do not try to pull the cables from the unit.
-
Page 17: Brief Instructions For Installing The Turntable
BRIEF INSTRUCTIONS FOR INSTALLING THE TURNTABLE The sequence of pictures shown illustrates all the necessary installation steps that are required to install the turntable and the BAS 60 parabolic refl ector on the roof of the vehicle. The other detailed instructions in this installation and operating manual must also be followed! Determination of installation location. - Page 18 Set up electrical connections. Connect the UFS 740 receiver. Connect the turntable to the battery. The antenna must always be lowered into horizontal position (park position) while driving! Maximum driving speed of the vehicle: 130 km/h Screw turntable on to mounting plate using torque wrench.
-
Page 19: Installation Of The Ufs 740Sw Receiver
INSTALLATION AND CONNECTION INSTALLATION OF THE UFS 740SW RECEIVER The turntable is controlled by the UFS 740sw DVB-S receiver. The cable lengths must be taken into account when choosing the installation location. For suspended installation use the installation kit supplied with the receiver. - Page 20 INSTALLATION AND CONNECTION Remove the wood screws supplied from their transport attachment on the underside of the respective mounting piece (2 pieces). Vertically insert each mounting piece into the fi fth slot from the edge, as shown in Fig. 1. Then push each mounting piece downwards and outwards (see Fig.
-
Page 21: Laying Cables And Connecting The Turntable
Avoid laying the cables across sharp edges and protect the cables against possible chafi ng points. • Connect the coaxial cable (coming from the turntable) to the “IF IN” F socket on the rear of the UFS 740sw. • Place the infrared sensor for the receiver close to or directly on top of the TV set and lay the cable to the UFS 740sw. -
Page 22: Functional Instructions For Connection To The On-Board Power Supply
INSTALLATION AND CONNECTION Only for connection in a motor home, not in a caravan! • The green connecting cable, marked “IGNITION” allows you the option of connection to a circuit in the vehicle that is activated when the ignition key is turned and then carries a continuous 12 V supply. -
Page 23: Connection Example For 12 V Battery Connection
For operation with two batteries, it must be ensured that the ignition signal earth has the same potential as the power supply battery earth for the turntable. Non-compliance means that the automatic lowering function will not work! Ensure the cable polarity is correct! -
Page 24: Reception Range/Footprint
RECEPTION RANGE/FOOTPRINT The footprint is the reception area on the earth that a satellite covers with its transmission beam (spot), within which satellite reception is possible. The transmission power is at its greatest in the centre of this spot – it becomes progressively weaker moving outwards. You should preferably align your antenna to the position of the ASTRA satellite 19.2°... -
Page 25: Dismantling For Servicing
Never open the turntable yourself! DISMANTLING • Do not cut the cables! At the cable junction provided, disconnect the cables projecting from the turntable from the two cables laid within the interior of the vehicle (unplug the plug). • The cables laid within the vehicle can remain there •... -
Page 26: Polarisation Setting
POLARISATION SETTING The LNB for the CAP 700 is factory-set to the polarisation setting “0”. In this position you can still receive signals from satellites with differences (between the longitude of the desired reception area and the orbit position of the satellite) of 15° to 20°. For differences greater than this it is best to rotate the LNB and set the necessary polarisation angle. -
Page 28: Safety Notes
- During setting operations, make sure that no persons, in particular no children, are in the immediate vicinity of the turntable and that they cannot touch any moving parts - crush hazard! Nobody should be below the antenna inside the caravan / motor home during setting operations... - Page 29 Press the button and the turntable will move to the selected elevation angle. Turn off the UFS 740 using the main switch on the front and disconnect it from the power. 10. Use the socket driver supplied (size 20) to slacken the securing screw of the clamp on the LNB.
-
Page 30: Manual Lowering To Park Position
MANUAL LOWERING TO PARK POSITION If a defect arises in the electronic controls, after some disassembly work the satellite dish can be returned to the park position (horizontal position) manually. Following this however recalibration by an authorised workshop is always necessary. Driving to the nearest workshop with the antenna extended at a moderate speed and taking into account the increase (+ 79 cm) in the vehicle height is an option and is preferable to manual lowering! -
Page 31: Manual Lowering
The connection to the rocker can suddenly come loose during the next step (item 4). It is then no longer connected to the turntable! Screw an M10 x 40 screw into this thread (minimum length: 40 mm). Screwing in the M10 screw pushes the rocker off the tapered shaft and releases the engagement. -
Page 32: Technical Data
TECHNICAL DATA DIMENSIONS (MM) Direction of travel Mounting plate... - Page 33 TECHNICAL DATA...
- Page 34 Stand-by Current consumption from the receiver Setting range: Elevation Azimuth Skew Weight of the turntable with parabolic refl ector Packing unit/weight Ignition signal Search time for fi rst satellite Search time for further satellites LSM search time (LSM = Last Satellite Memory)
-
Page 35: Sikaflex 291 Safety Data Sheet
SIKAFLEX ® 291 SAFETY DATA SHEET 1. Materials/preparation and company designation Data on the product (trade name): Data on manufacturer/suppliers Manufacturer/suppliers: Street/postcode: Postcode and town: Country: Germany Tel: General information: Emergency information hotline: 2. Composition/data on components Chemical characterisation: Hazardous contents (designation to 67/548/EEC) CAS-No. - Page 36 SIKAFLEX ® 291 SAFETY DATA SHEET 5. Measures for fi re fi ghting Suitable extinguishing media Compatible with all extinguishing media in general use. Special hazard from the product, its products of combustion or gases released In case of fi re the following can be released: Carbon monoxide (CO) Additional instructions Combustion residues and contaminated extinguishing media must be disposed of in accordance with the local authority regulations.
- Page 37 SIKAFLEX ® 291 SAFETY DATA SHEET 4,4‘ methylene-diphenyl-diisocyanate 101-68-8 101-68-8 Xylol 1330-20-7 1330-20-7 1330-20-7 1330-20-7 1330-20-7 1330-20-7 Personal protective equipment General protective and hygiene measures Ensure suffi cient ventilation at the workplace. Avoid contact with the eyes and skin. Apply prophylactic skin protection by protective hand cream. Take off soiled clothing immediately.
- Page 38 SIKAFLEX ® 291 SAFETY DATA SHEET 11. Toxicology data Sensitisation Sensitisation/allergic reactions may occur. Sensitive individuals may exhibit allergic reactions even at very low concentrations. Experience of human exposure On skin contact: On eye contact: On being breathed in: On being swallowed: 12.
- Page 39 SIKAFLEX ® 291 SAFETY DATA SHEET Risk phrases Sensitisation possible by breathing in. Safety phrases Do not breathe in gas/smoke/vapour/aerosol. IN the event of accident or feeling unwell summon a doctor immediately (if possible show the doctor this label). Special identifi cation of particular components Contains isocyanates.
-
Page 40: Sikaflex
SIKAFLEX Technisches Merkblatt Technical data sheet Version 12 / 2005 Version 12/2005 Sikafl ex Sikaflex Der haftstarke Marine-Dichtstoff The strongly bonding marine adhesive Technical characteristics Technische Eigenschaften Chemische Basis Chemical basis Farbe Colour Härtungsmechanismus Curing mechanism Dichte vor Aushärtung (DIN 53479) Density before curing (DIN 53479) Standfestigkeit Stability... - Page 41 ® SIKAFLEX 291 TECHNICAL DATA SHEET Die Vernetzungsreaktion von Si- The cross-linking reaction of Sikaf- ® kaflex -291 erfolgt mit Luftfeuch- ® 291 occurs in the presence of tigkeit. Bei niedriger Temperatur ist atmospheric moisture. At lower tem- der Wassergehalt der Luft geringer peratures the water content of the air und die Vernetzungsreaktion ver- is less and the cross-linking reaction...
-
Page 42: Cap 700 Operating Manual
The Kathrein customer hotline is also at your disposal. Phone: +49 8031/184-700 The automatic updating of the EPG data described in the UFS 740sw operating... -
Page 43: Important Information For Cap 700 Before Setup
IMPORTANT INFORMATION FOR CAP 700 BEFORE SETUP This section of the UFS 740 operating manual for the turntable assumes that the UFS 740 and the turntable have been properly installed and connected, as described in the installation and operating manuals! -
Page 44: First Installation
Before using your unit for the fi rst time, read the “Safety Instructions - Important Information” and “Installation and Connection” sections. You will fi nd a sample confi guration for a motor home in the Section “Installation and Connection”, “Connection Example”. Do not connect the receiver to the power supply until all installation work has been properly carried out. - Page 45 The following display appears: Use the buttons to select whether to replace the default channel list with one pre-sorted for Germany, Austria, Switzerland or Italy. If you want to use the default channel list, choose “No” under “Restore Channellist”. Press the (green) button to move to the next menu.
- Page 46 TV aspect ratio Select the TV's picture format. Either 4:3 or 16:9 Picture format Here you select the type of screen display, depending on the setting of your TV format: TV format “4:3”: Pan & Scan (picture is clipped) or Letterbox (black bands above and below) TV format “16:9”: Always 16:9 or automatic TV Scart Output Select the type of video signal at the TV Scart socket here.
- Page 47 The following display appears: Local time offset Use the buttons to set the time zone variation from UTC (formerly GMT) (e.g. for Germany +1 hour). Use the buttons to switch to the “Automatic clock change” fi eld. Use the buttons to select whether the receiver should automatically change over between summer and winter time.
-
Page 48: Alignment (Satellite Search)
This works because each satellite is automatically recognised by the turntable. The satellite search is started when you select a channel. If the turntable has not yet saved the position of the satellite, you will see the following display when you select a channel (example):... -
Page 49: Moving The Antenna Manually
MOVING THE ANTENNA MANUALLY Press the button to return to the main menu. The buttons and button allow you to call up the submenus (“Settings”, “Antenna Confi guration”). You can correct the inclination and horizontal angle of the antenna using the “Elevation” and “Azimuth” settings. -
Page 50: Channel (Satellite) Selection
UFS 740sw operating manual. (blue) button to switch between TV and radio channels. button calls up the channel list. The following display ) to select the desired channel in the various channel list views. button. button. As soon as the turntable has... -
Page 51: Change Of Location/Timer Programming
To prevent the turntable rotating at a time when it is unsupervised or when rotation might be irritating (e.g. in the middle of the night), a timer can be set. During the timer period the turntable is active only if the UFS 740sw is in operation or is in standby mode. -
Page 52: Reset/Parking
Note: Before exchanging any component of the system (such as the receiver) the turntable should be moved to its park position by means of the “Reset the turn table antenna” command. The “Reset” deletes all previously saved satellite positions. The satellite data in the UFS 740 receiver are however retained. -
Page 53: Parking The Turntable
(see “Connection Diagram”). Refer to the detailed instructions for this in the CAP unit installation manual. -
Page 54: Special Messages From The Turntable
The following messages are shown on the screen to protect your reception system and the on-board power supply: The power supply to the turntable is inadequate (battery voltage below the minimum value). The turntable can still be moved, but communication errors can occur between the UFS 740sw and the turntable (e.g. - Page 55 This operates however only if the green ignition cable for the turntable is connected to the vehicle ignition and the turntable is connected to the power supply! As long as voltage is present at the ignition, the connection to the CAP will remain disabled. This means the CAP cannot be operated.
- Page 56 SPECIAL MESSAGES FROM THE TURNTABLE MESSAGES ARISING FROM SOFTWARE PROBLEMS A serious software error has occurred. Reset the turntable in the CAP menu, or contact our service centre. The turn table antenna software is defective. An update is required. Contact our service centre.
-
Page 57: Further Messages
The receiver has lost communication with the turntable. Check the connection between the UFS 740sw and the turntable, the power supply and whether possibly the ignition signal is present at the CAP. The connection to the turntable is defective. Reset the turntable in the CAP menu, check the connections... -
Page 58: Declaration Of Conformity
DECLARATION OF CONFORMITY EC Declaration of Conformity Rosenheim, 04.07.07... -
Page 59: For Your Notes
FOR YOUR NOTES... - Page 60 Internet: http://www.kathrein.de KATHREIN-Werke KG • Anton-Kathrein-Straße 1 - 3 P.O. Box 100 444 • 83004 Rosenheim GERMANY...
Need help?
Do you have a question about the MobiSet 3 Digital CAP 700 and is the answer not in the manual?
Questions and answers